To uninstall your Ring Doorbell 2, first ensure the power is switched off to prevent any safety risks. Get your tools ready, such as a security screwdriver and safety goggles. Remove the security screw from the faceplate and detach it gently. If you are taking out the doorbell permanently, unscrew the screws from the bottom of the doorbell and lift it up from the mounting bracket. In the case of wired connections, disconnect the wires carefully and label them for future use. Then, patch up any holes with wall filler to restore the surface. There are many more tips to discover regarding the maintenance of your doorbell and how to safely uninstall it.
Key Takeaways
- Turn off power to avoid electrical hazards before beginning the removal process of the Ring Doorbell 2.
- Remove the faceplate by unscrewing the security screw at the bottom and gently pulling it down.
- Detach the doorbell from its mounting by removing all security screws and pulling it upward while pushing down on the bracket.
- Disconnect any wired connections after confirming power is off, and label the wires for easy reconnection.

Screwdriver for Ring Doorbell,EMiEN Torx T6 T15 Bit Screwdriver For Ring Video Doorbell,Doorbell 2,Doorbell Pro And Elite Battery Change, Charge & Replacement, Wifi Password Reset Access
[ DOORBELL SCREWDRIVER ] : Double Head T6 & T15 Torx Head Screwdriver Used For Video Doorbell,Doorbell 2,Doorbell…
As an affiliate, we earn on qualifying purchases.
As an affiliate, we earn on qualifying purchases.
Reasons for Removal
There are several reasons you might decide to remove your Ring Doorbell 2, from upgrading to a new model to relocating to a different home. One common reason is the desire for enhanced features; perhaps you're considering switching to another brand like Arlo or Google for better technology.
On the other hand, if you're moving, taking your Ring Doorbell with you helps maintain your security setup in your new location. Additionally, if you're in the process of renovating your home, you might want to integrate sustainable home decor options that better match your aesthetic.
Another factor might be regular maintenance. You'll need to remove the doorbell occasionally for battery charging or general upkeep to guarantee peak performance. Additionally, if your doorbell is installed in a vulnerable spot, you might choose to remove it to prevent theft.
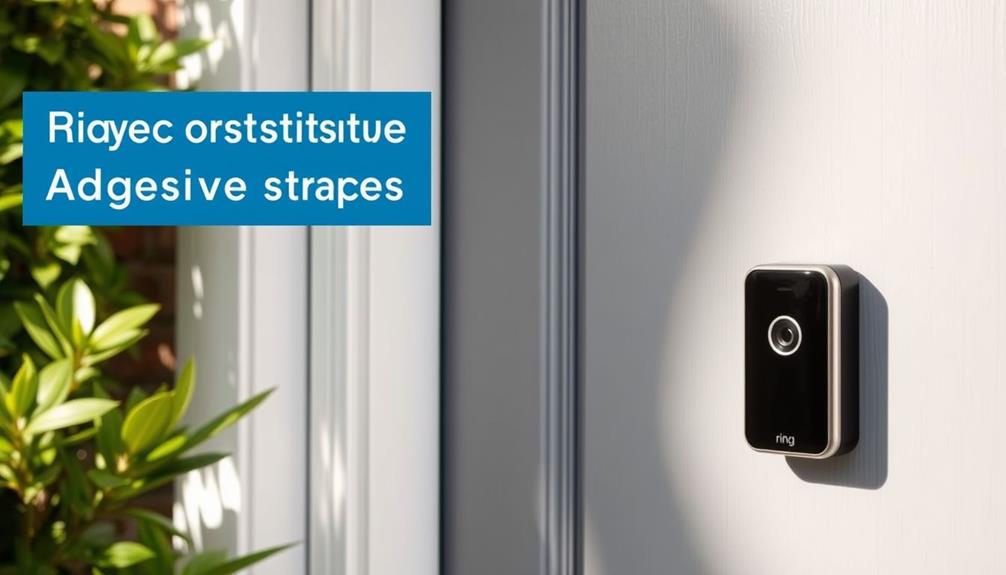
When removing your Ring Doorbell 2, the removable faceplate is key. It allows you to easily detach the device from its mounting bracket without hassle.

KIMILAR Anti-Theft Video Doorbell Mount Compatible with Ring/Blink Wireless Video Doorbell, Adjustable Mounting Bracket Accessories for Houses, Apartments, Businesses, Not for Blink 2nd Gen
Anti-theft Design: By a group of excellent designers racking their brains to design the anti-theft doorbell bracket, with…
As an affiliate, we earn on qualifying purchases.
As an affiliate, we earn on qualifying purchases.
Tools Required

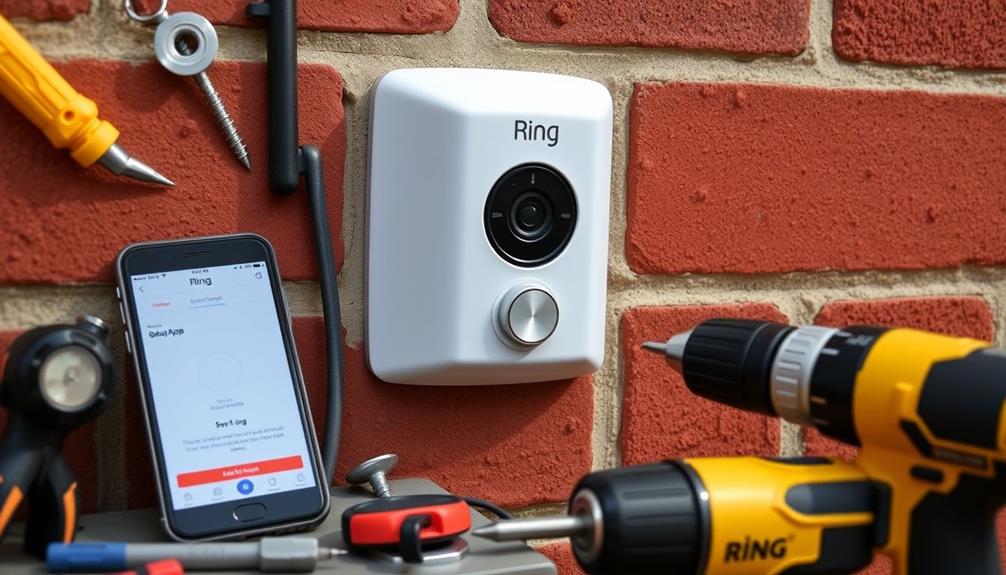
You'll need a few specific tools to successfully remove your Ring Doorbell 2. First and foremost, grab the screwdriver that came with your Ring package. This screwdriver is designed specifically for those security screws, making it vital for the task at hand. If you've lost that original screwdriver, don't worry; a small flathead screwdriver can also work to manipulate the security screws if necessary.
Understanding the significance of family bonds can motivate you to guarantee your home remains secure as you remove your doorbell.
As a backup, consider having a T15 Torx head screwdriver on hand. It's useful for unscrewing the device if you run into any issues with the original tools.
Besides these screwdrivers, make sure you have your Ring Video Doorbell ready, as it's essential for the removal process.
After you successfully detach the doorbell, you might need silicone or filler to cover any holes left in the wall. This step is important for maintaining your home's appearance and preventing water intrusion.
Having these tools ready will streamline the process and make removing your Ring Doorbell 2 a breeze. So, gather your screwdriver and any other necessary items before you plunge into the removal.

Fix it Fast Wall Hole Filler
All-in-One compound, applicator & spreader
As an affiliate, we earn on qualifying purchases.
As an affiliate, we earn on qualifying purchases.
Steps to Remove for Charging

To charge your Ring Doorbell 2, you'll first need to remove the faceplate.
This process involves unscrewing a security screw and gently detaching the faceplate to access the battery.
It's important to guarantee you have the right tools on hand, as having a proper home cleaning kit can make the task easier and more efficient.
Once you've got the battery out, you can charge it and prepare to reattach everything when you're done.
Faceplate Removal Process
Removing the faceplate of your Ring Doorbell 2 for charging is a straightforward process that takes just a few steps.
First, grab the provided screwdriver and locate the security screw at the bottom of the faceplate. Remove this screw to begin the process.
Next, gently pull the bottom portion of the faceplate down towards you, but make sure to keep the top of the faceplate in place. Once you've detached the bottom, lift the faceplate off the top hooks to completely remove it from the doorbell unit.
After you've taken off the faceplate, you'll have access to the battery pack. To release the battery for charging, simply press the small silver lever.
When you're done charging, reattach the faceplate by aligning it with the top hooks first. Push it upward into place and secure it by reinserting the security screw at the bottom. This guarantees your faceplate is firmly back in position, keeping your Ring Doorbell 2 ready for use.
Battery Charging Instructions
Before charging the battery, make certain to carefully follow the steps to remove it from your Ring Doorbell 2.
Start by locating the security screw at the bottom of the faceplate. Use the included screwdriver to remove this screw. Once it's out, pull the bottom portion of the faceplate down and towards you to detach it from the device.
With the faceplate removed, you can access the battery pack. Look for the small silver lever; press it to release the battery. After you've taken out the battery, you can charge it separately. Confirm it's fully charged before reinserting it back into the doorbell.
Once the battery is charged, slide it back into its compartment. Don't forget to reattach the faceplate. Align it properly with the device, and push it back into place. Finally, secure the faceplate by replacing the security screw you removed earlier.
Following these steps will help you maintain your Ring Doorbell 2's functionality and keep the battery charged for ideal performance.

Video Doorbell Key Replacement Tool, Doorbell Screwdriver Replacement Compatible with Battery Doorbell (2024), Doorbell Camera Opening Key Tool Video Doorbell Screwdriver
【Compatible Models】:Video Doorbell Key Replacement Tool Doorbell Screwdriver Replacement are compatible with Battery Doorbell (2024)
As an affiliate, we earn on qualifying purchases.
As an affiliate, we earn on qualifying purchases.
Removal Without Special Tool

If you don't have the special screwdriver, you can still remove your Ring Doorbell 2 using a small flathead screwdriver or a T15 Torx head screwdriver.
It's important to follow the removal steps carefully to avoid damaging the doorbell or screws.
If you run into trouble, reaching out to Ring customer support can help you find the right solution.
Alternative Tools Available
For those without the original security screwdriver, a small flathead or a T15 Torx head screwdriver can effectively help you remove the Ring Doorbell 2. These alternatives can be handy if you've misplaced the specific tool designed for the device.
Here's a quick reference table to assist you in choosing the right alternative tool:
| Tool Type | Description | Pros & Cons |
|---|---|---|
| Flathead Screwdriver | A simple, flat blade screwdriver. | Pros: Commonly available. <br> Cons: May slip and strip the screw if not used carefully. |
| T15 Torx Head | A star-shaped screwdriver specifically for Torx screws. | Pros: Fits securely and reduces risk of stripping. <br> Cons: May not be available in all tool kits. |
| Original Security Tool | The tool designed specifically for Ring Doorbell. | Pros: Perfect fit and designed for the task. <br> Cons: Can be easily lost or misplaced. |
When using alternative tools, be cautious to avoid damaging the screws or the mounting surface. Following the standard removal steps will help guarantee a smooth process. If you still encounter difficulties, don't hesitate to reach out for support.
Contacting Support Options
When you've exhausted your options for removing the Ring Doorbell 2 without the special tool, reaching out to Ring customer support can provide the assistance you need. They can guide you through the process or help you obtain the necessary tools.
Here are some steps you might take when contacting support:
- Visit the Ring Website: Start by visiting Ring's official support page for guidance on replacement tools.
- Use the Live Chat Feature: If you need immediate help, use the live chat feature for quick responses from support representatives.
- Call Customer Support: For more complex issues, calling Ring's customer support can provide personalized assistance in real-time.
- Email Support: If you prefer to write, sending an email detailing your issue can also lead to helpful responses.
Keep in mind that while you're contacting support, they may suggest using alternative tools like a small flathead screwdriver or a T15 Torx head screwdriver in the meantime.
Be careful during the removal process to avoid stripping the screws, which could complicate detachment.
Permanent Removal Process

To permanently remove your Ring Doorbell 2, begin by using the security screw tool to detach the faceplate from the device.
Once you've successfully removed the faceplate, you'll gain access to the mounting screws. Next, take out the four screws that secure the doorbell to the mounting bracket or wall. Make certain you have the right tools on hand to avoid any difficulties during this process.
If your Ring Doorbell 2 is a wired model, you'll need to disconnect the wires attached to the chime. Before doing this, verify that no power is present to avoid any electrical hazards. Once the wires are safely detached, you can proceed to remove the doorbell from its bracket.
After you've completely removed the doorbell, it's crucial to seal any holes left behind. Use silicone or filler to prevent leaks or pest entry into your home.
Preparation Steps

Gather the necessary tools, including a screwdriver, drill, and safety goggles, to secure a smooth removal process. Preparing the area and guaranteeing safety are essential steps before you begin removing your Ring Doorbell 2. Follow these preparation steps:
- Turn Off Power: If your doorbell is hardwired, make sure to turn off the power to avoid any electrical hazards during the removal.
- Gather Tools: Collect all the tools you'll need such as a screwdriver, drill, and safety goggles. This ensures you're ready to tackle the removal efficiently.
- Check Mounting Hardware: Look for any additional mounting hardware that may be required for reinstalling or relocating the doorbell.
- Clear the Area: Remove any obstacles around the doorbell to provide easy access, making the removal process smoother.
Removing the Doorbell From Mounting

Removing the Ring Doorbell 2 from its mounting bracket requires you to start by ensuring all security screws at the bottom are completely taken out. Once those screws are removed, grip the doorbell firmly and gently pull it upward while pushing down on the mounting bracket. This motion creates the leverage you need for easy separation.
If you encounter any resistance, you might use a paint scraper or a similar tool to carefully pry the doorbell from the bracket. Just be cautious not to damage the mounting surface during this process.
After successfully removing the doorbell from mounting, take a moment to check both the mounting bracket and the wall for any damage. If you find any holes, fill them with appropriate wall filler to restore the surface.
Here's a quick reference table for your convenience:
| Step | Action |
|---|---|
| 1. Remove Screws | Take out all security screws |
| 2. Grip Doorbell | Firmly hold and pull upward |
| 3. Check Resistance | Use a scraper if needed |
| 4. Inspect & Repair | Check for damage and fill holes if any |
Following these steps will help you safely detach your Ring Doorbell 2.
Disassembling Wired Connections

Disassembling the wired connections of your Ring Doorbell 2 requires guaranteeing that power is turned off to avoid any electrical hazards. Start by switching off the circuit breaker linked to the doorbell.
Once that's done, follow these steps:
- Use a voltage tester: Confirm that there's no power at the wires before you proceed with disconnection.
- Identify the wire connections: Look for the power supply wires, which are typically secured with wire nuts or screws.
- Loosen the connections: Carefully detach the wires from their terminals by loosening the wire nuts or screws.
- Label the wires: If there are multiple wires, label them to make reconnection easier later on.
After removing the wired connections, guarantee that all exposed wires are safely tucked away. This prevents any accidental contact or short circuits.
Removing the Mounting Bracket

To remove the mounting bracket of your Ring Doorbell 2, you'll need a few tools, primarily a screwdriver or drill.
Follow a simple step-by-step process to guarantee a smooth removal, while also checking the wall condition afterward.
Let's go through each of these points to make the task easier for you.
Tools Needed for Removal
Gathering the right tools is essential for easily taking off the Ring Doorbell 2 mounting bracket. Using the correct tools not only makes the process smoother but also prevents damage to your doorbell or wall.
Here's a list of the tools you'll need for removal:
- T15 Torx Screwdriver: This is the primary tool needed to remove the security screws from the mounting bracket. It's often included in the Ring package.
- Small Flathead Screwdriver: If you can't find the Torx screwdriver, a flathead screwdriver can serve as an alternative to help with the screws.
- Drill: If the screws are particularly stubborn, using a drill can speed up the removal process. Just make sure you choose the right drill bit size.
- Step Stool: If your doorbell is installed high, a step stool will help you reach the mounting bracket comfortably and safely.
With these tools in hand, you'll be well-prepared for the removal process.
Step-by-Step Process
With your tools ready, you can now follow these steps to remove the mounting bracket of your Ring Doorbell 2.
Start by locating the screws that secure the mounting bracket to the wall. These screws are usually positioned at the top and bottom of the bracket.
Using a screwdriver or drill, carefully remove these screws. Make sure to keep them in a safe place for potential reinstallation later.
Once the screws are out, gently pull the mounting bracket away from the wall. Be cautious not to damage the surface underneath as you do this.
If the bracket feels tightly adhered, you might need to use a paint scraper or a similar tool. Gently pry it off to avoid causing any damage to the wall.
After successfully removing the bracket, take a moment to inspect the wall for any damage. If you notice any holes or imperfections, fill them with appropriate wall filler as needed. This will guarantee your wall looks clean and neat after the removal of your Ring Doorbell 2.
Wall Condition After Removal
After you've removed the mounting bracket, inspect the wall for any damage, like holes or scratches, that may have been caused during the process. It's crucial to evaluate the wall condition to guarantee a clean finish after the removal.
Here are a few steps to reflect upon:
- Check for Holes: Identify any holes left by screws or anchors. Filling these will improve the wall condition.
- Use Wall Filler: Apply appropriate wall filler to seal any holes. This prevents moisture infiltration and maintains the integrity of the wall.
- Touch Up Paint: If the wall was painted, think about touching up the paint to achieve a uniform look. This helps restore your wall's appearance.
- Clean Up Debris: After removal, make sure you clean any dust or debris. A tidy area not only looks better but also prevents accidents.
Post-Removal Considerations

Cleaning the area thoroughly guarantees no dust or debris from the installation is left behind after you remove the Ring Doorbell 2. This step is essential for maintaining the cleanliness of your home and securing a smooth shift for any future installations.
Next, store the Ring Doorbell and its components in a safe location. This will prevent damage or loss, especially if you plan to reinstall it later. If you decide not to use the device anymore, consider updating the Ring app to reflect this change. Doing so will make sure you receive accurate notifications regarding your devices.
Take a moment to explore options for replacing or upgrading to a new model. Newer devices often come with enhanced features that can greatly improve your home security system.
Lastly, if you have any unwanted hardware, dispose of it responsibly. Follow local guidelines for electronic waste to minimize environmental impact. By taking these post-removal considerations into account, you'll guarantee your space remains tidy and that your home security remains a priority.
Frequently Asked Questions
How to Remove Ring Doorbell 2 From Mounting Bracket?
To remove your device from its mounting bracket, start by ensuring all security screws at the bottom of the faceplate are taken out.
Gently pull the bottom of the device away from the bracket while pushing down on the bracket for better leverage.
If it's stubborn, try using a small paint scraper to carefully pry it off.
Make sure to hold both parts firmly to avoid any damage during the process.
How Do You Take a Ring Doorbell Off?
Taking off a Ring Doorbell might seem intimidating, but it's surprisingly straightforward.
You'll need a T15 Torx screwdriver to unscrew the security screw at the bottom first.
Once that's done, pull the faceplate down gently.
Next, remove the screws securing the doorbell itself, keeping them safe for later.
Finally, grip the doorbell and pull it straight out.
If it's hardwired, remember to turn off the power before disconnecting the wires.
How to Remove Ring Doorbell 2 Faceplate?
To remove the faceplate of your Ring Doorbell 2, start by locating the security screw at the bottom.
Use the provided screwdriver to take it out.
Gently pull the bottom of the faceplate down and towards you to detach it.
Make sure you've removed all necessary screws beforehand; if it feels stuck, double-check for any remaining screws or clips.
The faceplate should slide off easily, giving you access to the battery.
How to Unscrew Ring Doorbell Without Tool?
If you don't have a tool to unscrew your Ring doorbell, you might try using a small flathead screwdriver to carefully manipulate the security screw at the bottom.
Alternatively, you could look for a T15 Torx head screwdriver, which can also work well.
Just be cautious while applying pressure, since you don't want to strip the screw head.
If all else fails, consider reaching out to customer support for assistance.
Conclusion
So, you've bravely ventured into the world of doorbell removal—truly a heroic feat!
Whether you're charging it, making room for the latest tech marvel, or just trying to avoid that awkward "Who's at the door?" moment, you've got this down.
Just remember, if you accidentally disconnect the neighbor's Wi-Fi while you're at it, you might want to invest in a good pair of running shoes.
After all, nothing says "friendly neighbor" like a hasty retreat!