
To hook your Ring Doorbell to power, start by gathering the necessary tools like a screwdriver, drill, and wire strippers. First, verify safety by disconnecting the power at the circuit breaker. Connect a jumper cable from the front terminal to the trans terminal, securing both ends tightly. Mount the doorbell using the provided screws and anchor, making sure to loop the wires around the terminals before restoring power. Once everything's connected, check the functionality with the Ring app. If you're unsure about any steps, there's more helpful information available to guide you.
Key Takeaways
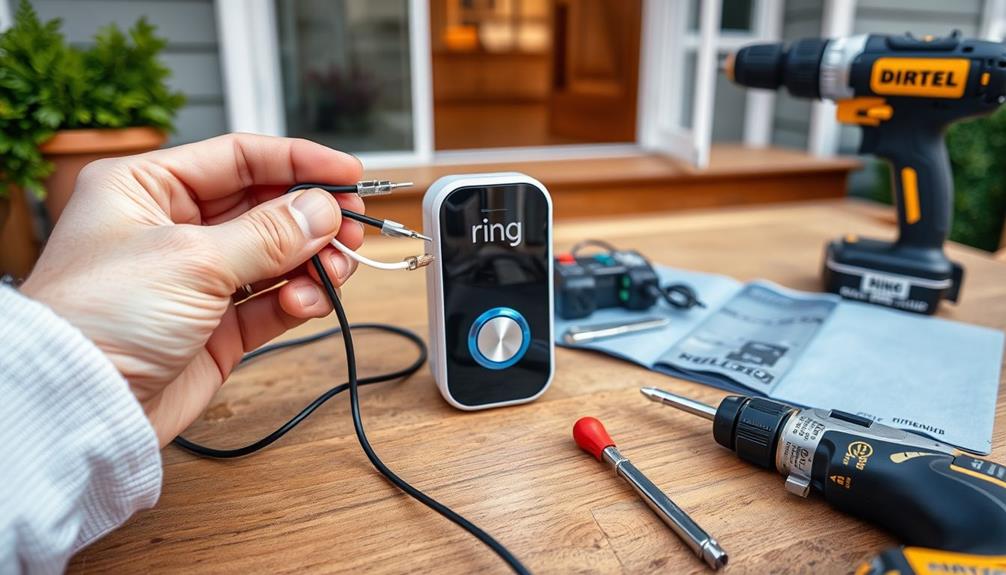
- Gather necessary tools including a screwdriver, drill, and wire strippers before starting the installation process.
- Disconnect power at the circuit breaker to ensure safety during installation.
- Use a jumper cable to bypass existing chimes if needed, connecting it to the Front and Trans terminals.
- Ensure transformer compatibility, confirming it operates between 8-24 VAC and has a minimum of 40 VA.
Help Resources
When you need assistance with your Ring doorbell, you can easily access a variety of help resources through the Ring website or app. These resources offer you essential help for your Ring, ensuring you can get your device up and running smoothly.
For instance, checking the General Return Policies Overview can provide insights if you need to return any related accessories. Start by exploring the installation guides tailored for your specific model, which provide clear instructions for wiring into the wall and connecting to your existing doorbell transformer.
If you encounter any issues, the troubleshooting articles are a great way to identify and resolve common problems. You can also use the Ring app to understand your device's settings and features better.
For more personalized assistance, don't hesitate to contact customer support, where experts can help you navigate installation challenges or device functionality concerns.
Additionally, community forums are excellent places to ask questions and share experiences with fellow Ring users. You can gain insights and solutions that you mightn't find elsewhere.
Installation Preparation

Before you start installing your Ring Doorbell, gather all the required tools and materials, including a screwdriver and wall anchors if needed.
It's important to guarantee that any electrical installation adheres to local regulations and standards, as outlined in legal requirements for starting a home cleaning business.
Don't forget to disconnect the power at the circuit breaker to guarantee your safety during the process.
It's also a good idea to check local laws about electrical work to keep everything compliant.
Required Tools and Materials
Gathering the right tools and materials is vital for a smooth installation of your Ring Video Doorbell. Start by collecting a screwdriver and a drill, especially if you're mounting on hard surfaces.
You'll need wire strippers to connect the doorbell to power easily. To guarantee you have everything else you might need, consider making a checklist of tools, similar to organizing for a modern farmhouse bedroom project. Check that you have the Jumper Cable included in your installation package for bypassing existing chimes.
Next, gather the necessary hardware, including mounting screws from Bag A and wall anchors if your installation requires them. It's important to verify you have a compatible low voltage transformer rated between 8 to 24 VAC and at least 40 Volt Amps (VA) for best performance.
Before starting, verify that your existing doorbell wiring is accessible. This makes it easier to connect your new doorbell.
To prevent wires from falling back into the wall during disconnection, consider having a helper hold the wires or use tape to secure them temporarily.
With these tools and materials in hand, you'll be well-prepared to proceed with the installation process and hook up your Ring Video Doorbell to power efficiently.
Safety Precautions Checklist
It's important to disconnect the power at the circuit breaker to avoid electrical hazards during your Ring doorbell installation. Following these safety precautions is vital for a smooth installation process.
First, double-check that the power is disconnected before you start any electrical work. Next, verify you have all required hardware included in your Ring doorbell package. You should also familiarize yourself with the existing doorbell chime since it needs to be compatible with your new device.
Before proceeding, consult local laws to determine if you need any permits for the installation. This step can save you from potential fines and guarantee compliance with safety standards.
Gather the necessary tools, like a screwdriver and wall anchors, to secure a secure installation.
Here's a quick checklist to help you prepare:
| Safety Precautions | Checklist |
|---|---|
| Power Disconnected | Yes |
| Required Hardware | Confirmed |
| Existing Doorbell Chime | Compatible |
| Local Laws/Permits | Checked |
| Tools (Screwdriver, Anchors) | Gathered |
Jumper Cable Connection

To connect your Ring Doorbell using a Jumper Cable, you'll need to understand how to properly use it and make the right terminal connections.
It's essential to follow safety precautions to avoid any electrical hazards while you work.
Additionally, ensuring that your home's energy systems are efficient, like using a heat pump, can contribute to a more stable power supply for devices like your doorbell.
Let's break down these key points for a smooth installation.
Jumper Cable Usage
Connect the included Jumper Cable by attaching one end to the Front terminal and the other to the Trans terminal on your Ring Video Doorbell. This bypasses the existing doorbell chime, allowing your doorbell to operate efficiently.
It's vital to tighten the terminal screws securely after making the connections to guarantee a stable electrical connection. Additionally, make sure that your indoor air quality is ideal during your installation process, as poor air quality can affect your focus essential for allergy sufferers.
Make sure you're using the Jumper Cable with doorbell systems that function on 10-24 volts AC. This verifies safe functionality and prevents any electrical issues. Once you've completed the connection process, you'll need to restore power at the circuit breaker. This step is fundamental for allowing your doorbell to power on and work correctly.
As you handle the electrical components, always follow safety precautions to avoid hazards. Confirm your workspace is dry and that you're wearing appropriate gear. If you're unsure about any step, consult a professional.
Proper installation of the Jumper Cable will set your Ring Video Doorbell up for success, providing you with reliable performance and peace of mind.
Terminal Connections Explained
Understanding the terminal connections in your Ring Video Doorbell setup is fundamental for guaranteeing a reliable and efficient installation.
To connect your Video Doorbell Wired, you'll use the included Jumper Cable. This cable bypasses the existing chime by connecting one end to the Front terminal and the other to the Trans terminal.
It's significant to observe that guaranteeing proper electrical connections can help prevent potential appliance issues, similar to the significance of HVAC maintenance in keeping systems running efficiently.
Make sure your doorbell system operates on a voltage of 10-24 volts AC, which is essential for compatibility with your Ring device.
After you've made the Jumper Cable connections, securely tighten the terminals to create a solid electrical connection. This step is critical; loose connections can lead to functionality issues.
Once everything is connected, don't forget to restore power at the circuit breaker. This action guarantees your doorbell powers on and functions correctly.
If you've followed these steps, your setup should work seamlessly, even if the existing chime isn't present or compatible.
Safety Precautions Required
Before you start connecting the Jumper Cable, make certain to turn off the power at the circuit breaker to confirm your safety. This step is essential to avoid any electrical hazards during the installation process.
Once the power is disconnected, you can use the Jumper Cable to bypass the existing chime. Connect one end to the Front terminal and the other to the Trans terminal of your doorbell.
Ascertain that the ends of the Jumper Cable are securely fastened by tightening the terminal screws. Loose connections can lead to malfunctions and compromise the proper functionality of your doorbell.
It's also important to verify that your doorbell system operates at a compatible voltage of 10-24 volts AC to guarantee the Jumper Cable works effectively.
Always follow the manufacturer safety guidelines and precautions throughout the installation. This will help minimize risks and confirm a smooth process.
Mounting the Doorbell

To guarantee a secure installation, start by marking the screw hole locations on the wall using your Ring Video Doorbell as a template. This guarantees proper alignment during mounting.
If you're working with stucco, brick, or concrete surfaces, drill holes and install wall anchors to secure the doorbell properly. For wooden or siding surfaces, you can mount directly without wall anchors—just use the provided screws.
Next, take the existing doorbell wires and loop them around the screw terminals on the Video Doorbell. Make sure to tighten the screws fully for a secure connection. This step is essential, as loose connections can affect the functionality of your doorbell. After securing the wires, double-check to ensure they are snugly fastened to avoid any potential issues with power or connectivity. Once everything is in place, proceed to mount the Video Doorbell onto its bracket. You can then explore additional features, such as configuring a smart home system or even learning how to hook Ring Doorbell to TV for real-time visitor notifications on your screen.
Once you've mounted the doorbell and connected the wires, it's time to restore power at the circuit breaker. This will activate your device and allow you to confirm that everything is working correctly.
Following these steps carefully will guarantee a smooth installation process, setting you up for successful operation of your Ring Video Doorbell.
Final Steps and Power Restoration

Now that you've connected the doorbell wires, it's time to power up the device by flipping the circuit breaker back on. This step is essential to restore power and energize the device. Once you've done this, wait for the Ring Video Doorbell to light up and announce its activation.
Follow these final steps to guarantee everything is set up correctly:
- Reattach the faceplate: Secure it back onto the doorbell, making sure it fits snugly.
- Use the security screw: Tighten the screw to prevent any tampering or accidental removal of the faceplate.
- Check functionality: Open the Ring app on your smartphone to confirm proper installation and responsiveness of the doorbell.
Remember to adhere to all safety guidelines when restoring power to avoid any electrical hazards.
Once you've completed these steps, you can enjoy the added security that your Ring Video Doorbell provides. If everything checks out, you're all set!
Ring Device Connectivity

Connecting your Ring Video Doorbell requires verifying it's powered by a compatible low voltage transformer that meets specific voltage and wattage requirements. Your transformer should operate within 8 to 24 VAC and have a wattage rating between 5VA and 40VA. Avoid using unsuitable transformers like DC, halogen, or garden-lighting types.
To help you with the installation process, here's a quick reference table:
| Transformer Type | Voltage Range | Wattage Rating |
|---|---|---|
| Compatible | 8-24 VAC | 5VA – 40VA |
| Incompatible | DC | N/A |
| Incompatible | Halogen | N/A |
| Incompatible | Garden-lighting | N/A |
When you connect your Ring Doorbell, make sure to use the existing doorbell wiring. If necessary, bypass any mechanical doorbell chimes by using a jumper cable. It's wise to consult a licensed electrician for assistance with wiring to verify safety and compliance with local codes. Finally, confirm that your installation setup adheres to the manufacturer's guidelines to guarantee peak performance.
Power Management and Troubleshooting

Proper power management is essential for guaranteeing your Ring Video Doorbell operates smoothly and efficiently. To achieve peak performance, follow these steps:
- Connect Your Ring Video: Verify you're using a compatible low voltage transformer that outputs between 8 to 24 VAC and has at least 40 Volt Amps (VA). This helps maintain power management for your device.
- Verify Connections: When hardwiring Ring devices, double-check that the wires are securely looped around the terminal screws and that the screws are tightened properly. This minimizes the risk of power failure.
- Monitor the Battery Charge: Regularly check the battery charge level using the Ring app. Remember, the doorbell will only start trickle charging when the battery level drops below 90%.
If you experience any issues, troubleshoot by inspecting your existing doorbell system for compatibility and secure connections. Adjust settings in the Ring app to guarantee the device is receiving the necessary power supply, especially if a chime isn't connected.
Frequently Asked Questions
Can You Just Plug a Ring Doorbell In?
You can't just plug a Ring doorbell into a standard electrical outlet. It needs a hardwired connection to a compatible transformer that provides 8 to 24 volts AC.
Directly connecting it to an incompatible power source can damage the device and void the warranty.
Instead, using the right transformer guarantees your doorbell stays powered and keeps its battery charged for continuous functionality.
Always check the specifications before making any connections.
How Do I Hardwire My Ring Doorbell?
To hardwire your Ring Doorbell, start by ensuring you have a compatible transformer providing 8-24 Volts AC with at least 40 VA.
Next, disconnect power at the circuit breaker for safety.
Use the included Jumper Cable to bypass the existing chime by connecting it to the Front and Trans terminals.
Securely loop one wire around each screw terminal on the doorbell, then restore power and check if it powers on and functions correctly.
Can Ring Doorbell Be Connected to Electricity?
Imagine you're living in a sci-fi movie—your doorbell can connect to electricity!
Yes, your Ring Doorbell can indeed be hooked up to a power source.
You'll need a compatible transformer that delivers 8 to 24 volts AC, ideally rated at 40 VA or more.
This setup lets the doorbell trickle-charge its battery.
Just make sure the existing wiring is compatible for smooth operation with your house-mounted chimes.
Safety first!
How Do You Connect a Ring Doorbell to Power?
To connect your Ring Doorbell to power, start by ensuring you've got a compatible transformer that delivers 8-24 Volts AC.
Use the provided Jumper Cable to bypass your existing doorbell chime, connecting it to the Front and Trans terminals on the device.
Loop the wires around the screw terminals and tighten them securely.
Once you restore power at the circuit breaker, wait for the doorbell to light up and confirm it's connected in the Ring app.
Conclusion
Now that you've successfully hooked your Ring Doorbell to power, you can enjoy the peace of mind that comes with enhanced security.
With your device mounted, your home monitored, and your connections secure, you're ready to embrace convenience and safety.
Remember to manage your power wisely and troubleshoot any issues as they arise.
By staying proactive and informed, you'll keep your home connected, your family protected, and your experience seamless.
Enjoy your new smart home upgrade!