
To install your Ring Doorbell, gather tools such as a screwdriver, measuring tape, and drill. Begin by turning off the power at the breaker for safety. Take out the old doorbell and affix the mounting bracket approximately four feet above the ground. Connect the existing wires, then attach the Ring Doorbell to the bracket until it clicks into place. Switch the power back on and observe the light indicators. Lastly, utilize the Ring app to link your doorbell to Wi-Fi and test out its functionalities. There are many more features to explore to ensure a seamless installation!
Key Takeaways
- Gather essential tools like a screwdriver, power drill, and smartphone for installation.
- Ensure safety by turning off power at the circuit breaker before starting.
- Attach the mounting bracket approximately four feet off the ground, marking screw locations first.
- Connect wires securely to the Ring Doorbell, using a diode for digital chimes if needed.

Ring Spare Parts Kit for Video Doorbell (2nd Generation)
Replace any lost or misplaced parts for your Ring Video Doorbell (2nd Generation).
As an affiliate, we earn on qualifying purchases.
As an affiliate, we earn on qualifying purchases.
Overview of Ring Doorbells
Ring Doorbells provide an innovative way to enhance your home security with features like remote viewing and two-way communication through a smartphone app.
With the Ring Video Doorbell, you can see who's at your door from anywhere, giving you peace of mind whether you're at home or away. These devices come equipped with motion-activated notifications, alerting you to deliveries or suspicious activity, which helps deter potential trespassers.
Additionally, AI in Cybersecurity can further improve your home security by integrating advanced threat detection systems.
Installation is user-friendly, often requiring no professional help. You can choose between wired and wireless models based on your existing doorbell setup. If you have low-voltage wiring, a wired model integrates seamlessly into your current system. On the other hand, battery-operated models are perfect if you prefer a hassle-free installation without any wiring.
The flexibility in choosing the right model allows you to personalize your security solution, fitting your home's unique needs. By opting for a Ring Doorbell, you're investing in not just a doorbell, but a thorough security upgrade that can help safeguard your property and loved ones.

Orbitell 1080p Wireless Wi-Fi Video Doorbell Camera with Two Way Audio, Night Vision, Cloud Storage, Smart AI Motion Detection, Support 2.4GHz Wi-Fi only
AI-Powered Smart Detection: Advanced AI technology accurately identifies people while filtering out vehicles and animals, so you only…
As an affiliate, we earn on qualifying purchases.
As an affiliate, we earn on qualifying purchases.
Tools Needed for Installation

Before you start installing your Ring doorbell, it's important to gather the right tools.
While the package includes some essentials, having optional tools on hand can make the process smoother.
Consider using smart organization techniques to keep your workspace tidy and efficient.
Plus, don't forget about safety gear to guarantee a secure installation.
Essential Tools Overview
To successfully install your doorbell, you'll need a few essential tools, including the components provided in the package and some additional items for a smoother setup.
The Ring doorbell package includes screws, a charging cord, and a screwdriver, which are vital for the installation process. As you begin this project, remember that empowering future generations through DIY skills can enhance your confidence and creativity.
In addition to these basics, consider having a smartphone on hand for the app setup. A power drill can also be helpful if you're working with harder surfaces like brick or stucco. If you plan to mark the placement of your doorbell, a pencil will come in handy.
For ensuring accurate installation, a small level and measuring tape can be beneficial, although they're not strictly necessary.
If you're using a wireless model, remember that regular battery charging is required, typically taking around 8 hours to fully charge. On the other hand, wired models can utilize your existing wiring, so you won't need to worry about charging.
Optional Tools Benefits
Having the right optional tools can streamline your Ring doorbell installation and enhance the overall experience. While the essential tools will get you started, adding a few extras can make a significant difference.
A power drill is particularly useful if you're working with brick or stucco surfaces. When you pair it with a masonry drill bit, you'll guarantee proper anchoring for your doorbell, preventing any future sagging or detachment.
Alongside the power drill, use a measuring tape to determine the ideal height for installation. Mounting your doorbell at about four feet off the ground optimizes its functionality and aesthetic appeal.
Before you start drilling, grab a pencil to mark the screw hole locations. This simple step guarantees accurate placement, helping avoid misalignment and the need for re-drilling.
Additionally, a small level can verify that your doorbell is straight, further enhancing video capture and visual appeal.
Safety Gear Importance
Wearing safety gear is essential for protecting yourself during the installation of your Ring Doorbell. You want to make sure that you're equipped to handle any potential hazards while working. Here's a quick overview of the necessary gear:
| Safety Gear | Purpose |
|---|---|
| Safety Goggles | Protects your eyes from debris while drilling. |
| Gloves | Provides grip and shields hands from sharp objects. |
| Steel-Toed Boots | Protects feet from heavy tools that may drop. |
| First Aid Kit | Makes certain you're prepared for any minor injuries. |
Using safety goggles is a must, as they shield your eyes from dust and debris. Gloves give you a better grip on tools and safeguard your hands from sharp edges or wires. Don't forget about steel-toed boots—they protect your feet, especially if you're working with heavy equipment. Finally, having a first aid kit handy makes certain that you can quickly address any minor injuries, making your installation process safer and smoother. Prioritizing safety gear will help create a worry-free environment while you set up your Ring Doorbell.

Ring Spare Parts Kit for Battery Doorbell
Everything you need to setup your Ring Battery Doorbell in just a few minutes.
As an affiliate, we earn on qualifying purchases.
As an affiliate, we earn on qualifying purchases.
Preparing for Installation

Before you begin the installation of your Ring doorbell, double-check that you have all the necessary hardware and tools ready for a smooth setup. Confirm your Ring package includes screws, a charging cable, and any other components. You don't want to run into problems halfway through installing your doorbell.
For your safety, disconnect power at the circuit breaker to avoid any electrical hazards during the installation process. If you have an existing doorbell system, it's crucial to locate the doorbell chime, as this will help you with wiring connections later on.
Check local laws and building codes to understand any specific requirements for electrical work in your area. This guarantees that you're compliant and safe throughout the installation.
Gather the necessary tools, like a screwdriver and power drill, if needed, and a pencil for marking screw hole placements. Having everything on hand will streamline the installation process and make it much easier for you to get your Ring doorbell up and running in no time.

WarmBot 1080p Smart Wi-Fi Doorbell Camera with Doorbell Receiver, AI Motion Detection, Night Vision, Cloud Storage, 2 Way Audio, Battery Powered, 2.4GHz Wi-Fi Only
Private and Secure Cloud Recording – Video footage is stored securely with bank-level AES 128-bit encryption, accessible through…
As an affiliate, we earn on qualifying purchases.
As an affiliate, we earn on qualifying purchases.
Charging the Battery

Charging your Ring Doorbell battery is straightforward, but it's crucial to follow the right procedure.
You'll want to pay attention to the battery indicator lights to know when it's fully charged, which typically takes about 4 to 6 hours.
Let's break down the charging process, what those lights mean, and what you can expect regarding charging time.
Charging Procedure Overview
How do you charge the Ring Doorbell battery? Simply use the provided orange USB charging cable to connect it to a power source for about 4 to 6 hours. It's important to remove the doorbell from its mounting bracket to access the battery easily. Place the device against a flat surface, which makes the battery removal process smoother.
Here's a quick overview of battery charging:
| Status | Light Color | Meaning |
|---|---|---|
| Charging | Red | Battery is currently charging |
| Fully Charged | Green | Battery is fully charged |
| Power Source | – | Connected to a power source |
| Removal | – | Must remove doorbell to charge |
Regularly charging your battery is vital for peak performance, especially for wireless models that depend on battery power. If you have the Ring Video Doorbell Pro, remember that it doesn't require charging, as it's hardwired to your existing doorbell wiring. Keeping your battery charged guarantees your Ring Doorbell functions properly when you need it most.
Battery Indicator Lights
The Ring Doorbell features distinct battery indicator lights that help you easily monitor the charging status of your device. When your battery is fully charged, only one LED light will be lit, signaling that it's ready for use. If you see a red light, that means your battery is currently charging. Once the battery is fully charged, a green light will illuminate, giving you a clear indication that you can disconnect the charging cable.
To maintain peak performance, it's essential to recharge the battery periodically. Low battery levels can negatively affect your Ring Doorbell's functionality. You should also regularly check the battery level through the Ring app, ensuring you stay informed about your device's status.
Charging the battery typically takes about 4 to 6 hours with the included USB charging cable, so plan accordingly to keep your doorbell operational.
Charging Time Expectations
Expect to fully charge your Ring Doorbell battery in about 4 to 6 hours using the included USB charging cable. It's crucial to confirm that the battery is charged before installation, so you can start using your doorbell right away. When your battery is charging, you'll see a red light, and once it's fully charged, the light will turn green.
To keep your Ring Doorbell functioning at its best, regular battery charging is necessary, especially for wireless models. Here's a quick reference for your charging expectations:
| Battery Status | Indicator Light |
|---|---|
| Charging | Red Light |
| Fully Charged | Green Light |
| Initial Charge Needed | N/A |
Make it a habit to check the battery level regularly. If you notice the light turning red, it's time for charging again. Keeping your doorbell's battery in good shape guarantees you won't miss any important notifications or features. Don't let a low battery hinder the performance of your Ring Doorbell!
Setting Up the Ring App

To get started, download the Ring app from the App Store or Google Play and create an account using your email and a password.
Make certain your smartphone is connected to a Wi-Fi network, as the app requires internet access for setup and configuration. Once you're logged in, follow the in-app instructions to add your Ring Doorbell. Tap on "Set Up a Device" and select your doorbell model from the list provided.
Next, to link your device to your account, scan the QR code located on the doorbell or enter the serial number manually. This process guarantees that your Ring Doorbell is properly connected to your account.
After you've set up the device, take some time to customize your notification preferences, motion zones, and video settings. By tweaking these options, you can optimize your Ring Doorbell's functionality to suit your needs.
Once you've completed these steps, you'll be all set to enjoy the features of your new Ring Doorbell. Remember, the app is user-friendly, making it easy to adjust settings whenever you need.
Removing the Old Doorbell

Before you start, grab a screwdriver or box cutter to help you remove the old doorbell.
It's essential to handle the exposed wires carefully and make sure the power is off at the breaker to avoid any accidents.
Let's go through the steps to safely detach the old doorbell and prepare for your new Ring installation.
Tools Needed for Removal
You'll need a few essential tools to safely remove your old doorbell before installing the Ring Doorbell. Having the right equipment will make the process smoother and guarantee you don't damage anything in the process. Here's a quick list of the tools you should gather:
- Screwdriver or box cutter
- Voltage tester
- Pliers
- Storage container for screws
First, use the screwdriver or box cutter to carefully remove the faceplate of the old doorbell. This helps prevent any damage to the surrounding wall. Next, disconnect the wires attached to the old doorbell by loosening the screws that hold them in place. If you’re replacing it with a smart doorbell, such as a Ring doorbell, the process may involve similar steps, like removing the cover on Ring doorbell with a security screw before accessing the internal wiring. Once everything is disconnected, you’re ready to proceed with installing your new doorbell system.
Next, unscrew the old doorbell from the wall to expose the power wires. Be gentle when handling them, and make sure you loosen the screws completely to detach the wires without causing any damage.
Before you start removing the old doorbell, use the voltage tester to confirm that no current is running through the wires. This is vital to guarantee your safety during the removal process.
Safe Wire Handling Tips
Guaranteeing safety while handling wires is essential when removing your old doorbell, so always turn off the power at the breaker box first. This step prevents electrical hazards from occurring.
Once the power is off, use a screwdriver or box cutter to carefully remove the faceplate and unscrew the old doorbell. As you expose the power wires, handle them gently to avoid damage.
Loosen the screws to detach the wires completely, making sure they aren't touching each other. This precaution helps avoid short circuits. If your old doorbell is connected to a chime, take a moment to note the wiring configuration. This will be significant for a proper connection when you install the new doorbell.
For added safety, wear insulated gloves throughout the process. Following these safe wire handling tips not only protects you but also guarantees compliance with local code regulations.
Always prioritize safety to make your installation smooth and successful. By taking these steps, you'll minimize risks and be ready to enjoy your new Ring doorbell without worry.
Attaching the Mounting Bracket

Start by positioning the Ring Doorbell's mounting bracket at about four feet off the ground for ideal performance. Confirm that it's straight and aligned properly to maximize functionality. Next, firmly attach the mounting bracket to the wall using the provided screws and anchors. Once the bracket is securely in place, you can proceed with installing your Ring Doorbell. Be sure to follow the manufacturer’s instructions carefully to ensure a smooth and successful installation process.
Once you've determined the placement, use a pencil to mark the screw hole locations through the bracket's template. This step is essential to avoid any mistakes during installation.
Next, drill pilot holes to prevent wood splitting, or use anchors if you're mounting on brick or concrete. If you're using existing doorbell wiring, you can connect the wires to the mounting bracket's screws. Just make sure to loosen the screws, wrap the wires securely around them, and tighten them without letting the wires touch each other.
Now it's time to secure the mounting bracket to the wall using the screws provided. Remember not to overtighten, as this can bend the bracket.
Finally, once the mounting bracket is secure, snap the Ring Doorbell onto it until you hear a click, confirming it's properly mounted.
- Position at four feet.
- Mark screw holes.
- Drill pilot holes.
- Use existing wiring carefully.
Connecting Wires

Safety is paramount when connecting the wires for your Ring Doorbell, so be certain to turn off the power at the breaker first. Once you've confirmed the power is off, locate the wires coming from your existing doorbell.
If you're connecting to an existing doorbell system, you might need to install a diode for digital chimes, so check the installation instructions.
Next, take the wires and connect them to the screws on the back of the Ring Doorbell. It's essential that you connect them correctly, as the order of the connections won't affect functionality, but you want to guarantee a secure fit. Use the provided screws to secure the wires in place, making sure they don't touch each other to prevent short circuits.
After securing the wires, double-check your connections. Once you're confident everything is in order, restore power at the breaker.
Look for the doorbell lights to illuminate, which indicates a successful connection. If everything's working properly, you're one step closer to enjoying your new Ring Doorbell!
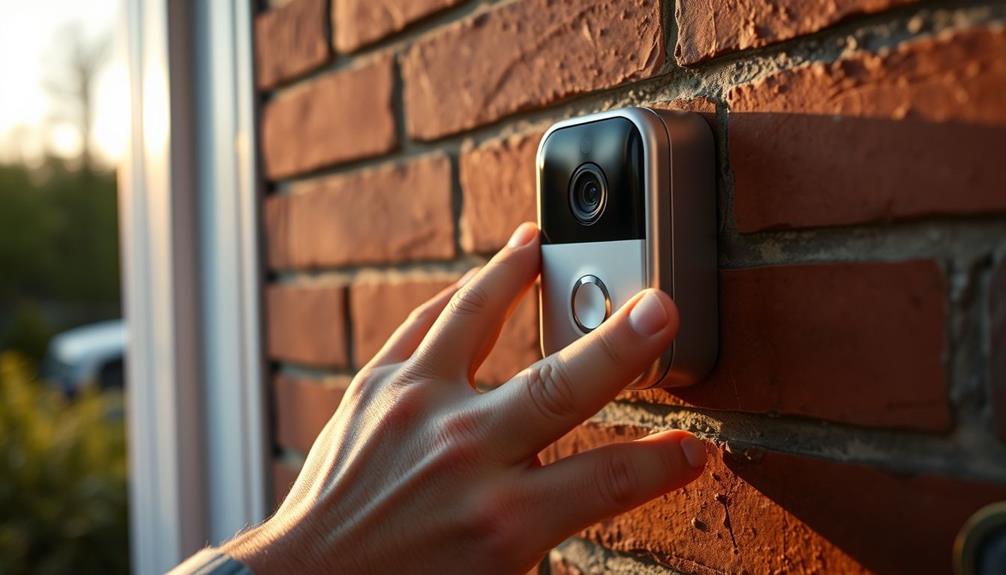
Securing the Doorbell

Once you've connected the wires, align the Ring Doorbell with the mounting bracket and press down until you hear a click that confirms it's securely attached. When installing the Ring Doorbell, be sure to double-check that everything is properly aligned and securely fastened before letting go. It’s also a good idea to test the doorbell to make sure it is working properly before completing the installation process. Overall, taking the time to properly install the Ring Doorbell will ensure that it functions effectively and provides the security and convenience you expect. After installing the Ring Doorbell, it’s important to activate your ring doorbell plan to take full advantage of its features. This will allow you to receive notifications, view recorded footage, and access other security options. By activating your ring doorbell plan, you can enhance the overall effectiveness of your home security system.
Next, you'll want to use the included short security screws to fasten the doorbell to the mounting plate. Be careful not to over-tighten the screws, as this can bend the bracket and compromise your installation.
To make sure everything is secure, follow these steps:
- Double-check the connection of the existing doorbell wiring to avoid any electrical issues.
- Reattach the faceplate using the small security screw provided to deter unauthorized removal.
- Regularly inspect the installation for any signs of wear or damage.
- Make certain that no wires are touching each other to maintain safety.
Securing your Ring is essential for its functionality and your peace of mind. By following these guidelines, you'll enhance the security of your doorbell and guarantee it operates effectively for years to come.
Finalizing the Setup

After mounting your Ring Doorbell, it's time to restore power and confirm the device activates properly. Head to your breaker box and turn the power back on. Watch for power-on indications, like lights or sounds. If your doorbell connects to a chime, press the button to verify it activates.
Next, use the Ring app to finalize setup. Open the app, select your doorbell, and confirm it's connected to Wi-Fi. You can then test the live video functionality by pressing the doorbell button. Below is a quick reference table to help you during this process:
| Step | Action |
|---|---|
| Restore Power | Turn on power at the breaker |
| Check Chime Activation | Press the doorbell button |
| Connect to Ring App | Select doorbell and test functionality |
Frequently Asked Questions
How Do You Put a Ring Doorbell In?
To put a Ring Doorbell in, you'll first need to charge its battery until the green light shows.
Then, turn off the power at the breaker to stay safe.
After that, attach the mounting bracket to the wall, ensuring it's about 4 feet off the ground.
Connect the existing wires securely to the back of the doorbell, restore power, and finally, use the Ring app to complete the setup.
Is It Easy to Install a Ring Doorbell?
Installing a Ring Doorbell is like planting a seed in your garden; it's simple and rewarding. Yes, it's easy!
You'll find the process straightforward, taking less than ten minutes with just a few tools. You charge the battery, mark your screw holes, and mount it around four feet high.
With the Ring app guiding you every step of the way, you'll be up and running in no time, enjoying the benefits of your new smart doorbell.
How Do You Position a Ring Doorbell Camera?
To position your Ring Doorbell camera effectively, aim for a height of about 4 feet for ideal video capture.
Make sure it's within range of your Wi-Fi for stable streaming.
Use the Ring app to check the live feed and adjust the angle for the best view of your entryway.
Mark the screw hole locations accurately with the mounting bracket to avoid misalignment and guarantee secure installation, especially on hard surfaces.
How Can I Get My Ring Doorbell to Work?
Getting your Ring Doorbell to work isn't just about installation; it's about connection.
First, charge the battery with the orange cable for 4 to 6 hours.
Next, set it up in the Ring app near your Wi-Fi router.
Mount it at about four feet high, ensuring it's secure.
If you're using a doorbell chime, check your wiring compatibility.
Conclusion
Now that you've got your Ring Doorbell installed, you can kick back and relax like it's 1999, knowing you've got an extra set of eyes on your front porch.
With everything set up, you'll enjoy peace of mind and the convenience of monitoring your home from your smartphone.
Remember, if you run into any issues, the Ring app's support features are just a tap away.
Happy home security!


