To remove the faceplate from your Ring Doorbell Pro, start by powering off the device for safety. Locate the two security screws at the bottom corners. Use the specialized screwdriver provided or a Phillips #1 or #00. Carefully remove the screws and apply gentle pressure on the faceplate as you pull it off. If you encounter stubborn screws, a rubber band can help improve grip, or needle-nosed pliers may assist. Remember, keeping your workspace clear and well-lit makes the process easier. Once you're set, there's more valuable information ahead that can enhance your experience! After removing the faceplate, you’ll have access to the internal components of the Ring Doorbell Pro. This can be useful if you need to replace the faceplate with a different color or design, or if you need to troubleshoot any issues with the device. Additionally, removing the faceplate allows you to clean any debris or dirt that may have accumulated around the edges, which can improve the performance of the doorbell. So, take your time and follow the proper steps for removing the faceplate to ensure a safe and successful process.
Key Takeaways
- Power off the Ring Doorbell Pro before starting to avoid electrical issues during faceplate removal.
- Locate and remove the two security screws at the bottom rear corners using the specialized Ring screwdriver.
- Apply pressure on the inner faceplate while gently pulling it off to prevent damage during removal.
- Use a rubber band on the screwdriver for better grip if dealing with stripped screws.

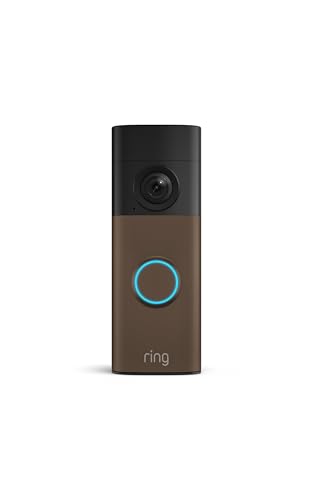
Ring Battery Doorbell (newest model) — Retinal 2K with wide-angle video, up to 6x Enhanced Zoom, Two-Way Talk, and Built-In Battery, Speckled Gray
Capture it all with Retinal 2K video — From wide views to tighter focus, it’s easy to see...
As an affiliate, we earn on qualifying purchases.
Overview of Ring Doorbell Pro
The Ring Doorbell Pro offers a sleek, wired solution for enhancing your home security with high-definition video and advanced smart features. This device is designed to give you peace of mind while enabling seamless integration with your smart home systems.
With its two-way audio communication, you can converse with visitors at your door, no matter where you are. Additionally, the Ring Doorbell Pro is built to withstand various weather conditions, ensuring durability and reliability, much like sustainable home decor. Plus, the motion detection alerts keep you informed about any activity at your doorstep.
When it comes to installation, it's crucial to recognize that the Ring Doorbell Pro requires a compatible power source. You'll also need specific tools, including a T15 Torx screwdriver, to access the security screw that holds the faceplate in place. Removing the faceplate allows you to access the inner workings of the device for setup or maintenance.
The customizable motion zones and impressive 160-degree field of view help you optimize your surveillance coverage, ensuring you capture everything happening around your front door. Overall, the Ring Doorbell Pro is a powerful addition to your home security arsenal, blending functionality and style effortlessly.
Ring Battery Doorbell (newest model) — Retinal 2K with wide-angle video, up to 6x Enhanced Zoom, Two-Way Talk, and Built-In Battery, Matte Mocha
Capture it all with Retinal 2K video — From wide views to tighter focus, it’s easy to see...
As an affiliate, we earn on qualifying purchases.
Tools Needed for Faceplate Removal

Removing the faceplate from your Ring Doorbell Pro requires a few specific tools to guarantee the process goes smoothly. You will need a screwdriver with a T6 Torx bit, as well as a small flathead screwdriver or pry tool. Once you have these tools on hand, carefully insert the flathead screwdriver or pry tool into the slot at the bottom of the faceplate. Gently apply pressure and the faceplate should pop off easily, allowing you access to the internal components of the Ring Doorbell Pro. Remember to proceed slowly and cautiously to avoid damaging the device when removing faceplate from ring doorbell.
First, you'll need the specialized Ring screwdriver that comes with the installation package. This tool is specifically designed for the security screws used in your doorbell. If you don't have the Ring screwdriver, you can alternatively use Phillips screwdrivers #1 and #00.
To make sure a safe and effective removal, it's also a good idea to maintain a clean indoor environment, as air purifiers improve indoor air quality considerably, which can be beneficial during your DIY tasks.
Before you start, make sure you have proper lighting to clearly see the screws. This visibility will help you avoid any issues, especially if you encounter stripped screws. If you do run into stripped screws, don't worry—using a rubber band can help improve your grip on them, making it easier to remove.
In cases where the screws are stubborn, needle-nosed pliers can be a lifesaver. They can grip and extract stripped screws more effectively than your fingers.
Gathering these tools beforehand will make your faceplate removal process much more efficient. With everything ready, you'll be set to tackle the task without any hiccups.

Ring Battery Doorbell (newest model), Matte Mocha with Indoor Cam Plus, Black
Protect home inside and out — Bundle Battery Doorbell (2nd Gen), Matte Mocha and Indoor Cam Plus, Black...
As an affiliate, we earn on qualifying purchases.
Step-by-Step Removal Instructions

To begin the removal process, locate the two security screws at the bottom rear corners of the Ring Doorbell Pro faceplate. You'll need a specific Ring screwdriver or a compatible Phillips screwdriver #1 or #00 to remove these screws. If you find that the screws are stripped, don't worry! You can use rubber bands to improve grip or needle-nosed pliers to assist in extracting them. Once the screws are removed, gently pull the faceplate away from the Ring Doorbell Pro to reveal the device’s internal components. To continue with how to uninstall a Ring Doorbell, disconnect the wires connected to the back of the device one by one. Carefully label or remember their configuration, as this will make reinstallation easier if needed.
| Step | Action |
|---|---|
| 1 | Power off the device. |
| 2 | Locate the two security screws. |
| 3 | Use a screwdriver to remove screws. |
| 4 | Apply pressure on the inner faceplate. |
| 5 | Gently pull off the faceplate. |
Once you've successfully removed the screws, carefully apply pressure with your thumbs on the inner piece of the faceplate. This action helps prevent any damage to the doorbell while you gently pull the faceplate off. Now you can access the internal components for maintenance or reprogramming. Remember, always verify the device is powered off to avoid any electrical issues during the removal process.

Ring Wired Doorbell Pro (newest model), Home or business security, Retinal 4K with wide-angle video, 10x Enhanced Zoom, and Low-Light Sight, Deep Silver
Capture it all with Retinal 4K video — See your home or business in the ultimate clarity with...
As an affiliate, we earn on qualifying purchases.
Troubleshooting Common Issues

Stripped screws can make removing the faceplate from your Ring Doorbell Pro frustrating, but there are effective solutions to tackle this issue.
If the screw is stripped and your screwdriver doesn't catch, try placing a rubber band between the screwdriver and the screw for better grip. This simple trick can often help you gain enough traction to turn the screw.
Additionally, it's important to remember that regular maintenance of your devices can prevent such issues from arising in the first place, similar to how health checks for dogs can detect early signs of illness.
It's also vital to guarantee you're using the correct screwdriver type—either a T15 or T6 Torx—depending on your specific model. Using the wrong type can lead to more stripped screws and further complications.
If you still can't remove the screw, needle-nosed pliers might do the trick. They can grip the edges of the stripped screw, allowing you to twist it free.
If you encounter persistent issues and really need to remove the faceplate, please give our support a call. They can provide additional troubleshooting assistance and guidance tailored to your situation.
Community Support Resources

When you need help with removing the faceplate from your Ring Doorbell Pro, tapping into community support can be invaluable.
You can share your experiences and learn from others who've faced similar challenges, finding practical solutions together.
Whether it's tips on techniques or troubleshooting advice, the community is a great resource for enhancing your DIY skills.
User Experience Sharing
Engaging with the Ring Community forum can provide invaluable support as you navigate the challenges of removing the faceplate from your Ring Doorbell Pro.
This platform is a treasure trove of user experience sharing, where you can learn from others who've faced similar issues. Many users discuss common challenges like stripped screws or the specific tools needed for effective removal.
If you're struggling, don't hesitate to post a question. Community members are often quick to respond with helpful tips. For instance, a T15 Torx screwdriver is frequently recommended as essential for accessing the screws on the faceplate.
You might also discover alternative methods, such as using rubber bands for a better grip on stubborn screws, making your removal process smoother.
As you browse through the forum, you'll find a wealth of troubleshooting articles and guides tailored to faceplate removal.
This collective knowledge enhances your experience and equips you with the information you need to succeed.
Problem-Solving Techniques
Finding effective problem-solving techniques can greatly enhance your experience in removing the faceplate from your Ring Doorbell Pro, especially with the support resources available in the community. Here are three key ways to leverage these resources:
- Join in the discussion: Log into the Ring Community forum and engage with users who've faced similar challenges. Sharing your specific issue can lead to tailored advice that addresses your situation directly.
- Use visual aids: Many users recommend checking out guides and videos shared by the community. Visuals can clarify the faceplate removal process, making it easier to troubleshoot any problems you encounter.
- Document your issue: When you post your question, provide a detailed description of your problem. This helps fellow users and the support team better understand your situation and offer relevant suggestions. If community input doesn't resolve your issue, don't hesitate to give our support team a call for further assistance.
Additional Tips for Success

To guarantee a smooth removal of your Ring Doorbell Pro's faceplate, it's essential to use the right tools and techniques.
Start with a specific Ring screwdriver designed for security screws or a Phillips screwdriver #1 and #00 for a proper fit. If you encounter stripped screws, don't worry—try placing a rubber band between the screwdriver and the screw to enhance grip while you remove it.
For tougher screws, flipping the screwdriver tip can give you the leverage needed to succeed. While turning the screwdriver, apply pressure with your thumbs on the inner piece of the faceplate to help ease the removal process.
If you're still struggling, it's wise to reflect on reaching out to the Ring support team for assistance. They can provide guidance tailored to your specific issue, ensuring you can successfully remove the faceplate without damaging your doorbell.
Frequently Asked Questions
How to Remove Cover of Ring Doorbell Pro?
To remove the cover of your Ring Doorbell Pro, you'll need a specialized Ring screwdriver or a Phillips #1 or #00 screwdriver.
Start by locating the two security screws at the bottom corners of the cover. Unscrew them carefully.
If you encounter stripped screws, place a rubber band between the screwdriver and the screw for better grip.
Once the screws are out, gently pry off the cover using your thumbs on the inner section.
How Do I Get the Mounting Plate off of My Ring Doorbell?
To get the mounting plate off your Ring Doorbell, start by locating the two security screws at the bottom.
You'll need a specific Ring screwdriver or a compatible Phillips screwdriver.
If the screws are stripped, try using a rubber band for better grip or needle-nosed pliers.
If one screw's missing, you can pry off the faceplate using your thumbs.
If you're stuck, don't hesitate to contact Ring support for help!
How to Remove Ring Doorbell Faceplate Without Tool Youtube?
Picture yourself opening a treasure chest; the Ring Doorbell's faceplate is that chest waiting for your gentle touch.
To remove it without tools, locate the tiny slot at the bottom and use your fingers to pry it open.
Press gently with your thumbs to pop it off. If it's stubborn, a rubber band can help with grip.
How to Remove Ring Doorbell From Bracket?
To remove your Ring Doorbell from its bracket, first locate the release tab on the back of the device. Firmly press the release tab while gently pulling the doorbell away from the bracket. Once the doorbell is free, you can safely proceed with any maintenance or adjustments. When removing Ring Doorbell bracket, be sure to keep the screws and mounting hardware in a safe place for reinstallation.
Press it to disengage the doorbell from the mounting bracket.
Then, carefully slide the doorbell upward while ensuring you don't damage any wiring, especially if it's a wired model.
If you face any resistance, double-check for any screws you might've missed or use a tool for better grip.
Conclusion
Now that you know how to remove the faceplate from your Ring Doorbell Pro, you can easily access the inner components for maintenance or upgrades.
Isn't it satisfying to tackle home tech projects on your own?
Remember to gather your tools and follow the steps carefully for a smooth process.
If you run into any issues, don't hesitate to check community support resources—there's always someone ready to help.
Happy doorbell tinkering!


![Paged Out #9 [Pdf]](https://security-zone.info/wp-content/uploads/2026/07/paged-out-9-pdf-featured-260x140.jpg)