
To give your Ring Doorbell to a new owner, start by removing it from your Ring app account. Go to the menu, select the device, and tap "Remove this Device" to officially unlink it. Next, perform a factory reset by holding the setup button for 10 seconds. The new owner can then download the latest Ring app and scan the QR code on the doorbell to initiate setup. Once they do this, you'll receive a notification to confirm the transfer within 15 days. There's a lot more to guarantee a seamless switch, so keep going to learn the vital details.
Key Takeaways
- Remove the Ring doorbell from your app by accessing the menu and tapping "Remove this Device" to unlink it from your account.
- Perform a factory reset on the device by pressing the setup button for 10 seconds after uninstallation to prepare it for the new owner.
- Ensure the new owner downloads the latest Ring app to facilitate a smooth setup process.
- The new owner can initiate ownership transfer by scanning the QR code on the doorbell within 15 days of your removal confirmation.

Brother Work Smart 1360 Wireless Color Inkjet All-in-One Printer with Automatic Duplex Printing and 1.8” Color Display | Includes Refresh Subscription Trial(1) (MFC-J1360DW) (Uses LC501 Series Inks)
BEST FOR HOME AND HOME OFFICE: Get all your work done with an all-in-one multifunction printer. Print, copy,...
As an affiliate, we earn on qualifying purchases.
Understanding Ownership Transfer
Understanding ownership transfer for your Ring doorbell is fundamental, as it often involves specific steps to secure a smooth change between you and the new owner.
To initiate the process, the previous owner must first remove the device from their Ring app account. This step is vital for a successful transfer of ownership. Additionally, confirming that the device is in good working condition can help enhance the new owner's experience, similar to how a modern farmhouse bedroom creates a serene atmosphere.
Once the device is removed, you, as the new owner, can begin the setup process by scanning the QR code found on the device.
After you initiate the setup, the previous owner will receive a notification asking to confirm the device transfer. They need to act on this notification within 15 days to finalize the process.
If the previous owner is unreachable, don't worry—you can still proceed with the ownership transfer by starting it in the app. In this case, the ownership will automatically release after 15 days of no response from the previous owner.
Keep in mind that special cases may require documentation, such as certified death certificates or Power of Attorney documents, particularly if the previous owner is deceased or incapacitated.
Being aware of these steps will help secure a seamless change of your Ring doorbell.

HP Color LaserJet Pro MFP 3301sdw Wireless All-in-One Color Laser Printer, Office Printer, Scanner, Copier, ADF, Duplex, Best-for-Office (499Q3F)
FROM AMERICA'S MOST TRUSTED PRINTER BRAND – Perfect for small teams printing, scanning and copying professional-quality color documents...
As an affiliate, we earn on qualifying purchases.
Duration of the Process

Transferring ownership of your Ring doorbell usually takes about 15 minutes when both parties work together. This swift process is designed for efficiency, allowing you to change ownership without the hassle of extensive customer support interactions.
If you and the new owner communicate clearly, you can complete the transfer in no time. Additionally, it's helpful to verify the new owner is aware of their responsibilities, such as maintaining the device and understanding its features, which can enhance their experience with the doorbell.
You may also want to reflect on how the new owner can benefit from a home cleaning service to keep their environment tidy.
The straightforward nature of the transfer process means you won't waste precious moments. You'll find that the steps involved are quick and simple, making the whole transaction smooth.
Whether you're busy with work or personal commitments, transferring ownership of your device won't eat up your day. Once both parties are on the same page, expect the ownership transfer to be finalized in under 15 minutes.
This efficient system is particularly beneficial for those with tight schedules, as it minimizes downtime and helps you move on with your day. By following the correct steps, you can easily hand over your Ring doorbell and confirm the new owner is set up for success.
HP Color LaserJet Pro MFP 3301cdw Wireless All-in-One Color Laser Printer, Office Printer, Scanner, Copier, Fax, ADF, Duplex, Best-for-Office (74T92FR) (Renewed)
Official Refurbished Program - From a renowned American brand, we offer superior refurbishment technology. Genuine parts and toner...
As an affiliate, we earn on qualifying purchases.
Steps to Remove Previous Owner

To remove the previous owner from the Ring Doorbell, you need to start by uninstalling it from their Ring app.
This step is essential as it guarantees that the device is no longer linked to the previous owner's account, similar to how astrological compatibility can affect relationships.
Once you confirm the device removal, it'll be ready for the new owner to set up.
Let's break down these essential steps to guarantee a smooth shift.
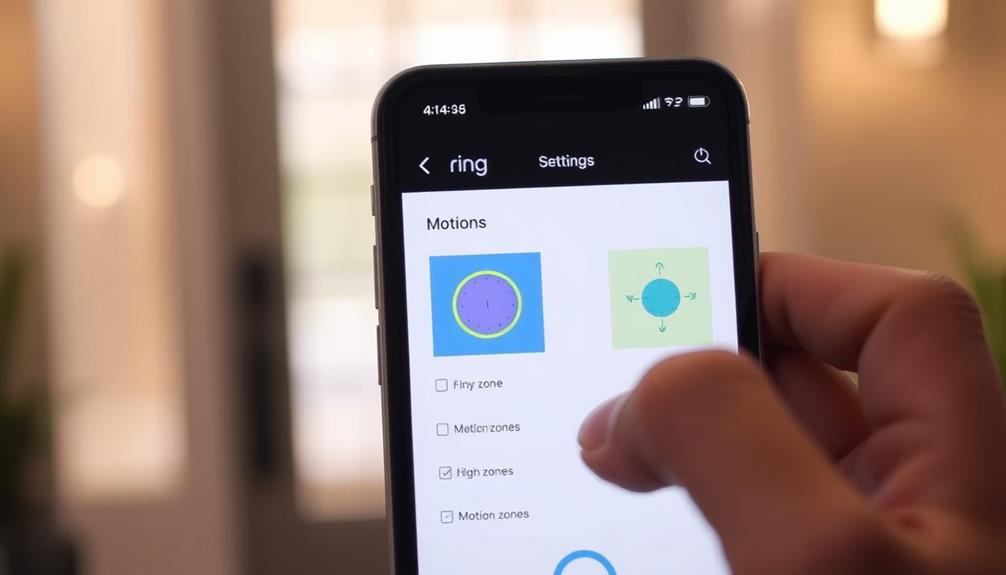
Uninstalling From Ring App
Removing the Ring doorbell from the previous owner's account is essential for a smooth shift to the new owner. To do this, the previous owner needs to open the Ring app and tap the three lines in the top left corner to access the menu. From there, select the specific device you want to transfer and navigate to Device Settings, then General Settings. This transition process is similar to celebrating special occasions, where careful planning is key to ensuring everything goes off without a hitch.
Once you're in the General Settings, you'll see an option labeled "Remove this Device." Tap it to officially uninstall the device from the previous owner's account. Completing this step is vital because only after the device is removed can the new owner initiate their ownership request through the Ring app.
This process shouldn't take more than 15 minutes, ensuring a quick shift to the new owner. By following these steps to remove the device, you can help facilitate a seamless handoff, allowing the new owner to set up their account without any lingering issues from the previous owner.
Make sure to complete these steps promptly to avoid any delays in transferring device ownership.
Confirming Device Removal
Once you've tapped "Remove this Device," you'll want to double-check that the device no longer appears in your Ring app list. This step is essential to guarantee the successful transfer of ownership of a Ring doorbell to the new owner.
Additionally, it's important to verify that any connected devices, like audio systems or other smart home components, are also removed if they were linked to your Ring account. For those interested in enhancing their home setup, consider looking into Home Theater Setup options for a more immersive experience.
To confirm the removal, open your Ring app and access the menu by tapping the three lines in the upper left corner. Next, scroll through your list of devices. If the device has been removed successfully, it shouldn't be listed anymore. If it still appears, you'll need to repeat the removal process to guarantee it's completely free from your account.
Once you've verified that the device is gone, the new owner can download the Ring app and set up the doorbell under their account. This seamless change guarantees that the new owner can start using the device without any lingering ties to your account.
Canon Color imageCLASS MF662Cdw - Wireless Duplex Laser Printer with Copier, Scanner, 3 Year Limited Warranty, 26 PPM
Color, Wireless, Duplex 3-in-1: Print, scan, copy.
As an affiliate, we earn on qualifying purchases.
Official Ownership Change Process

Changing ownership of a Ring doorbell involves a few straightforward steps that the previous owner must complete in the Ring app.
First, they need to uninstall the device by selecting it, moving to Device Settings, and choosing "Remove this device." This step is essential for transferring ownership of the device to the new owner. Conducting proper ownership transfers can also guarantee compliance with legal compliance and enhance security, similar to how background checks promote workplace safety.
Once the device is removed, the new owner can download the latest version of the Ring app and follow the prompts to set up the device.
The previous owner will receive a notification regarding the ownership transfer request and has a 15-day window to respond. If they don't respond within this timeframe, ownership will be automatically released.
In cases where the previous owner is unreachable, the new owner can scan the device's QR code in the app to trigger a request for ownership confirmation.
Overall, all steps in the ownership transfer process can be completed in about 15 minutes, making it a quick and efficient procedure for both parties involved.
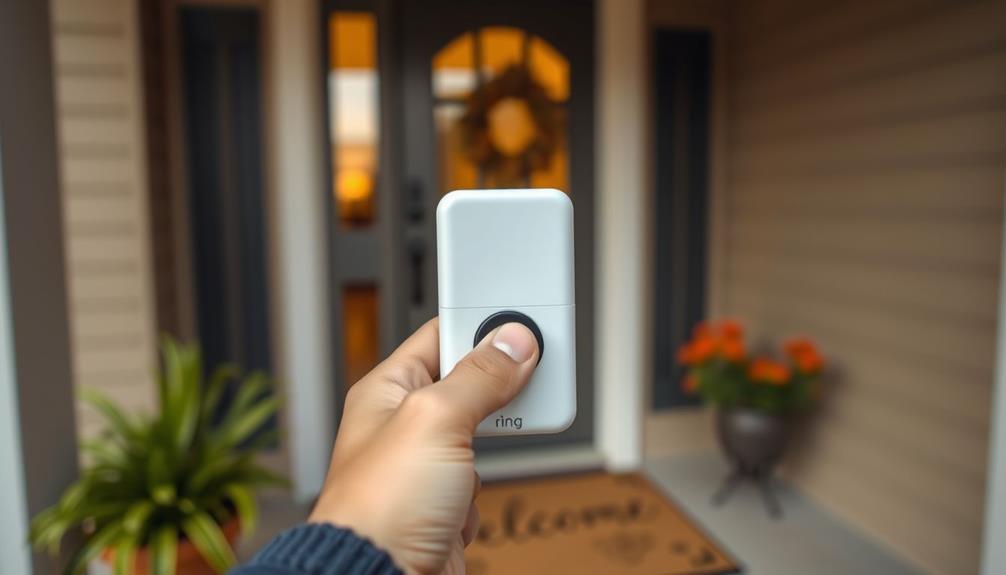
Factory Resetting the Doorbell

To factory reset your Ring Doorbell, you'll need to remove the faceplate and press the setup button for 10 seconds.
It's essential to uninstall the device from the previous owner's Ring app account first, as this guarantees a smooth shift for the new owner.
Once reset, the doorbell can be set up as if it were brand new.
Reset Process Overview
Resetting a Ring Doorbell is a straightforward process that prepares it for the new owner. To guarantee a smooth ownership transfer, you'll first want to uninstall the device from the Ring App. After that, follow these simple steps to perform a factory reset:
| Step | Description |
|---|---|
| Remove Faceplate | Take off the faceplate or bracket using the security screw. |
| Press Setup Button | Locate the setup button and press it for 10 seconds. |
| Check for Flashing | Watch for the doorbell to flash, indicating setup mode. |
| Wi-Fi Information | Know that all saved settings, including Wi-Fi info, will be deleted. |
| Ready for New Owner | After resetting, the new owner can set it up using the Ring App prompts. |
Once you've completed these steps, your Ring device will be reset and ready for the next user. It's important to follow these instructions carefully to avoid any issues during the ownership transfer.
Importance of Uninstallation
Uninstalling the Ring Doorbell from the previous owner's account is essential for enabling a smooth shift to the new owner. This step guarantees the new owner can successfully set up the device under their account without any hitches.
Here are three key actions you should take for a proper ownership transfer:
- Access the Ring App: The previous owner needs to open the Ring app, select the relevant device, and navigate to Device Settings.
- Remove the Device: Choose the "Remove this Device" option to complete the uninstallation process.
- Perform a Factory Reset: After removing the device from the app, hold the setup button for 10 seconds. This action resets all saved settings and Wi-Fi information, preparing the doorbell for the new owner's configuration.
If you skip these steps, the new owner might struggle to access or set up their Ring Doorbell, leading to unnecessary delays and frustration.
Troubleshooting Transfer Issues

When facing ownership transfer issues with your Ring Doorbell, make sure the app is updated to the latest version to minimize technical glitches. An outdated app can lead to complications during the transfer process, so this step is vital for a smooth changeover.
If the previous owner is unreachable, you might experience delays in transferring ownership of the Ring. However, keep in mind that after 15 days, the device will automatically remove from their account. If you receive repeated email notifications aimed at the previous owner while trying to register, you'll need to contact Ring support for assistance. They can help resolve any persistent issues that may arise during the transfer.
Even with cooperation from the previous owner, technical difficulties can still prevent successful ownership transfers. In these cases, persistent follow-up with customer support is essential. Don't hesitate to reach out for help if you encounter obstacles. The support team is there to guide you through the process, ensuring you can enjoy your Ring Doorbell without further complications.
Community Support Resources

If you encounter issues during the ownership transfer of your Ring Doorbell, the Ring Community can be a valuable resource for finding support and solutions from fellow users. Engaging with the community not only helps you troubleshoot but also allows you to learn from the experiences of others.
Here are three ways to make the most of this community support:
- Browse Existing Posts: Check out discussions related to ownership transfer. You may find solutions to common issues others have faced.
- Participate in Discussions: Share your experiences and ask questions. The respectful dialogue encouraged by community guidelines can lead to quicker resolutions.
- Provide Feedback: Use the community space to voice your thoughts on Ring's policies. Your input could influence future improvements.
If you still can't find a solution, don't hesitate to reach out to Ring Customer Support. They can assist with more technical issues that the community mightn't cover. Engaging with both the community and official support can guarantee a smoother ownership transfer process for your Ring Doorbell.
Handling Special Circumstances

When it comes to transferring a Ring doorbell under special circumstances, you'll need to follow specific steps based on the situation.
For instance, if the previous owner has passed away or is incapacitated, you'll require certain documentation to validate the transfer.
Let's explore the procedures you need to follow for deceased owners, incapacitated users, and the necessary documentation.
Deceased Owner Procedures
Transferring ownership of a Ring doorbell from a deceased owner requires specific documentation to guarantee a smooth handover. To initiate the process, you'll need to gather the following items:
- Certified Death Certificate: This proves the owner's passing and is mandatory for the transfer.
- Account Email and Device Serial Number: You must provide the email associated with the Ring account and the serial number of the doorbell.
- Proof of Entitlement: If someone else manages the deceased owner's estate, a notarized letter or active Power of Attorney may be necessary.
Once you have all this documentation ready, submit it to the Ring support team. They'll verify your documents and guide you through the ownership transfer process.
This procedure is designed to protect the deceased's privacy and security, guaranteeing that only rightful parties gain access to the device.
Incapacitated User Steps
Managing the ownership transfer of a Ring doorbell for an incapacitated user requires specific legal documentation to guarantee a smooth handover. If the user is medically incapacitated and unable to provide consent, you'll need to follow the appropriate legal protocols. This typically involves obtaining notarized letters or active Power of Attorney documents to validate the new owner's claim to the device.
The new owner must take over ownership by providing verification of entitlement. Make sure you have clear evidence of consent to protect the rights of the incapacitated user while also enabling the new owner to manage the Ring device effectively. This step is vital to maintain privacy and security measures upheld by Ring.
It's also a good idea to contact Ring customer support for guidance. They can provide you with specific instructions tailored to your situation and help navigate any complexities during the transfer process.
Documentation Requirements
To guarantee a seamless ownership transfer of a Ring doorbell in special circumstances, you'll need to gather specific documentation that validates your entitlement to the device.
Whether you're handling a deceased owner's account or a medically incapacitated user, proper documentation is vital to meet the documentation requirements set by Ring.
Here's a quick checklist of what you may need:
- Certified Death Certificate: If the previous owner has passed away, you'll need this document.
- Account Email & Device Serial Number: Essential for Ring support to verify ownership.
- Notarized Letter or Power of Attorney: For incapacitated users, this proves your right to access their account and recordings.
Make sure to prepare all necessary documentation in advance to expedite the transfer ownership process.
Ring customer support may request additional legal paperwork to confirm your rights, so being organized helps protect user rights and data privacy.
Documentation Requirements

When giving your Ring doorbell to a new owner, you'll need specific documentation to guarantee a smooth ownership transfer. First, you should gather a signed letter of consent from the previous owner. This document validates the transfer process and confirms that the new owner is authorized to take over the device.
If the previous owner is deceased, you'll need to provide a certified death certificate along with the account email or serial number to initiate the transfer.
In cases where the previous owner is medically incapacitated, similar documentation is required. You may need to include notarized letters or active Power of Attorney documents to prove entitlement.
It's essential to prepare all necessary documentation in advance to avoid delays.
Ring prioritizes privacy and security, so having clear and complete documentation helps facilitate a seamless shift of device ownership. This not only protects user rights but also safeguards personal data associated with the device.
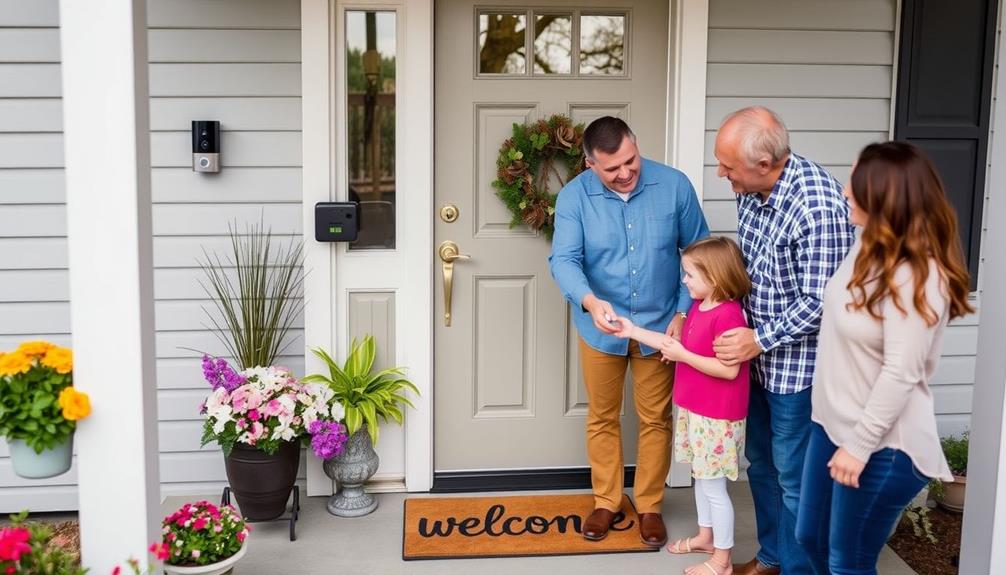
Recommendations for New Owners

Before diving into the setup, make sure the previous owner has removed the Ring doorbell from their account. This step is essential for a seamless shift. Once that's confirmed, follow these recommendations for setting up your new Ring: Download the Ring app and create an account if you don’t already have one. The app will guide you step-by-step on how to install Ring doorbell, including connecting it to your home’s Wi-Fi and personalizing your settings. Be sure to test the video feed and motion detection to ensure everything is functioning properly.
- Download the latest Ring app: This guarantees you have the most up-to-date features and prompts, making the setup process smoother.
- Power off the doorbell: Turning off your doorbell before setup helps prevent any potential connectivity issues during the transfer.
- Scan the QR code: Use the app to scan the QR code on your new Ring doorbell. This action initiates the ownership transfer and lets you confirm your account details.
If the previous owner is unresponsive, don't worry. You can expect automatic release of ownership after 15 days, allowing you to create your Ring account without complications.
Frequently Asked Questions
How Do You Transfer Ownership of a Ring Doorbell?
To transfer ownership of your Ring Doorbell, start by uninstalling it from your Ring app.
Go to Device Settings and select "Remove this device."
Once you've done that, the new owner can set it up in their Ring app, where they'll confirm ownership.
Verify both of you're using the latest app version for a smooth transfer.
Typically, this process takes under 15 minutes, so it's quick and easy!
How to Reset a Ring Doorbell for a New Owner?
To reset your Ring Doorbell for a new owner, first, make sure it's removed from your Ring App.
Then, take off the faceplate or bracket using a security screw to reveal the setup button.
Press and hold that button for 10 seconds to initiate a factory reset, clearing all saved settings.
Once reset, it'll enter setup mode, ready for the new owner to configure it as their own.
Can You Remove the Owner of a Ring Doorbell?
Removing the owner of a Ring Doorbell is like trying to untangle a knotted string; it requires careful steps. First, you’ll need to access the Ring app to remove the owner from the account, ensuring all personal data and settings are cleared. After that, the next step involves the physical removal of the device, which may leave you wondering **how to remove ring doorbell cover** in order to reach the necessary screws or components. Typically, the cover can be detached with a special tool provided with the doorbell, allowing you to proceed with the uninstallation process easily.
You can't directly remove the owner, but the current owner must uninstall the device from their account.
They can do this by accessing the Ring App, steering to Device Settings, and selecting "Remove this device."
Once they complete this process, the device becomes available for someone else to set up and use.
How Do I Give Someone Full Access to My Ring Doorbell?
To give someone full access to your Ring Doorbell, first, open the Ring app and navigate to Device Settings.
From there, select "Remove this device" to unlink it from your account.
Once that's done, the new owner can set it up under their own account by downloading the Ring app and following the on-screen prompts.
It's a simple process that usually takes about 15 minutes with both parties cooperating.
Conclusion
In summary, transferring ownership of your Ring Doorbell is straightforward if you follow the correct steps.
For instance, if you're moving to a new home and want to give your Ring Doorbell to the new owners, make certain it's properly reset and the app access is removed.
This way, they can enjoy the benefits without any hassle.
By staying organized and informed, you'll make the change smooth for everyone involved.