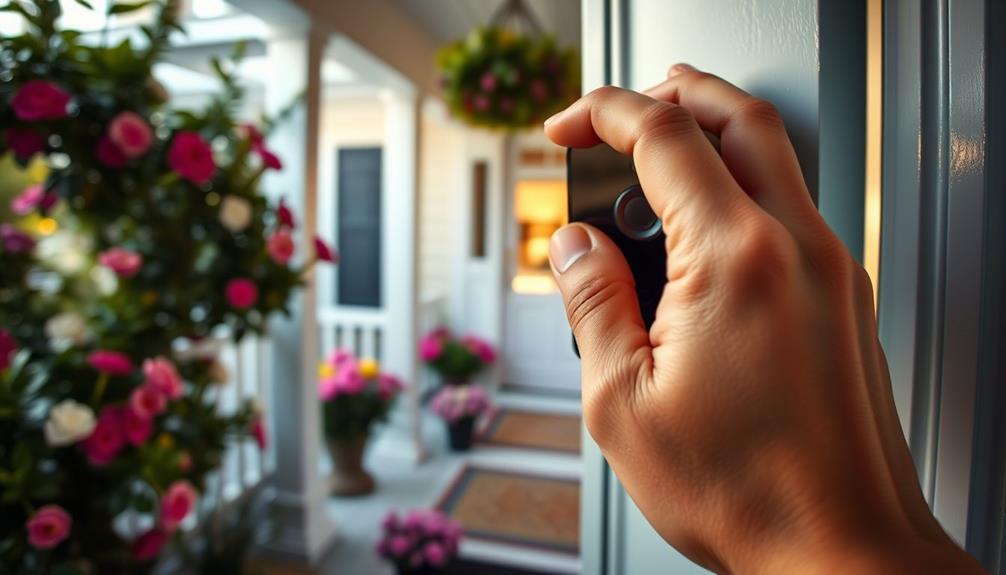
To get your Ring doorbell off, start by using the security screwdriver to turn the screw counterclockwise. Once that's done, grasp the faceplate with your fingers and push it up while carefully supporting it. If it's stuck, a flat tool like a paint scraper can help pry it loose. For models with a removable battery, press the black tab to slide it out. Keep a steady grip throughout the process to avoid damage. If you face any issues, there's a wealth of community tips that can guide you further through tricky situations.
Key Takeaways
- Locate and turn the security screw counterclockwise to loosen the faceplate before attempting removal.
- Use a flat, skinny tool to gently pry off the faceplate if it's stuck.
- For models with removable batteries, press the black tab to slide the battery out easily.
- Ensure a clean workspace and maintain a steady grip during the removal process to prevent damage.

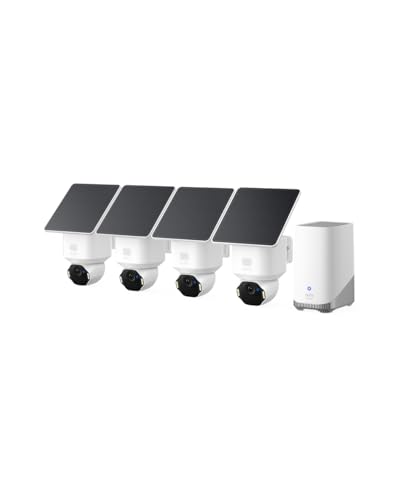
aosu Security Cameras Outdoor Wireless, 4 Cam-Kit, No Subscription Required, Solar-Powered, Home Security Cameras System with 360° Pan & Tilt, Auto Tracking, 2K Color Night Vision, Easy Setup
No Subscription Required with aosuBase: All recordings will be encrypted and stored in aosuBase without subscription or hidden...
As an affiliate, we earn on qualifying purchases.
Overview of Ring Doorbell Models
Ring offers several doorbell models, each designed to meet different user needs and installation preferences. If you're considering a Ring doorbell, you'll find options like the Ring Video Doorbell Classic, which is specifically made for wired installation. This model guarantees a constant power supply, eliminating the need for battery changes.
If you prefer flexibility, the newer models like the Video Doorbell 2 come with a removable battery, allowing for easier maintenance. These models provide a range of options that cater to various preferences, whether you're looking for the reliability of a wired connection or the convenience of a battery-powered device.
Each Ring doorbell boasts high-definition video quality and two-way audio, so you can monitor your entrance and communicate with visitors directly from your smartphone. This feature is particularly useful for busy homeowners who want to keep an eye on deliveries or visitors without being physically present.
Furthermore, these doorbells integrate seamlessly with smart home systems, including compatibility with Alexa, enhancing your overall convenience. For those interested in creating a welcoming atmosphere, incorporating elements like a modern farmhouse front door can complement your Ring doorbell setup.
The design and ease of installation can vary among the models, which may influence your experience during setup and maintenance tasks. Understanding these differences is essential for selecting the right Ring doorbell that fits your specific needs and installation preferences.
eufy Security SoloCam E42 4-Cam Kit, 4K Security Camera Wireless Outdoor, Solar Powered, AI Motion Tracking, Strobe Light, Pan & Tilt, Facial Recognition, Built-in Local Storage (Up to 16TB)
Ultra HD 4K Clarity: Features true 4K UHD resolution to capture every detail around your home. It can...
As an affiliate, we earn on qualifying purchases.
Common Removal Challenges

Removing a Ring doorbell can present several challenges, especially due to the security screws that often spin without loosening. This can lead to frustration as you try to detach the device from the mounting bracket. Additionally, certain models, like the Classic version, don't have a removable faceplate, making battery access tricky.
Here's a quick overview of common challenges you might face:
| Challenge | Description |
|---|---|
| Security Screws | Often spin in place, making them hard to remove. |
| Tool Requirements | You may need a T6 torx-head screwdriver or a thin tool like a paint scraper. |
| Model Variations | Different models have unique removal processes. |
| Installation Surface Variations | Different surfaces can complicate the removal process. |
When you're ready to remove your Ring doorbell, be prepared to exert some force. Many users find that a firm grip on both the doorbell and the mounting bracket is essential. Patience is key, as overcoming these challenges can take time and effort.

eufy Security 4K NVR Security Camera System S4 Max, POE Wired, 24/7 Recording, Triple Lens Bullet-PTZ Cam, 360° PTZ, Up to 16CH, Cross-Cam Tracking, 8× Auto Zoom, Smart Video Search, 2TB HDD
4K Triple-Lens Bullet-PTZ Camera: The upper 4K wide-angle camera provides a 122° fixed view of the entire scene,...
As an affiliate, we earn on qualifying purchases.
Essential Tools for Removal

To successfully detach your doorbell, you'll need a few essential tools on hand.
First, grab the special star-shaped screwdriver that came with your Ring Doorbell; it's designed to remove the security screws. If you've lost it, a T6 torx-head screwdriver can work as a suitable alternative. Understanding how these tools interact with your device can enhance your effectiveness in this task, similar to how astrological compatibility can influence relationships.
Next, you might find it handy to have a flat, skinny tool like a butter knife or a paint scraper. This can help you pry the doorbell off its mounting bracket if it's stuck. Remember, be gentle to avoid damaging the device.
Safety should also be a priority, so wearing safety glasses is a smart move. This protects your eyes from any debris or accidents that could occur during the removal process.
Lastly, keep a clean cloth nearby. You'll want to use it to prevent scratches on your doorbell while you're working.
With these tools ready, you'll be well-equipped to tackle the removal and guarantee that everything goes smoothly.

ANSQUE Security Cameras Wireless Outdoor Home System, 4 Camera Kit, No Subscription Fees, Solar Powered, Local Storage, 365-Day Battery Life, 360°PTZ Surveillance, Auto Tracking, 2K Color Night Vision
No Subscription Fees, Secure Local Storage: AnsqueBase features built-in 32GB local storage with up to 120 days of...
As an affiliate, we earn on qualifying purchases.
Step-by-Step Faceplate Removal

Begin by locating the security screw at the bottom of the faceplate and turning it counterclockwise to loosen it.
Once you've loosened the screw, use your thumbs as levers to push the faceplate up from the bottom. Support the front of the faceplate with your index and middle fingers to maintain control.
For a truly serene atmosphere in your space, consider incorporating elements from cozy textiles and natural elements which can enhance your home environment.
Carefully lift the faceplate away from the body in a fluid motion. Make sure the top plastic hook aligns with the corresponding hole when you're ready to reattach it.
If you find the faceplate difficult to remove, consider using a flat, skinny tool, like a butter knife, to gently pry it off without causing damage.
Once the faceplate is off, you can proceed with your maintenance tasks.
When you're ready to reattach the faceplate, slide it back into position, guaranteeing the hooks fit snugly.
Accessing and Charging the Battery

Accessing the battery on your Ring Video Doorbell is a straightforward process that guarantees you can keep it charged and operational.
First, you'll need to remove the faceplate by unscrewing the security screw located at the bottom. Gently push the faceplate up from the bottom to detach it.
If your model has a removable battery, you can access it easily. Press down on the black tab while sliding the battery out to guarantee a safe removal. Always handle the battery with care to avoid any damage. Before reinstalling, make sure the battery is fully charged to maintain peak performance.
When reinserting the battery, slide it back in until the black tab snaps into place, guaranteeing it's fitted securely.
It's also a good idea to regularly check the battery life via the Ring app, so you know when it's time to charge. Consider keeping a backup battery on hand for uninterrupted operation, especially if you rely heavily on your doorbell for security. This way, you can quickly swap out the battery and keep your Ring Video Doorbell functioning without delays.
Maintaining clean indoor air is essential for overall health, especially in spaces where allergens may accumulate, as noted in air quality improvement.
Troubleshooting Security Screw Issues

When you're trying to remove the security screws on your Ring doorbell, you might run into some common problems. Stripped screw heads or screws that just spin in place can really complicate things.
Fortunately, there are effective tools and community support solutions that can help you tackle these issues.
Additionally, using the right garage door openers can enhance your home security while ensuring your other devices are secure as well.
Common Screw Removal Problems
Removing security screws from your Ring doorbell can be frustrating, especially when they spin in place instead of backing out.
One common issue you might face is stripped screw heads, which can prevent you from effectively removing the screw from the bottom. If you notice that your screws aren't turning, first check for any signs of stripping. This could indicate that the screw threads are damaged, making removal even harder.
In situations like this, it's crucial to evaluate the right tools and techniques, similar to how one would prepare an effective home cleaning kit for best results.
Before you resort to drastic methods, assess the situation. If the screw head is stripped, you might want to try using alternative tools to gain leverage. Some users have reported success with Exacto knives or flat-ended pliers to grip and twist stubborn screws.
Keep in mind that community discussions highlight a collective need for better screw designs and instructional materials for easier access in the future.
If you're still struggling, don't hesitate to reach out for help online or consult with a professional. By addressing these common screw removal problems, you can improve your chances of successfully detaching your Ring doorbell without causing damage.
Effective Tools to Use
Utilizing the right tools can make all the difference in troubleshooting stubborn security screw issues with your Ring doorbell. Start with the special star-shaped screwdriver that came with your device, or opt for a T6 torx-head screwdriver if it's lost. If you find yourself dealing with screws that just spin, grab an Exacto knife or flat-ended pliers for better leverage.
For screws that seem stuck, a flat, skinny tool like a paint scraper or butter knife can help pry around the doorbell, releasing it from the mounting bracket. Don't forget to wear safety glasses to protect your eyes from any debris or slipping tools.
Here's a quick reference table for effective tools:
| Tool Type | Use Case | Notes |
|---|---|---|
| Star-shaped Screwdriver | Removing security screws | Comes with the Ring device |
| T6 Torx-head Screwdriver | Alternative for lost tools | Matches Ring screws |
| Flat-ended Pliers | Gaining leverage on stubborn screws | Provides better grip |
Keep these tools handy, and you'll tackle those screw issues like a pro! If screws get stripped or lost, consider ordering replacements online or through customer service.
Community Support Solutions
Engaging with the Ring Community can provide valuable insights and solutions for tackling those pesky security screw issues that often leave users frustrated. When you're dealing with screws that spin in place, you might feel like you're out of options. However, community support can be a game-changer. Many users have shared their troubleshooting tactics, like using an Exacto knife or flat-ended pliers for better leverage. These tools can help you grip and turn stubborn screws effectively.
If you're still struggling, don't hesitate to post a question in the community forums. You'll likely find others who've faced similar challenges and can offer helpful advice. Additionally, some users recommend reaching out to Ring customer support for guidance, especially if your screws are stripped or unyielding.
Feedback from the community also highlights the need for improved screw design and clearer instructional materials. By collaborating with others, you can navigate these frustrating issues more easily. Remember, you're not alone in this process, and leveraging the community's collective knowledge can make a significant difference in your experience.
Community Support and Resources

Engaging with the Ring Community Forum can really enhance your experience when removing your doorbell.
You can share troubleshooting tips and get real-time assistance from fellow users who've faced similar challenges.
Plus, uploading images of your setup can help you receive more specific advice tailored to your situation.
Community Forum Engagement
Joining the Ring Community Forum can greatly enhance your troubleshooting experience by connecting you with fellow users who share valuable tips and solutions.
To get started, you'll need to create your Ring account. This allows you to post questions and join in the discussion, tapping into a wealth of knowledge from other users who've faced similar challenges.
In the forum, you'll find a supportive network ready to help you tackle installation issues and troubleshoot problems with your Ring products, including the removal of your Ring Doorbell.
Engaging actively in these discussions can lead to quicker resolutions, as community members often share their own experiences and provide tested solutions.
Sharing Troubleshooting Tips
Utilizing community support resources can greatly enhance your troubleshooting efforts when it comes to removing your Ring Doorbell. Engaging with the Ring Community platform allows you to share your experiences and receive tailored advice on issues like removing the doorbell.
If you're dealing with Rings wired, participating in a discussion about Rings wired can be particularly beneficial. When you post images of your setup in community forums, you enable others to provide more accurate guidance suited to your specific model and installation.
Many community members have faced similar challenges and can share tips and tricks that worked for them, fostering a collaborative problem-solving environment. You'll find that actively participating in discussions can lead to quicker resolutions.
By tapping into user-generated content, like success stories and instructional videos, you can further enhance your understanding and improve your experience with Ring products.
Don't hesitate to ask questions or share your own insights; the community thrives on collaboration and mutual support. So, engage in those discussions and leverage the wealth of knowledge available to tackle your Ring Doorbell removal effectively!
Real-Time Assistance Availability
The Ring Community offers real-time assistance, allowing you to connect with fellow users for immediate support with your doorbell removal challenges. By joining this platform, you can engage in discussions, share experiences, and ask questions that will help you navigate the removal process more effectively.
Here's a quick overview of what you can find in the community:
| Feature | Description | Benefit |
|---|---|---|
| User Accounts | Create an account to post questions | Personalized support |
| Active Discussions | Participate in forums | Quick resolution of issues |
| Tips & Tricks | Access shared user-generated tips | Simplified removal process |
| Community Collaboration | Learn from others' experiences | Enhanced troubleshooting skills |
| Real-Time Support | Get immediate feedback | Timely solutions to problems |
Active participation will lead to quicker resolutions for your installation issues. Members frequently share helpful insights that can enhance your satisfaction and ease the removal of your Ring Doorbell. Don't hesitate to join the discussion and make the most of this valuable resource!
Contacting Customer Support

When you need help with your Ring doorbell, you can easily reach out to customer support through various contact methods like phone, email, or live chat. This flexibility allows you to choose the way that best suits your needs.
Here are three ways to get in touch:
- Phone Support: Call Ring's customer service for immediate assistance. Be prepared for potential longer wait times, especially due to COVID-19 precautions.
- Email Support: Send an email detailing your issue. This method might take longer for a response but is a good option if you prefer written communication.
- Live Chat: Use the live chat feature on the Ring website for real-time support. This can be the quickest way to resolve your issues with the Video Doorbell.
Additional Tips for Success

To successfully remove your Ring doorbell, make sure you've got the right tools and a steady grip on the device.
You'll need the star-shaped screwdriver that came with your doorbell or a T6 torx-head screwdriver to facilitate the removal process.
As you start, firmly grip both the doorbell and the mounting bracket to prevent slipping. If you feel any resistance, don't force it; instead, gently use a flat, skinny tool like a paint scraper to help pry the doorbell off the bracket without causing damage.
Patience is key here. Apply consistent pressure while carefully wiggling the doorbell to disengage stubborn connections. Make sure not to use excessive force, as this can damage both the doorbell and its wiring. If the device remains unresponsive during this process, it may be necessary to perform a force restart Ring Doorbell by holding down the reset button for 15 seconds. Once restarted, verify that all connections are secure before testing functionality.
If you're still having trouble, don't hesitate to reach out to the Ring support team for assistance. They can provide tailored advice and troubleshooting tips that can make the removal process smoother.
Additionally, you can consult the Ring Community, where many users share their experiences and solutions.
Frequently Asked Questions
How to Take a Ring Doorbell Back Off?
To take a Ring doorbell off, start by locating the security screw at the bottom of the faceplate.
Use the star-shaped screwdriver to unscrew it.
Once that's done, push the faceplate up with your thumbs while supporting it from behind.
If it's stubborn, grip both the doorbell and the mounting bracket firmly, and gently pry it off with a flat tool.
Make sure you handle any battery with care if your model has one.
How Do I Get My Ring Doorbell Off?
Imagine your Ring Doorbell as a vigilant knight guarding your castle.
To release it from duty, locate the security screw at the bottom of its armor and turn it counterclockwise.
With a firm grip, use your thumbs to gently push the faceplate up. If it's stubborn, a thin tool can assist you.
How to Unscrew Ring Doorbell Without Tool?
If you need to unscrew your Ring doorbell without a tool, you can get creative.
Try using a rubber band over the screw head to increase grip and turn it.
If that doesn't work, grab a flat-ended pair of pliers to firmly grip the screw.
For stubborn screws, an Exacto knife can help leverage them.
Just be cautious, as these methods might require some patience and a steady hand.
How Do I Remove a Ring Doorbell Device?
To remove your Ring Doorbell device, start by locating the security screw at the bottom of the faceplate and using the star-shaped screwdriver to unscrew it. Once the security screw is removed, gently pull the faceplate away from the device to expose the mounting bracket. You can then lift the doorbell off the bracket to fully detach it from the wall. If you are removing the original Ring Doorbell to replace it with a newer model, ensure that you carefully disconnect any wired connections before installation of the new unit.
Grip both the doorbell and its mounting bracket firmly, then gently pull the doorbell away from the bracket.
If it's tough to detach, use a flat tool like a paint scraper for assistance.
If you face challenges, consider reaching out to Ring support for help.
Conclusion
In the grand scheme of home security, occasionally detaching your Ring Doorbell can feel like a minor adventure.
With a bit of patience and the right tools, you'll be back in action in no time.
Remember, it's all about finding that sweet spot between ease and security.
If you run into a snag, don't hesitate to reach out for help.
After all, even the most seasoned DIYers need a hand every now and then!
Happy tinkering!