To change the Wi-Fi on your Ring Doorbell, start by opening the Ring app and logging into your account. Verify your doorbell is in setup mode by pressing the appropriate button on the device. Tap the three lines icon in the app, select "Devices," then find your doorbell. Go to "Device Health" and choose "Change Wi-Fi Network." Follow the prompts to select your new network and enter the password. Make sure you're connected to a secure Wi-Fi network. If you need help with any issues, there are more tips available to verify a smooth setup process.
Key Takeaways
- Launch the Ring app, log in, and ensure your device is in setup mode by pressing the designated button on your Ring Doorbell.
- Access the "Devices" section in the app, select your Ring Doorbell, and navigate to "Device Health."
- Tap "Change Wi-Fi Network," confirm setup mode is active, and follow on-screen prompts to select a new Wi-Fi network.
- Ensure the Wi-Fi network is secure, and enter the correct password for a successful connection.

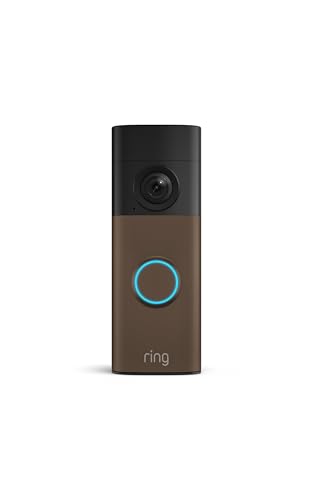
Ring Battery Doorbell (newest model) — Retinal 2K with wide-angle video, up to 6x Enhanced Zoom, Two-Way Talk, and Built-In Battery, Speckled Gray
- Video Resolution: Retinal 2K with wide-angle view
- Zoom Capability: Up to 6x Enhanced Zoom
- Two-Way Communication: Real-time audio and video
As an affiliate, we earn on qualifying purchases.
Launching the Ring App
To get started, tap the Ring icon on your mobile device's home screen to launch the app.
Once the Ring app opens, make certain you're logged into your Ring account. If you haven't logged in yet, just enter your email and password to access all your connected devices.
This app serves as an essential interface for managing your Ring devices, similar to how WordPress offers a user-friendly interface for website creation and management.
Upon entering the app, you'll see a dashboard that displays all your Ring devices.
This interface is designed to be user-friendly, making it easy for you to navigate through various features and access device settings quickly.
If you're looking to change your Wi-Fi connection, verify that your app is updated to the latest version.
This will help you avoid any potential issues and get the best performance from your devices.
If you find yourself needing to reconnect to Wi-Fi, the app will guide you through the necessary steps.
Having a stable Wi-Fi connection is essential for your Ring devices to function properly, so double-check that everything's set up correctly.
With these steps, you're well on your way to managing your Ring devices efficiently.
Ring Battery Doorbell (newest model) — Retinal 2K with wide-angle video, up to 6x Enhanced Zoom, Two-Way Talk, and Built-In Battery, Matte Mocha
- Video Resolution: Retinal 2K wide-angle video
- Zoom Capability: Up to 6x Enhanced Zoom
- Two-Way Communication: Real-time see, hear, speak
As an affiliate, we earn on qualifying purchases.
Finding Your Device
Open the Ring app and tap the three lines icon in the upper left corner to access your devices. From the main menu, select the "Devices" option to view a list of all your registered Ring devices.
It's important to locate the specific Ring Doorbell model you want to change the Wi-Fi network for. As you navigate through your devices, it's significant to reflect on how AI advancements raise significant privacy concerns around data collection and user information.
Once you've selected your device, you'll gain access to its settings. Here, you can easily check the current connection status.
To find the option to change your Wi-Fi network, navigate to the "Device Health" section. This area provides vital information about your device's connectivity and guarantees that everything is functioning correctly.
Before proceeding, make certain your device is in setup mode. Follow the on-screen instructions, which may involve pressing the setup button on your Ring Doorbell itself.
This step is fundamental to successfully change the Wi-Fi network. By following these directions, you'll be well on your way to reconfiguring your Ring device for a better connection.

Ring Battery Doorbell (newest model) — Retinal 2K with wide-angle video, up to 6x Enhanced Zoom, Two-Way Talk, and Built-In Battery, Speckled White
- Video Resolution: Retinal 2K wide-angle video
- Zoom Capability: Up to 6x Enhanced Zoom
- Two-Way Communication: Real-time see, hear, speak
As an affiliate, we earn on qualifying purchases.
Accessing Device Health

Accessing Device Health in the Ring app lets you check your doorbell's connectivity and battery status quickly. To get started, follow these simple steps:
- Launch the Ring app and tap the three lines icon in the upper left corner of the home screen.
- Select the "Devices" option to view all registered Ring devices linked to your account.
- Choose the specific Ring Doorbell model you wish to manage from the device list.
Making sure your Ring Doorbell is functioning at its best is vital, especially as AI security provides robust defenses against potential threats.
In this Device Health section, you'll find key information to make certain your Ring Doorbell functions at its best.
If you notice connectivity issues or a low battery, you can take action right away.
Plus, from the Device Health page, you can initiate the process to change the Wi-Fi network if needed.
This feature is especially handy if your current network isn't providing a strong connection.
Keeping your Ring Doorbell connected is essential for security, so checking Device Health regularly can help maintain its performance.

Ring Battery Doorbell (newest model), Matte Mocha with Indoor Cam Plus, Black
- Home Security Bundle: Battery Doorbell, Indoor Cam Plus, Matte Mocha, Black
- 2K Retinal Video: Clear, detailed footage with 6x zoom
- Color Night Vision: See in true color even in low light
As an affiliate, we earn on qualifying purchases.
Entering Setup Mode
To enter Setup Mode on your Ring Doorbell, you'll need to follow specific activation steps based on your model.
It's important to make sure your indoor environment is free from allergens and pollutants, as this can affect the overall performance of devices in your home.
If you run into any issues while trying to set it up, troubleshooting tips can help you get back on track.
Additionally, maintaining a clean air quality can contribute positively to your device's operation and your well-being, so consider using a reliable air purifier in your home for better air quality like ozone air purifiers.
Let's walk through the important steps to make sure your doorbell connects to the new Wi-Fi network seamlessly.
Setup Mode Activation Steps
Activating setup mode on your Ring Doorbell is vital for changing your Wi-Fi settings. By entering this mode, you can easily facilitate the configuration process.
It's important to make certain your device is properly maintained, similar to how you'd with a home cleaning service to keep your environment tidy.
Here's how to do it based on your specific model:
- For the standard Ring Doorbell, remove it from its bracket and press the orange button at the back.
- If you have a Ring Doorbell 2, 3, 3 Plus, or Elite, remove the faceplate and press the black button on the front.
- For the Ring Doorbell Pro, simply tap the button located on the right side of the device.
Once you've activated setup mode, follow the on-screen instructions provided in the Ring app. This will guide you through the necessary steps to successfully connect your doorbell to your new Wi-Fi network.
Troubleshooting Setup Mode Issues
If you're having trouble entering setup mode on your Ring Doorbell, there are a few common issues you can troubleshoot to guarantee a successful connection to your Wi-Fi network.
First, make sure you've removed the Doorbell from its bracket or faceplate, depending on your model. For the Ring Doorbell 2, 3, 3 Plus, and Elite, press the black button on the front. For the Pro model, use the button on the right side. It's important to verify that your doorbell is functioning at its best, as any electrical failures or operational issues could hinder the setup process, similar to how heat pump failures can affect system performance.
Next, check that the doorbell's light is either spinning or flashing, indicating it's in setup mode and ready to connect to a new Wi-Fi network. If the light isn't behaving as expected, it mightn't be in setup mode. In that case, try performing a factory reset by holding the setup button for 15 seconds. After the reset, attempt to enter setup mode again.
If you're still having issues, double-check that your Wi-Fi network is active and that you're within range. Once you sort through these troubleshooting steps, you should be able to reconnect your Ring Doorbell to your new Wi-Fi network successfully.
Changing the Wi-Fi Network

Changing the Wi-Fi network on your Ring Doorbell is a straightforward process that involves a few key steps.
You'll need to access the Ring app and guarantee your device is in setup mode.
It's important to confirm that your home network is secure, as vulnerabilities in your Wi-Fi can lead to potential breaches and impact your overall cybersecurity measures.
If you run into any issues, there are simple troubleshooting tips that can help get you back on track.
Steps to Change Network
To change the Wi-Fi network on your Ring Doorbell, start by opening the Ring app and accessing the menu through the three lines icon in the upper left corner. From the menu, select “Devices” and then choose your Ring Doorbell from the list of devices. Tap on “Device Health,” then scroll down and select “Change Wi-Fi Network” to begin the process. For a step-by-step guide on how to change Ring Doorbell WiFi, follow the on-screen instructions to connect to your new network. Once you’ve selected “Change Wi-Fi Network,” your Ring Doorbell will enter setup mode, and you’ll be guided to connect it to your new Wi-Fi network. Make sure you have the password for the new network ready, as it will be required during the setup process. For further details, including troubleshooting tips and additional resources on **how to change Ring Doorbell WiFi**, refer to the provided link or consult Ring’s support page for assistance.
Once you're in the menu, follow the steps below to connect to your new Wi-Fi Network:
Many people find that enhancing their home environment, much like creating a modern farmhouse bedroom, can improve their overall comfort and functionality.
- Select the "Devices" option and choose your specific Ring Doorbell model.
- Navigate to the "Device Health" page to find the option to change the Wi-Fi network.
- Tap on "Change Wi-Fi Network" and verify your Ring Doorbell is in setup mode by pressing the orange button (or the appropriate button for your model).
Make certain you're connecting to a compatible network and that your Ring Doorbell is within range.
If you encounter any hiccups, it's a good idea to restart your Ring Doorbell and router, and double-check that you have the latest version of the Ring app installed.
This should help you successfully change the Wi-Fi network and keep your Ring Doorbell connected.
Troubleshooting Connection Issues
Troubleshooting your Ring Doorbell's connection issues can often be resolved by ensuring it's in setup mode and checking your Wi-Fi network compatibility.
First, make sure your Ring Doorbell is in setup mode by pressing the appropriate button for your model. If you don't see the "Change Wi-Fi Network" option in the app, check that you have the latest version of the Ring app installed on your device. The value of home security systems can be greatly enhanced with reliable connectivity, ensuring that you receive timely alerts and notifications.
When prompted, select "no" if asked to use the previous network. Enter the new Wi-Fi credentials for a successful reconnection. Keep in mind that common reasons for connection issues include network compatibility problems, signal strength limitations, and interference from other devices.
If you're still having trouble, restart both your Ring Doorbell and your router. This simple step can often resolve lingering connection problems. If issues persist after these troubleshooting steps, consider consulting Ring's online support for additional guidance.
Updating Your Doorbell Password
If you've decided to update your Ring Doorbell password, start by opening the Ring app and tapping the three-line icon in the upper left corner. This will take you to your account settings where you can make the necessary changes.
Keeping your devices secure is essential, especially as understanding credit card impacts on personal finances can help you manage your overall financial health.
Next, follow these steps to verify your password is updated correctly:
- Select the "Account" option.
- Tap on "New Password" to begin the process.
- Enter your current password in the provided box.
It's important to create a strong password to keep your Ring Doorbell and your Wi-Fi Network secure.
After entering and confirming your new password, don't forget to save the changes. This will update your account successfully, verifying your Ring Doorbell is protected with your new password.
Selecting Wi-Fi Frequency

Choosing the right Wi-Fi frequency for your Ring Doorbell is vital for guaranteeing a reliable connection and ideal performance. Your Ring Doorbell typically supports both 2.4 GHz and 5 GHz Wi-Fi frequencies, so it's important to pick the one that best suits your environment.
Here's a quick comparison to help you decide:
| Frequency | Range |
|---|---|
| 2.4 GHz | Longer range, slower speeds |
| 5 GHz | Shorter range, faster speeds |
If your Ring Doorbell is located far from your dual-band router, the 2.4 GHz frequency might be your best bet, as it offers a longer range. However, if your doorbell is close to the router, the 5 GHz frequency can provide faster speeds, enhancing performance.
Before making a selection, check your specific Ring Doorbell model's compatibility to verify it can connect to the chosen frequency. By selecting the correct Wi-Fi Network frequency, you can maintain a stable connection and enhance your Ring Doorbell's functionality.
Common Connection Issues
Even after selecting the right Wi-Fi frequency, you might encounter common connection issues that can hinder your Ring Doorbell's performance. These problems can arise unexpectedly, making it frustrating to connect your device to Wi-Fi. Here are some frequent issues you might face:
- Difficulty finding the "Change Wi-Fi Network" option in the Ring app
- Error messages when setting up a new device, often due to improper resets
- Connectivity problems following a router upgrade that requires manual reconnection
If you find your device appears registered to another user, you'll need to take extra steps to resolve this before changing your Wi-Fi network. It's crucial to confirm your device is reset correctly to avoid those pesky error messages.
If you're dealing with connectivity problems, consider rebooting your router or checking for any interference in your network. Remember, shared users can complicate things, so make sure the primary account holder handles any necessary adjustments.
Importance of Wi-Fi Changes

Changing the Wi-Fi on your Ring Doorbell is important for ensuring seamless connectivity and uninterrupted functionality, especially when you switch Internet Service Providers or adjust your network settings.
Wi-Fi changes are essential to resolving recurring connection issues, which can arise from network upgrades or interference from other devices. When you update your Wi-Fi settings, you help maintain a stable connection that allows your Ring Doorbell to perform at its best.
If you're using a mobile hotspot during a power outage, updating the Wi-Fi settings is key to keeping your doorbell connected for monitoring and alerts.
Regularly adjusting your Wi-Fi also helps your device adapt to enhancements in your network, ensuring it continues to function efficiently.
Frequently Asked Questions
How Do I Change the Wi-Fi Network on My Ring Doorbell?
To change the Wi-Fi network on your device, you'll need to access the app associated with it.
Start by opening the app, then navigate to the settings or device options.
Look for a section related to network settings.
Once there, you might need to put your device into setup mode.
Follow the on-screen instructions to connect to your desired Wi-Fi network, entering any required credentials along the way.
How Do I Reconnect My Ring Doorbell After Changing Wifi?
Did you know that about 80% of smart home devices rely on Wi-Fi for connectivity?
To reconnect your Ring Doorbell after changing your Wi-Fi, open the Ring app and navigate to the Devices section.
Select your Doorbell, tap Device Health, and choose Change Wi-Fi Network.
Make sure your Doorbell is in setup mode by pressing the orange button.
Follow the prompts in the app to enter your new Wi-Fi credentials and complete the connection.
Why Won't My Ring Doorbell Connect to My New Wifi?
If your Ring Doorbell won't connect to your new Wi-Fi, there could be several reasons.
First, check if it's still registered to the old network; you might need to select "no" when asked about previous credentials.
Verify the doorbell is in setup mode and compatible with your router's frequency.
If it still won't connect, restart both the device and the router, and make sure you've got the latest version of the Ring app.
How Do I Reset a Ring Doorbell?
To reset your Ring Doorbell, start by locating the reset button, usually on the back or side.
Press and hold it for about 15 seconds until the light flashes, indicating it's resetting.
Once that's done, your device will enter setup mode.
Keep in mind that this will remove the doorbell from your account, so you'll need to set it up again in the Ring app.
Have your Wi-Fi credentials ready for the process.
Conclusion
Changing the Wi-Fi on your Ring doorbell is like tuning a musical instrument; it guarantees everything plays in harmony.
By following these steps, you're not just connecting a device, you're weaving a secure thread into your home's digital fabric.
As you fine-tune your connection, you create a watchful guardian, ready to protect your space.
So, embrace the change, and let your doorbell sing with clarity and confidence, keeping you connected to what matters most.