To install your Ring Doorbell in brick, start by charging the battery. Choose a secure method: drilling into mortar provides stability, while a no-drill mount works for smooth surfaces. Use a masonry drill bit to create holes and insert plastic anchors. Position the doorbell around 125 cm from the ground and mark where to drill with a pencil. After drilling, attach the doorbell with screws, ensuring everything's tight. Keep in mind that temperature can affect adhesives, so drilling is usually better for long-term security. There's plenty more useful info about optimizing your installation ahead!
Key Takeaways
- Choose between a no-drill mount or drilling into mortar for secure installation based on your brick's surface texture.
- Use a masonry drill bit and plastic anchor bolts for a stable, long-term mounting solution.
- Position the Ring Doorbell at approximately 125 cm from the ground for optimal visibility and functionality.
- Ensure all screws are tight and the doorbell is level to avoid connectivity issues and misalignment.

Philips Wi-Fi Door Lock, WiFi Smart Lock Keyless Entry Deadbolt for Front Door, Compatible with Alexa & Google Assistant, Remote Control, Built-in WiFi, APP Fingerprint Passcode Unlock, Auto Locking
𝐅𝐥𝐞𝐱𝐢𝐛𝐥𝐞 𝐖𝐚𝐲𝐬 𝐭𝐨 𝐔𝐧𝐥𝐨𝐜𝐤: Unlock the way you want: app, passcode, fingerprint, physical key, or voice via Alexa/Google...
As an affiliate, we earn on qualifying purchases.
Choosing the Right Installation Method
When choosing the right installation method for your Ring Doorbell on brick, consider the surface texture and your preferences for durability and aesthetics.
If your brick surface is smooth, a no-drill mount can be an attractive option. It's easy to install with strong double-sided tape, making it a quick solution. However, if your brick is textured, this method mightn't adhere well, leading to potential issues with security. Additionally, it's essential to assess the local weather conditions, as extreme temperatures can affect the adhesive's performance, making it less reliable over time.
For a more robust option, you might want to look into the key factors in choosing a home cleaning service that can guarantee your space is well-maintained.
On the other hand, drilling into mortar presents a more secure mounting option. This method minimizes damage to the brick itself and allows for easy repairs if necessary. You'll need the right masonry drill bits and anchors for this approach. Drilling guarantees a long-lasting installation, which may be ideal if you want your Ring Doorbell to stay put for years.
Ultimately, think about what you value more: the ease and removability of a no-drill mount or the durability and stability of drilling. Each method has its benefits, so weigh your options carefully based on your specific needs and the condition of your brick surface.

REOLINK Smart 5MP 8CH Home Security Camera System, 4pcs Wired PoE IP Cameras Outdoor with Person/Pet/Vehicle Detection, 4K 8CH NVR with 2TB HDD for 24-7 Recording, RLK8-520D4-5MP
CAPTURE CRIME FROM DETAILS: Discover potential crime has never been so easier with superior 5MP HD. With advanced...
As an affiliate, we earn on qualifying purchases.
Tools Needed for Installation

To successfully install your Ring Doorbell on brick, you'll need a few essential tools at your disposal. Having the right equipment makes the process smoother and guarantees a secure installation. For those looking to enhance their home's exterior, incorporating elements like a farmhouse front door can complement your new doorbell beautifully.
- Masonry Drill Bit: This is vital for drilling into brick or mortar. You'll typically need a size that matches your screws, usually between 3/16" and 1/2".
- Plastic Anchor Bolts: These provide extra support for securing your Ring Doorbell to the brick surface, making sure it stays in place.
- Level Tool: To avoid misalignment, use a level tool to verify your Ring Doorbell is mounted straight before you drill.
Additionally, don't forget a screwdriver or a drill with a screwdriver bit to tighten the screws, and always wear safety goggles to protect your eyes from dust and debris during drilling.
With these tools in hand, you'll be ready to tackle the installation of your Ring Doorbell with confidence and precision.

eufy Security Video Doorbell E340,No Subscription,Dual Cameras, 2K FHD,Head-to-Toe View, Doorbell Camera Wireless & Wired, Color Night Vision, Two-Way Talk, AI Motion/Package Detection, Built-in 8GB
𝐃𝐮𝐚𝐥 𝐂𝐚𝐦𝐞𝐫𝐚𝐬, 𝐃𝐨𝐮𝐛𝐥𝐞 𝐒𝐞𝐜𝐮𝐫𝐢𝐭𝐲 | Dual cameras work seamlessly together. The front camera captures visitors head-to-toe, while the...
As an affiliate, we earn on qualifying purchases.
Step-by-Step Installation Guide

Now that you've gathered the necessary tools, let's walk through the step-by-step installation guide for your Ring Doorbell on brick. First, mark the placement of the mounting bracket where you’d like to install the Ring Doorbell on brick. Use a power drill with a masonry bit to create holes for the provided anchors. Once secured, attach your Ring Doorbell to the bracket and follow the app instructions to complete the setup.
Start by fully charging the Ring Doorbell battery to confirm peak performance. It's important to verify a safe installation environment, as certain environmental factors can affect your device's performance. For instance, keeping the area clear of strong smells or toxic plants is advisable for both your pet's safety and device functionality understanding toxicity to cats from ferns.
Next, use a level tool to align the doorbell at approximately 125 cm from the ground. Mark the mounting hole positions with a pencil for accuracy.
Once you've marked your spots, it's time to drill holes using a masonry drill bit. After drilling, insert plastic anchors into the holes to provide a secure grip for mounting your Ring. If applicable, feed the wires into the wall before attaching the doorbell.
Now, secure the Ring Doorbell with all four included screws, making sure it's firmly mounted.
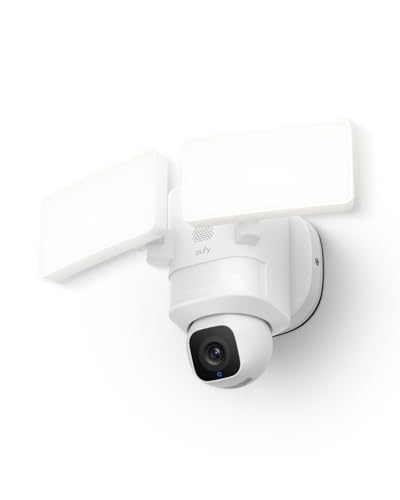
eufy Security Floodlight Camera E30, Security Camera Outdoor, 360° Pan and Tilt, AI Detection and Tracking, 2K Video, 2.4GHz Wi-Fi, 2,000 Lumens, Built-in Siren, 24/7 Recording,No Monthly Fee
360° Surveillance, Your All-Seeing Guardian: Enjoy complete 360° coverage of your property. Set the camera to patrol automatically...
As an affiliate, we earn on qualifying purchases.
Troubleshooting Common Issues

Common issues with your Ring Doorbell can often be resolved with a few simple troubleshooting steps. Regularly monitoring your device's performance can also help in identifying potential issues before they become problematic. Here are three common concerns and how to tackle them:
- Power Issues: If your doorbell isn't functioning, verify the battery is fully charged. Use the provided orange cable to charge it until the light glows green before installation.
- Connectivity Problems: If you're facing issues with connectivity, check your Wi-Fi signal strength. Make sure your Ring Doorbell is within range of your router. If not, consider using a Wi-Fi extender to boost the signal.
- Video Quality: Poor video quality may stem from misalignment or lighting issues. Check for loose fittings, verifying all screws are tight and the device is securely mounted. Reposition your doorbell to improve lighting and minimize obstructions, and clean the camera lens to verify a clear view.
Engaging visuals and infographics can enhance your understanding of user experience improvements
Community Support and Resources

When you install your Ring Doorbell in brick, tapping into community support can really enhance your experience.
You'll find valuable user experiences and tips that can guide your installation process, as well as troubleshooting advice from others who've faced similar challenges.
Engaging with fellow users can spark creative solutions and help you tackle any issues that arise along the way.
Additionally, exploring resources on auditory processing techniques can provide insights into enhancing your auditory skills, which might be useful if you face challenges with sound notifications.
User Experiences and Tips
Many users in the Ring Community share their firsthand experiences and tips for overcoming the unique challenges of installing a Ring Doorbell on brick surfaces. Understanding how environmental factors can impact your installation, such as verifying your workspace is free of 10 Smells Cats Hate, can also be helpful. By tapping into these insights, you can simplify your installation process considerably.
Here are three valuable tips from the community:
- Consider the Wasserstein Ring Doorbell Mount: Many users recommend this mount for drilling into mortar. It's designed for compatibility and makes installation easier.
- Try a no-drill mount: Some find success with no-drill options, but verify the brick surface is smooth and clean for the best adhesion. This could save you time and effort.
- Engage in community discussions: Don't hesitate to ask questions! Many have faced similar challenges, like misalignment or wiring issues. The community is full of practical solutions.
Remember to follow manufacturer guidelines and utilize available resources, such as video tutorials and FAQs. These can provide clarity and help you avoid common pitfalls during your installation.
Installation Advice and Insights
Engaging with the Ring Community can provide you with invaluable installation advice and insights, helping you navigate the challenges of mounting your Ring Doorbell on brick surfaces.
By participating in community forums, you can discover effective installation methods that others have successfully used. Whether you're facing aesthetic concerns or issues with wall damage, shared experiences can guide you in making informed decisions.
The collaborative environment in these forums fosters problem-solving, as users exchange tips and solutions. You might find unique ideas for drilling techniques or alternative mounting options specific to brick.
Don't forget to check out the official Ring support resources, which include thorough installation guides and video tutorials. These materials can clarify complex steps and help troubleshoot common issues.
As you begin installing your Ring Doorbell, leveraging both community feedback and official resources will equip you with the knowledge you need.
Troubleshooting Shared Solutions
Troubleshooting shared solutions in the Ring Community can help you resolve common installation issues while mounting your doorbell on brick surfaces. Engaging in forums allows you to tap into the collective experience of users who've faced similar challenges during installation.
Here are three common problems and their solutions you might find:
- Misalignment: Many users report issues with alignment when mounting on brick. Check the horizontal and vertical alignment carefully before securing your doorbell.
- Connectivity Problems: If your doorbell isn't connecting properly, consult the community for tips on optimizing your Wi-Fi signal. Sometimes, repositioning your router or using a Wi-Fi extender can help.
- Drill Bit Recommendations: The right drill bit is essential for installation on brick. Community members often suggest specific sizes that work best for anchoring your doorbell securely.
Don't forget to check the official Ring support page and browse community posts for more troubleshooting tips. By leveraging these shared solutions, you can enhance your installation experience and guarantee your Ring Doorbell functions smoothly.
Product Features Overview

When you choose the Ring Doorbell 4, you're getting high-definition video, two-way audio, and advanced motion detection, all designed to enhance your home security.
These features not only provide peace of mind but also make installation easier, as you can opt for battery or wired setups.
Let's explore how these capabilities can benefit you and your home.
Key Features Highlighted
The Ring Doorbell 4 packs impressive features, including HD video quality and two-way audio, making it a top choice for enhancing your home security. With its advanced technology, you can feel secure knowing you have a vigilant guardian at your doorstep.
Here are three key features that stand out:
- HD Video Quality: You'll capture clear and detailed footage of visitors and surroundings, allowing you to identify anyone who approaches your home.
- Two-Way Audio: This feature lets you communicate with visitors through the Ring app, giving you the ability to respond even when you're not at home.
- Motion Detection: Real-time alerts notify you of movement at your doorstep, greatly boosting your security by keeping you informed of any activity.
Additionally, the Ring Video Doorbell 4 includes night vision technology for monitoring your entryways in low-light conditions.
Plus, you get flexible installation options with both battery and wired setups, ensuring you can choose what's best for your home.
With these features combined, the Ring Doorbell 4 is an excellent choice for anyone looking to enhance their home security system.
Installation Benefits Explained
Installing the Ring Doorbell 4 not only enhances your home security but also offers a range of benefits that make monitoring your property more convenient and efficient. When you're physically installing your Ring, you're choosing a device that combines cutting-edge technology with user-friendly features.
Here's a quick overview of the standout features:
| Feature | Benefits | Additional Notes |
|---|---|---|
| HD Video Resolution | Clear visuals of visitors | Essential for safety |
| Two-Way Audio | Communicate with anyone at the door | Instant interaction |
| Advanced Motion Detection | Real-time alerts on movement | Keeps you informed |
Tips for Aesthetic Installation

Achieving an aesthetically pleasing installation of your Ring Doorbell involves careful planning and attention to detail. Here are some tips to enhance your installation:
- Use a masonry drill bit: Create precise holes in the mortar rather than the brick. This minimizes aesthetic disruption while you secure the Ring Doorbell.
- Conceal the wiring: Consider running the wires through mortar joints or along edges. Keeping them concealed helps maintain a clean look and prevents clutter in your installation area.
- Seal any gaps: After installation, use silicone caulk to seal any gaps around the doorbell. This guarantees a neat finish that blends seamlessly with the surrounding surface.
Position your Ring Doorbell at approximately 125 cm from the ground for ideal visibility while making sure it doesn't overpower your entryway.
If you prefer a temporary solution, opt for a no-drill mount, which allows for easy removal without damaging the brickwork.
With these tips, you'll achieve a stylish and functional installation that enhances the overall aesthetic of your home.
Frequently Asked Questions
Can a Ring Doorbell Be Installed on Brick?
Yes, you can install a Ring Doorbell on brick.
You've got a few options: use a no-drill mount with strong tape, which is easy to remove, or take a DIY approach with tape for better adhesion on uneven surfaces.
For a more secure fit, consider drilling into the mortar.
Just make sure to follow the manufacturer's guidelines for height and angle to guarantee the camera captures the best view.
How to Install Ring Doorbell on Brick Without Drilling?
To install your Ring Doorbell on brick without drilling, start by cleaning the surface to guarantee proper adhesion.
You can use the official Ring no-drill mount with double-sided tape or apply several layers of industrial-strength tape for better grip on rough surfaces.
If you prefer, Command strips can work too but be careful, as they might damage the wall when you remove them.
Just make certain the surface is dry for the best results.
How to Install a Camera on a Brick Without Drilling?
Ever wondered how to securely mount a camera on brick without drilling?
You can use the Ring no-drill mount, which features strong double-sided tape.
For a DIY approach, layer industrial-strength tape for better adhesion.
Command strips work too, but they're more temporary and can damage the wall.
Just make sure the surface is clean and dry before applying anything, so you get the best stick possible for your camera.
Can I Glue Doorbell to Brick?
You can technically glue a doorbell to brick, but it's not the best idea.
Glue may not stick well, especially on rough surfaces, and removing the doorbell later could damage the brick.
If you're looking for a temporary solution, strong double-sided tape might work, but keep in mind that it may not hold up long-term.
For a more secure setup, consider drilling into mortar or using a no-drill mounting option.
Conclusion
Installing a Ring doorbell in brick can seem intimidating, but with the right tools and steps, you can do it yourself.
Did you know that homes with video doorbells experience a 55% decrease in package theft?
By enhancing your home's security with a Ring doorbell, you're not just improving safety; you're also adding convenience.
Enjoy the peace of mind that comes with knowing who's at your door, all while boosting your home's curb appeal!