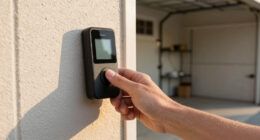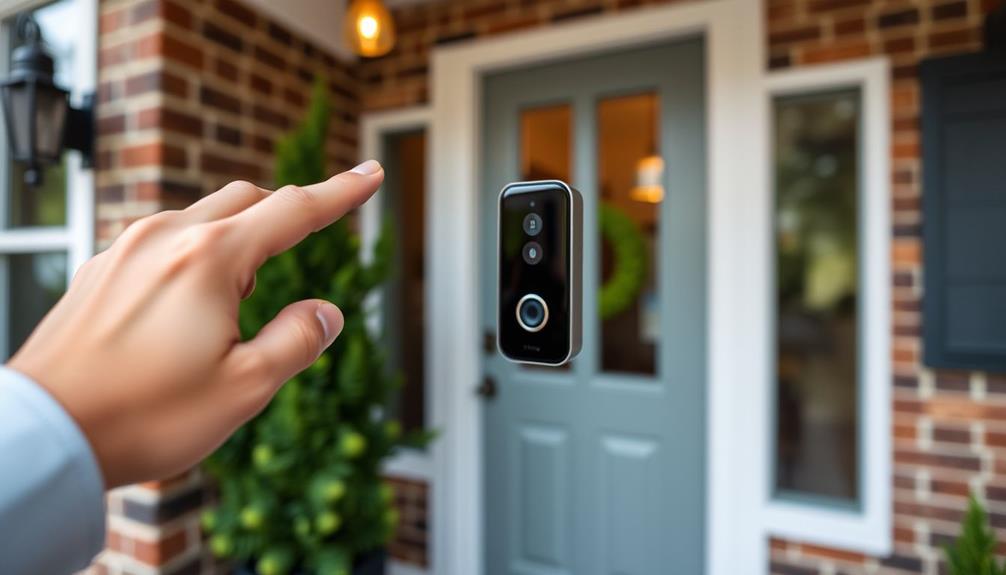

To remove your Ring Doorbell, the first step is to gather the necessary tools such as a security screwdriver. If you need to take it off for charging, simply unscrew the security screw located at the bottom of the faceplate and carefully remove it. If you are looking to permanently remove the doorbell, detach it from the mounting bracket and disconnect any wired connections if necessary. It is important to remember to seal any holes that are left behind. In case you cannot find the security screwdriver, you can use a small flathead or T15 Torx screwdriver as a substitute. Handling this process with caution will ensure a smooth removal and you may come across some additional helpful tips as you proceed. Keep the security screw stored in a safe place for future use. While handling the Ring Doorbell, be aware of any other maintenance or troubleshooting needs that may arise. For more useful advice and tips on Ring doorbell installation, consult the manufacturer’s website or product manual for extra support.
Key Takeaways
- Use the security screwdriver included with the Ring package to remove the faceplate by unscrewing the security screw at the bottom.
- For a permanent removal, unscrew the device from its mounting bracket and disconnect any wired connections if applicable.
- After removal, seal any holes left behind with silicone or filler to prevent leaks or pest issues.
- If you need to charge the battery, remove the faceplate and pull the battery pack down using the silver lever.

Screwdriver for Doorbell Screwdriver Replacement with WiFi Password Reset and Battery Change, Fits for All Doorbell Models (Orange), CTYUKHS
Doorbell Screwdriver: If you lose the doorbell screwdriver, this doorbell screwdriver will be the perfect replacement for battery…
As an affiliate, we earn on qualifying purchases.
As an affiliate, we earn on qualifying purchases.
Reasons for Removal
There are several reasons you might decide to remove your Ring Doorbell, whether it's for a brand switch, a move, or an upgrade. If you're looking to switch to a different brand, like Arlo or Google, you may find that compatibility issues or personal preference lead you to remove the Ring.
Additionally, if you're contemplating upgrading to a newer model of the Ring Doorbell, you'll need to detach the existing unit first. Understanding your home's layout and security needs can also play a role in this decision, as you might want to reflect on essential gadgets for your kitchen that enhance overall functionality.
Moving to a new home often requires taking your doorbell with you, so removing the Ring becomes crucial.
Additionally, sometimes you might need to remove the doorbell for maintenance, like charging the battery. This temporary removal can help guarantee your device stays functional and efficient.
Finally, to prevent theft, some users choose to take down their Ring Doorbell altogether, enhancing their property's security.
Regardless of your reason, understanding these motivations can help you make an informed decision about removing the Ring. Each scenario has its own considerations, but knowing the "why" behind your choice can streamline the process and keep your home secure.

Bonsicoky T15 Torx Security Screwdriver with Magnetic Tip Plastic Grip, Torx Screwdriver for Computer Repairing, Home Appliances(Red, 178mm/ 7")
❤What You Get: 1 Pcs Torx Screwdriver; Torx Size: T15; Handle Length: 78mm/ 3.1"; Overall Length: 178mm/ 7".
As an affiliate, we earn on qualifying purchases.
As an affiliate, we earn on qualifying purchases.
Tools Required

To release your Ring doorbell, you'll need a few specific tools. The security screwdriver that came with your device is essential, but if you've lost it, a small flathead or T15 Torx screwdriver can work as alternatives.
Additionally, maintaining a clean environment with an air purifier can help reduce allergens in your home, creating a more pleasant atmosphere while you work on your doorbell.
Having air purifiers improve indoor air quality is also a smart move to seal any holes left behind.
Essential Tools Needed
You'll need a few essential tools to safely release your Ring doorbell, guaranteeing a smooth removal process. First and foremost, you'll require the security screwdriver that came with your Ring package. This tool is specifically designed to detach the faceplate, allowing you to access the screws holding the doorbell in place.
Regular maintenance of your appliances, such as making sure your doorbell is securely mounted, can enhance their longevity and performance, similar to the importance of appliance maintenance.
If you've misplaced the original screwdriver, don't worry! A small flathead screwdriver can be used to manipulate the security screw, helping you ease the faceplate off. Alternatively, a T15 Torx head screwdriver is a great backup option for removing the screws securing the doorbell. Using the correct tools is vital to avoid stripping the screws during the process.
Once you've removed the doorbell, you might want to seal any holes left behind. Having silicone or filler on hand can help you tidy up the area after removal.
Remember to handle all your tools carefully to guarantee a successful release without damaging your doorbell or the wall. With these essential tools ready, you're well-equipped to remove your Ring doorbell efficiently.
Alternative Tool Options
Having a variety of alternative tools at your disposal can simplify the process of releasing your Ring doorbell. If you've misplaced the original screwdriver, don't worry! A small flathead screwdriver can effectively manipulate the security screw for faceplate removal.
Alternatively, a T15 Torx head screwdriver serves as a handy backup if you can't find the designated tool. When using these alternative tools, confirm they're compatible with your security screw to prevent stripping during removal.
It's always a good idea to keep these tools nearby during installation or removal, as they can save you time and hassle. If you find yourself without any suitable tools, you can reach out to Ring customer support. They can help you obtain replacement screwdrivers or guide you on the best options available.
Being prepared with the right alternative tools can make your experience smoother and guarantee that your Ring doorbell is quickly and safely released when needed. So, don't wait until the last minute—gather those tools today!

2Pcs Doorbell Key Replacement Tool Compatible with Blink, Doorbell Camera Release Pin, with 2Pcs Doorbell Removal Pin,Highly Efficient Tool for Remove Blink Doorbell Mount and Battery Replacement
Solve Your Immediate Needs:Do you feel embarrassed when you lose your doorbell key when changing the battery or…
As an affiliate, we earn on qualifying purchases.
As an affiliate, we earn on qualifying purchases.
Steps to Remove for Charging

Begin by locating the security screw at the bottom of your Ring Doorbell's faceplate using the provided screwdriver. Once you've found it, carefully unscrew it to release the faceplate.
After that, gently pull the bottom portion of the faceplate down and towards you. This should detach it from the device, giving you access to the battery pack.
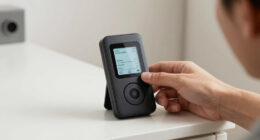
Now, look for the small silver lever on the battery pack. This lever is designed specifically to release the battery for charging. Press the lever firmly to release the battery. You'll feel it disengage, which allows you to pull it out easily for charging.
Once the battery's charged and ready to go, it's time to reattach the faceplate. Align it properly with the device and make sure it fits snugly.
Finally, secure the faceplate by screwing the security screw back in tightly. This guarantees your Ring Doorbell remains secure and functional, ready to monitor your home once again.
Following these steps will help keep your device powered and in good working order.
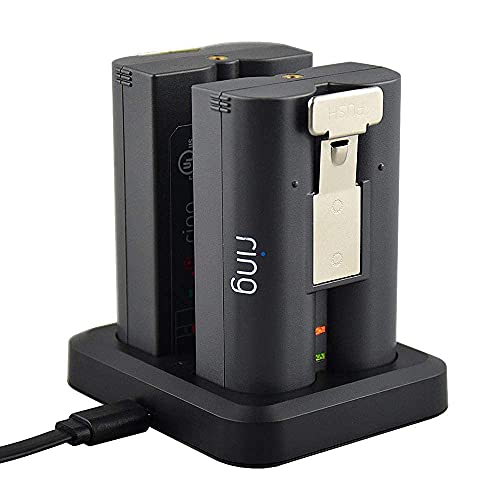
Battery Charger for Ring Rechargeable Battery,Dual Ring Battery Charger Station for Ring Spotlight Cam Battery,Ring Video Doorbell 2/3/4,Ring Stick Up Cam Battery (Ring Batteries NOT Included)
[Dual Charging] This Ring rechargeable battery charger station can charge up to 2 ring batteries simultaneously, allowing you…
As an affiliate, we earn on qualifying purchases.
As an affiliate, we earn on qualifying purchases.
Removal Without Special Tool

If you find yourself without the special screwdriver for your Ring Doorbell, a small flathead or a T15 Torx head screwdriver can be used to remove the security screw instead. Here's how to proceed with the removal:
- Choose Your Tool: Select a small flathead screwdriver or a T15 Torx head screwdriver. Make sure the tool fits snugly to avoid stripping the security screw.
- Loosen the Security Screw: Carefully manipulate the screwdriver to unscrew the security screw. Be gentle and take your time to prevent damage.
- Detach the Faceplate: Once the security screw is removed, follow the standard steps to detach the faceplate. This will give you access to the device for battery removal or charging.
If you encounter difficulty in removing the screw with your available tools, don't hesitate to reach out to Ring customer support. They can provide assistance or help you obtain a replacement screwdriver. Remember, handling the screw carefully is vital to guarantee a smooth removal process.
Permanent Removal Process

To permanently remove your Ring Doorbell, start by using the provided security screw tool to detach the faceplate by removing the security screw at the bottom.
Once the faceplate is off, you can unscrew the device from its mounting bracket or wall. Be certain to keep track of all screws, as you'll need them for future installation if you decide to reinstall the doorbell later.
If you have a wired model, carefully disconnect the wires attached to the chime. This step is essential for a complete removal, so take your time to make sure you don't damage any wiring.
After you've successfully removed the doorbell, you'll want to seal any holes left behind with silicone or filler to prevent leaks or pest issues.
Before you finish, confirm that the device and all components are entirely removed. This will guarantee a clean removal process and prevent any future issues.
Following these steps will help you effectively remove your Ring Doorbell without complications, leaving your entryway tidy and ready for whatever you plan to install next.
Overview of Ring Video Doorbell

The Ring Video Doorbell offers homeowners a reliable way to enhance their security with real-time video surveillance right at their front door. You can monitor visitors from anywhere using the Ring App, ensuring you never miss a delivery or unexpected guest. With both wired and battery-operated models available, you can easily install a Ring that fits your specific needs.
Here are three standout features of the Ring Video Doorbell:
- Two-way audio: Communicate directly with visitors using your smartphone or tablet, no matter where you are.
- Smart home integration: The Ring Video Doorbell works seamlessly with various smart home systems, boosting your overall security.
- Remote access and notifications: The Ring App lets you customize device settings, manage your Ring devices, and receive instant alerts whenever someone is at your door.
Troubleshooting Common Issues

Troubleshooting common issues with your Ring Doorbell can often restore its functionality and improve your overall experience. One of the most frequent issues you might encounter is connectivity problems. To resolve this, check your Wi-Fi signal strength and verify the doorbell is within range of your router. A weak connection can hinder performance.
If you're experiencing app errors, try restarting both your Ring device and the smartphone or tablet running the app. This simple step often clears glitches that might affect performance. Should your Ring Doorbell become unresponsive, you may need to perform a factory reset. To do this, hold down the setup button for 15 seconds.
Don't forget to check for software updates in the Ring app, as outdated firmware can lead to functionality problems. Keeping your app and device updated guarantees you have access to the latest features and fixes.
For persistent issues, utilize the troubleshooting steps and community support resources available in the Ring app. These resources can guide you through specific problems, helping you maintain a reliable security camera setup and enhancing your overall security experience.
Frequently Asked Questions
How Do You Release a Ring Doorbell When Moving?
When you're moving, releasing a doorbell can seem tricky, but it's manageable.
Start by logging into the app and guiding yourself to device settings. You'll need to remove the device from your account; just select the doorbell and tap "Remove This Device."
If you can't do it, reach out to the previous owner for help.
Once it's unlinked, you can set it up on a new account with the app.
How Do You Unclip a Ring Doorbell?
To unclip your Ring Doorbell, start by locating the security screw at the bottom of the faceplate.
Use the provided screwdriver to remove it.
Once that's done, gently pull the bottom of the faceplate down and away from the device.
This will detach it from the mounting bracket.
If you want to remove the doorbell completely, unscrew it from the wall.
Handle everything carefully to avoid any damage.
How to Unscrew Ring Doorbell Without Tool?
You might think unscrewing a Ring doorbell without the right tool is impossible, but it's doable!
If you don't have the original screwdriver, try using a small flathead screwdriver or a T15 Torx head screwdriver.
Carefully insert your screwdriver into the security screw and turn it counterclockwise.
If it's stubborn, don't hesitate to reach out to Ring customer support for help.
You've got options, so don't stress!
How Do You Unmount a Ring Doorbell to Charge?
To unmount your Ring doorbell for charging, you'll start by locating the security screw at the bottom of the faceplate.
Use the screwdriver that came with it to remove that screw.
Once it's out, pull the bottom of the faceplate down and away from the device.
After that, you can access the battery pack, release the battery, and charge it as needed before reassembling everything.
Conclusion
So, whether you're liberating your Ring Doorbell for a battery recharge or sending it into permanent retirement, remember: it's just a gadget, not your long-lost pet.
Armed with the right tools—or maybe just a little ingenuity—you can handle this like a pro.
And if things go haywire, don't panic! You can always call tech support, who'll be thrilled to explain for the fifth time how to press a button.
Happy doorbell detachment!