
To remove the faceplate from your Ring doorbell, you will need a T15 Torx screwdriver and a flat prying tool. Make sure you have a clean workspace before starting. Identify the security screw located at the bottom of the faceplate and loosen it by turning it counterclockwise. While holding the faceplate, gently push upwards to release it. If you encounter any stubborn screws, try using a rubber band for better grip. Once the faceplate is removed, you can access the battery compartment for maintenance. Looking for more helpful tips and tricks to simplify the process? Continue reading to uncover additional insights!
Key Takeaways
- Gather necessary tools, including a T15 Torx screwdriver and a flat prying tool, for faceplate removal.
- Locate and loosen the security screw at the bottom of the faceplate by turning it counterclockwise.
- Push upward on the faceplate while supporting it with your fingers to detach it.
- Ensure good lighting and a clean workspace to facilitate the removal process and avoid losing small parts.
![IMBZBK [Auto-Dust Removal] 3 Pack Privacy Screen Protector for iPhone 13 Anti Spy Private Accessories, Case Friendly Film, Military Grade Tempered Glass 3 Camera Lens Protector](https://m.media-amazon.com/images/I/51ZrDxIx-FL._SL500_.jpg)
IMBZBK [Auto-Dust Removal] 3 Pack Privacy Screen Protector for iPhone 13 Anti Spy Private Accessories, Case Friendly Film, Military Grade Tempered Glass 3 Camera Lens Protector
[Auto-Dusting Removal Installation] Includes everything you need with innovative automatic positioning, dust removal, and absorption technology, making the...
As an affiliate, we earn on qualifying purchases.
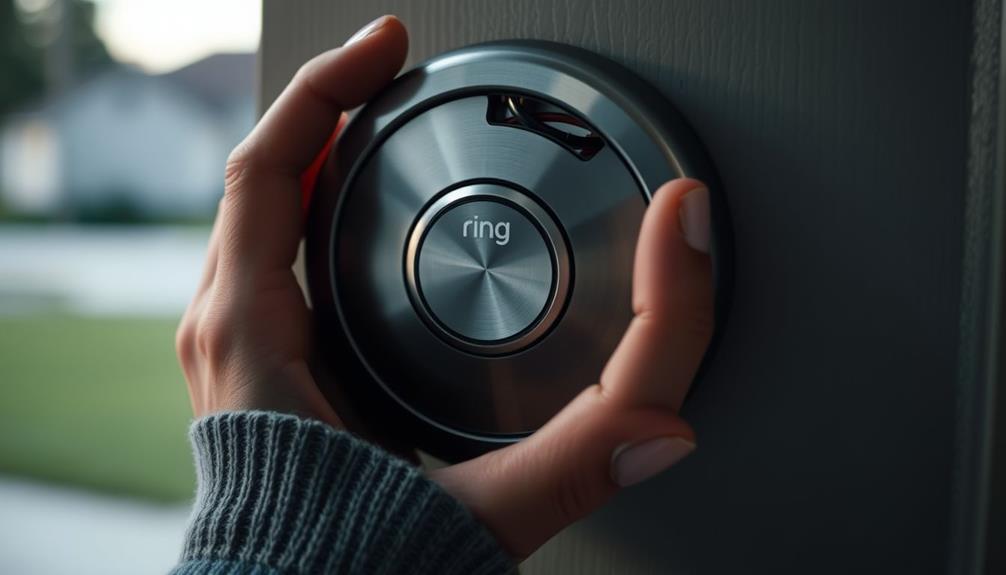
Overview of Ring Doorbell
Designed to enhance your home security, the Ring Video Doorbell offers both wired and battery-operated options to suit your installation needs.
This device allows you to keep an eye on your front door in real-time through the Ring app, giving you peace of mind no matter where you are. With its high-definition Video capabilities, you'll clearly see who's at your door, and thanks to the two-way audio feature, you can converse with visitors directly from your smartphone.
Additionally, the integration of AI in cybersecurity can boost security measures, guaranteeing that your Ring Doorbell remains safe from potential cyber threats.
When you want to access the inner workings of your Ring Doorbell, you'll need to remove the faceplate. This process is straightforward, but it's important to follow the correct steps to avoid damaging your device.
The faceplate protects the camera and other components, so handling it properly guarantees your security system remains intact and functional.

Supershieldz (2 Pack) (Privacy) Anti Spy Screen Protector Designed for iPhone 17e, 16e, 14, 13, 13 Pro (6.1 inch) Tempered Glass, Anti Scratch, Bubble Free
Made from the high quality privacy tempered-glass in portrait viewing modes; screen is only visible to persons directly...
As an affiliate, we earn on qualifying purchases.
Tools Needed for Removal

Gathering the right tools is vital for easily removing the Ring doorbell faceplate without causing any damage.
You'll need a few specific items to guarantee the process goes smoothly. It's also important to take into account essential kitchen gadgets that enhance efficiency, as having the right tools can make any task easier.
Here's what you'll need:
- T15 Torx screwdriver: This special star-shaped screwdriver is vital for removing the security screws on your Ring doorbell.
- T6 Torx screwdriver: If you can't find the original T15 screwdriver, a T6 can serve as a backup.
- Flat and skinny object: A butter knife or a similar tool can help pry the faceplate away once the screws are removed.
Having these tools ready will make it easier for you to remove the faceplate without damaging your Ring doorbell.
If you happen to misplace the original screwdriver, remember that replacement options are available through customer service or online marketplaces.
With everything in hand, you'll be all set for the next steps in removing the faceplate.
![UNBREAKcable Privacy Screen Protector for iPhone Air, Shatterproof Tempered Glass [True 28°Anti Spy] [9H Hardness] [Easy Installation Frame] Private Protector for iPhone 6.5inch-2 Pack](https://m.media-amazon.com/images/I/41ZTqzTKWxL._SL500_.jpg)
UNBREAKcable Privacy Screen Protector for iPhone Air, Shatterproof Tempered Glass [True 28°Anti Spy] [9H Hardness] [Easy Installation Frame] Private Protector for iPhone 6.5inch-2 Pack
True 28° Anti-spy Protection: This privacy screen offers 28° partial and 45° full peep-proof protection, keeping your messages...
As an affiliate, we earn on qualifying purchases.
Step-by-Step Faceplate Removal

To start removing your Ring Doorbell faceplate, you'll need the right tools, including the special screwdriver.
Before diving into the process, it's helpful to guarantee you have a clean and organized workspace, as this can make handling the various components easier.
Additionally, keeping in mind the importance of smart organization techniques can help you manage any other devices or tools you may be using.
Once you're equipped, follow the steps to detach the faceplate carefully.
Let's walk through the process so you can get it done efficiently.
Required Tools Overview
You'll need a few essential tools to successfully remove the Ring doorbell faceplate, including the special star-shaped screwdriver that comes with the device. If you don't have the original screwdriver, a T6 torx-head screwdriver will work as an alternative.
Here's a quick list of the tools you'll want to gather:
- Star-shaped screwdriver (included or T6 torx-head)
- Flat and skinny object (like a butter knife for prying)
- Rubber bands (to improve grip on stripped screws)
Before you begin, make sure you identify the security screw located at the bottom of the faceplate. You'll need to loosen it by turning counterclockwise.
In case you encounter stripped screws, the rubber bands can provide better traction, while the needle-nosed pliers can assist in pulling them out.
If you need replacement security screws, they can easily be ordered through customer service or found online.
With these tools in hand, you'll be well-equipped to remove the faceplate and access your Ring device.
Faceplate Detachment Process
Begin the faceplate detachment process by removing the security screw at the bottom using the provided Ring screwdriver. Turn it counterclockwise until it's completely removed. Next, place your thumbs at the bottom edge of the faceplate and push upward to loosen it from the device.
If the faceplate doesn't detach easily, you can gently insert a flat object, like a butter knife, to assist in prying it away. While doing this, hold the front of the faceplate with your fingers for support, and continue applying upward pressure with your thumbs to completely detach it.
Here's a quick overview of the steps:
| Step | Action | Tool Needed |
|---|---|---|
| 1 | Remove security screw | Provided Ring screwdriver |
| 2 | Push up from the bottom edge | Your thumbs |
| 3 | Pry if necessary | Flat object (optional) |
After you successfully remove the faceplate, store it in a safe location to prevent any damage during maintenance or reassembly.
![Ailun Privacy Screen Protector for iPhone 17e / iPhone 16e / iPhone 14 / iPhone 13 / iPhone 13 Pro [6.1 Inch] 2 Pack Anti Spy Private Tempered Glass Case Friendly [Not for iPhone 16 6.1 Inch]](https://m.media-amazon.com/images/I/41BTcRUr-ZL._SL500_.jpg)
Ailun Privacy Screen Protector for iPhone 17e / iPhone 16e / iPhone 14 / iPhone 13 / iPhone 13 Pro [6.1 Inch] 2 Pack Anti Spy Private Tempered Glass Case Friendly [Not for iPhone 16 6.1 Inch]
[2 Pack] This product includes 2 pack privacy screen protectors.WORKS FOR iPhone 17e/16e/14/iPhone 13/13 Pro 6.1 Inch tempered...
As an affiliate, we earn on qualifying purchases.
Common Challenges Encountered

When you're trying to open your Ring doorbell faceplate, you might run into a few common challenges.
Stripped screws, the wrong tools, and visibility issues can make the process frustrating.
Let's tackle these points to help you get that faceplate off smoothly.
Stripped Screw Difficulties
Stripped screws often pose a significant challenge during the removal of a Ring Doorbell faceplate, primarily due to the use of incorrect tools. If you find yourself struggling with a stripped screw, don't worry; there are several techniques you can try to make the process easier.
- Use a rubber band: Placing a rubber band between your screwdriver and the stripped screw can provide extra grip, helping to loosen it.
- Check your lighting: Verify you have adequate lighting to clearly see the screws. A flashlight can help illuminate the area and make it easier to identify any issues.
- Try needle-nosed pliers: If the screw is partially protruding and you can grip it, needle-nosed pliers may help you extract it more easily.
Tool Compatibility Issues
Facing tool compatibility issues can greatly complicate the process of removing the Ring Doorbell faceplate. The specific Ring screwdriver included with your device is essential for tackling the security screws.
If you use alternative screwdrivers, you might encounter compatibility issues that can make the removal process frustrating. Common tools like Phillips screwdrivers #1 and #00 may fit, but they often don't provide the best grip, making it difficult to remove the screws effectively.
Additionally, if you misidentify the screw type—like using a T15 instead of a T6 Torx—you'll find yourself stuck. Stripped screws can further complicate things, limiting the effectiveness of standard tools. In such cases, using a rubber band can help improve grip on those stubborn screws.
If you're still struggling with removal after trying the right tools, don't hesitate to seek support from the Ring community or their customer service. They can provide guidance and solutions when tool compatibility issues arise, ensuring you can successfully access the faceplate without unnecessary hassle.
Visibility Challenges During Removal
Visibility challenges can greatly hinder your ability to locate the security screw on the Ring doorbell faceplate, especially in low-light conditions or awkward angles. These obstacles can make it frustrating to remove the faceplate properly. Here are some common visibility issues you might encounter:
- The design of the faceplate can obscure access points, making it tough to spot the security screw.
- If the device is mounted in a low-light area, you'll struggle to see where to apply your tools.
- A stripped security screw can further complicate visibility, making it difficult to grip and turn effectively.
To tackle these challenges, consider using a flashlight or your smartphone's flashlight feature to illuminate the area.
Additionally, maintaining a clean and well-lit workspace can markedly improve visibility and help you identify the security screw more easily.
Taking these steps can make the process of removing the faceplate smoother and less frustrating.
Battery Access and Replacement

Accessing and replacing the battery in your Ring Video Doorbell is a straightforward process that guarantees your device remains powered and functional.
Start by removing the faceplate; you'll need to unscrew the security screw located at the bottom. Once that's done, push up from the bottom with your thumbs to detach the faceplate.
With the faceplate removed, locate the battery compartment. To access the battery, gently pull it out by pressing down on the black tab and sliding it towards the bottom of the device. Before you do this, verify the doorbell is powered off to avoid any electrical issues.
When it's time to replace the battery, make certain it's sufficiently charged so your Ring device performs at its best. Slide the new battery into the compartment and secure it properly.
After replacing the battery, reattach the faceplate by aligning the top hook first, then snug the bottom into place. Don't forget to replace the security screw and tighten it to fully secure the faceplate.
This simple process guarantees your Ring Video Doorbell stays functional and ready to keep your home safe.
Reattaching the Faceplate

To reattach the faceplate of your Ring Doorbell, start by aligning the top hook at a 45-degree angle with the corresponding hole on the device. Once it's aligned, press the bottom of the faceplate and snap it back into place. This guarantees a secure fit.
Next, don't forget about the security screw, which is essential for keeping the faceplate in place. Here's what you need to do:
- Align the faceplate properly to avoid any gaps.
- Snap the bottom into place firmly.
- Replace the security screw at the bottom of the faceplate.
If you've lost the security screw, you can easily order replacement screws from customer service or online retailers.
By following these steps carefully, you'll guarantee your Ring Doorbell's faceplate is securely reattached, maintaining its functionality and security features.
Regular maintenance helps keep your device in top shape, so always double-check that everything is tight and secure!
Community Support Resources

The Ring Community offers a valuable platform for users to seek help and share experiences regarding faceplate removal and other device issues. If you have questions about removing the faceplate or dealing with screws, this is the place to be. You can log in or create an account to connect with others who've faced similar challenges. Many users share practical solutions based on their experiences, creating a collaborative environment for troubleshooting.
If you're dealing with persistent issues, the community support team is available to provide more in-depth assistance. Additionally, you can access various troubleshooting articles and guides that can enhance your understanding of the faceplate removal process.
Here's a quick overview of community resources:
| Resource Type | Description |
|---|---|
| Community Forums | Post questions and share tips |
| Troubleshooting Guides | Step-by-step assistance |
| User Experiences | Real-life solutions shared |
| Support Team | Help with complex issues |
| Subscription Options | Access to premium resources |
Engaging with the community can empower you to tackle faceplate removal confidently and efficiently!
Additional Tips and Tricks

When faced with stubborn screws during faceplate removal, try flipping the screwdriver for better grip and leverage. This simple trick can make a significant difference in loosening those tricky screws. If you lose your Ring screwdriver, don't worry; you can contact the Ring support team for a replacement or look for compatible tools online.
Another effective method is to use rubber bands between the screwdriver and stripped screws. This can enhance grip and help you remove those difficult screws without causing further damage to your faceplate.
Here are some additional tips to take into account:
- Always use the correct bit (T15 Torx) for peak performance.
- Document any issues you encounter during the removal process; it's useful for getting help later.
- Engage with community forums for shared advice and alternative methods.
These tips should help you successfully remove your Ring doorbell faceplate, ensuring you can access the inner workings of your device without any frustration. Happy tinkering!
Frequently Asked Questions
How Do You Open a Ring Doorbell Plate?
To open a Ring doorbell plate, you'll need the star-shaped screwdriver that came with it.
Start by removing the security screw at the bottom of the plate.
Once that's done, push up gently from the bottom with your thumbs to loosen it.
If it's stubborn, you might use a flat object to pry it free.
Remember to keep the screw in a safe spot, just in case you need it later!
How to Unscrew Ring Doorbell Without Tool?
If you need to unscrew your Ring Doorbell without a tool, try using a rubber band over the screw to boost grip for a standard Phillips screwdriver.
If the screws are stripped, needle-nosed pliers can help you grip the edges and turn them counterclockwise.
For tough screws, a flat object like a butter knife might pry open the faceplate.
Just remember to apply consistent pressure to avoid damaging anything.
How Do You Open a Doorbell Cover?
Opening a doorbell cover can feel like cracking a safe, but it's usually straightforward.
Start by locating any screws on the cover, often found at the bottom.
Use the right screwdriver to avoid stripping the screws.
Once you've loosened them, gently push from the bottom with your thumbs or use a flat tool to pry it off carefully.
Just make sure to do this in a well-lit area for better visibility!
How Do You Remove a Ring Doorbell 2 Face Plate?
To remove the Ring Doorbell 2 faceplate, first grab the special star-shaped screwdriver that came with your device.
Unscrew the security screw at the bottom of the faceplate.
If you don't have that screwdriver, a T6 torx-head will work too.
Once the screw's out, push up from the bottom with your thumbs to loosen it.
If needed, use a flat object to gently pry it off, being careful not to damage it.
Conclusion
Opening the Ring Doorbell faceplate might seem tricky, but it's a straightforward task that anyone can handle with a little guidance. To open the Ring Doorbell faceplate, first, locate the security screw on the bottom of the device and use the provided screwdriver to loosen it. Once the screw is removed, gently lift the faceplate away from the device to access the inner components. If you have a Ring Doorbell Pro, the process for cover ring doorbell pro removal is similar, but be sure to follow the specific instructions for your model to avoid any damage. With a bit of patience and careful attention to detail, you’ll have the faceplate removed and the device accessible in no time. If you’re having trouble opening the faceplate, refer to the user manual or the Ring website for additional guidance. Once you’ve accessed the inner components, you can easily perform any necessary maintenance or troubleshooting. And when you’re finished, replacing your Ring Doorbell Pro is just as simple—just align the faceplate with the device and secure it in place with the security screw.
Even if you're worried about damaging your device, rest assured that following the steps carefully will keep it safe.
Plus, accessing the battery for replacement becomes a breeze once you're familiar with the process.
Don't hesitate to jump in—your Ring Doorbell will thank you for the extra care, and you'll feel accomplished for taking charge!