To know if your Ring Doorbell is charging, check the LED indicators. A solid red and green light means it's charging, while a solid green light signals it's fully charged. You can also monitor the battery's status through the Ring app, which provides real-time updates. Make sure you're using a compatible micro-USB cable, and inspect the connection if the LED indicators aren't responding. Regular maintenance and charging practices will help keep your device in top condition. If you want to optimize your experience further, there's more helpful information you can explore.
Key Takeaways
- Look for a blinking red light on the LED indicator, which signifies that the Ring Doorbell is currently charging.
- A solid blue circle on the LED indicates that charging is complete, while red and green lights signal ongoing charging.
- Check the Ring app for real-time battery status updates and percentage through the Power Settings menu.
- Ensure the USB cable is securely connected to both the doorbell and the power source for proper charging.

SimpliSafe 8 Piece Wireless Home Security System - Optional 24/7 Professional Monitoring - No Contract - Compatible with Alexa and Google Assistant , White
Simple to set up. Seriously secure - Get ready to protect right out of the box. Just plug...
As an affiliate, we earn on qualifying purchases.
Understanding Charging Indicators
To determine if your Ring doorbell is charging, keep an eye on the LED indicators, which provide clear signals about the battery's status. A solid green light indicates that your battery is fully charged, while red and green lights mean it's currently charging. If you notice that the LED indicator light is not turning on at all, or if it is consistently showing a red light, this could indicate that your Ring doorbell is not charging properly. In this case, try unplugging and re-plugging the device to make sure it is receiving power. If the issue persists, you may need to check the power source or contact Ring customer support for assistance with troubleshooting a “ring doorbell not charging” issue.
If you're using a USB connection, watch for a blinking light pattern that will shift to a solid blue circle once the battery reaches full charge. Regular maintenance of your devices, similar to how you'd care for an air purifier, can guarantee peak performance.
For models equipped with a Quick Release Battery Pack, you'll notice the LED indicators showing charging progress through a gradual blue light fill. This visual cue helps you see how close your battery is to being fully charged.
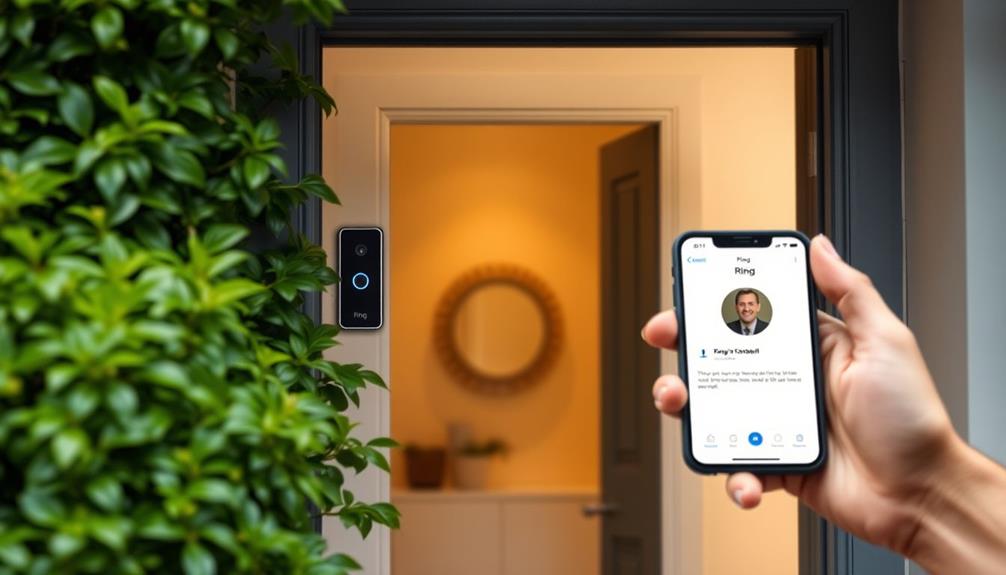
Additionally, the Ring app offers battery status updates directly on your mobile device, allowing you to monitor the charge level without needing to check the doorbell physically.
If you don't see any charging indicators, you might need to inspect the USB connection or verify that your power source is functional. Understanding these charging indicators guarantees you'll always know whether your Ring doorbell is ready to go or needs a little more time to charge.

15-Piece WiFi Home Security System, DIY Wireless Alarm Kit, No Subscription
Control your home security system with ease using the app remote control feature, giving you peace of mind...
As an affiliate, we earn on qualifying purchases.
Charging Process Overview

Charging your Ring doorbell involves connecting a micro-USB cable to the charging port and monitoring the LED indicators for updates on the battery's status.
When you plug in the cable, keep an eye on the LED indicators. A blinking red light indicates that the battery is currently charging. For peak performance, it's advisable to confirm proper ventilation while charging, similar to safety precautions needed for other appliances safety precautions necessary.
If your model has a Quick Release Battery Pack, you'll need to remove the faceplate to access the battery's LED lights. Here, a solid green light means the battery is fully charged.
It's important to note that while the battery is charging, the doorbell itself won't show any charging indicators. So, you'll rely entirely on the LED indicators for status updates.
The charging process typically takes between 5 to 10 hours, depending on the power source you're using. Once the battery is fully charged, you'll see a solid blue circle on the LED, signaling that charging is complete.

Home Security System with Camera, WiFi + GSM Home Alarm Kit with Phone App Alert, Door/Window Sensor, Remote Control for Apartments (13 Pieces)
【2.4" TFT Colour Screen&11Languages】- The home security system features a 2.4-inch TFT colour touchscreen with clear time display...
As an affiliate, we earn on qualifying purchases.
Model-Specific Charging Instructions

When it comes to charging your Ring Doorbell, the instructions can vary by model.
It's important to guarantee you're using the correct charging method for your specific device, as improper charging can lead to performance issues.
You'll need to pay attention to the indicator lights specific to your device, as they provide essential feedback on the charging status.
If you encounter any issues, troubleshooting steps can help you get back on track.
For best performance, make sure to follow maintenance and cleaning tips to keep your device in good condition.
Charging Process Overview
For each model of the Ring doorbell, the charging instructions vary, so it's essential to follow the specific guidelines for your device.
To determine if your Ring doorbell is charging, connect the orange micro-USB charger to the battery charging port. Observe the charging indicators on the battery: for the Video Doorbell (2nd Generation), a blinking red and green light means it's charging, while a solid green light indicates it's fully charged. This process can be simplified by referring to timeless life guidance that emphasizes the importance of following instructions carefully. If you observe a solid red light on your Ring doorbell battery, it means the battery is critically low and needs immediate charging. If you find that your Ring doorbell is not charging despite following the instructions, it may be necessary to troubleshoot the issue by checking the power source, the charger, and the battery connection. If “Ring doorbell not charging” persists, it is recommended to reach out to customer support for further assistance.
The charging process typically takes between 5 to 10 hours, depending on your power source. If you have a model with a Quick Release Battery Pack, you can easily remove the battery for charging. However, for the 1st and 2nd Generation doorbells, you'll need to detach the entire unit.
To keep track of your battery's health, always check the battery status via the Ring app. A solid blue circle in the app shows that the battery is fully charged.
Following these instructions will help guarantee your Ring doorbell remains operational and ready to secure your home.
Indicator Lights Explained
Understanding the indicator lights on your Ring doorbell helps you quickly determine its charging status and overall battery health. These lights can vary depending on the model, so it's important to know what each one means.
| Model | Charging Light | Fully Charged Light |
|---|---|---|
| Ring Video Doorbell (2nd Gen) | Blinking red light | Solid green light |
| Quick Release Battery Pack (Other) | Blinking blue light | Solid blue light |
| Additional Models (Check App) | Varies | Varies |
When you see a blinking red light, it means your Ring doorbell is actively charging. Once the light turns solid green, your battery is fully charged and ready for action. For other models with Quick Release Battery Packs, the blinking blue light will change to a solid blue light once fully charged.
You can also check the Ring app to monitor your battery status, which provides real-time updates on whether the battery is charging and its current charge level. This can be especially useful to guarantee you're always prepared and your doorbell is ready when you need it most.
Troubleshooting Charging Issues
Occasionally, you might encounter charging issues with your Ring doorbell, but troubleshooting these problems can be straightforward. Understanding the nuances of device connectivity and performance, especially in relation to email and communication security, can help in resolving these issues effectively.
Here are some steps you can take to resolve charging issues with your device:
- Check LED lights: When charging, the LED indicators on the battery should blink red and green. If they don't, that indicates a problem.
- Inspect the USB connection: Make sure the charging cable is firmly connected to the battery charging port. A loose connection can prevent effective charging.
- Examine the charging cable and power source: If the LED lights aren't blinking, try using a different USB cable or plug it into another power source to see if that resolves the issue.
- Monitor the battery's charging status: For the Video Doorbell (2nd Generation), keep an eye on the LED lights, as it doesn't have its own charging indicators.

Ring Alarm 14-Piece Kit (newest model), Wireless smart home or business security system, expandable, easy setup, Mobile App Control, 24/7 Professional Monitoring, Alexa Compatible
A great fit for 2-4 bedroom homes, this Alarm Kit includes one Base Station, two Keypads, eight Contact...
As an affiliate, we earn on qualifying purchases.
Monitoring Battery Status
Monitoring your Ring doorbell's battery status is easy through the Ring app, where you can quickly check the current charge level. Simply open the app and navigate to the Power Settings menu. Here, you'll see the battery status displayed as a percentage, giving you a clear indication of how much charge is left.
To guarantee your device remains functional, it's crucial to maintain a consistent charging routine, much like how yoga for back pain management emphasizes regular practice for best results.
While your doorbell is charging, you may notice a blinking red and green light. Once the battery is fully charged, the light will turn solid green, letting you know it's ready to go.
Regularly checking the battery status in the app not only helps you stay updated but also allows you to track usage and enhance settings for longer battery life.
Additionally, you can set up notifications to alert you when the battery is running low. This proactive approach means you won't be caught off guard when it's time to charge your device.
Troubleshooting Charging Issues

If your Ring doorbell isn't charging, start by checking the USB connection to make sure it's secure.
Next, inspect the charging cable for any damage that could be affecting its performance.
If everything looks good, consider restarting the device to see if that resolves the issue.
Check USB Connection
Checking your Ring Doorbell's USB connection is essential for resolving any charging issues you might encounter. Start by ensuring everything is securely connected and functioning properly. Here are some steps to help you troubleshoot:
- Check the USB connection: Make sure the USB cable is firmly connected to both the charging port of the doorbell and the power source. Loose connections can prevent charging.
- Inspect for damage: Look for any visible damage or frays on the charging cable. Even minor issues can disrupt the connection and hinder charging.
- Test the power source: Verify that your power source is working by testing it with another device. This helps rule out any supply issues that might be affecting your doorbell.
- Reset the connection: If the charging lights aren't blinking as expected, try disconnecting and reconnecting the USB cable. This can sometimes reset the connection and get things back on track.
If you've checked all these aspects and the indicators still don't work, consider reaching out to customer support for further assistance.
Inspect Charging Cable
Inspecting your charging cable is essential for troubleshooting any charging issues with your Ring Doorbell. Start by ensuring that you're using a compatible micro-USB charging cable; an incompatible cable might prevent your device from charging properly.
Next, closely examine the cable for any visible damage, like fraying, kinks, or bent connectors. These issues could disrupt the charging process and affect your doorbell's performance.
Make sure both ends of the charging cable are securely connected. The cable needs to be firmly plugged into the doorbell's charging port and a functional power source.
If the doorbell doesn't show any charging indicators, it's a good idea to try a different power source or outlet. This can help you rule out problems with the initial power source.
Restart Device If Needed
Restarting your Ring Doorbell can often resolve charging issues, especially when the indicators fail to respond during the charging process. If you're experiencing problems, here's a simple process to follow:
- Remove the Doorbell: Take your Ring Doorbell off its mounting bracket carefully.
- Check the USB Cable: Verify the USB cable is securely connected to both the doorbell's charging port and the power source. A loose connection can hinder charging.
- Inspect for Damage: Look for any visible damage on the USB cable that might affect its functionality. A frayed or broken cable can prevent proper charging.
- Reattach the Doorbell: After a few seconds, reattach your doorbell to its bracket.
If the charging indicators still don't respond after following these steps, it might indicate a deeper issue. Restarting the device can also fix glitches that affect the LED indicators.
Should problems persist, consider reaching out to customer support for assistance tailored to your specific device model. Taking these steps can help guarantee your Ring Doorbell charges effectively and keeps you connected.
Importance of Regular Maintenance

Regular maintenance of your Ring doorbell greatly enhances its battery life and overall performance. By consistently monitoring the battery status through the Ring app, you can avoid unexpected outages and guarantee timely recharging. This proactive approach allows you to keep your device functioning at its best.
Cleaning the charging ports is another essential aspect of regular maintenance. Dust and debris can hinder the charging process, so keeping these ports clean guarantees good contact and efficient charging. Additionally, it's best to avoid letting the battery deplete completely before recharging. Doing so can preserve battery health and extend its lifespan, which is vital for uninterrupted service.
Temperature also plays a significant role in your doorbell's performance. Keeping the device in moderate temperatures during use and storage helps prevent damage and degradation of the battery over time. Remember that extreme heat or cold can negatively impact battery efficiency.
Incorporating these regular maintenance habits into your routine won't only prolong the life of your Ring doorbell but also enhance its overall functionality. By taking these steps, you'll enjoy a reliable and efficient home security solution.
Customer Support Resources

If you encounter charging issues with your Ring doorbell, you can access a variety of customer support resources to help troubleshoot and resolve the problem. Here are some effective options to take into account:
- Support Section: Visit Ring's thorough support section on their website, where you'll find detailed information on charging issues and troubleshooting steps.
- FAQ Section: Check out the FAQ section that addresses common concerns related to battery charging and device functionality.
- Live Chat: For personalized assistance, use the live chat feature or email support options to get answers to your specific charging-related inquiries.
- User Manuals: Download user manuals containing specific charging instructions and indicators tailored for your Ring device.
Additionally, don't forget about community forums, where you can share experiences and solutions with other users facing similar charging issues.
Safety Precautions for Charging

Charging your Ring doorbell safely requires using the original micro-USB cable and checking for any damage or debris in the charging port. Before you start charging, guarantee the device is powered off and disconnected from any power sources for added safety. Following the manufacturer's guidelines is vital to maintain your device's integrity and prevent any fire hazards during charging.
Here are some key safety precautions to keep in mind:
| Precaution | Description |
|---|---|
| Use Original Cable | Always use the supplied micro-USB cable for safety. |
| Inspect Charging Port | Check for debris or damage before connecting. |
| Power Off Device | Guarantee the doorbell is off before charging begins. |
| Secure with Correct Screws | Use the right screws when reassembling after charging. |
| Follow Manufacturer's Guidelines | Adhere to guidelines to prevent hazards. |
Enhancing Battery Longevity

To keep your Ring doorbell performing at its best, it's important to take steps that enhance battery longevity. By following these tips, you can guarantee your device remains charged and ready for peak performance:
- Charge Regularly: Don't let the battery drop below 30% before recharging. Keeping it topped up helps prevent complete depletion, which can shorten its lifespan.
- Store in Moderate Temperatures: Keep the battery in conditions between 32°F and 113°F (0°C to 45°C). Extreme temperatures can damage the battery and reduce capacity.
- Update Firmware: Regularly check for firmware updates for your Ring device. Manufacturers often release updates that improve battery management and efficiency, guaranteeing your doorbell operates smoothly.
- Clean Charging Ports: Periodically clean the charging ports and connectors. A good connection is essential for efficient charging and overall battery health.
Frequently Asked Questions
How Do I Know if My Ring Doorbell Battery Is Charging?
To check if your Ring doorbell battery is charging, look for the LED lights on the battery.
A blinking red light means it's charging, while a solid green light shows a full charge.
When connected to a power source, the blue ring will blink during charging and turn solid blue once fully charged.
You can also use the Ring app to monitor the battery level and get alerts for significant drops in charge.
Should Ring Doorbell Light up When Charging?
They say, "A watched pot never boils," but you might be wondering if your Ring Doorbell lights up while charging.
It doesn't. Instead, the battery's LED indicators show the charging status. When you plug it in, look for a blinking red light, which means it's charging.
Once fully charged, it'll change to a solid green light. Just make sure the micro-USB cable is securely connected for accurate indicators.
Does the Ring Doorbell Flash When Charging?
Yes, the Ring Doorbell does flash when it's charging.
You'll see a blinking blue light, which indicates that the device is in the charging process.
Additionally, the battery's LED lights will blink red and green.
If you don't notice any lights flashing, check your USB connection or power source, as that might signal an issue.
Once fully charged, you'll see a solid green light on the battery, indicating it's ready to use.
What Does Ring Look Like When Charging?
When your Ring doorbell is charging, you'll see specific LED indicators on the battery.
The battery will flash red and green lights, showing that it's actively charging.
As it gets closer to a full charge, you'll notice a blue light blinking, which eventually fills up as it nears completion.
Once it's fully charged, a solid green light will appear, letting you know it's ready to use.
Conclusion
In summary, keeping an eye on your Ring doorbell's charging indicators and battery status can save you a lot of hassle down the line.
If you run into any snags, don't hesitate to reach out for help or consult the manual.
Remember, a little regular maintenance goes a long way to make sure your doorbell's always ready to ring.
So, stay proactive, and you won't find yourself caught flat-footed when you need it most!