To install a Ring Doorbell without an existing doorbell, start by gathering your tools: a power drill, screwdriver, and the Ring Doorbell itself. Choose a location about 48 inches high for the best visibility. Use a Ring Plug-In Adapter or a low voltage transformer to power your device, since there's no existing wiring. Secure the mounting bracket to your wall, then attach the doorbell. Finally, set up the Ring app on your smartphone, connect it to Wi-Fi, and follow the on-screen instructions. This gives you a solid start, and there's more helpful information ahead.
Key Takeaways
- Use a Ring Plug-In Adapter to connect the Doorbell directly to a standard outlet for power without existing doorbell wiring.
- Install a low voltage transformer (24VAC) if you prefer hardwiring the Ring Doorbell for optimal performance.
- Ensure the installation height is approximately 4 feet above ground for optimal visibility.
- Follow the mounting instructions carefully, including pre-drilling holes and securing the mounting bracket with screws.

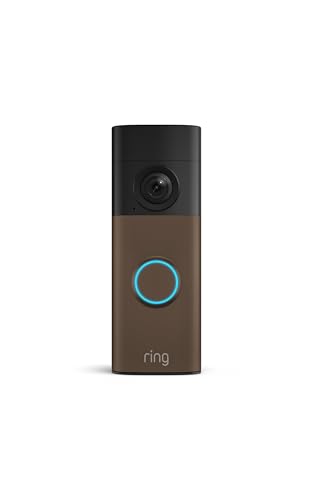
Ring Battery Doorbell (newest model) — Retinal 2K with wide-angle video, up to 6x Enhanced Zoom, Two-Way Talk, and Built-In Battery, Speckled Gray
- Video Resolution: Retinal 2K with wide-angle view
- Zoom Capability: Up to 6x Enhanced Zoom
- Two-Way Communication: Real-time audio and video
As an affiliate, we earn on qualifying purchases.
Installation Preparation
Before you start, gather your Ring Doorbell device, a screwdriver, a drill, a level tool, and your smartphone for setup. Proper installation preparation is vital for a smooth process.
First, choose a suitable location for your Ring Doorbell, ideally around 48 inches from the ground near your front door. This height guarantees ideal visibility and accessibility. Additionally, make certain that your installation area is well-lit and easily accessible for future maintenance, much like how garage door openers enhance home security with modern technology.
Next, verify that the area around your chosen spot is free from any obstructions like plants or decorations that could block the camera's view. You want clear sightlines to capture any activity at your entrance.
Before you install your Ring, check the Wi-Fi signal strength at the location. Reliable connectivity is essential for your device to function effectively, as it relies on an internet connection for notifications and video feeds. If the signal is weak, consider repositioning your router or choosing a different spot for installation.
Taking these steps in advance will streamline your setup process and help avoid interruptions during installation. With everything in place, you're ready to move on to the actual installation of your Ring Doorbell.

Ring Battery Doorbell (newest model), Matte Mocha with Indoor Cam Plus, Black
- Home Security Bundle: Battery Doorbell, Indoor Cam Plus, Matte Mocha, Black
- 2K Retinal Video: Clear, detailed footage with 6x zoom
- Color Night Vision: See in true color even in low light
As an affiliate, we earn on qualifying purchases.
Tools and Materials Needed

Before you start your Ring Doorbell installation, you'll want to gather some essential tools and materials.
It's also a good idea to verify your indoor air quality is ideal, especially if you're sensitive to dust and allergens; consider using an air purifier for improved air quality while you work air purifiers reduce allergens.
You'll need a screwdriver, a drill, and a level tool, along with the Ring Doorbell itself and a compatible power source.
Having these items ready will make your installation process smooth and efficient.
Essential Tools Required
To successfully install your Ring Doorbell, you'll need several essential tools and materials, including a screwdriver, power drill, level tool, and a smartphone. Gathering these items before you start will help streamline the installation process and guarantee you have everything you need on hand, especially if you're accustomed to understanding home cleaning service costs to budget for your new device.
Here's a quick list of the essential tools required:
- Screwdriver: A Phillips or flathead screwdriver is necessary to secure screws during installation.
- Power Drill: You'll need a power drill with appropriate bits to make holes in the wall, especially if you're mounting on tough surfaces like brick or concrete.
- Level Tool: This is essential for confirming your doorbell is mounted straight and aligned properly.
With these tools ready, you're set to tackle the installation of your Ring Doorbell. Each tool plays an important role in guaranteeing a smooth and efficient setup, allowing you to enjoy the benefits of your new doorbell in no time.
Installation Materials Checklist
Gather the necessary installation materials, including the Ring Doorbell device, mounting hardware, and tools, to guarantee a smooth setup process.
Start with the Ring Doorbell itself, along with the provided mounting bracket and screws. If you're installing on stucco, brick, or concrete, don't forget to grab wall anchors for stability.
Additionally, consider the significance of preparation and attention to detail, much like celebrating special occasions that enhance our lives.
You'll need a Philips or flathead screwdriver, a drill with appropriate bits, and a level tool to verify your installation is accurate.
Having a measuring tape handy is essential; aim for an installation height of about 4 feet for peak visibility.
A smartphone is also necessary for downloading the Ring app, allowing you to configure the device during setup.
If you don't have existing doorbell wiring, prepare a power source by getting a power adapter or a Ring Plug-In Adapter.
This will connect your Ring Doorbell to a reliable power source, guaranteeing it functions properly.

Ring Wired Doorbell Pro (newest model), Home or business security, Retinal 4K with wide-angle video, 10x Enhanced Zoom, and Low-Light Sight, Deep Silver
- 4K Retinal Video: Ultra-clear 4K resolution for detailed footage
- 10x Enhanced Zoom: Magnify distant details up to 10 times
- Two-Way Audio: See, hear, and speak to visitors remotely
As an affiliate, we earn on qualifying purchases.
Charging the Ring Doorbell

Charging your Ring Doorbell is a simple process that guarantees your device remains operational and ready to use.
To start, you'll need to remove the battery from the bottom of your doorbell. It's important to make certain that your environment is free from common distractions, just like how cats show signs of separation anxiety when their owners are away.
Once that's done, connect the battery to a power source using the provided orange USB cable. Keep an eye on the indicator light: a solid green means it's fully charged, while an absence of the orange light confirms the charging is complete.
Here are some tips to keep in mind:
- Monitor your battery's health regularly through the Ring app.
- The average battery life is about 6 months, so plan for periodic charging.
- Consider purchasing a second battery for backup to avoid downtime.
Ring Battery Doorbell (newest model) — Retinal 2K with wide-angle video, up to 6x Enhanced Zoom, Two-Way Talk, and Built-In Battery, Matte Mocha
- Video Resolution: Retinal 2K wide-angle video
- Zoom Capability: Up to 6x Enhanced Zoom
- Two-Way Communication: Real-time see, hear, speak
As an affiliate, we earn on qualifying purchases.
Power Supply Options

When it comes to powering your Ring Doorbell, you've got a few options to take into account.
You can either use a low voltage transformer that meets specific requirements or opt for the Ring Plug-In Adapter for certain models.
It's important to select a solution that guarantees efficient power usage, as improper installation can lead to operational issues and potential device failures.
Additionally, understanding the thermal energy transfer basics can help you make informed decisions about your device's performance.
It's essential to verify compatibility with your device to maintain peak performance.
Low Voltage Transformer Requirements
A low voltage transformer with a 24 VAC power supply is vital for installing your Ring Doorbell if you don't have an existing doorbell. This transformer guarantees you have the right voltage for peak performance, with a maximum capacity of 40VA. It's important to choose a transformer that's compatible with your specific Ring Doorbell model.
When considering your power source, keep these points in mind:
- You can connect directly to the low voltage transformer, eliminating the need for an in-home chime.
- Proper wiring and secure connections to the transformer are significant to prevent power issues during operation.
- If hardwiring Ring devices isn't feasible, you might explore using alternative options, such as the Ring Plug-In Adapter Gen 2.
Ring Plug-In Adapter
If you're looking for an easier way to power your Ring Doorbell without installing a low voltage transformer, the Ring Plug-In Adapter Gen 2 is a great alternative.
This adapter connects directly to a standard power outlet and provides the necessary 24VAC power supply for your Ring Doorbell to function effectively. By using the Ring Plug-In Adapter, you can avoid complex wiring, making the installation process simpler, especially if you don't have prior electrical experience.
This adapter allows you to install your Ring at your desired height and location, giving you flexibility in placement. Just plug it into an outlet, and you're ready to go!
Before you start, though, make sure to check the power specifications and verify that the outlet is functioning properly to avoid any power-related issues.
Using the Ring Plug-In Adapter not only simplifies your installation but also guarantees that your device receives consistent power. With this option, you can enjoy the convenience of your Ring Doorbell without the hassle of traditional installation methods.
Compatibility With Ring Models
Understanding the compatibility of your Ring Doorbell model with various power supply options is vital for a successful installation. When you're looking to install your Ring Video Doorbell without an existing doorbell, you'll need the right power source to guarantee everything functions smoothly.
Here are some key considerations:
- Ring Video Doorbell Pro 2: Requires a low voltage power supply of 24 VAC (40VA max) for peak operation.
- Alternative Power Source: If you don't have an existing doorbell, consider using a Ring Plug-In Adapter Gen 2 for compatibility.
- Voltage Verification: Always verify that your power supply meets Ring specifications to prevent malfunctions.
Follow these guidelines to guarantee a seamless installation experience. Make sure to consult wiring diagrams provided by Ring to secure connections to the transformer, which is vital for safety and functionality.
With the right preparations and knowledge, you can enjoy the benefits of your new Ring Doorbell.
Mounting the Doorbell

To mount your Ring Doorbell securely, start by confirming it's positioned about 1.2 meters (4 feet) above the ground for the best view of visitors.
Once you've chosen the ideal spot, grab the mounting bracket and use it as a template to mark the mounting holes. This step is essential for accurate alignment, so take your time to make sure everything lines up properly.
Next, if you're mounting on surfaces like stucco, brick, or concrete, you'll need to install wall anchors to secure the screws effectively. This will provide the stability needed to keep your doorbell in place. When drilling, verify you're using the correct drill bit for your material type to avoid any damage.
If your existing wiring is higher than 4 feet, consider using a Wedge Kit to adjust the angle of the doorbell for best viewing.
After drilling the holes and installing the anchors, double-check the stability of the mounting bracket before attaching the Doorbell. This will help confirm it's secure and won't fall.
Now you're ready to install the Doorbell and enjoy the added security!
Securing the Mounting Bracket

Once you've positioned the mounting bracket, it's essential to secure it properly.
Start by ensuring it's aligned and leveled, then use wall anchors for added stability, especially on tougher surfaces.
Proper Alignment Techniques
Securing the mounting bracket in a level position is essential for both the functionality and appearance of your Ring Doorbell. Proper alignment guarantees the doorbell operates correctly and looks great on your wall. Here are some key steps to help you achieve this:
- Use a Level Tool: Before securing the bracket, place a level on top to confirm it's horizontal. This prevents any tilting that could affect performance.
- Mark Screw Holes: With the bracket in place, use it as a template to mark the screw holes accurately. This helps avoid misalignment during installation.
- Drive Screws Flush: Use a Philips head screwdriver to secure the bracket. Drive the screws until they're flush with the bracket for a stable attachment.
Installing Wall Anchors
Installing wall anchors is vital for guaranteeing the mounting bracket of your Ring Doorbell stays securely attached, especially on surfaces like stucco, brick, or concrete.
To start, pre-drill holes into the wall at the marked locations for the mounting bracket. Make sure you use a drill bit that matches the size of the wall anchors you'll be installing. This step is important for a secure installation.
Once your holes are ready, insert the wall anchors into the drilled holes until they're flush with the wall surface. This provides a solid grip for the mounting screws.
Next, align the mounting bracket over the installed wall anchors. Using a Philips head screwdriver, drive the screws through the bracket and into the anchors, securing everything in place.
Before you tighten all the screws, double-check that the mounting bracket is level. This guarantees that your Ring Doorbell is installed at the best angle for video capture.
With the wall anchors properly installed, you can feel confident that your Ring Doorbell will stay securely attached, ready to alert you to visitors at your door.
Ensuring Bracket Stability
After guaranteeing your wall anchors are properly installed, it's important to confirm the stability of the mounting bracket before attaching your Ring Doorbell. A secure fit is vital for the functionality and longevity of your device.
Here's how to guarantee bracket stability:
- Use a level tool to confirm the mounting bracket is perfectly level. This helps achieve proper alignment for your Ring Doorbell.
- Feed any existing wires through the hole in the mounting bracket. This prevents obstructions that could interfere with installation.
- Take a Philips head screwdriver and drive the mounting screws until they're flush with the bracket. This step guarantees a tight and secure fit.
Attaching the Ring Doorbell

To attach your Ring Doorbell, hook the rear slot of the device onto the mounting bracket tab, making certain it's securely positioned.
Once it's in place, pivot the Doorbell down gently until it sits flush against the mounting bracket. This guarantees a proper fit and alignment.
Next, grab the included short security screws to finalize the attachment. Using a star-shaped screwdriver, tighten these screws carefully. Be cautious to avoid using incorrect screws, as this can damage your device.
After securing the Doorbell, double-check its stability and alignment. It should feel firmly attached to the bracket without any wobbling. This step is vital to guarantee the Doorbell functions correctly and lasts long-term.
If everything looks good, you're well on your way to completing your installation. Attaching the Ring Doorbell properly is key to getting the most out of its features.
Configuring the Ring App

Configuring your Ring app is a straightforward process that connects your device to your home network and customizes your settings. Start by downloading the Ring app from the App Store or Google Play. You'll need to create an account to begin configuring your Ring Doorbell.
Once you've installed the app, follow these steps:
- Verify your smartphone is connected to the same Wi-Fi network you want your Ring Doorbell to use.
- Use the in-app prompts to add your new device and scan the QR code on the Ring Doorbell to link it to your account.
- Customize your notification preferences to receive alerts for motion detection, doorbell presses, and other events.
Troubleshooting Common Issues

Even with the app set up correctly, you might encounter some common issues when using your Ring Doorbell that need troubleshooting.
If your doorbell doesn't power on, first check the low voltage transformer. Make sure it's supplying the correct 24VAC power supply; insufficient voltage can lead to functionality issues. Also, verify all connections to the transformer are secure and compatible with your Ring device.
If you're having trouble connecting to Wi-Fi, the signal might be too weak. Try relocating your router closer to the installation site. Alternatively, consider using a Wi-Fi extender to boost the signal strength. This can help improve connectivity and reduce disconnections.
Frequent disconnections can also stem from outdated software. Make sure that both the Ring app and your device's firmware are updated to the latest versions for peak performance.
If you still face installation issues after checking these factors, you might find helpful insights by consulting the Ring Community forums. Other users often share their experiences and solutions, which can guide you through any persistent challenges you might encounter.
Community Support Resources

Many users find the Ring Community to be an invaluable resource for troubleshooting and sharing installation tips.
If you're facing installation challenges while installing Ring without an existing doorbell, you'll benefit from the collective knowledge of fellow users. This community fosters collaboration, allowing you to share your experiences and learn from others who've tackled similar issues.
Here are some community support resources you can tap into:
- Discussion Forums: Post your specific installation challenges and receive feedback from experienced members.
- Expert Advice: Engage with Ring support representatives who offer solutions to common problems.
- Wiring Diagrams: Access shared diagrams that can clarify your installation process.
Frequently Asked Questions
Can You Have a Ring Doorbell Without an Existing Doorbell?
Yes, you can have a Ring Doorbell without an existing doorbell!
It's designed to work independently. Just use a Ring Plug-In Adapter or a compatible low voltage transformer to supply power.
Make sure the transformer meets the voltage requirements of 24VAC for ideal performance.
You won't need an in-home chime, and it's a good idea to consult a qualified electrician for safety and compliance with your local electrical codes.
How to Install Doorbell Without Existing Doorbell or Wiring?
"Where there's a will, there's a way."
To install a doorbell without existing wiring, start by locating a nearby power outlet.
Use a Ring Plug-In Adapter or low voltage transformer to supply power.
Mark your desired height, about 4 feet off the ground, and drill holes for the mounting bracket.
Connect the doorbell to the adapter or transformer, then finish by downloading the Ring app to set up your new doorbell. Once the app is downloaded, follow the in-app instructions to connect the doorbell to your Wi-Fi network. This process ensures that you can receive notifications and monitor your doorbell’s camera feed remotely. For more detailed guidance, you can follow the steps provided in the app to install Ring Doorbell 3, which walks you through the installation process step-by-step for seamless setup.
Is There a Way to Install Ring Doorbell Without Drilling?
Yes, you can install a Ring Doorbell without drilling.
Consider using a mounting bracket designed for adhesive application, which secures it without damaging your walls. Some models even offer a wireless battery option, eliminating the need for drilling entirely.
Heavy-duty adhesive strips can provide a strong hold and make removal easy if necessary.
For better camera positioning, a wedge kit can be used alongside adhesive solutions to tilt the view without any drilling involved.
Do Ring Doorbells Have to Be Hardwired?
When it comes to Ring doorbells, you don't have to be tied to hardwiring.
You can choose battery-operated models that fit your needs like a glove.
While hardwired options offer continuous power and better performance, battery versions give you flexibility without needing any existing wiring.
Conclusion
So, you've successfully installed your Ring Doorbell without an existing doorbell—how ironic that now, the only thing ringing is your phone with notifications!
With a little preparation and creativity, you've turned your front door into a high-tech portal.
You can finally greet visitors from afar… or ignore them altogether!
As you admire your handiwork, just remember: while your doorbell may not chime, it sure knows how to keep you connected, one alert at a time.