You can easily install a Ring Doorbell without existing doorbell wiring. Start by fully charging your device with the included USB cable. Gather your tools, like a Phillips screwdriver and a drill, and choose a mounting height of about 48 inches. Use the mounting bracket to mark and drill holes for screws, ensuring everything's level. Secure the bracket and hook the doorbell onto it. Finally, connect to Wi-Fi via the Ring app, configure your settings, and test it. By following these steps, you can enhance your home security, and there's still more to explore for a smooth installation! Once everything is in place, don’t forget to adjust the motion settings within the app to suit your home’s layout and minimize false alerts. Installing a Ring Doorbell stepbystep allows you to monitor your front door with ease, giving you peace of mind. With this simple process, you’ll soon benefit from real-time notifications and enhanced security for your home.
Key Takeaways
- Fully charge the Ring Doorbell before installation and consider having a second battery for continuous operation without downtime.
- Choose a mounting height of approximately 48 inches for optimal camera view and visibility of visitors.
- Use the mounting bracket to mark and drill holes, ensuring alignment for a level installation.
- Secure the device to the bracket with screws, making sure it sits flush for optimal functionality.
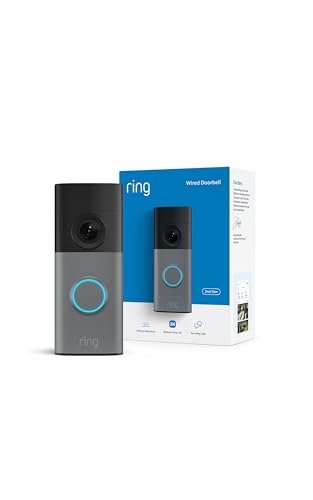
Ring Wired Doorbell (newest model), Wide-Angle Retinal 2K, up to 6x Enhanced Zoom, pair with Alexa or Ring Chime for in-home alerts, Speckled Gray
Retinal 2K with up to 6x Enhanced Zoom — From wide views to tighter focus, it’s easy to…
As an affiliate, we earn on qualifying purchases.
As an affiliate, we earn on qualifying purchases.
Installation Preparation and Tools
Before you begin installing your Ring Doorbell, make sure to fully charge it using the provided orange USB cable until the indicator light turns green. This step is essential for guaranteeing your device has enough power during installation.
Additionally, consider the benefits of using essential oils for relaxation to create a calming atmosphere as you work.
Next, gather the necessary tools you'll need: a Phillips screwdriver, drill, level tool, and tape measure. These tools will help you accurately mount the Ring video doorbell for peak performance.
Choose a mounting location near your door, ideally about 48 inches from the ground. This height provides the best camera view and guarantees effective monitoring.
While you're at it, confirm that you have the Ring app installed on your smartphone. If you don't already have an account, create one to facilitate the setup process.
Before finalizing your mounting location, check the Wi-Fi connection in the area. A strong signal is critical for your Ring Doorbell to function correctly, especially if you're replacing an existing doorbell or installing one for the first time.
With these preparation steps completed, you'll be ready to install your Ring Doorbell efficiently and effectively.

KIMILAR Anti-Theft Video Doorbell Mount Compatible with Ring/Blink Wireless Video Doorbell, Adjustable Mounting Bracket Accessories for Houses, Apartments, Businesses, Not for Blink 2nd Gen
Anti-theft Design: By a group of excellent designers racking their brains to design the anti-theft doorbell bracket, with…
As an affiliate, we earn on qualifying purchases.
As an affiliate, we earn on qualifying purchases.
Charging the Ring Doorbell

Charging your Ring Doorbell is a straightforward process that guarantees your device stays powered.
You'll want to keep an eye on the battery life, as a fully charged battery typically lasts about six months.
To maintain peak performance, consider the air quality in your environment, as air purifiers can improve indoor air quality and may reduce allergens that could affect the device's performance.
Let's go over how to charge the battery correctly and what you should consider for peak performance.
Charging Process Overview
To keep your Ring Doorbell functioning smoothly, you'll need to charge the battery periodically by removing it and connecting it to a power source with the supplied USB cable.
First, locate the battery compartment at the bottom of the device and gently take out the battery. It's important to verify that your charging area is well-ventilated, much like the safety precautions for using gas appliances during outages to avoid any hazards.
Once removed, plug the orange USB cable into the battery and connect the other end to a power source. While charging, watch for a green light on the battery; this indicates it's fully charged. If you see no orange light, that means charging is complete.
To verify continuous operation of your Ring Doorbell, consider purchasing a second battery as a backup. This way, you can swap out the battery without downtime.
After charging, reinsert the battery back into the Ring Doorbell before you install it on the wall. It's that simple!
Regularly checking and maintaining the battery will help keep your doorbell working efficiently and ready to capture every moment at your doorstep. Don't forget to keep an eye on the charging process so you're never caught off guard.
Battery Life Considerations
Maintaining ideal battery life for your Ring Doorbell is key to guaranteeing it operates effectively between charges. The battery typically lasts around six months, but this can vary based on usage and environmental factors.
To charge the battery, simply remove it from the doorbell and connect it to a power source using the provided orange USB cable. Keep an eye on the green light; it indicates a full charge.
In addition to monitoring battery health, consider the potential impact of temperature on battery performance, similar to how geothermal energy utilizes environmental factors for efficiency.
For continuous operation, it's wise to have a second battery on hand, so you can swap it out while the other charges. Regularly monitor battery health through the Ring app, which alerts you when the battery is running low. This proactive approach helps maintain your doorbell's performance and prevents unexpected downtime.
Also, be cautious about temperature. Exposing the battery to extreme heat or cold can negatively impact its performance and lifespan.

Ring Battery Doorbell (newest model) — Retinal 2K with wide-angle video, up to 6x Enhanced Zoom, Two-Way Talk, and Built-In Battery, Speckled Gray
Capture it all with Retinal 2K video — From wide views to tighter focus, it’s easy to see…
As an affiliate, we earn on qualifying purchases.
As an affiliate, we earn on qualifying purchases.
Mounting the Doorbell

When it comes to mounting your Ring Doorbell, getting the height just right is essential for capturing clear images.
Consider the location and surroundings, such as making sure it's not obstructed by plants or furniture, for maximum visibility.
You'll want to mark and drill holes accurately using the mounting bracket as a guide.
For more tips on creating an inviting entryway, check out transform entryways with rustic charm.
Once everything's in place, securing the device properly will guarantee it stays put and functions effectively.
Optimal Mounting Height
Mounting your Ring Doorbell at an ideal height of about 1.2 meters (4 feet) guarantees a clear view of visitors and enhances video recording quality. This optimal mounting height guarantees your Ring Video Doorbell captures a better field of view, which is essential for identifying guests accurately.
When considering your installation, you might also think about other home security options, such as modern garage door openers, that can enhance your overall safety features. If the existing wiring is higher than 1.2 meters, you can use a Wedge Kit to adjust the angle and maintain that recommended height.
It's crucial to check the area around your doorbell for obstructions. Make sure there are no plants, decorations, or other objects that could block the camera's line of sight. An unobstructed camera view is important for getting the most out of your video quality.
During installation, always use a level tool to confirm that the doorbell is mounted straight. A properly aligned doorbell not only looks better but also guarantees that video footage is clear and free of distortion.
Marking and Drilling Holes
After confirming your Ring Doorbell is at the perfect height, it's time to mark and drill holes for the mounting bracket. Start by using the included mounting bracket as a template to mark the positions for the screws. Make certain to hold it steady at about 1.2 meters (or 48 inches) above the ground for ideal alignment.
Once you've marked your holes, it's time for drilling. If you're installing on brick, concrete, or stucco, drill holes at the marked positions and insert plastic anchors to secure the mounting bracket effectively. This guarantees that the bracket stays in place despite any weather conditions.
For wooden or vinyl surfaces, you can skip the anchors—just use the provided screws directly into the material.
After drilling, double-check that the holes are level and then securely attach the mounting bracket to the wall. This step is vital, as a solid installation lays the groundwork for a stable and functional Ring Doorbell.
Once you're satisfied that everything is secure, you'll be ready to move on to the next steps of the installation process.
Securing the Device
To secure your Ring Doorbell, first hook the rear slot onto the mounting bracket tab. Next, pivot the device down to guarantee it sits flush on the bracket.
Now, follow these steps to complete the installation:
- Use the mounting bracket as a template to mark screw holes on the wall.
- Drill holes at the marked positions. If you're mounting on brick, stucco, or concrete, insert wall anchors for a secure fit.
- Fasten the mounting bracket to the wall using a Philips head screwdriver, driving screws until they're flush with the bracket.
- Tighten the Doorbell to the mounting bracket using the included short security screws and a star-shaped screwdriver. This prevents unauthorized removal of the device.

Video Doorbell Key Removal Tool Compatible with Ring Battery Doorbell 2024 Release, Wired Doorbell Pro (N ewest Model), Wired Doorbell Plus (N ewest Model) 2PACK
COMPATIBILITY: compatible with Ring Battery Doorbell 2024 Release,Compatible with Wired Doorbell 2nd Gen (Newest Model), Wired Doorbell Plus…
As an affiliate, we earn on qualifying purchases.
As an affiliate, we earn on qualifying purchases.
Finalizing the Installation

Once you've securely attached the doorbell, make certain the faceplate is fitted properly by inserting the top at an angle and pressing down until it clicks. This step is essential for finalizing the installation and making certain everything looks neat.
Next, tighten the security screw located at the bottom of the doorbell with the included star-shaped screwdriver. This prevents theft and adds stability to your setup.
Now, check that all wires and wire nuts are neatly tucked into the wall. A clean appearance not only enhances the look of your installation but also helps protect the wiring.
It's time to perform a functionality test. Press the doorbell to confirm that it rings and activates the camera features as expected.
After confirming the functionality, open the Ring app for any final setup instructions. Here, you can adjust settings like motion detection and notifications to suit your preferences. This guarantees that your doorbell operates according to your needs.
With these steps completed, your Ring Doorbell is ready to go, providing security and convenience right at your doorstep.
Configuring Device Settings

Start by opening the Ring app and selecting "Set up a Device" to configure your Ring Doorbell settings. Make sure your device is fully charged before you proceed to connect it to Wi-Fi. Follow the in-app instructions, and if the QR code isn't available, simply enter the device's serial number.
Once you've scanned the QR code or entered the serial number, you'll need to:
- Name your device: Give your Ring Doorbell a unique name that helps you identify it easily.
- Input your address: This is essential for setting up location-based features that enhance your experience.
- Adjust motion sensitivity: Set your preferences to control how sensitive the motion detection should be.
- Customize notification preferences: Decide how and when you want to receive alerts, ensuring you're always informed.
After completing these steps in the Ring app, your device settings will be configured, and your Ring Doorbell will be ready to monitor your entrance. Enjoy the peace of mind that comes with enhanced security!
Troubleshooting Common Issues

Even with the right configurations, you might encounter some common issues with your Ring Doorbell that need troubleshooting. Here's a handy table to help you quickly identify and resolve these problems:
| Issue | Possible Causes | Solutions |
|---|---|---|
| Wi-Fi Connection | Out of range | Move closer to the router or use a Wi-Fi extender. |
| Video Quality | Obstructions or dirty lens | Clear obstructions and clean the camera lens. |
| Unresponsive Device | Power issues or app settings | Check battery status; reset the device if needed. |
If your Ring Doorbell doesn't ring or send alerts, double-check the Ring app settings to confirm notifications are enabled. For power issues, make sure your battery is charged, or consider hardwiring the doorbell for a consistent power source. If your device remains unresponsive, perform a reset by holding the setup button for 15 seconds. This often helps restore functionality and reconnects it to the Ring app smoothly. By addressing these common issues, you'll enhance your experience with your Ring Doorbell.
Frequently Asked Questions
Can I Install a Ring Doorbell Without an Existing Doorbell?
Yes, you can install a Ring Doorbell without an existing doorbell. You can choose a battery-operated model or hardwire it using a compatible power adapter.
If you opt for battery power, just make certain the battery's fully charged before you start.
For hardwiring, use the Ring Plug-In Adapter for continuous power. Remember to install it at about 48 inches from the ground for the best viewing angle.
Gather your tools to guarantee a smooth installation!
Is There a Way to Install Ring Doorbell Without Drilling?
Yes, you can install your Ring Doorbell without drilling. You can use strong adhesive mounts or brackets specifically designed for this purpose.
Double-sided tape or removable adhesive strips can also work well if they're made for outdoor use. Just verify the adhesive can withstand the weight of the doorbell and outdoor conditions.
While this method is convenient, check the installation regularly for stability to keep your doorbell secure.
Does the Ring Doorbell Have to Be Hardwired?
No, the Ring Doorbell doesn't have to be hardwired.
You can use it as a battery-powered device, which offers flexibility in installation locations.
If you prefer continuous power, you can opt for a Plug-In Adapter instead. This way, you won't need existing doorbell wiring.
Just remember, if you choose the battery option, you'll need to recharge or replace the battery roughly every six months, depending on your usage.
Can I Bypass My Doorbell With Ring?
Imagine you've just moved into a new home, and you want to enhance your security without traditional wiring.
Yes, you can bypass your doorbell with a Ring! By simply using a battery-powered model or a Plug-In Adapter, you'll have your device up and running.
Just install it at about 48 inches high for the best view. This way, you won't need to deal with any existing doorbell wiring.
Conclusion
Now that you've installed your Ring Doorbell without an existing doorbell, you're all set to enjoy the convenience of modern technology.
Just like a knight in shining armor ready to defend the castle, your new doorbell will keep watch over your home, providing peace of mind.
Be sure to configure your settings and check for any issues.
You've turned your entryway into a smart fortress—welcome to the future of home security!