To install and use a Ring Doorbell, start by charging the battery for 4-6 hours. Choose a location near your front door and attach the mounting bracket with screws. Connect either to your existing doorbell wires or use the battery option, then secure the doorbell. Download the Ring app, create an account, and connect the doorbell to your Wi-Fi. Customize your settings and notifications in-app for ideal use. You'll receive alerts on motion and can communicate through the two-way audio feature. For more tips on maintaining your device and troubleshooting, keep exploring your options.
Key Takeaways
- Charge the battery for 4-6 hours or verify existing wiring provides 10-24 volts AC before starting installation.
- Use the provided mounting bracket to mark drill holes and secure the doorbell to the wall.
- Download the Ring app, create an account, and connect the doorbell to your Wi-Fi network.
- Access live video feeds and notifications through the app, utilizing two-way audio for visitor communication.

Ring Wired Doorbell Pro (newest model), Home or business security, Retinal 4K with wide-angle video, 10x Enhanced Zoom, and Low-Light Sight, Deep Silver
Capture it all with Retinal 4K video — See your home or business in the ultimate clarity with…
As an affiliate, we earn on qualifying purchases.
As an affiliate, we earn on qualifying purchases.
Benefits of a Video Doorbell
A video doorbell boosts your home security by letting you see and communicate with visitors in real-time from your smartphone. With real-time video feeds, you can keep an eye on your front door whether you're at home or away. This feature is essential for proactive monitoring, allowing you to respond quickly to deliveries or suspicious activity. Motion-activated notifications alert you when someone approaches, guaranteeing you never miss a visitor again.
Additionally, the experience can be enhanced by creating a cottagecore home office atmosphere, which emphasizes the importance of a serene and cozy environment that promotes focus and well-being.
The two-way audio communication enables you to interact with delivery personnel or even deter trespassers by talking to them directly. Just knowing that a video doorbell is installed can act as a strong deterrent to potential intruders, making your home a less appealing target.
You'll also appreciate the flexibility of installation options, as many video doorbells come with both wired and wireless installation methods. This versatility guarantees you can choose a setup that best suits your home.

GE Wireless Doorbell Kit, 2 Push Buttons Door Bells for Homes, 8 Melodies Door Chime with 4 Volume Levels, Battery Doorbell Chime, Room Doorbell with 150 Ft Range, White, 19297
All-in-One Kit – One battery-operated receiver featuring up to a 150ft. range, two push buttons with CR2032 batteries…
As an affiliate, we earn on qualifying purchases.
As an affiliate, we earn on qualifying purchases.
Installation Requirements

Before you begin the installation of your Ring doorbell, make certain you've gathered all the necessary hardware and tools for a smooth setup. Check that your Ring doorbell package includes items like screws, a mounting bracket, and a charging cable. Additionally, make sure your installation area is free from any strong smells that could deter you, such as 10 smells cats hate which might affect nearby pets.
Next, confirm the installation requirements for your doorbell type. If you're using a wired model, verify that your existing doorbell wires provide the right voltage—between 10-24 volts AC. For battery-operated models, charge the battery for 4-6 hours before installation to guarantee peak performance.
When you're ready to install, gather the tools for installation, including a screwdriver, a drill (if you're mounting on brick or stucco), and a level tool for proper alignment. Ensure you have a strong Wi-Fi connection at the installation location, ideally close to your router. This will help facilitate the setup process through the Ring app once your doorbell is installed.

Screwdriver Replacements and Security Mounting Screws Compatible with Google Nest Doorbell (Wired,3rd Gen)/(Wired, 2nd Gen),L Shape Screwdriver Doorbell Key Tool Easy to Intall, 4 Pack
【Compatible Model】:This screwdriver replacement is designed for Google Nest Doorbell (Wired,3rd Gen),Google Nest (Wired) Doorbell 2nd Gen,these screws…
As an affiliate, we earn on qualifying purchases.
As an affiliate, we earn on qualifying purchases.
Setting Up the Ring App

To get your Ring doorbell up and running, start by downloading the free Ring app from the App Store or Google Play. Once you've installed the app, open it and create an account using your email address. Follow the prompts to log in, which will grant you access to essential device management features.
Safeguarding your privacy while using smart devices is fundamental, as ethical considerations are critical in today's technological landscape.
Next, make sure your smartphone is connected to the same Wi-Fi network where you'll install your Ring doorbell. This connection is essential for ideal setup and functionality. In the app, scan the QR code displayed on your Ring doorbell to easily connect the device to your account.
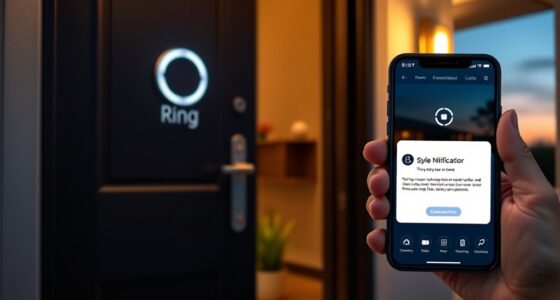
After connecting, take a moment to customize your notification preferences within the app. You can set up alerts for motion detection and doorbell presses, guaranteeing you receive timely updates directly to your mobile device.
With these steps completed, your Ring app is fully set up, allowing you to manage your doorbell and stay informed about activity at your front door. Enjoy the convenience and security that your Ring doorbell provides.

Blink Outdoor 2K+ (newest model) — Wireless smart security camera, 2K video resolution, enhanced audio, two-year battery. Sync Module Core included — 5 camera system (Black)
Battery-powered protection, now in 2K — Blink Outdoor 2K+ is our next-generation wireless smart security camera that delivers…
As an affiliate, we earn on qualifying purchases.
As an affiliate, we earn on qualifying purchases.
Subscription Options

With your Ring app set up, it's time to explore the subscription options that can enhance your doorbell's features and security capabilities. The Ring Protect Plan offers video recording, storage, and sharing, greatly boosting your home security. Subscription plans start at just $4 per month or $40 per year, giving you flexible payment options.
You can also enjoy a free 30-day trial of the Protect Plan, allowing you to test these premium features before committing. Even without a subscription, you can access basic features like real-time notifications and live video streaming.
To help you understand the differences, here's a quick comparison of the features:
| Feature | Basic Plan | Ring Protect Plan |
|---|---|---|
| Real-Time Notifications | Yes | Yes |
| Live Video | Yes | Yes |
| Video Recording | No | Yes |
| Manage Subscription | Yes | Yes |
You can easily manage, upgrade, or cancel your subscription directly through the Ring app, ensuring you have control over your security services. Choose the plan that best meets your needs!
Recommended Accessories

Enhancing your Ring doorbell experience is easy with the right accessories that improve functionality and aesthetics. A Chime is vital for receiving doorbell notifications inside your home, guaranteeing you never miss an alert, even if your phone is out of reach.
Additionally, consider the importance of a well-maintained environment for your devices, similar to how well-draining soil is essential for plant health, as it guarantees your doorbell operates smoothly without interruptions.
To optimize the view from your Video Doorbell, consider a Wedge Kit that angles the doorbell, accommodating uneven door frames or capturing a wider perspective.
For those who appreciate customization, Faceplate Covers come in various finishes like Brushed Bronze, Brushed Graphite, and Brushed Silver, allowing your doorbell to blend seamlessly with your home's decor.
If you're tired of frequent battery charging, a Solar Charger can harness sunlight to keep your device powered longer, making it a practical addition for sunlit areas.
Tools Needed for Installation

Installing your Ring doorbell requires specific tools to confirm a smooth and efficient process. Here's a list of essential tools you'll need for the installation:
| Essential Tools | Purpose |
|---|---|
| Screwdriver | To install screws and secure the doorbell. |
| Screws | Necessary for mounting the doorbell. |
| Masonry Drill Bit | Used to drill holes in brick or stucco surfaces. |
| Level Tool | Confirms the mounting bracket is aligned properly. |
| Existing Wiring | Required for power connection. |
| Power at the Breaker | Make sure to turn off to confirm safety. |
Additionally, you might consider using optional tools like pliers to help with wire connections. First, you'll want to confirm power at the breaker is off for safety. If you're replacing an old doorbell, a box cutter or flathead screwdriver can help remove it and expose the existing wiring. Once you're ready, drill the holes for the screws using the masonry drill bit if needed. Having these tools on hand will streamline the installation process and help you get your Ring doorbell up and running efficiently.
Preparing for Installation

Before you start installing your Ring doorbell, you need to gather all the necessary tools and make certain everything's in order. This may include a screwdriver, drill, and level for accurate installation.
Don't forget to charge the battery for four to six hours to guarantee it functions properly. With your checklist and a fully charged battery, you'll be ready to move forward confidently.
For additional security options, consider exploring garage door openers that enhance home safety.
Required Tools Checklist
Gather the essential tools to guarantee a smooth installation of your Ring doorbell. Having the necessary tools on hand will make the process quicker and more efficient.
Before you start, check your required tools checklist to confirm you're fully prepared. Additionally, verifying that the air quality in your home is ideal can enhance your overall installation experience, as it helps maintain focus and comfort. Consider using air purifiers to reduce allergens and improve indoor air quality.
Here's what you'll need:
- Screwdriver: For securing the mounting bracket and attaching your Ring doorbell.
- Pliers: Helpful for making secure wire connections when dealing with existing wiring.
- Drill and masonry bit: If you're mounting on brick or stucco, this is essential for a solid installation.
Also, don't forget your charging cable to power the device initially.
Before you begin installing a Ring, confirm all required hardware is included in the kit, so you won't face delays. This preparation will help you avoid unnecessary trips to the store.
Once you have everything ready, you can follow the install your video in the Ring app for a step-by-step guide. With your tools laid out and the right mindset, you'll be well on your way to enjoying your new Ring doorbell.
Charging the Battery
To prepare for your Ring doorbell installation, start by charging the removable battery pack with the included charging cable. Once fully charged, insert the battery pack back into the doorbell unit. Next, mount the doorbell securely on the wall using the provided hardware. After that, I’ll need to hook up my Ring doorbell to my home Wi-Fi using the Ring app to complete the setup and ensure the device is connected and working properly.
Locate the battery pack, then connect it to a power source. A full charge typically takes about 4 to 6 hours, so plan accordingly to guarantee peak performance. You can confirm the battery is fully charged by checking the green light indicator on the pack.
It's essential to charge the battery before you install the doorbell, especially if you're using a model that isn't hardwired. This way, you assure functionality right after setup.
Once your doorbell is installed, regularly check the battery status within the Ring app to monitor the charge level. This will help you avoid any performance issues down the line.
For added convenience, consider keeping a spare battery charged. This guarantees uninterrupted operation during battery swaps, allowing you to maintain security without any downtime.
Mounting the Doorbell

Start by using the provided mounting bracket as a template to accurately mark screw hole locations on your wall. This guarantees your installation area is correct and the doorbell will be level.
Follow these steps to mount your Ring Doorbell securely:
- Mark the Location: Hold the bracket against the wall and use a pencil to mark where the screws will go. Make sure it's level before proceeding.
- Connect Existing Doorbell Wires: If you're reusing existing doorbell wires, carefully connect them to the terminals on the Video Doorbell. Ensure they don't touch each other to avoid any short circuits.
- Align and Secure: Align the Ring Video Doorbell with the mounted bracket, then press down firmly until it clicks into place. This guarantees a secure fit.
After mounting, restore power at the breaker to test the doorbell's functionality. If needed, adjust the connections to guarantee everything is working properly.
Finalizing the Setup

Once you've mounted your Ring doorbell, restore power at the circuit breaker and wait for the spinning white light to signal it's on.
Now, open the Ring app to configure your settings and connect to Wi-Fi.
Power Restoration Steps
After completing the installation of your Ring doorbell, restore power by turning the breaker back on. Head back to the breaker box and flip the switch you turned off earlier. Wait a few moments to see if the doorbell powers on, which will be indicated by a light flashing or a chime sound.
To guarantee everything is set up correctly, follow these steps:
- Test the Doorbell: Press the button on your Ring doorbell. It should activate the chime or send a notification to the app.
- Check Connections: If the chime doesn't work, double-check your wire connections. Make sure they're secure and not touching each other. Verify that your chime type is compatible.
- Secure the Faceplate: Once everything's operational, use the provided security screws to fasten the doorbell's faceplate. This step is essential for tampering prevention.
App Configuration Settings
With your Ring doorbell powered on and tested, it's time to configure the app to complete the setup and enhance your device's functionality. Start by opening the Ring app and connecting your doorbell to your Wi-Fi network. A strong signal is key for peak performance.
Next, customize your notification preferences. Tailor alerts for motion detection and doorbell presses to fit your lifestyle. If you want family members or trusted friends to have access, set up shared access so they can view live video and receive notifications. This feature enhances your security while keeping loved ones informed.
Regularly check the app for updates and new features to guarantee your Ring doorbell benefits from the latest security enhancements. Don't forget to utilize the live view feature, which allows you to monitor your front door in real-time, giving you peace of mind when you're away.
Here's a quick summary of key settings to adjust:
| Setting | Description |
|---|---|
| Wi-Fi Network | Connect to a strong, stable network |
| Notifications | Customize alerts for motion and doorbell |
| Shared Access | Allow others to view live video |
| Updates | Regularly check for app and feature updates |
| Live View | Monitor your door in real-time |
Testing Doorbell Functionality
To finalize your setup, it's essential to test the functionality of your Ring doorbell and confirm everything is working smoothly. Here's how to verify your doorbell is ready to go:
- Test the Chime: Press the doorbell button and listen for the chime inside your home. This confirms a successful connection to your existing doorbell chime system.
- Check Video Quality: Open the Ring app and access the live video feed. Make sure the camera is working properly and that the video quality meets your expectations.
- Verify Motion Detection: Walk in front of the doorbell to test its motion detection feature. You should receive notifications on your smartphone via the Ring app.
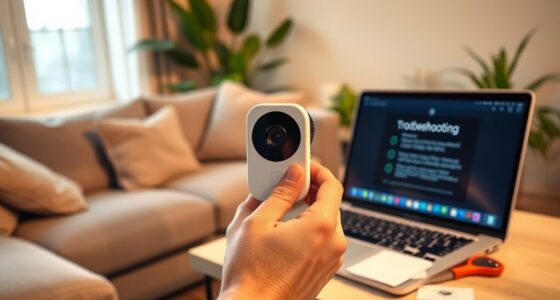
If you encounter any issues during this testing phase, check the wire connections and confirm your doorbell is securely mounted. A stable setup is key to peak functionality.
Once everything works as it should, you'll be ready to enjoy the convenience and security your Ring doorbell offers!
Maintenance Tips

Regular maintenance is key to keeping your Ring doorbell functioning at its best and guaranteeing reliable performance. Here are some essential maintenance tips to follow:
| Task | Frequency | Purpose |
|---|---|---|
| Check battery status | Monthly | Confirm battery is fully charged |
| Clean the camera lens | Every few months | Maintain clear video quality |
| Update the Ring app | As updates are available | Access latest security enhancements |
| Inspect the doorbell | Quarterly | Confirm continued functionality |
Make it a habit to regularly check the battery status. Ideally, start charging the battery when it drops below 20% to maintain peak performance. Additionally, don't forget to clean the camera lens—especially after bad weather or dust accumulation—to keep your video quality sharp.
Updating the Ring app and device firmware guarantees you benefit from the latest features and security enhancements. Finally, inspect your doorbell and its accessories for any signs of wear and tear; replace damaged components promptly. These simple tasks will help you enjoy a fully functional and secure doorbell experience.
Frequently Asked Questions
Is It Easy to Install Ring Doorbell Yourself?
Yes, it's easy to install a Ring Doorbell yourself. You won't need many tools, just some screws and a screwdriver.
The installation kit comes with a manual and often a quick video to guide you. If you're using a wireless model, you'll just need to charge the battery first.
Mark the screw locations, secure the device, and follow the app's instructions to connect it to Wi-Fi. You can do it all on your own!
Does Ring Doorbell Require Wiring?
No, a Ring Doorbell doesn't always require wiring.
You can choose between wired and wireless models. If you go for a wired version, you'll need to connect it to your existing doorbell chime and power supply.
However, wireless models operate on rechargeable batteries, offering more flexibility.
If you prefer less maintenance, consider using a solar charger for compatible models to keep your doorbell powered without frequent charging.
How Do You Set up a Ring Doorbell for the First Time?
Setting up a Ring doorbell for the first time is like accessing a treasure chest of security.
You'll start by downloading the Ring app and creating your account.
Then, charge the doorbell's battery for about 8 hours.
Follow the app's guided setup, scanning the QR code and connecting to Wi-Fi.
Use the live feed to find the perfect spot, mount it securely, restore power, and test its functionality.
Now you're ready to guard your doorstep!
Do You Need an Electrician to Install a Ring Doorbell?
You don't necessarily need an electrician to install a Ring doorbell. If you're replacing an existing wired doorbell and your system's compatible (10-24 volts AC), you can handle it yourself.
For wireless models, just charge it up and you're good to go.
However, if you're uncomfortable with electrical work or local laws require permits, hiring an electrician is smart for safety and compliance.
Always prioritize safety by turning off the power first.
Conclusion
To sum up, installing your Ring doorbell is a straightforward step towards smarter security.
With its seamless setup and stunning features, you'll soon savor the safety and satisfaction it brings.
Remember to maintain your device for peak performance, ensuring it captures every visitor with clarity.
So, gear up for a gated guardian that's great for your home!
Enjoy enhanced peace of mind as you embrace this exciting entryway enhancement.
Your doorbell journey starts now!