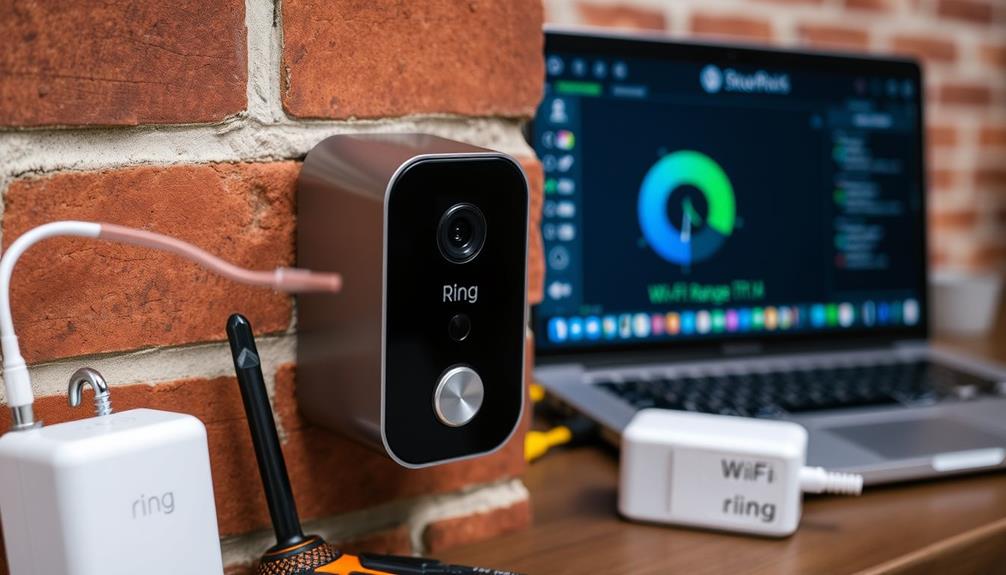
To install your Ring Doorbell to brick, you have a few options. For a no-drill approach, use strong double-sided tape, ensuring the surface is clean and dry for the best adhesion. If you prefer a more secure method, consider drilling into the mortar. Use a masonry drill bit and plastic anchor bolts for stability. Whichever method you choose, make sure to maintain the aesthetic of the brickwork. Take your time with the setup, and soon you'll have that doorbell securely in place. Stick around to discover tips on concealing wires and community support for any challenges. Once you’ve decided on your preferred method to **install the Ring Doorbell on brick**, follow the manufacturer’s guidelines to avoid damaging the unit. If you’re running wires, use cable clips or wire covers to keep the installation tidy without disrupting the appearance of your home. For further assistance, check the community forum or reach out to customer support if you encounter any issues during the process.
Key Takeaways
- Choose between installation methods: no-drill mount, DIY tape method, or drilling into mortar based on your needs and surface compatibility.
- For no-drill mounts, use strong double-sided tape, ensuring the brick surface is clean and dry for optimal adhesion.
- The DIY tape method works well on textured surfaces; consider using industrial-strength tape for better durability.
- Drilling into mortar provides a secure installation; use masonry drill bits and check mortar joint thickness for support.
Ring Doorbell brick mount kit
As an affiliate, we earn on qualifying purchases.
As an affiliate, we earn on qualifying purchases.
Overview of Installation Methods
When it comes to installing a Ring Doorbell on brick, you have three effective methods to choose from, each offering distinct advantages based on your needs.
Before you begin, it's also helpful to evaluate the key factors in choosing a home cleaning service to guarantee your home remains tidy during the installation process.
The first method involves using a no-drill mount, which utilizes strong double-sided tape. This option is easy to apply, but keep in mind that it works best on smooth surfaces; its effectiveness may drop on textured surfaces like brick.
Another option is the DIY tape method, where you can customize the adhesive strength. While this can be more cost-effective, it mightn't be as durable as other methods and could potentially damage your walls upon removal.
The third method, drilling into mortar, is known for its secure installation. This approach minimizes damage to the brick itself, but requires specific masonry drill bits and careful installation to avoid any repair issues later on.
Each installation method has its own advantages, so evaluate your specific requirements for aesthetics, durability, and surface compatibility before making a decision.
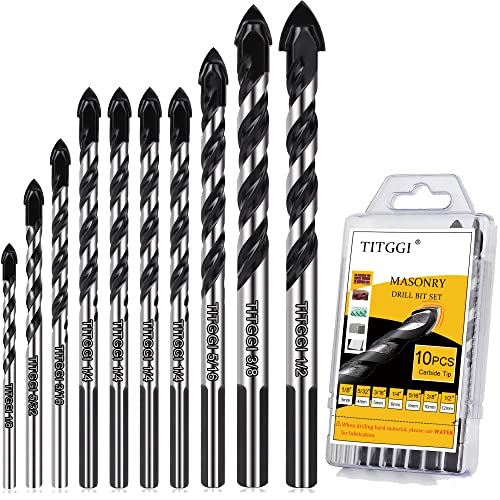
10-PCS Masonry Drill Bit Set & Concrete Drill Bit Set, Professional Drill Bit Set for Glass/Brick/Plastic/Cement/Wood/Tile/Etc, Industrial Strength Carbide Drill Bit Tip, 1/8"-1/2" by TITGGI
HIGH QUALITY DRILL BIT SET; TITGGI Masonry drill bit set, industrial strength carbide drill bit tip, excellent abrasion…
As an affiliate, we earn on qualifying purchases.
As an affiliate, we earn on qualifying purchases.
The No-drill Mount Option

If you're looking for an easy installation, the no-drill mount option is a great choice.
It's crucial to verify that the area is clean before applying the adhesive, as this will improve the bond strength.
Additionally, take into account the environmental factors such as humidity and temperature, as these can affect adhesion.
However, it's important to take into account the type of surface you're attaching it to, as adhesion can vary considerably.
You'll want to verify you have a smooth, flat area for the best results.
Air purifiers reduce allergens and improve indoor air quality, which can contribute to a healthier home environment.
Installation Ease and Convenience
The no-drill mount option for your Ring Doorbell makes installation a breeze, allowing you to securely attach it without damaging your brick surface. This mount utilizes strong double-sided tape, guaranteeing a convenient installation process that saves you time and effort. You won't need to worry about drilling holes or causing any damage to your wall, which is particularly beneficial for maintaining content credibility and compliance with home aesthetics.
Designed with waterproof materials, the no-drill mount is perfect for uncovered porch installations, standing up to various weather conditions without compromising durability. While this mount offers significant ease of use, keep in mind that some users have experienced varying effectiveness on textured surfaces like brick. For the best results, it's ideal to use the no-drill mount on smoother surfaces, where it adheres more reliably.
Although the no-drill mount is a higher-cost option sold separately from the Ring Doorbell kit, its benefits regarding installation ease and convenience often outweigh the expense. You'll appreciate the simple, non-invasive method it provides—allowing you to install your Ring Doorbell quickly and efficiently while maintaining the integrity of your brick exterior.
Additionally, strategies for increasing topical authority can help guarantee that your installation guides are both informative and trustworthy.
Surface Compatibility Considerations
Understanding surface compatibility is key to maximizing the effectiveness of the no-drill mount for your Ring Doorbell. This mounting option employs a fixing plate with strong double-sided tape, making it highly effective on smooth surfaces like painted wood or vinyl siding.
However, when it comes to brick, you might encounter challenges. The no-drill mount generally struggles on uneven or textured surfaces, limiting its adhesive performance. For added security, consider looking into garage door openers that enhance home security with modern technology.
For best results, verify your installation area is smooth and free from any imperfections. While this no-drill option offers easy removal and helps preserve the integrity of your home's exterior, it doesn't provide the same durability as traditional installations that involve drilling into mortar.
Keep in mind that while the no-drill mount might be a convenient choice, it's often more expensive than DIY alternatives and may not offer the same level of security. If your brick surface isn't compatible, consider alternative mounting methods to verify your Ring Doorbell remains securely in place and functions effectively for years to come.
Adhesion Performance Variability
Many users experience varying levels of adhesion with the no-drill mount for their Ring Doorbell, depending largely on the surface it's applied to.
This mount employs strong double-sided tape, which works best on smooth surfaces like painted wood or vinyl. When attempting installation on textured surfaces like brick, you may encounter performance issues, as the adhesion can struggle to maintain a secure hold over time.
Understanding the properties of adhesive materials is vital, as certain conditions might impact their effectiveness in outdoor settings, particularly in relation to essential oils and their applications.
While the no-drill mount is designed for ease of installation and removal, it's significant to highlight that its waterproof design allows you to install it in uncovered porch areas without worrying about weather-related damage.
However, mixed results from users indicate that you might need to evaluate your specific surface conditions before committing to this option.
Though the no-drill mount tends to be pricier than DIY alternatives, the convenience of avoiding permanent fixtures can be worth it.
Just keep in mind that if you're working with textured surfaces, you may want to take into account other mounting options to guarantee better adhesion and performance for your Ring Doorbell.

Gorilla Heavy Duty Double Sided Mounting Tape, Black Tape, 1" x 120" (Pack of 1) – Weatherproof for Indoor or Outdoor
Heavy duty: This double sided tape is designed to mount up to 60 pounds instantly
As an affiliate, we earn on qualifying purchases.
As an affiliate, we earn on qualifying purchases.
DIY Tape Mounting Technique

When it comes to the DIY tape mounting technique, you'll want to compare different tape types to find the best fit for your needs, especially considering options with strong adhesive properties for outdoor use.
Preparing the brick surface properly is vital for guaranteeing strong adhesion, so let's go over those important steps. For best results, make sure the area is clean and dry, as this will greatly enhance the effectiveness of the tape, similar to how well-draining soil supports plant health.
Tape Types Comparison
Choosing the right tape for your DIY Ring Doorbell installation can greatly impact the effectiveness and durability of your mount. You have several tape options to evaluate, primarily focusing on double-sided tape.
If your installation needs require a strong hold, industrial-strength double-sided tape can provide the necessary adhesive strength, especially on uneven surfaces. However, if you're looking for something that's easy to remove later, standard double-sided tape is a budget-friendly choice that's readily available at local hardware stores.
Keep in mind that using multiple layers of tape can enhance adhesion, particularly on textured brick. This adaptability is critical for ensuring a secure fit. However, be cautious; stronger adhesives might lead to wall damage upon removal, potentially leaving residue or pulling paint off your bricks.
The effectiveness of your chosen tape will also depend on the quality of the product and the surface condition. Generally, smoother brick surfaces yield better results than rough ones.
Ultimately, selecting the right type of tape not only helps in securing your Ring Doorbell but also minimizes potential issues with wall integrity later on.
Surface Preparation Tips
Start by thoroughly cleaning and drying the brick surface to guarantee ideal adhesion for your double-sided tape. Dust and moisture can greatly reduce the adhesive strength, making it essential to prep the area properly. Use a brush or cloth to remove any debris and confirm the brick is completely dry before proceeding.
For better adhesion, consider using industrial-strength double-sided tape, as it's designed to hold heavier objects securely, especially on uneven surfaces like brick. If your brick surface is textured, applying multiple layers of tape can help create a smoother application area, enhancing the bond between the tape and the brick.
Before you fully mount the Ring Doorbell, test the adhesion by applying a small piece of tape to a less visible area of the brick. This will help you confirm compatibility. Additionally, choose tape with good removal properties to avoid damaging the brick when you decide to take it down.
With these surface preparation tips, you'll guarantee a strong and reliable mounting for your Ring Doorbell!
Installation Steps Overview
To successfully install your Ring Doorbell using the DIY tape mounting technique, gather your materials and make sure you have a clean, prepared brick surface ready for the adhesive.
Start by choosing a strong double-sided tape, like industrial-grade, to guarantee it adheres well to the brick. Before applying the tape, take the time to clean the brick surface thoroughly, removing any dust or debris that could interfere with the mounting process.
Next, cut the tape to the desired length and stick it evenly on the back of your Ring Doorbell. Make certain you cover the entire area for maximum hold.
Once you've applied the tape, press the Ring Doorbell firmly against the brick for at least 30 seconds. This pressure helps the adhesive bond properly.
After pressing, allow the tape to cure for a minimum of 24 hours before testing the doorbell's functionality. This waiting period is essential for guaranteeing a secure installation.
wire covers for doorbell wiring
As an affiliate, we earn on qualifying purchases.
As an affiliate, we earn on qualifying purchases.
Drilling Into Mortar

Drilling into mortar is often easier than drilling into brick, making it a smart choice for securely mounting your Ring Doorbell.
When you decide to drill into mortar, it's vital to use appropriate masonry drill bits. These bits are specifically designed for the task, allowing you to create holes without damaging the surrounding brick.
Before you start, check that the mortar joint is thick enough to support the screws and plastic anchor bolts you'll be using. A thicker joint guarantees a more secure installation, which is essential for supporting the weight of your doorbell.
Remember to drill straight and apply even pressure; excessive force can lead to cracks in the mortar or surrounding brick.
If you do encounter cracks in the mortar, don't worry. Any holes created during the installation can be easily filled with mortar repair compound afterward, helping to maintain the aesthetic of your brickwork.
Choosing the Best Method

After considering the option of drilling into mortar, it's important to weigh the various mounting methods for your Ring Doorbell to find the best fit for your home. Each method has its pros and cons, so think about what suits your needs best.
Drilling into mortar is the most secure method, providing excellent stability and minimizing damage to your brick. However, it requires proper masonry drill bits and anchors, which may complicate the installation process.
If you're looking for a no-drill solution, you might try the no-drill mount. This method preserves your home's siding and allows for easy removal, but its effectiveness heavily relies on surface texture and adhesion quality.
For a budget-friendly option, consider the DIY tape method. It allows you to customize adhesive strength and can work well on uneven surfaces, but be cautious—it might damage your wall upon removal.
Ultimately, you'll want to balance aesthetic preferences with functional durability. Always follow manufacturer guidelines for installation to guarantee security and effectiveness, regardless of the method you choose.
Common Installation Challenges

Installing a Ring Doorbell can present several challenges, especially when dealing with hard surfaces like brick or existing wiring from a previous doorbell. Here are some common installation challenges you might face:
- Drilling into brick: The hard surface can make drilling a formidable task, requiring the right tools and techniques.
- Plastic anchor bolts: You'll need these to secure your Ring properly, but they can be tricky to install without damaging the brick.
- Concealing wires: If you want a clean look, hiding wires can be difficult, especially if you're replacing an existing wireless doorbell.
- Aesthetic preferences: Avoiding visible conduits or utility boxes may limit your mounting options, leading to further complications.
Navigating these challenges requires careful planning and the right approach. Taking the time to address these common obstacles will help guarantee a smoother installation process and a more polished final look for your Ring Doorbell.
Equipment and Tools Needed

To tackle the installation of your Ring Doorbell effectively, having the right equipment and tools on hand is fundamental.
First, you'll need a masonry drill bit, typically between 3/16" to 1/4", to drill holes into the brick or mortar. This is essential for creating a secure anchor point for your doorbell.
Next, gather plastic anchor bolts. These are critical for fastening the doorbell firmly to the brick surface, ensuring it stays in place over time without loosening.
You'll also need a level tool to check that your doorbell is mounted straight. A straight installation is important for both camera functionality and visual appeal.
A screwdriver, ideally a Phillips head, is necessary to tighten the screws that hold the doorbell to the wall.
For those looking to enhance weather resistance, having a caulking gun and silicone sealant handy can help seal any gaps around the installation, providing extra protection for your wiring.
Concealment Techniques for Wiring

Concealing the wiring during your Ring Doorbell installation not only enhances the aesthetics but also protects the wires from potential damage. By implementing effective concealment techniques, you can maintain the visual integrity of your installation and guarantee a discreet appearance.
Here are some tips to help you achieve this:
- Run wires through mortar joints: This technique minimizes visible wiring on brick surfaces, keeping your installation clean.
- Scrape away existing caulking: Creating space for wire placement can greatly enhance the overall aesthetics of your doorbell setup.
- Seal with silicone: After installing the wires, use silicone to seal any entry points. This provides a polished look while preventing moisture infiltration.
- Fish wires through trim and drywall: This keeps your exterior walls free from exposed wires, providing a neat appearance.
Community Insights and Support

Engaging with the Ring Community offers you invaluable insights from fellow users who've tackled similar installation challenges on brick surfaces. You'll discover a wealth of installation methods that can suit your specific needs. Many users share their success with no-drill mounts, while others advocate for DIY tape methods or drilling into mortar, providing you with diverse options to contemplate.
Community forums are particularly helpful for discussing common challenges like misalignment or adhesive issues. You can tap into collective troubleshooting advice, which can save you time and frustration during your installation process. Users often exchange tips on how to balance aesthetics and functionality, guaranteeing your Ring Doorbell looks great against your brick exterior.
Additionally, participating in these discussions can reveal innovative concealment techniques for wiring. You'll find suggestions that assure a clean and professional installation outcome, giving you confidence in your project.
Embracing the support and shared experiences of the community won't only enhance your installation skills but also make the process more enjoyable and less intimidating. So, immerse yourself in the forums and connect with others who share your DIY spirit!
Frequently Asked Questions
How Do You Install a Ring Doorbell on Brick Without Drilling?
To install your Ring Doorbell on brick without drilling, start by choosing a no-drill mount with strong double-sided tape.
Make sure the brick surface is clean and dry for the best adhesion.
Alternatively, you can use industrial-strength tape or Command strips, but be cautious as they might damage the brick when removed.
Layering tape can improve hold, though it may not last long on uneven surfaces.
Test out what works best for your situation!
Can Ring Doorbell Be Installed on Brick?
Yes, you can install a Ring Doorbell on brick.
You've got a few options depending on your preference.
If you want to avoid drilling, try a no-drill mount with strong double-sided tape, but keep in mind it mightn't work well on textured surfaces.
Alternatively, drilling into the mortar is a solid choice for a secure fit.
Just make sure you consider the height and angle for ideal camera performance.
Should You Drill Into Brick or Mortar for a Doorbell?
Should you really drill into brick or mortar for your doorbell?
It's generally better to drill into mortar. Mortar's easier to repair if needed and usually provides a secure hold for mounting screws. Just make sure the mortar's at least 1/2 inch thick for stability.
If you do decide to drill into brick, use specialized masonry drill bits to avoid damaging it.
How to Install a Camera on a Brick Without Drilling?
To install a camera on brick without drilling, you can use a no-drill mount that features strong double-sided tape, perfect for smooth surfaces.
Alternatively, try the DIY tape method with industrial or easy-removal tape for better adhesion.
Command strips are also an option, but be cautious—they might damage the wall when removed.
Make sure the adhesive method you choose is waterproof, especially if your camera will be exposed to the elements.
Conclusion
In the end, installing your Ring doorbell to brick can feel like opening a door to a world of security and convenience.
Whether you chose the no-drill option or embraced the drill, you've taken a step toward peace of mind.
With the right tools and a bit of creativity, you've turned your home into a fortress, safeguarding your loved ones and welcoming guests with a smile.
Now, every ring at your door is a reminder of your proactive choice.