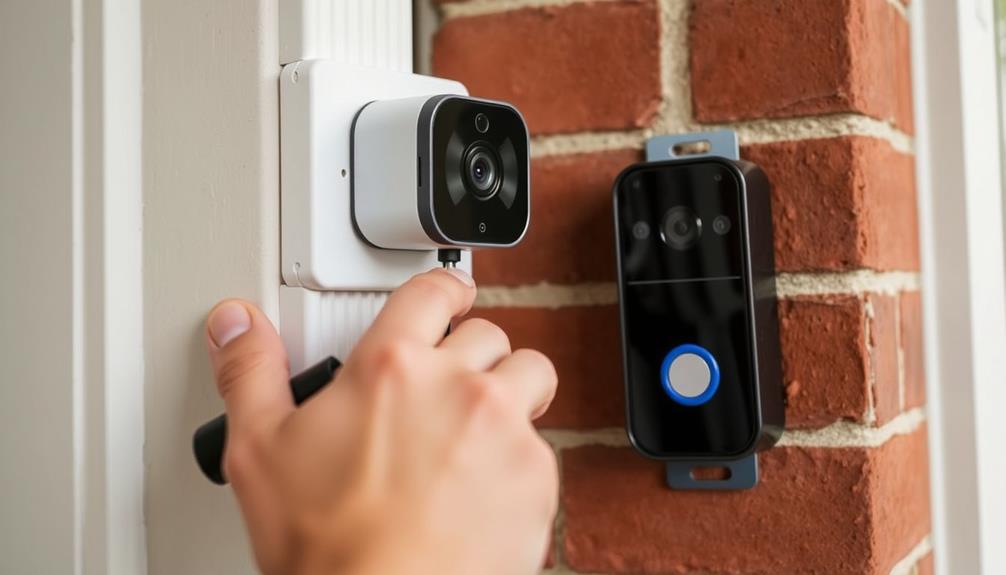
To install a Ring doorbell on brick, start by gathering your tools: a masonry drill, screws, plastic anchors, a level, and safety goggles. Mark the desired height—around 125 cm—and drill pilot holes, ideally into the mortar to minimize brick damage. Insert the plastic anchors for stability, then align the mounting bracket and secure it with screws. Finally, attach your Ring doorbell to the bracket. If you're considering a no-drill approach, industrial-strength tape might work too. Need tips on ensuring your installation's success? There's more information available to make your project easier.
Key Takeaways
- Choose a secure installation method: either drill into mortar for stability or use strong double-sided tape for no-drill mounting.
- Mark the desired height (around 125 cm) on the brick and ensure it's level before drilling or applying adhesive.
- Use a masonry drill bit to create pilot holes in mortar, inserting plastic anchors for secure screw placement.
- Align the mounting bracket with the anchors and fasten securely using screws included in the Ring kit.

Philips Wi-Fi Door Lock, WiFi Smart Lock Keyless Entry Deadbolt for Front Door, Compatible with Alexa & Google Assistant, Remote Control, Built-in WiFi, APP Fingerprint Passcode Unlock, Auto Locking
𝐅𝐥𝐞𝐱𝐢𝐛𝐥𝐞 𝐖𝐚𝐲𝐬 𝐭𝐨 𝐔𝐧𝐥𝐨𝐜𝐤: Unlock the way you want: app, passcode, fingerprint, physical key, or voice via Alexa/Google...
As an affiliate, we earn on qualifying purchases.
Installation Preparation
Before you start installing your Ring doorbell, make sure you've gathered all the necessary tools and components for a smooth setup. You'll need a drill with masonry bits to create the required drill holes in the brick, a screwdriver for securing the screws, and a level tool to guarantee proper alignment during mounting. Having a measuring tape handy will help you place the doorbell at the right height. Additionally, it's wise to reflect on any key factors in choosing a home cleaning service if you're planning to clean the area afterward.
Double-check that your Ring doorbell kit is complete, including screws, anchors, and a charging cable, as these are essential for a secure installation. Before beginning the actual process, charge the battery fully—this usually takes four to six hours. Look for a green light to confirm it's ready to go.
Familiarizing yourself with the installation instructions provided in the package is critical. They'll guide you through specific steps tailored for mounting on brick surfaces.

Ring Alarm 14-Piece Kit (newest model), Wireless smart home or business security system, expandable, easy setup, Mobile App Control, 24/7 Professional Monitoring, Alexa Compatible
A great fit for 2-4 bedroom homes, this Alarm Kit includes one Base Station, two Keypads, eight Contact...
As an affiliate, we earn on qualifying purchases.
Required Tools and Materials

Gathering the right tools and materials is key to successfully installing your Ring doorbell on brick surfaces.
First, you'll need a masonry drill bit to create the necessary holes in the brick. This bit is designed specifically for hard surfaces, guaranteeing you can drill without damaging the material.
Ozone air purifiers are an excellent option for keeping your indoor air fresh while you work on your installation, as they effectively eliminate allergens and odors.
Next, plastic anchors are essential for providing a stable hold for the screws once you've drilled the holes. These anchors will keep your doorbell securely mounted, even in fluctuating weather conditions.
You'll also want a level tool to verify your Ring doorbell is mounted straight. A properly aligned doorbell not only looks better but also functions more effectively.
Additionally, have a screwdriver on hand for fastening screws into the plastic anchors. If you're opting for a hardwired installation, you might need pliers to help connect to any existing doorbell wiring.

eufy Security Video Doorbell, No Subscription, Dual Cameras, 2K FHD,Head-to-Toe View, Doorbell Camera Wireless & Wired, Color Night Vision, Two-Way Talk, AI Motion/Package Detection, Built-in 8GB
𝐃𝐮𝐚𝐥 𝐂𝐚𝐦𝐞𝐫𝐚𝐬, 𝐃𝐨𝐮𝐛𝐥𝐞 𝐒𝐞𝐜𝐮𝐫𝐢𝐭𝐲 | Dual cameras work seamlessly together. The front camera captures visitors head-to-toe, while the...
As an affiliate, we earn on qualifying purchases.
Mounting Method Options

When choosing a mounting method for your Ring doorbell on brick, it's essential to evaluate the surface's characteristics and your specific installation needs. Each method has its own advantages, so consider how they align with your preferences.
Here are three popular mounting method options:
- No-drill Mount: This option uses strong double-sided tape, making it easy to install and remove. However, it may struggle with brick's texture and has variable adhesion effectiveness.
- DIY Tape Method: This approach allows you to customize adhesive strength, potentially saving money. Keep in mind, though, it may risk wall damage and mightn't hold as long as more robust options.
- Drilling into Mortar: This is a secure method that minimizes damage to the brick. Using the appropriate masonry drill bit and plastic anchors guarantees a stable installation process, giving you peace of mind.
Ultimately, the best mounting method depends on your aesthetic and functional needs. Take the time to assess your options, as the right choice will enhance your Ring doorbell's performance and longevity.

Blink Video Doorbell (newest model) – Head-to-toe HD view, two-year battery life, and simple setup. Sync Module Core included – System (Black)
Video Doorbell is our second-generation smart security doorbell with up to two years of battery life, an expanded...
As an affiliate, we earn on qualifying purchases.
Step-by-Step Installation Process

After selecting your preferred mounting method, you can begin the step-by-step installation process for your Ring Doorbell. Start by marking the desired location on the brick surface, aiming for a height of about 125 cm to guarantee ideal viewing.
Next, grab your masonry drill bit and carefully drill holes in the marked spots, focusing on the mortar between bricks to minimize damage. Once you have your holes, insert plastic anchors to provide secure support for the screws that will hold the mounting bracket in place.
Align the mounting bracket with the anchors and use the screws included in the Ring Doorbell kit to fasten it securely. Finally, attach the Ring Doorbell to the mounted bracket by pressing down until it clicks into place, ensuring a snug and secure fit.
Here's a quick summary of the steps:
| Step | Action |
|---|---|
| 1. Mark Location | Height of 125 cm |
| 2. Drill Holes | Use a masonry drill bit |
| 3. Insert Anchors | Secure support for screws |
| 4. Attach Doorbell | Click into the mounting bracket |
No-drill Mounting Techniques

When using no-drill mounting techniques for your Ring Doorbell, you'll want to take into account the adhesive strength, especially on different surface types.
Not all surfaces are created equal, so make sure your brick is clean and smooth for the best adhesion.
Additionally, verify that the area is free from allergens and dust to promote better adherence, similar to how air purifiers improve indoor air quality.
Plus, one of the major perks is the easy removal, allowing you to relocate your doorbell without damaging your walls.
Adhesive Strength Considerations
Choosing the right adhesive is essential for ensuring your Ring Doorbell stays securely in place without drilling into your wall. When using no-drill mounting techniques, consider the following factors regarding adhesive strength:
- Double-sided Tape: Opt for industrial-strength double-sided tape to enhance grip on uneven brick surfaces. Multiple layers can be particularly effective in providing better adhesion. This is similar to how <a target="_blank" href="https://adsandseo.com">keyword clustering enhances SEO</a> by grouping related content for improved visibility.
- Environmental Conditions: Be mindful of moisture and temperature fluctuations in your area. These factors can notably impact the adhesive's performance over time, so regular checks are necessary.
- Alternatives: While command strips can also be used, they may damage the wall upon removal due to their strong adhesive. Evaluate their suitability based on your preferences for wall integrity.
Surface Compatibility Issues
Understanding surface compatibility is essential for successful no-drill mounting, as different materials can significantly affect how well your Ring Doorbell adheres. The Ring no-drill mount works best on smooth surfaces, but can struggle with textured materials like brick. This may lead to adhesion issues over time, so it's vital to take into account your wall type before installing your Ring.
Here's a quick overview of surface compatibility:
| Surface Type | No-Drill Mount Effectiveness | Recommended Action |
|---|---|---|
| Smooth Surfaces | High | Go ahead with no-drill mount |
| Textured Brick | Low | Think about DIY tape method |
| Wood | Moderate | Use no-drill mount cautiously |
| Stucco | Low | Explore alternative mounting |
| Vinyl Siding | High | Safe for no-drill installation |
If you find that the no-drill mount doesn't hold, contemplate drilling into the mortar instead. This approach minimizes damage to the brick while ensuring a secure installation. Remember, successful adhesion is key for effectively installing your Ring.
Easy Removal Benefits
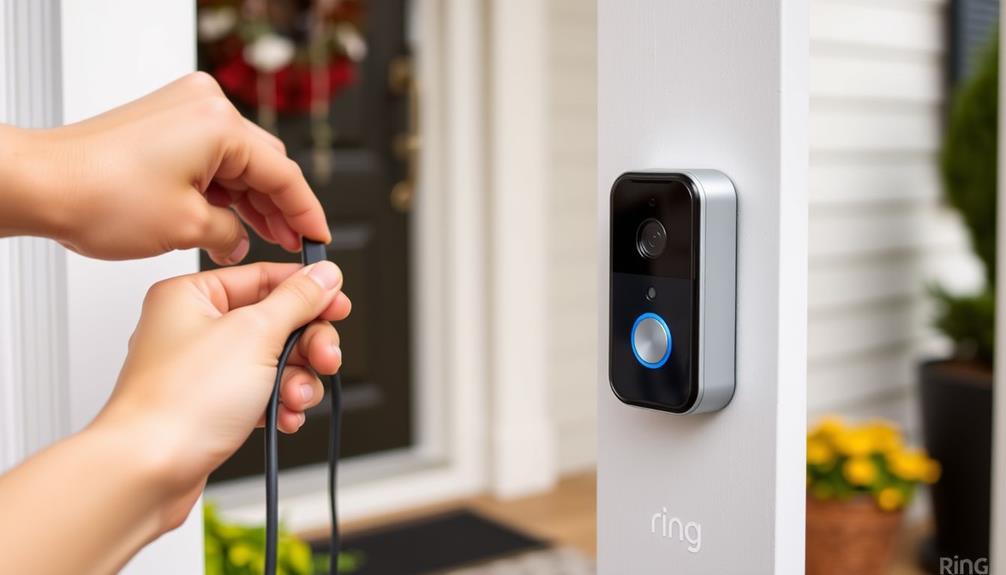
The no-drill mounting technique offers you the advantage of easy removal, allowing for hassle-free adjustments without damaging your surfaces. This method employs strong double-sided tape, making it perfect for those who want to keep their brick walls intact while still enjoying the benefits of a Ring Doorbell. Additionally, this installation approach can be likened to the rustic charm of a farmhouse front door, providing both functionality and aesthetic appeal.
Here are three key benefits of using a no-drill mount:
- Flexibility: You can easily reposition your doorbell if you find a better angle or if you decide to change your home decor.
- Surface Preservation: Unlike traditional mounting, this method avoids drilling holes, preserving the integrity and appearance of your brickwork.
- Weather Resistance: The no-drill mount is waterproof, ensuring durability against rain or snow, making it suitable for uncovered porch installations.
While it may cost a bit more than DIY options, the ease of installation and removal with the no-drill mount far outweighs the hassle of complex mounting techniques. This is especially beneficial if you're renting or plan on moving, keeping your space looking great without any damage.
Drilling Into Mortar

When you're ready to drill into mortar for your Ring Doorbell, you'll need the right tools to get started.
Understanding the steps for proper mortar installation and tips for secure mounting will make all the difference in a successful setup.
Additionally, making certain that your workspace is organized and free of distractions can help maintain focus during the installation process, much like creating a serene workspace in Cottagecore home office inspiration.
Let's explore what you need to do to make certain your doorbell is securely attached.
Tools Needed for Drilling
You'll need a few essential tools to successfully drill into mortar for mounting your Ring Doorbell. Gathering the right equipment guarantees a smooth installation process and a secure fit for your doorbell. For best results, consider using a high-quality masonry drill bit that provides efficiency and precision.
- Masonry Drill Bit: This specialized bit is designed for hard materials like brick and mortar. Make sure to choose one that's slightly smaller than your plastic anchor bolts for a snug fit.
- Power Drill: Use a power drill with variable speed settings. This gives you better control while drilling and helps prevent damage to the surrounding brick.
- Plastic Anchor Bolts: These are vital for securing the screws in the drilled holes. They make certain your doorbell stays in place over time without loosening.
Before you start, don't forget to wear safety goggles and a dust mask. These will protect you from debris and dust generated during the drilling process.
With the right tools and precautions, you're well on your way to a successful installation.
Steps for Mortar Installation
Begin by positioning the Ring mounting bracket at a height of approximately 125 cm from the ground, ensuring it's level before marking where you'll drill into the mortar.
Using a masonry drill bit that's about 3/16 inches in diameter, carefully drill pilot holes into the mortar at the marked locations. Be gentle while drilling into mortar; applying excessive pressure can crack the surrounding brick or mortar, which you want to avoid.
Once you've drilled the holes, insert plastic anchors into them. These anchors will help create a secure fit for the screws provided in the Ring kit.
After inserting the anchors, use screws to secure the mounting bracket to the mortar. Make sure everything is tightened well, but don't overtighten, as that can also cause damage.
Tips for Secure Mounting
To guarantee a secure installation of your Ring Doorbell, pay close attention to the thickness of the mortar and the type of drill bit you use. Mortar that's at least ½ inch thick offers the necessary support for your screws and anchors, making sure your doorbell stays in place.
Here are some tips for secure mounting:
- Choose the Right Drill Bit: Use a masonry drill bit, typically a ¼ inch, to match the size of your screws. This guarantees a snug fit for the plastic anchors.
- Insert Plastic Anchors: After drilling, insert plastic anchors into the holes. This step is vital for creating a secure fit and helps prevent the doorbell from loosening over time.
- Be Cautious While Drilling: Maintain a steady hand and apply consistent pressure. This prevents damage to the surrounding brick and guarantees clean holes in the mortar.
Once you've installed the Ring Doorbell, double-check its alignment. You want to capture the ideal view while making sure it's securely fastened to the mortar.
Following these steps will help you achieve a reliable and long-lasting installation.
Troubleshooting Common Issues

Troubleshooting common issues with your Ring Doorbell can help guarantee it functions smoothly and meets your security needs. First, address any installation issues you might encounter. If your doorbell isn't level, check the mounting surface for uneven spots and adjust accordingly. If it's hardwired but doesn't power on, double-check that the battery is charged and all wiring connections are secure.
Next, consider connectivity problems. A weak Wi-Fi signal can lead to intermittent performance. If your doorbell's connection is spotty, try moving it closer to your router or using a Wi-Fi extender to boost the signal.
Lastly, if you're experiencing video quality issues, verify the camera isn't obstructed and is positioned correctly. Adjust the angle or height for the best visibility. If your device remains unresponsive despite these adjustments, you may need to reset it by pressing and holding the setup button for at least 15 seconds. This can often clear operational glitches and restore functionality.
Community Support Resources

Connecting with the Ring Community can provide valuable support and insights for your installation journey, especially when facing unique challenges like mounting on brick surfaces. Engaging with fellow users can help you navigate the installation process more smoothly.
Here are three ways you can leverage community resources:
- Forums and Discussions: Participate in forums dedicated to the Ring Doorbell. Here, you can pose questions and engage in discussions to find an answer to your specific issues.
- Shared Experiences: Learn from others who've tackled similar brick mounting challenges. Their firsthand experiences can offer practical solutions and tips to enhance your installation technique.
- Tutorials and Guides: Access a wealth of tutorials and guides curated by community members. These resources can help you figure out the best practices for installing your Ring Doorbell on brick, saving you time and frustration.
Product Features Overview

The Ring Doorbell offers a range of features designed to enhance your home security and improve your overall user experience.
With its HD video resolution, you can capture clear footage of visitors and any activity at your doorstep. You'll appreciate the two-way audio capabilities, which let you communicate with visitors in real time through the Ring app on your smartphone.
Motion detection alerts keep you informed by sending notifications to your device whenever movement is detected near your door. This feature markedly enhances security, ensuring you're aware of any activity around your home.
Plus, the night vision capability allows you to monitor your entryway even in low-light conditions, providing peace of mind after dark.
Installation is flexible; you can either use the included battery or connect it to your existing doorbell wiring. This adaptability makes it easier to set up the Ring Video Doorbell in a way that suits your home's configuration.
Whether you prefer a wired or battery-powered option, you can choose the best power source for your needs, ensuring your doorbell operates effectively.
Frequently Asked Questions
How to Install Ring Doorbell on Brick Without Drilling?
To install your Ring Doorbell on brick without drilling, you can use the official no-drill mount, which relies on strong double-sided tape.
Make certain the brick surface is smooth for the best adhesion.
Alternatively, you can grab industrial-strength double-sided tape from a hardware store for more customization.
Just be careful—stronger adhesives may damage the brick when removed, while weaker ones mightn't hold securely.
Test the fit gently to verify it's secure!
Can a Ring Doorbell Be Installed on Brick?
Absolutely, you can mount a Ring Doorbell on brick—like securing a treasure chest to a castle wall.
It's all about the method you choose. You can drill into the mortar for a sturdy hold, or if you want to avoid drilling, consider a no-drill mount or industrial-strength tape.
Just make sure your choice fits the brick's texture and your aesthetic.
With the right approach, your Ring will shine like a beacon of safety!
Can I Glue Doorbell to Brick?
You can try gluing a doorbell to brick, but it's not the best option.
Adhesives often struggle with rough surfaces, and your doorbell mightn't stay secure.
While some people use industrial-strength glue, it's usually less reliable than mechanical methods.
If you want a more stable installation, consider using screws or anchors.
Temporary solutions like double-sided tape can work for a short time, but they won't hold up well outdoors.
How to Install Ring Doorbell on Stone?
To install your Ring Doorbell on stone, start by drilling into the mortar instead of the stone to avoid damage.
Use a masonry drill bit and plastic anchors for a secure fit.
Aim for a mounting height of about 125 cm for ideal camera visibility.
If drilling's not an option, try a no-drill mount with strong double-sided tape, but remember that adhesion can vary based on the stone's texture.
Always check for levelness during installation.
Conclusion
Installing a Ring doorbell on brick may seem challenging, but with the right tools and methods, you'll have it up in no time. First, ensure you have a power drill with a suitable masonry bit to make holes in the brick for the mounting screws. You’ll also need wall anchors to secure the screws firmly. By following the proper steps, you can confidently install your Ring doorbell on brick and ensure it stays securely in place for optimal use.
Imagine greeting your neighbor with a smile, knowing you can see who's at your door before answering.
Just like Sarah did when she installed hers last week. Now, she's enjoying the peace of mind that comes with home security, all thanks to her new Ring doorbell.
You can experience that same security and convenience!