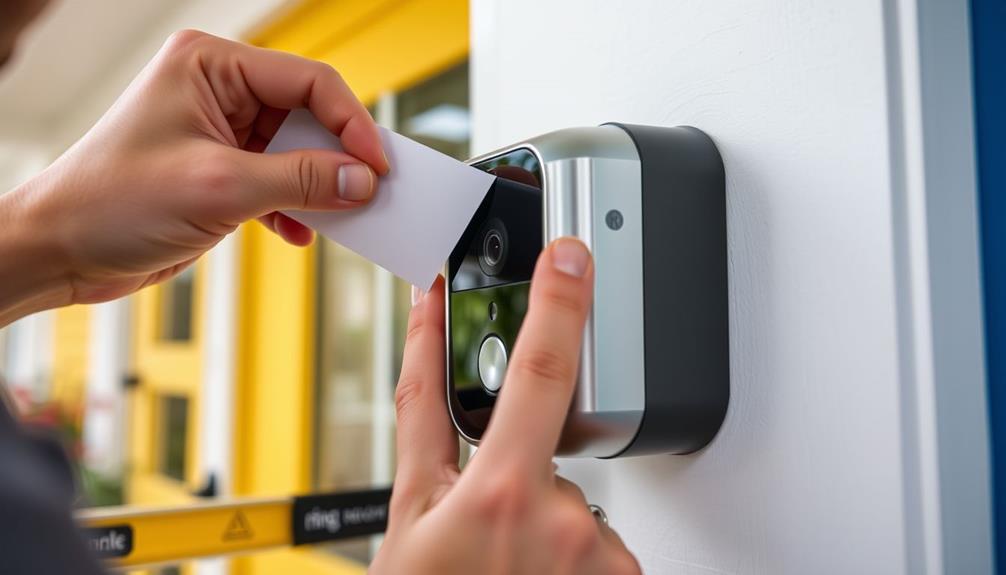

Gluing your Ring Doorbell is simple and guarantees it stays in place. Start by cleaning the surface to remove dirt and oils for better adhesion. Choose a strong adhesive, like 3M double-sided tape or epoxy, based on your needs. Apply the adhesive according to the instructions, then firmly press the doorbell against the wall and hold it for the recommended time. Once it's set, check the stability to make certain it's secure. Don't forget to perform regular maintenance checks to guarantee the adhesive holds up over time. You'll discover more tips and techniques to enhance your installation.
Key Takeaways
- Choose a strong adhesive, like 3M double-sided tape or epoxy, suitable for your mounting surface and weather conditions.
- Clean the surface thoroughly to remove oils and debris, ensuring optimal adhesion.
- Apply the adhesive as per the manufacturer's instructions and press the doorbell firmly against the surface.
- Check the stability of the installation after application and perform regular maintenance to ensure continued effectiveness.

Ring No-Drill Mount for Ring Video Doorbell 4, Battery Doorbell Plus (1st Gen), Battery Doorbell Pro (1st Gen) and Battery Doorbell (1st Gen)
Mount without worry — Attach a compatible Ring video doorbell to your home with the durable, weather-resistant, adhesive-backed…
As an affiliate, we earn on qualifying purchases.
As an affiliate, we earn on qualifying purchases.
Installation Options
When it comes to installing your Ring Video Doorbell, you have several options to choose from, including drilling or using adhesive methods. If you’d prefer not to drill into your wall, the adhesive method offers a quick and damage-free alternative. For more detailed instructions on both installation methods, searching for “how to install Ring doorbell” in the official guide or online tutorials can provide step-by-step guidance. Whether you’re mounting it on brick or siding, you’ll find a solution that suits your home.
If you prefer a secure and permanent installation, drilling holes in your wall is a common choice. This method guarantees a tight fit and reduces the risk of your doorbell coming loose over time.
However, if you're renting or want a less invasive option, adhesive solutions are the way to go. Factors Before Conversion can also apply when deciding how to install, as evaluating your living situation and future plans is essential.
Using double sided tape is one popular adhesive method. It provides a strong bond while allowing you to easily remove the doorbell later without damaging the wall. Just make sure to clean the surface well before applying the tape for the best results.
Another option to think about is mounting brackets, which can help protect your doorbell during installation and provide additional stability.
Ultimately, your choice depends on your living situation and personal preference. If you're up for a DIY challenge, feel free to customize your installation based on your unique needs.
Whether you opt for drilling or adhesive, both methods can successfully secure your Ring Video Doorbell and keep your home safe.
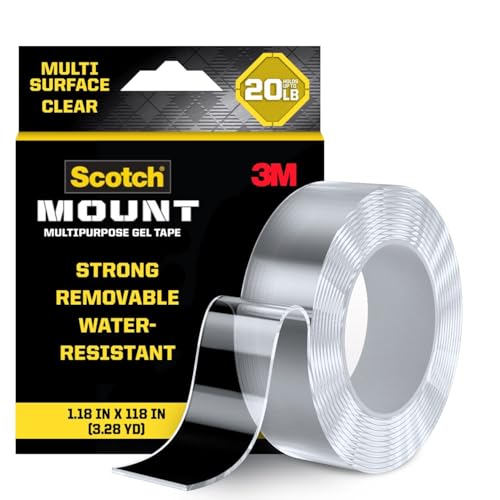
Scotch-Mount Multi-Purpose Gel Tape, Double-Sided Tape for Heavy Duty Applications, Removable Mounting Tape, Nano Tape, Water-Resistant Clear Mounting Tape, Holds up to 20 lbs, 1-Pack
VERSATILE SCOTCH MOUNTING TAPE: Ideal for hard surfaces including metal, tempered glass, tile, painted wood, smooth stone, brick,…
As an affiliate, we earn on qualifying purchases.
As an affiliate, we earn on qualifying purchases.
Choosing the Right Adhesive

Selecting the right adhesive for your Ring Doorbell installation guarantees a secure fit while accommodating your specific needs and surface type.
For most users, 3M double-sided mounting tape is an excellent choice due to its strong adhesion and ease of use on surfaces like wood and metal. It provides a balance between strength and convenience, making it ideal for simple installations.
Additionally, maintaining proper ventilation during installation can prevent any potential hazards, especially if you're working with materials that emit fumes safety precautions necessary.
If you're looking for a more permanent solution, consider using epoxy or PL adhesive. These options offer a robust attachment but can complicate future removals, so think carefully about your long-term plans for the Ring doorbell.
Before applying any adhesive, it's essential to clean the surface thoroughly to guarantee peak adhesion strength.
Avoid using silicone adhesive, as it may allow for easier removal, which could increase the risk of theft.
Lastly, testing different adhesives on a small area can help you assess compatibility and effectiveness on your specific mounting surface.
This way, you can confidently choose the best adhesive for your Ring doorbell, making sure it stays securely in place.

J-B Weld InstantWeld 2 Pack – Clear, 2 Minute Set Epoxy Adhesive, Static Mixer No Mess Application – 14ml
J-B Weld InstantWeld is an instant-setting epoxy adhesive that works on a wide variety of surfaces! The package…
As an affiliate, we earn on qualifying purchases.
As an affiliate, we earn on qualifying purchases.
Preparing the Surface

To guarantee your Ring Doorbell adheres properly, start by cleaning the surface thoroughly to remove any oils, dirt, or debris. This step is essential because any residue can weaken the bond between the adhesive and the surface, leading to potential failure. Use a damp cloth or a suitable cleaning solution, and make certain the area is completely dry before proceeding. Additionally, consider the importance of using quality products during installation, similar to how one would choose a reputable home cleaning service for the best results.
Next, check the texture of the surface where you'll be mounting the doorbell. Smooth and even surfaces yield better adhesion, while rough or grainy textures can inhibit sticking. If needed, sand down any rough spots to create a more suitable base for the glue.
Once you've prepared the surface, test the compatibility of your chosen adhesive—like epoxy or PL adhesive—with the material (wood, metal, or plastic). This helps prevent damage and guarantees a strong bond. Remember, confirming a clean and compatible surface aligns with your Ring Protect plan, as it enhances the durability and security of your installation.
Lastly, allow adequate curing time as specified by the adhesive manufacturer before using your Ring Doorbell. This guarantees it's securely mounted for the best performance.

No-Drill Mount Compatible with Ring Battery Doorbell (2024 Release),Ring Doorbell Mounting Holder Bracket for Apartments Office Houses(1 Pack)
【Compatibility】Our No-Drill Mount is designed for Ring Battery Doorbell (2024 Release),For pleasant shopping experience, please confirm that your…
As an affiliate, we earn on qualifying purchases.
As an affiliate, we earn on qualifying purchases.
Step-by-Step Gluing Process

Now that you've prepared the surface, it's time to focus on the gluing process.
Choosing the right adhesive is vital for guaranteeing a durable attachment, especially in varying weather conditions.
You'll need to follow specific adhesive application steps to secure a strong bond.
Finally, don't forget to check the installation's stability and perform maintenance as needed to keep your Ring Doorbell secure.
Regular maintenance is essential for peak performance, similar to how you'd care for air purifiers to maintain indoor air quality.
Surface Preparation Techniques
Cleaning the surface where you'll mount the Ring Doorbell is essential for achieving ideal adhesion. A clean surface guarantees that the adhesive bonds effectively, creating a stable installation. Additionally, confirming the surface is free from any organic matter can further enhance the attachment stability, much like how well-draining soil is crucial for plant health.
Here are some steps to prepare the surface properly:
- Clear the Area: Remove any items or decorations near the mounting location to give you ample workspace.
- Dust and Dirt Removal: Use a soft cloth or microfiber towel to wipe away any dust, dirt, or debris. This helps in preventing any contaminants from interfering with the adhesive.
- Degrease: If the surface has any oils or grease, clean it using a mild detergent or rubbing alcohol. This step is essential for ideal adhesion.
- Dry the Surface: Allow the area to dry completely before proceeding. Moisture can weaken the bond of the adhesive used for your Ring Video Doorbell.
Once you've completed these steps, you'll have a clean and prepared surface, ready for the adhesive application. Proper surface preparation is the key to guaranteeing your Ring Doorbell stays securely mounted for years to come.
Adhesive Application Steps
Selecting the right adhesive is essential for ensuring your Ring Video Doorbell stays securely mounted. You can choose between strong epoxy or double-sided mounting tape, particularly for a No-Drill Mount solution. Here's a step-by-step guide to help you apply the adhesive effectively:
| Step | Action |
|---|---|
| 1. Choose Adhesive | Select an appropriate adhesive that's compatible with your mounting surface. |
| 2. Clean Surface | Thoroughly clean the area where you'll mount the doorbell to remove dust and debris. |
| 3. Apply Adhesive | Apply the adhesive directly onto the back of the Ring Video Doorbell as per instructions. |
| 4. Press & Hold | Firmly press the doorbell against the cleaned surface and hold for the recommended time. |
Maintenance and Checks
Regular maintenance and checks are essential to guarantee your Ring Doorbell remains securely glued and functions properly over time.
By following these simple steps, you'll make certain that your doorbell stays in place and continues to serve its purpose effectively.
Effective use of social media can lead to increased awareness of your doorbell's features and benefits, making sure that you stay informed about the latest maintenance tips and tools for your device data-driven decisions enhance your approach.
- Clean the Surface: Regularly clean the area where the doorbell is mounted to remove dirt or debris that might affect adhesion.
- Inspect for Damage: Check the glue regularly, especially after severe weather conditions. Look for any signs of degradation or looseness.
- Reapply Adhesive if Necessary: If you notice any issues with the glue, promptly reapply a suitable adhesive to maintain a secure bond.
- Consider Alternatives: If the glue consistently fails, explore alternative mounting solutions to make certain your doorbell stays secure.
Temporary Vs. Permanent Solutions

When it comes to gluing your Ring doorbell, you'll want to weigh the pros and cons of temporary versus permanent solutions.
Temporary options like 3M Command Strips offer easy removal, while permanent adhesives provide a stronger hold for long-term use.
Consider your future maintenance needs and the potential effects of weather when making your choice.
Pros of Temporary Solutions
Using temporary solutions like glue or adhesive strips offers flexibility for easily removing and repositioning your Ring doorbell without damaging your walls or the device. This is particularly beneficial for renters or individuals who frequently adjust their installations.
Here are some key pros of using temporary solutions:
- Easy Installation: You can quickly attach and detach your doorbell without needing tools, making it hassle-free.
- No Wall Damage: Adhesive strips and similar options don't leave holes or marks, preserving the integrity of your walls.
- Repositioning Flexibility: If you decide to move your doorbell, temporary solutions allow for easy relocation without complications.
- Variety of Options: You can experiment with different adhesives, such as 3M Command Strips or Velcro, to find what works best for your specific surface type.
While temporary solutions provide convenience, it's important to regularly check their condition, as they may degrade over time.
Keep in mind that these options may not offer the same security as permanent installations. However, for those who value versatility, temporary solutions can be an ideal choice.
Benefits of Permanent Adhesives
While temporary solutions offer flexibility, permanent adhesives provide a strong, lasting bond that assures your Ring doorbell remains securely in place, even in challenging weather conditions.
Using permanent adhesives like epoxy or PL adhesive guarantees that your doorbell can withstand the elements, preventing it from falling or becoming detached over time.
Unlike temporary options, which may require constant monitoring and replacement, permanent adhesives minimize the risk of your device being lost due to inadequate attachment.
They're designed to endure varying temperatures and humidity levels, making them ideal for outdoor installations.
Though you might face complications with future maintenance or upgrades, the reliability of permanent adhesives makes them a worthy choice for long-term installations.
Just remember to check compatibility with your mounting surface, as some permanent adhesives can react negatively with materials like marble or painted surfaces, potentially causing damage.
In the end, if you're looking for a secure and dependable solution for your Ring doorbell, choosing permanent adhesives is a smart move that will save you time and hassle in the long run.
User Experiences and Tips

Many users have found that proper surface preparation is key to achieving a strong bond when gluing their Ring Doorbell. If you want to guarantee your mounting plate stays securely attached, consider these helpful tips:
- Clean the Surface: Remove any dust, oil, or debris from the mounting area. A clean surface improves adhesive performance.
- Choose the Right Adhesive: While epoxy and strong construction adhesives provide a lasting bond, many users prefer 3M double-sided tape for its simplicity and effectiveness on smooth surfaces.
- Apply Even Pressure: After applying glue or tape, press the mounting plate firmly against the surface. This guarantees a better seal and reduces air pockets.
- Check Regularly: Extreme weather conditions can impact adhesive longevity. Regularly inspect your doorbell for any signs of loosening and be prepared to reapply glue if necessary.
Safety Considerations

Assuring your Ring Doorbell is securely glued is vital not only for the device's functionality but also for the safety of those nearby. An improperly mounted doorbell can fall, leading to potential injuries or damage.
When you apply glue, make sure to follow the manufacturer's guidelines carefully to achieve a strong bond.
Keep in mind that environmental factors can degrade adhesives over time, making regular maintenance important. Extreme heat or humidity can greatly impact the glue's performance, so be aware of conditions that might compromise its integrity.
You should regularly inspect your glued Ring Doorbell to confirm it remains secure. Look for any signs of wear or loosening, and if you notice any issues, reapply the glue as needed.
This proactive approach not only protects your device but also guarantees the safety of family and visitors.
Testing Adhesion Strength

Testing the adhesion strength of your glue is vital to guarantee your Ring Doorbell stays securely mounted. Before diving into the installation, follow these steps to assure a strong bond:
- Prepare the Surface: Make sure the area where you'll mount the video doorbell is clean, dry, and free of oils or debris. This enhances the adhesion strength.
- Conduct a Test: Apply a small amount of your chosen glue on a sample area to evaluate its bonding capability. This will give you confidence before full application.
- Choose the Right Adhesive: Opt for a strong adhesive like epoxy or PL adhesive. These options typically offer better adhesion than regular craft glues, assuring your doorbell remains secure.
- Monitor the Bond: For the first 24 hours after gluing, keep an eye on the area. This period is important to assess initial adhesion and assure everything stays in place.
Maintenance and Checks

Regular maintenance is essential to keep your Ring Doorbell securely mounted and functioning well over time.
Start by regularly inspecting the adhesive you used. Weather conditions and surface contamination can degrade the bond, so look for any signs of wear or separation between the glue and the doorbell or wall. If you notice any issues, it might be time for re-gluing or considering a different mounting method.
Before applying glue, always clean the mounting surface thoroughly. Oils, dirt, or debris can weaken adhesion, so take a few extra minutes to verify a clean surface.
Periodically check the stability of your doorbell, especially after harsh weather. This will help prevent it from falling and verify it remains reliable.
If you've used a glue that allows for reapplication, schedule maintenance checks every few months to assess the bond strength. Keeping an eye on these factors will prolong the life of your installation and maintain the functionality of your Ring Doorbell.
Community Support and Resources

When you're looking for advice on gluing your Ring doorbell, tapping into the community can be invaluable.
You can exchange installation tips with other users who've faced similar challenges, helping you find the best adhesive solutions.
Sharing your experiences can also guide others in their installation journeys, creating a helpful support network.
User Experiences Sharing
The Ring Community offers a wealth of user experiences that can guide you through the nuances of gluing your doorbell, sharing both successes and challenges. Many users have shared their insights on the effectiveness of different glue methods, highlighting that results can vary based on several factors.
Here are some key takeaways from the community:
- Surface Type Matters: Users stress that the material of the surface where you apply the glue greatly influences adhesion. Smooth surfaces may require different adhesives than textured ones.
- Adhesive Experiments: Many recommend trying out various glues, as some found success with specific brands while others faced failures.
- Installation Technique: Some users suggest combining glue with traditional mounting methods for extra stability, especially in high-traffic areas.
- Feedback Loop: Engaging with the community can provide ongoing support. Share your results to help others refine their approaches to installing a Ring Doorbell.
Installation Tips Exchange
Many users find that exchanging installation tips within the Ring Community not only enhances their DIY skills but also boosts confidence in securing their devices effectively.
This platform allows you to ask questions about installation methods, and you'll receive valuable feedback from others who've faced similar challenges with their Ring Doorbell.
Community insights reveal that testing different adhesives is vital, as what works for one surface mightn't work for another.
Many users recommend using mounting brackets instead of direct glue applications to prevent damage to your Ring Doorbell during installation. This method not only guarantees secure placement but also offers flexibility if you decide to relocate the device later.
Stay engaged in the community discussions to learn about the best practices for securing your Ring Doorbell.
You'll find advice on weather considerations and surface preparation to guarantee ideal adhesion.
By collaborating with fellow users, you can discover effective DIY solutions that make your installation process smoother and more successful.
Embrace the collective knowledge of the Ring Community to enhance your installation experience and achieve the best results for your security needs.
Frequently Asked Questions
Can You Glue a Ring Doorbell?
You can glue a Ring Doorbell, but it's not the best idea.
While temporary adhesives might work, they often don't hold up well over time or in bad weather.
You'll likely face mixed results depending on the surface and conditions.
It's essential to clean the area thoroughly before applying any adhesive.
For a more secure and stable installation, consider using screws and anchors instead of relying on glue.
How Do You Attach a Ring Doorbell Without Drilling?
To attach a Ring Doorbell without drilling, you can use 3M Command Strips for a secure, non-permanent hold.
First, make certain the wall surface is clean and smooth to make sure the adhesive sticks well.
Alternatively, consider double-sided tape designed for mounting or Velcro strips, which allow for easy removal.
Just remember to regularly check the adhesive's condition, as weather can affect its performance, requiring you to replace or adjust it.
What Can I Stick My Ring Doorbell on With?
Did you know that nearly 50% of homeowners choose adhesive solutions for mounting devices like a Ring Doorbell?
You can stick your Ring Doorbell using 3M double-sided mounting tape, designed for various surfaces like wood and metal. This is a great solution if you prefer not to drill holes, making installation quick and damage-free. If you need to fit Ring Doorbell to composite door, the 3M mounting tape provides a secure hold without compromising the integrity of the door material. Just ensure the surface is clean and dry for the best adhesion. When fitting a Ring Doorbell, it’s important to apply even pressure when attaching the device to ensure the tape adheres properly. This method not only provides a firm grip but also allows for repositioning or easy removal if needed without leaving marks. Additionally, the tape is weather-resistant, making it a reliable option for outdoor use.
Just make sure the surface is clean and free of debris for the best adhesion.
If you want a temporary option, Velcro strips can also work well, allowing for easy removal when needed.
Can a Ring Doorbell Be Installed Without Screws?
Yes, you can install a Ring Doorbell without screws.
You've got options like adhesive strips or double-sided tape designed for secure mounting.
Just make sure to prepare the surface properly by cleaning it to remove any oils or debris, which helps with adhesion.
Keep in mind that while these methods can work, their effectiveness may vary based on the surface type and environmental conditions.
Always consider the long-term security of your mounting choice.
Conclusion
In summary, properly gluing your Ring doorbell can guarantee it stays securely in place, enhancing your home's security.
Did you know that over 70% of home break-ins happen through the front door?
By making certain your doorbell is firmly attached, you're taking a proactive step in deterring potential intruders.
Remember to regularly check the adhesion and maintain your device for peak performance.
With the right approach, you'll enjoy peace of mind knowing your home is protected.


