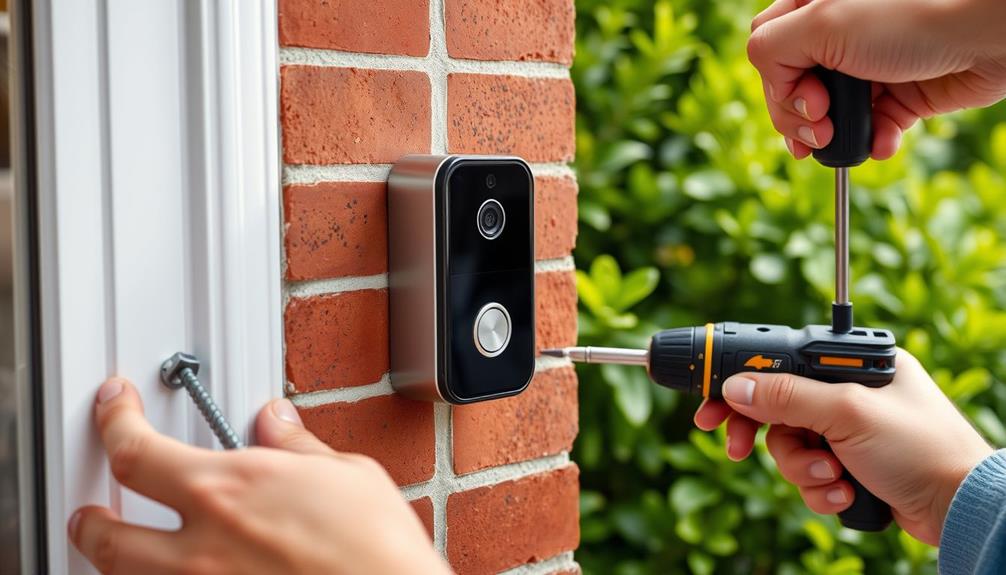
To get the back off your Ring Doorbell, start by locating the security screw at the bottom and using a star-shaped screwdriver to turn it counterclockwise. Gently push the faceplate up from the bottom with your thumbs while supporting the top with your fingers. If the screws are stubborn, a butter knife or paint scraper can help. Keep safety glasses on to protect your eyes, and use a clean cloth to avoid scratches. Once you've got the faceplate off, you'll be able to access the battery easily. There's more to discover about maintenance and tips that can enhance your experience. After accessing the battery, ensure it’s properly charged before reassembling the faceplate, tightening the security screw, and confirming all parts are securely in place. To further customize your experience, you can manage settings within the app, such as adjusting motion sensitivity or choosing to remove Ring Doorbell notifications if you prefer fewer alerts. Regular upkeep, including cleaning the sensor and checking the battery level, will help maintain the device’s performance over time.
Key Takeaways
- Locate and unscrew the security screw at the bottom of the doorbell using a T6 torx-head screwdriver.
- Gently push the faceplate up from the bottom using your thumbs for leverage.
- Support the front of the faceplate with your fingers to avoid any damage during removal.
- If the faceplate feels stuck, consider utilizing flat tools like butter knives for leverage.
Ring Video Doorbell Overview
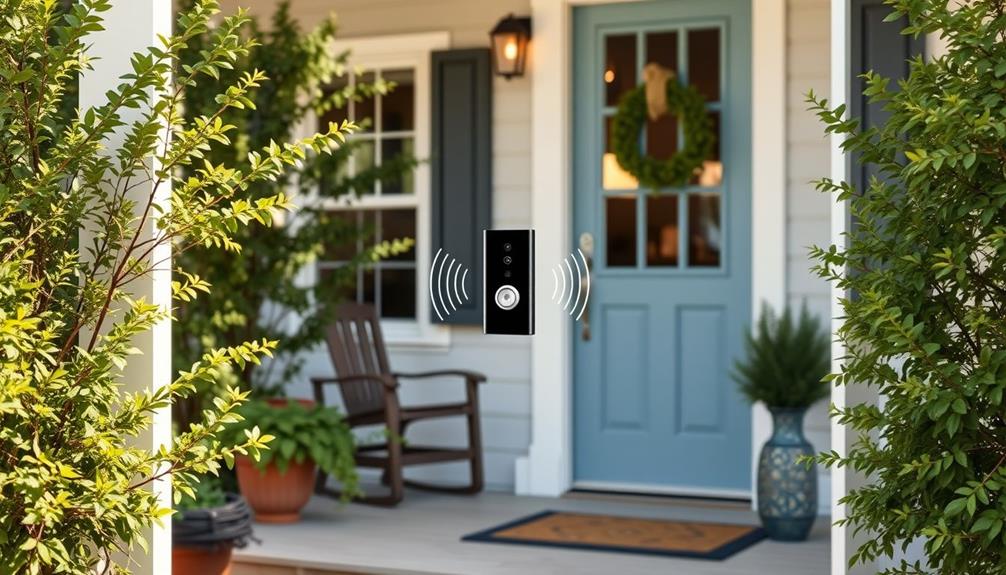
The Ring Video Doorbell is a versatile device that enhances your home security with high-definition video and two-way audio. You can choose between wired and battery-operated models, giving you the flexibility to fit your installation needs.
This doorbell not only allows you to see who's at your door but also lets you communicate with visitors through your smartphone app, making it convenient to stay connected with your home, even when you're away.
For peak performance, consider integrating your doorbell into an all-encompassing home theater setup, as it can complement your overall security system.
Popular models like the Video Doorbell Classic and Video Doorbell 2 come with unique specifications tailored to different user preferences.
When you're ready to maintain or upgrade your ring doorbell, you may need to remove the doorbell itself. To do this, you'll first have to locate the security screws that hold it in place.
Having the right tools on hand will make this process easier, ensuring you can quickly access the back of your doorbell for any necessary adjustments or battery replacements.
With its ability to integrate into various smart home systems, the Ring Video Doorbell enhances your security and simplifies your life.
Common Installation Challenges

Many users encounter challenges when installing or removing the Ring doorbell, often due to stubborn security screws that won't back out easily. This can lead to frustration, especially if you're not prepared for the common hurdles that come with the installation process. Here are a few points to keep in mind:
- Stubborn Security Screws: These screws can spin in place, making it difficult to detach the doorbell. Be patient and make certain you're using the right tool to avoid stripping the screws. It's also wise to have a basic <a target="_blank" href="https://bestvacuumexpert.com">essential cleaning kit</a> on hand, as it can help keep your workspace organized and free of debris during the installation.
- Uneven Surfaces: If the mounting surface is uneven, it can hinder how well the doorbell fits, creating binding issues during removal. Check your surface before installation to minimize complications.
Tools Needed for Removal

To get the back off your Ring Doorbell, you'll need a few specific tools.
A star-shaped screwdriver or a T6 torx-head screwdriver is crucial, while a flat tool can help if things get tricky.
It's important to guarantee you're working in a clean environment to avoid losing any small components.
Additionally, maintaining clear air quality in your workspace can help you focus better on the task at hand, especially if you use an air purifier to eliminate dust and allergens improve indoor air quality.
Let's go over the essential tools and some alternatives you can use.
Essential Tools Required
You'll need a special star-shaped screwdriver or a T6 torx-head screwdriver to remove the back of your Ring doorbell. This tool is typically included with the device, so make certain you've got it handy. If you've misplaced it, the T6 torx-head is a reliable alternative. Before you begin, verify that you have a calming atmosphere by using essential oils for relaxation like lavender to help reduce any stress during the process.
In addition to the screwdriver, gather these essential tools:
- A flat, skinny tool (like a butter knife) for prying the doorbell if it's stuck.
- Safety glasses to protect your eyes during the removal process.
When you're ready, carefully unscrew the screws holding the back in place. Once the back is off, you can access the battery for replacement or maintenance. Having the right tools guarantees that you avoid any damage to your doorbell and make the process smoother.
If you find you need extra screws or tools, remember you can order them through customer service or purchase online. With these tools in hand, you're all set to get the back off your Ring doorbell.
Alternative Tool Suggestions
If you've misplaced your original screwdriver, consider using a T6 torx-head screwdriver as an effective alternative for removing the Ring doorbell's back. This tool can easily fit the security screws. Additionally, once you've removed the screws, you may need a flat, skinny tool like a butter knife or paint scraper to pry off the faceplate without causing damage.
Here's a quick reference table for alternative tools:
| Tool | Purpose | Notes |
|---|---|---|
| T6 Torx Screwdriver | Unscrewing security screws | Effective substitute |
| Flat Tool | Prying off the faceplate | Avoids damage to the device |
| Safety Glasses | Protecting your eyes during removal | Recommended for safety |
| Replacement Screws | For lost or damaged screws | Available via customer service |
| Online Tools | Additional options for removal | Check for compatibility |
If you find yourself needing replacement screws or screwdrivers, don't hesitate to reach out to Ring customer service or browse online options for convenience. Having the right tools will make the removal process easier and more efficient.
Removing the Faceplate

Removing the faceplate from your Ring Doorbell is a straightforward process that requires only a few careful steps. First, locate the security screw at the bottom of the device and turn it counterclockwise to loosen it. This step is essential, much like guaranteeing proper maintenance and cleaning when using an airless paint sprayer for your painting projects. Once that's done, you can proceed with the removal of the faceplate.
Here are some tips to guarantee a smooth removal:
- Use your thumbs as levers to push the faceplate up from the bottom.
- Support the front of the faceplate with your index and middle fingers.
Once you've successfully lifted the faceplate away, make sure to align the plastic hook at the top with the corresponding hole when you're ready to reinstall. After replacing the faceplate, securely fasten it by tightening the security screw completely. This will guarantee it remains in place and functions as intended.
If you're looking for a fresh look, consider exploring different colored faceplates or silicone skins to enhance both the protection and style of your Ring Doorbell. Following these steps will make the removal process hassle-free.
Accessing the Battery

After successfully removing the faceplate, you can now access the battery of your Ring Doorbell. First, check if your model features a removable battery. If it does, locate the black tab on the battery. Gently press down on this tab while sliding the battery out. Be careful during this process to avoid any damage to the battery or the doorbell itself.
Understanding narcissistic behaviors can help you maintain a healthy perspective while managing the task at hand.
Before you reinstall the battery, make certain it's fully charged. A charged battery is essential for the ideal performance of your doorbell. If the battery isn't charged, your doorbell won't function properly, affecting your home's security.
Once the battery is charged and ready, slide it back into the compartment until you hear a click, indicating the black tab has snapped into place securely. This guarantees that your battery is seated properly and ready to power your device.
Lastly, it's a good idea to regularly check the battery life through the Ring app. This way, you can confirm timely charging, maintaining uninterrupted operation of your doorbell and keeping your home secure.
Troubleshooting Security Screws

When you're trying to remove security screws from your Ring doorbell, you might run into some common challenges, like stripped heads that just won't budge.
Fortunately, there are tools and techniques that can help you tackle these issues effectively.
Let's explore some solutions and community tips that might make this process smoother for you.
Common Screw Removal Challenges
Many users find themselves frustrated by security screws on the Ring Doorbell that spin in place and refuse to back out. This screw removal challenge can feel like a roadblock, especially when you're keen to access the device.
Stripped screw heads are a common issue, further complicating the removal process. If you're facing this problem, here are a few tips to take into account:
- Check for Stripping: Inspect the screw head for damage, as a stripped head makes it tough to get a proper grip.
- Try Different Tools: Experiment with various tools, like an Exacto knife or drill drivers, to see if they provide better leverage.
Keep in mind that many users share your frustrations. It's a recurring issue that highlights the need for a potential redesign of the security screw mechanism in future models.
Tools for Effective Removal
Addressing security screw challenges requires the right tools to guarantee effective removal of the Ring doorbell's back. Start with the special star-shaped screwdriver included with your device. If you've misplaced this tool, a T6 torx-head screwdriver works well as a substitute.
During your removal, you might encounter security screws that spin in place without backing out. In such cases, using an Exacto knife or flat-ended pliers can provide the leverage you need to turn the screws effectively. Always wear safety glasses during this process to protect your eyes from any debris or accidents.
If you find that the screws are stripped or particularly stubborn, don't hesitate to contact customer service for replacement screws or additional tools designed for these tricky situations. Keeping a clean cloth nearby while you work is also a smart move; it helps prevent scratches on your doorbell.
With these tools and precautions in hand, you'll be well-equipped to tackle the security screws and gain access to the back of your Ring doorbell without unnecessary hassle.
Community Troubleshooting Techniques
Community members have developed various troubleshooting techniques to tackle the common issue of security screws spinning in place on Ring doorbells. This frustrating problem often prevents you from accessing the back of your device.
Here are some methods that might help you out:
- Use an Exacto knife: This tool can provide leverage on stubborn screws, making it easier to loosen them.
- Try flat-ended pliers: These can give you a better grip on the screws, although effectiveness may vary, especially if the screws are stripped.
Frequent discussions within the community highlight the ongoing issue of security screws and emphasize the need for better design in future models. Many believe that improvements could greatly ease access to the back of the doorbell.
If you're struggling with a stuck screw, experimenting with these techniques might just do the trick. Always remember to approach the situation with patience, as the right method may vary for each user.
User Experiences and Solutions

Users often struggle with getting the back off their Ring doorbell due to the resistance from the PUSH tab, requiring extra force or specific techniques to disengage it effectively. Many user experiences highlight that the battery needs access can be frustrating when the tab feels stuck.
If you find yourself in this situation, consider partially unscrewing the doorbell from the wall. This approach often provides better leverage for releasing the battery compartment without fully detaching the device.
Some users have successfully employed a flat, skinny tool like a butter knife or paint scraper to pry the back off, making the process smoother. Additionally, feedback from the community suggests that improper mounting can lead to binding issues, so verify screws aren't overtightened during installation.
If you're dealing with older battery models, be aware that newer versions may not exhibit the same removal difficulties, indicating that product design can greatly impact user experience.
Community Support Resources

Finding support and solutions for removing the back of your Ring doorbell is made easier through the Ring Community platform, where members share their experiences and tips. By creating a Ring account, you can easily connect with others who've faced similar challenges. Engaging with the community not only provides you with valuable insights but also fosters a sense of camaraderie among users.
Here are some ways to maximize your experience in the Ring Community:
- Post a question: If you're struggling with a specific issue, don't hesitate to ask for help. The community is filled with knowledgeable members who are enthusiastic to assist.
- Join in the discussion: Participate in ongoing conversations to learn from others' experiences. You might discover solutions you hadn't considered.
Frequently Asked Questions
How to Take a Ring Doorbell Back Off?
To take the back off your Ring Doorbell, start by unscrewing the security screw at the bottom of the faceplate. Once the security screw is removed, gently pull the faceplate away from the device. Be careful not to apply too much force, as doing so could damage the internal components. For more detailed guidance, you’ll find video tutorials online on **how to remove Ring Doorbell** safely and reassemble it properly.
Once that's done, carefully remove the faceplate.
If you need to access the battery compartment, press down on the black tab and slide the battery out.
If it's stuck, gently use a flat tool to pry it off, but be careful not to damage your device while doing so.
How to Unscrew Ring Doorbell Without Tool?
Unscrewing a Ring Doorbell without a tool might feel like a high-stakes mission, but you've got options!
Grab a flat, skinny object, like a butter knife, and gently pry at those stubborn screws.
If they're spinning like they're in a dance-off, an Exacto knife can help create leverage.
Stripped screws? Flat-ended pliers are your best friend!
And don't forget the rubber band trick for extra grip.
You've got this!
How to Take off Ring Doorbell to Charge?
To take off your Ring Doorbell for charging, start by unscrewing the security screw at the bottom of the faceplate.
Once that's done, push the faceplate up from the bottom to remove it.
If your model has a removable battery, press down on the black tab and slide the battery out.
If not, charge it via the USB port after detaching the device from the wall.
Always make certain the battery's charged before reinstalling it!
How Do I Take off a Ring Doorbell?
Imagine opening a treasure chest; that's how it feels when you take off your Ring Doorbell.
First, locate the security screw at the bottom of the faceplate and use the special star-shaped screwdriver to remove it.
Then, push up from the bottom with your thumbs while supporting the front. If you hit resistance, a flat tool can help.
Once off, you can access the battery or charging port easily.
Conclusion
Now that you've mastered the art of removing the back of your Ring Doorbell, you're ready to immerse yourself in a world of seamless security and peace of mind.
Just like opening a treasure chest, you've uncovered the secrets to maintaining your device.
With a little patience and the right tools, you've transformed a challenging task into a simple journey.
So go ahead—embrace your newfound skills and keep your home safe, one ring at a time!