
Setting up the Ring Doorbell Pro is straightforward if you follow a few crucial steps. First, make sure you have the necessary tools like a Torx and Phillips screwdriver on hand. Verify that your power supply falls between 8-24 VAC and switch off the circuit breaker for safety precautions. Mount the bracket about four feet above the ground using the provided template and drill any necessary holes. Connect the doorbell to your existing chime using the Pro Power Kit, making sure the connections are secure. Finally, configure it in the Ring app to start enjoying all of its features. There’s a lot more you can learn about optimizing your installation!
Key Takeaways
- Gather necessary tools like a Torx screwdriver and ensure your doorbell system is compatible with 8-24 VAC power supply.
- Choose a mounting option (wall or corner) and maintain a recommended height of about 4 feet for optimal performance.
- Hardwire the doorbell using the Pro Power Kit and restore power at the circuit breaker to confirm electrical supply.
- Use the Ring app to set up the device, scan the QR code, and input Wi-Fi credentials for connectivity.

RIOVO Adjustable 30 to 55 Degree Doorbell Angle Mount Compatible with Ring/Blink Video Doorbell/Battery Doorbell, Replacement Angle Adjustment Adapter Mounting Bracket Wedge Kit
Compatible Model: This angle mount compatible with RlNG Battery Doorbell (2024 Release) / Video Doorbell 2 / Video…
As an affiliate, we earn on qualifying purchases.
As an affiliate, we earn on qualifying purchases.
Help Resources
When you need help with your Ring Doorbell Pro, there are plenty of resources available to guide you through installation and troubleshooting.
Start by exploring the official Ring app or website, where you'll find thorough installation guides tailored to your device. These guides provide step-by-step instructions to guarantee you set up your doorbell correctly from the beginning. Additionally, with advancements in technology, AI-driven solutions can enhance user experiences and streamline troubleshooting processes.
If you encounter any issues, the troubleshooting section is an invaluable resource. It's filled with articles and FAQs categorized by product type, making it easy to find quick resolutions to common problems. You can also connect with other Ring users through community forums, where you can share tips, solutions, and experiences related to installation and device functionality.
Should you need personalized assistance, don't hesitate to contact customer support. They can offer detailed guidance on installation processes and device management. Additionally, if you have specific questions about subscriptions or features, customer support is there to help.
With these resources at your fingertips, you'll be well-equipped to tackle any challenges that arise during your Ring Doorbell Pro setup.

Doorbell Screwdriver Replacement Kits, Double-Ended Torx T6 T15 Video Doorbell Camera Screwdriver with 20Pcs Security Screws for Battery Change & WiFi Password Reset, Fits All Video Doorbell Models
【Universal Doorbell Screwdriver】A must-have doorbell accessories compatible with all video doorbell models, including Video Doorbell, Video Doorbell 2,…
As an affiliate, we earn on qualifying purchases.
As an affiliate, we earn on qualifying purchases.
Installation Preparation

Before you begin installing your Ring Doorbell Pro, make certain you've gathered all the necessary tools and checked your existing doorbell system for compatibility. You'll need a Torx screwdriver, a #2 Phillips Head screwdriver, and a 0.25 in drill bit.
Start by verifying compatibility with your existing doorbell system, confirming the power supply is within the required range of 8-24 VAC to prevent any damage during installation. Additionally, consider your home theater setup to guarantee that any camera or video feeds integrate well with your existing audio and visual components, enhancing overall functionality and experience sound system configuration.
Next, download the latest version of the Ring app on your mobile device, as it will be significant for setup and managing your doorbell's features. Before you handle any wiring, prioritize electrical safety by turning off power at the circuit breaker. This step is essential to protect yourself from electrical hazards.
Additionally, take a moment to check the Wi-Fi signal strength at the installation location. A strong connection is imperative for the doorbell's functionality, making sure you receive notifications and video feeds without interruption.

Ring Spare Parts for Ring Wired Doorbell Pro (Video Doorbell Pro 2)
Spare parts to help you set up your Ring Wired Doorbell Pro (Video Doorbell Pro 2) in just…
As an affiliate, we earn on qualifying purchases.
As an affiliate, we earn on qualifying purchases.
Mounting Options

When it comes to mounting your Ring Doorbell Pro, you've got options that cater to your setup.
You can choose between wall mounting techniques or the advantages of corner mounting, both of which require careful consideration of installation height.
Incorporating natural materials in your mounting setup can enhance the aesthetic appeal of your home, creating a cozy entrance that aligns with cottagecore design principles.
Let's explore these methods to guarantee you get the best performance from your doorbell.
Wall Mounting Techniques
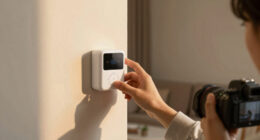
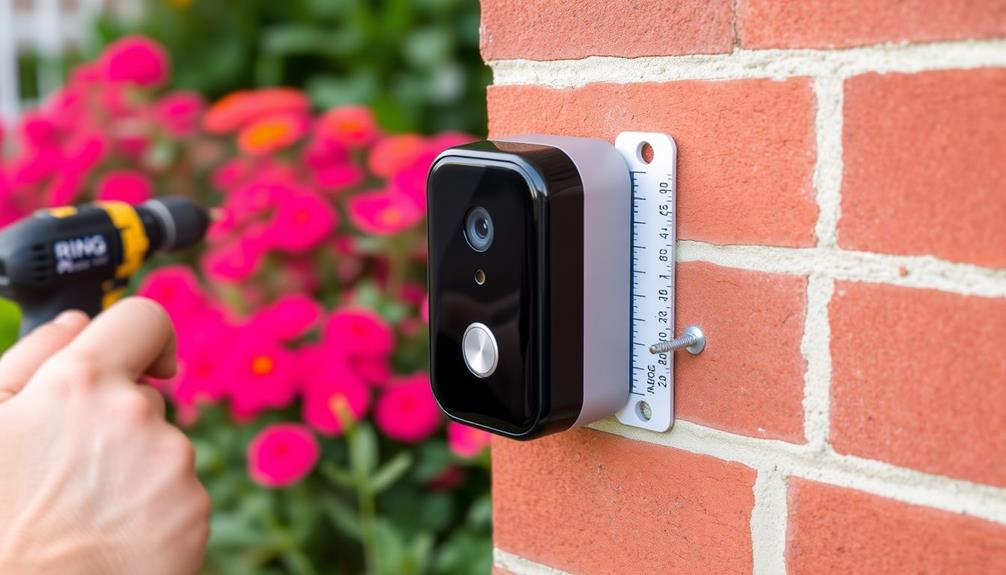
Choosing the right mounting technique for your Ring Doorbell Pro is vital for achieving peak performance and security. Wall mounting is a popular choice, allowing for best viewing angles when installed approximately 4 feet above the ground. For those considering hiring professionals for installation, it's important to verify they've a good reputation and reviews from past clients.
Here are some steps to guarantee a successful installation:
- Use the template: Position the Ring doorbell against the wall and mark the screw holes. This guarantees precise alignment before you start drilling.
- Prepare for masonry: If you're mounting on masonry, drill pilot holes and insert wall anchors. This secures the bracket and prevents any damage.
- Install the bracket: Attach the mounting bracket using screws, making sure they're tightened adequately. Loose screws can lead to instability and potential performance issues.
- Check with a level: During installation, use a level to confirm the doorbell is straight. Proper alignment is vital for effective motion detection and video capture.
Corner Mounting Advantages
Corner mounting your Ring Doorbell Pro offers significant advantages, such as a wider field of view that captures more of your surroundings compared to standard wall mounting. By choosing corner mounting, you enhance motion detection capabilities and improve visibility of visitors approaching from an angle, effectively reducing blind spots. This method is particularly beneficial if you want to integrate additional security features like garage door openers for an all-encompassing home security solution.
The installation process for a corner mount involves marking two mounting holes, guaranteeing a secure fit and proper alignment with existing wiring. This method allows you to elevate the doorbell to the recommended height of around 4 feet, which helps optimize camera performance.
Additionally, corner mounts are particularly beneficial for homes with unique architectural features, providing versatile placement options without sacrificing functionality. You can easily adapt the doorbell's location to suit your specific needs while maintaining an effective surveillance setup.
Incorporating corner mounting into your installation not only enhances the overall efficiency of your Ring Doorbell Pro but also guarantees that your home's aesthetics remain intact. With the right approach, you'll enjoy an all-encompassing view of your entryway, making your home safer and more secure.
Installation Height Guidelines
Mounting your Ring Doorbell Pro at the recommended height of about 4 feet guarantees ideal facial recognition and a clear field of view. This installation height helps capture faces clearly while minimizing obstructions from overhanging structures or plants.
Proper indoor air quality is essential for maintaining a healthy environment, and air purifiers improve indoor air quality effectively, which can be beneficial when installing security devices indoors. If you're considering a corner mount, adjust the height to maintain that 4-foot guideline, confirming you have a clear line of sight to the entrance.
Here are some key points to keep in mind:
- Facial Recognition: Proper height enhances the doorbell's ability to identify visitors.
- Field of View: A 4-foot installation allows for a broader perspective of approaching individuals.
- Motion Detection: Mounting too high can hinder motion detection features, impacting video quality.
- Angle of Approach: Confirm the doorbell is positioned to capture visitors as they arrive, enhancing security.

Smart WiFi Wireless Doorbell Chime for Google Nest, Ring, Blink – App-Connected with LED Light, No Wiring Required (1pack, Black)
Works with Ring, Blink, & Google Nest – This smart chime connects wirelessly via the App in seconds,…
As an affiliate, we earn on qualifying purchases.
As an affiliate, we earn on qualifying purchases.
Power Connection

To guarantee your Ring Doorbell Pro functions properly, you'll need to hardwire it to an existing doorbell chime with a voltage of 8-24 VAC.
Start by turning off the power at the circuit breaker to avoid any electrical hazards while you work. This step is vital for your safety.
Next, you'll want to use the provided Pro Power Kit to establish a stable power connection to your doorbell chime.
Carefully follow the wiring instructions included in the kit. Connect the existing doorbell wires to the corresponding secure terminals on the Ring Doorbell Pro, confirming that each connection is tight to prevent any interruptions in power.
Once you've completed the wiring, it's time to restore power at the circuit breaker. Before moving forward with the setup, check that your Ring Doorbell Pro is receiving electrical supply.
If everything is functioning correctly, you're ready to proceed with the installation process. Proper power connection is critical for the ideal performance of your Ring Doorbell Pro, so take your time to confirm everything is done right.
Connecting the Battery

To connect the battery for your Ring Doorbell Pro, start by accessing the battery compartment at the back of the device.
Next, make certain the battery is fully charged, then insert it securely until it clicks into place.
Battery Compartment Access
Accessing the battery compartment on your Ring Doorbell Pro is a straightforward process that begins by removing the faceplate. Once the faceplate is off, locate the battery slot at the bottom of the device.
To successfully install your battery, follow these steps:
- Ensure the battery is fully charged: Connect it to a power source for at least 8 hours.
- Insert the battery into the compartment: Push the battery in until you hear a click, which indicates it's securely in place.
- Close the battery compartment tightly: This step is essential to prevent any moisture or debris from entering, which could affect functionality.
- Check the battery level: Use the Ring app to verify that the battery is properly connected and has an adequate charge.
Secure Battery Installation
Connecting the battery securely is vital for guaranteeing your Ring Doorbell Pro functions properly right from the start. First, locate the battery compartment at the bottom of the device. Before installation, make certain the battery is fully charged to assure peak performance.
Here's a quick guide to help you with the process:
| Step | Action | Purpose |
|---|---|---|
| 1. Insert | Place the battery in the compartment | Establish a secure connection |
| 2. Close | Firmly close the battery compartment | Prevent moisture and debris |
| 3. Test | Press the doorbell button | Confirm power is on (spinning blue light) |
After you've inserted the battery, confirm it clicks securely into place. A proper connection is essential for the device's functionality. Once the compartment is closed, quickly test the doorbell to verify it powers on. If you see the spinning blue light, you're all set! A secure battery installation will enhance your doorbell's performance and reliability.
Final Setup

With the installation complete, it's time to power up your Ring Doorbell Pro and finish the setup process. First, you'll need to restore electricity to the device by turning the power back on at the circuit breaker.
Once that's done, follow these steps for the final setup:
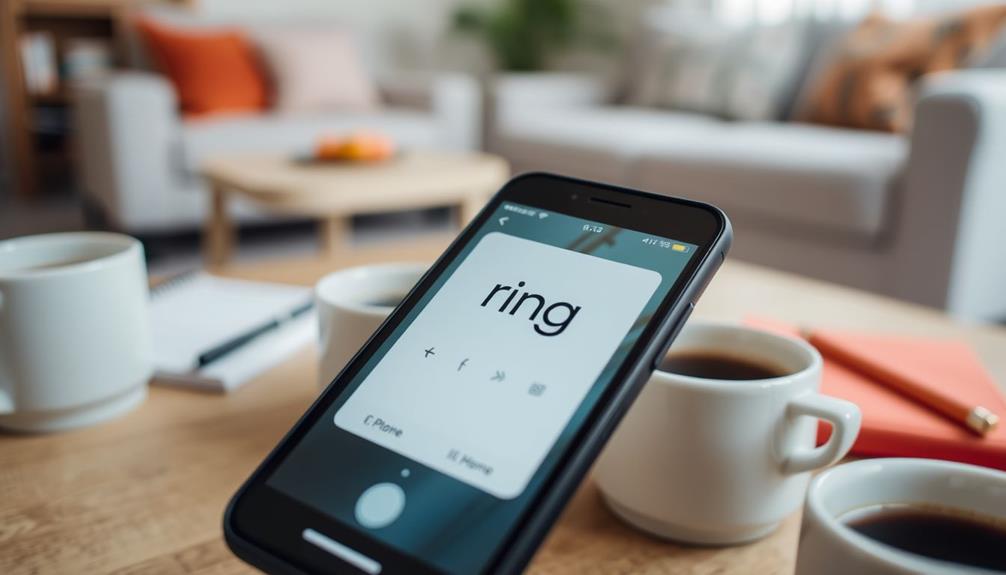
- Open the Ring app on your smartphone and select "Set Up a Device" to begin the connection process.
- Scan the QR code located on your Ring Doorbell Pro; this will help the app easily recognize your device.
- Input your Wi-Fi credentials when prompted. This is essential for connecting your doorbell to your home network and ensuring it functions properly.
- Finally, secure the faceplate of the doorbell using the included security screw. This step is important for protecting the device and keeping everything intact.
Once you've completed these steps, your Ring Doorbell Pro should be fully functional, ready to enhance your home security. Enjoy the peace of mind that comes with knowing your home is monitored!
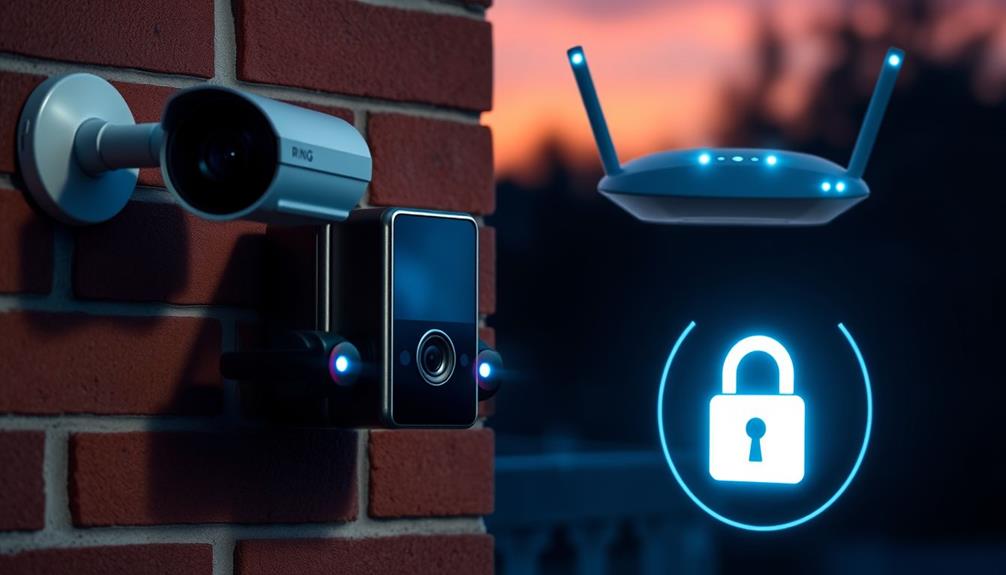
Wi-Fi Optimization

To guarantee your Ring Doorbell Pro performs at its best, optimizing your Wi-Fi connection is essential.
Start by confirming your router is within 30 feet of the doorbell. This proximity helps maintain a strong signal and prevents any drop in performance. Use a Wi-Fi speed test app to check the connection speed at the installation location; aim for at least 2 Mbps for ideal video performance.
Minimize interference by placing your router away from metal objects, microwaves, and cordless phones, as these can disrupt the Wi-Fi signal.
If you're using a standard router, consider upgrading to a dual-band model. The 5 GHz band offers less congestion and faster speeds than the 2.4 GHz band, which can enhance your connection quality.
For larger homes, investing in a Wi-Fi extender or a mesh network system can greatly improve coverage. This guarantees consistent connectivity for your Ring Doorbell Pro, allowing it to function smoothly.
Ring App Features

Optimizing your Wi-Fi connection sets the stage for taking full advantage of the Ring app features, which enhance your home security experience. With the app, you can seamlessly monitor your home and customize your security preferences.
Here are some key features to explore:
- Customize Notification Settings: Tailor alerts for motion detection, doorbell rings, and even specific activity zones, ensuring you stay informed without unnecessary distractions.
- Live Video Feeds and Recorded History: Access real-time video feeds and playback recorded history directly through the Ring app, giving you peace of mind while monitoring your property.
- Shared Access: Easily provide family members or friends with shared access, allowing them to view live feeds and receive notifications from your Ring device.
- Video Quality Settings: Adjust video quality settings to optimize performance based on your Wi-Fi connection and bandwidth, ensuring a clear view of your surroundings.
The Ring app features a user-friendly interface, making it simple to manage multiple devices, switch between different cameras and doorbells, and enhance your overall home security experience.
Troubleshooting Tips

Facing issues with your Ring Doorbell Pro can be frustrating, but there are several troubleshooting tips that can help you get it back on track.
First, check the power. Make sure the Pro Power Kit is correctly installed and that the circuit breaker for the doorbell is turned on.
If you're experiencing connectivity issues, confirm that your Wi-Fi network is functioning properly and that the doorbell is within range of the router, aiming for a signal strength of -60 dBm or better.
If the doorbell isn't responding during setup, try resetting the device. Hold the setup button for 20 seconds until the light flashes, then attempt the setup process again.
For video feed lag or poor quality, consider optimizing your Wi-Fi. Minimize interference from other electronic devices and verify your router's firmware is up to date.
If you encounter issues with the Ring app, try uninstalling and reinstalling it or checking for updates to guarantee you're using the latest version.
Following these tips should help resolve most common problems, allowing you to enjoy your Ring Doorbell Pro without hassle.
Frequently Asked Questions
How Do You Physically Install a Ring Video Doorbell Pro?
To physically install a Ring Video Doorbell Pro, start by removing your old doorbell button and disconnecting the wires.
If you're using a Corner Mount, mark and drill holes to secure it. Otherwise, use the doorbell as a template for screw holes.
Connect the existing wires to the Pro Power Kit, tighten them, and restore power.
How High Should Ring Doorbell Pro Be Mounted?
You should mount your Ring Doorbell Pro at approximately 4 feet, or 48 inches, above the ground.
This height guarantees ideal facial recognition and a clear view of anyone approaching your door.
If it's too high, the downward angle may obscure details; too low, and you risk obstructed views.
Don't forget to check your Wi-Fi range and avoid objects like overhangs or shrubs that could block the camera's line of sight.
How Long Does It Take to Install a Ring Pro Doorbell?
It usually takes about 30 to 60 minutes to install a Ring Doorbell Pro, depending on your experience and existing wiring.
If you're new to electrical work, it might take longer, especially if you need to consult a professional.
Don't forget to factor in extra time for ensuring Wi-Fi connectivity and testing the device, which can add another 10 to 15 minutes to your installation process.
Plan accordingly for a smooth experience!
Can I Install Ring Pro Without Existing Doorbell?
If you're looking to install the Ring Doorbell Pro without an existing doorbell, you're in for a bit of a pickle.
You can't simply plug it in; it needs a hardwired connection.
If there's no existing setup, you'll need to install a transformer that delivers 16-24 VAC.
Don't forget, safety's key—reach out to an electrician if you're unsure about the wiring to avoid any shocks down the line.
Conclusion
Now that you've successfully set up your Ring Doorbell Pro, you're ready to enjoy the peace of mind it brings.
With proper placement, power, and preparation, your home's security is safer and smarter.
Don't forget to explore the Ring app's features for a full-fledged experience.
If you encounter any hiccups, handy troubleshooting tips are just a click away.
Stay secure, stay savvy, and savor the seamless surveillance your new doorbell provides!