To install the battery in your Ring Doorbell, start by opening the silver nickel faceplate to access the battery compartment. Be sure to charge the battery fully using the included USB cable. Then, carefully insert the battery until it clicks securely into place. Close the compartment tightly to prevent any movement. Next, reattach the faceplate and secure it with the screws provided. To confirm everything is working correctly, check the battery status in the Ring app. By following these steps, your Ring Doorbell will be operational in no time. For more tips and troubleshooting, continue with the setup process! Before securely mounting the Ring Doorbell, ensure the battery is correctly inserted and the faceplate is firmly attached. Use the mounting bracket and screws provided to install the doorbell in your preferred location. Follow the manufacturer’s instructions for mounting to ensure a stable and secure installation. Once mounted, test the doorbell to verify its functionality before finishing the setup process.
Key Takeaways
- Open the silver nickel faceplate to access the battery compartment for installation.
- Insert the fully charged battery until it clicks securely into place.
- Close the battery compartment firmly to protect against weather elements.
- Check the battery status indicator to ensure proper connection and charge.
Unboxing the Ring Doorbell
When you unbox the Ring Doorbell, you'll find the doorbell unit, a security screw, a mounting bracket, screws, and a charging cable all neatly packed inside. Each component is essential for the setup and operation of your Ring Battery Doorbell, as effective keyword clustering enhances SEO and helps to improve discoverability.
The charging cable, in particular, is vital for getting your doorbell powered up. You'll need to charge the battery before installation, so be sure to plug it in using the provided orange USB cable until it's fully charged.
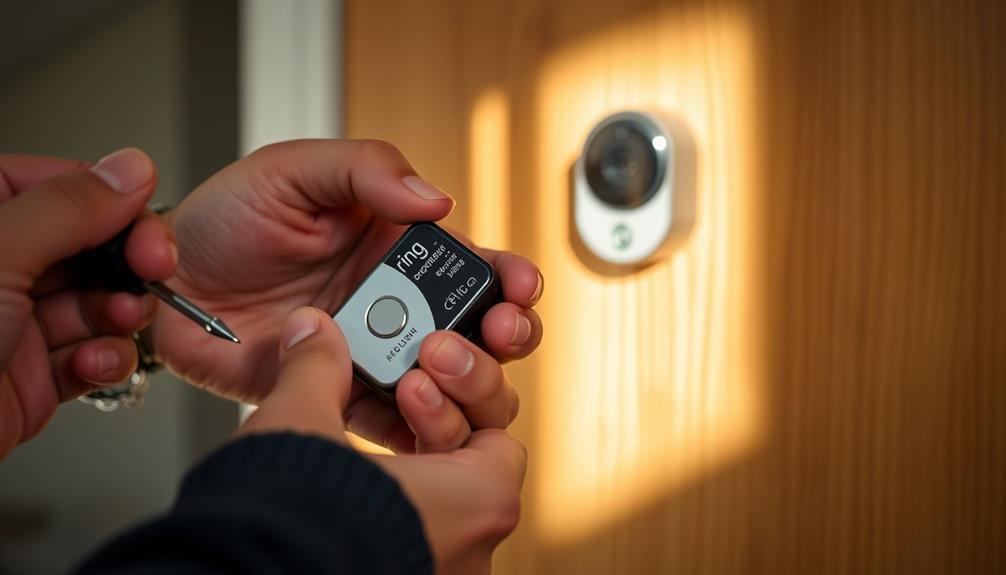
To access the battery compartment, simply open the silver nickel faceplate and slide it out. This design makes it easy to charge or replace the battery when needed.
Don't forget to check the included user manual; it provides detailed instructions on installation and battery management that can help optimize performance.
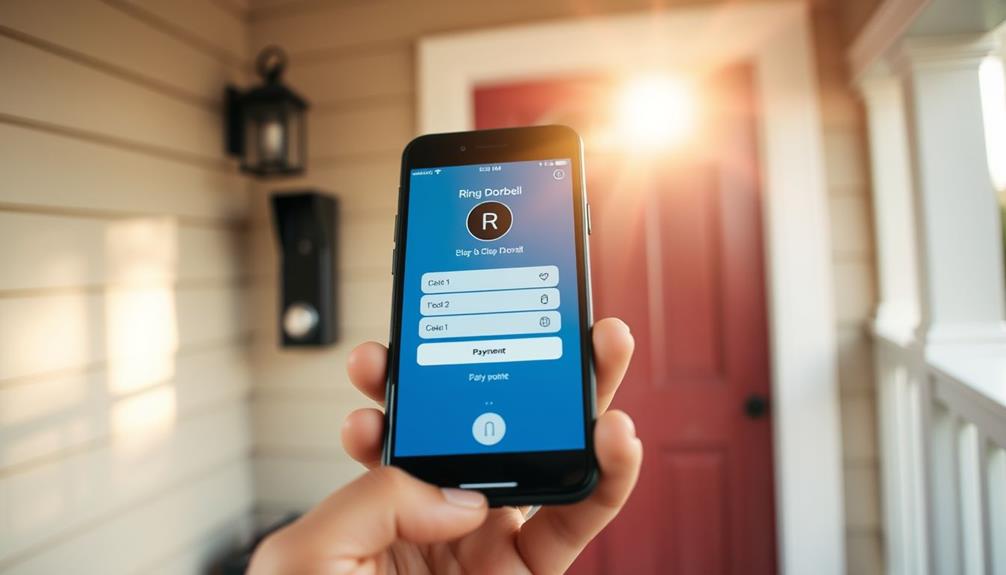
Before you get started, download the latest version of the Ring app, which will assist you during the setup process.
With these steps, you'll be well on your way to enjoying the benefits of your new Ring Battery Doorbell, enhancing your home security with ease.
Preparing for Installation

Before you start, make sure you've got all the required tools and materials handy, including a screwdriver and the Ring doorbell itself.
It's also important to follow safety guidelines to avoid any mishaps during installation, such as ensuring your workspace is clear and well-lit.
With everything prepared, you're ready to install your Ring doorbell battery efficiently.
For further insights on home maintenance, check out reliable service options.
Required Tools and Materials
Gathering the right tools and materials is essential for a smooth Ring doorbell battery installation. Start by getting a Torx screwdriver, which you'll need to remove the faceplate and access the battery compartment. A Phillips head screwdriver will also come in handy for securing the mounting bracket and faceplate during installation. It's also a good idea to have safety glasses on hand to protect your eyes while working. If you are installing a wired Ring Doorbell, you’ll also need to have wire strippers and a voltage tester to ensure a safe and proper installation. Additionally, having a power drill with appropriate drill bits for mounting the doorbell is essential. By gathering all of these tools and materials beforehand, you can ensure a successful and efficient installation of your Ring doorbell, whether it’s battery-operated or wired.
Make certain you have a fully charged battery ready, as this is critical for your doorbell's operation right from the start. Don't forget the orange USB charging cable included with your doorbell; you'll use it to charge the battery before fitting it.
Additionally, having a level tool handy is important to verify that the mounting bracket is installed straight. This step is essential for the proper functionality of your doorbell, so take your time to check it.
With these tools at your side, you'll be well-prepared for a successful installation. Remember, each tool has its purpose, and using them correctly will help you secure your Ring doorbell effectively and efficiently.
Safety Guidelines to Follow
To guarantee a safe installation, always turn off the power at the consumer unit to prevent electrical shock or damage to your Ring doorbell.
Before you start, put on safety goggles and gloves to protect yourself from debris and sharp tools. This simple precaution can save you from unnecessary injuries.
Consider adding a touch of creativity to your entryway with farmhouse front door decor, as it can enhance the overall aesthetic of your home.
Verify the installation surface is stable and capable of securely holding the weight of the doorbell. A shaky mount can lead to accidents after installation, so double-check that everything is secure.
Review the manufacturer's installation instructions carefully to avoid misuse and verify proper fitting of the battery compartment.
As you work, keep your tools and small parts organized and out of reach of children or pets. This will help you avoid potential hazards during the installation process.
If you're working in tight spaces, be cautious of your surroundings, as it's easy to trip or bump into something.
Following these safety guidelines won't only protect you but also verify your Ring doorbell is installed correctly and securely, providing peace of mind for years to come.
Installing the Doorbell

Now that you're prepared, it's time to install your Ring doorbell battery.
Before getting started, verify you have the right tools, and consider how a home theater setup can benefit from a well-placed doorbell for seamless integration.
You'll need a few basic tools and to follow some straightforward steps for battery installation.
Afterward, you can test the doorbell to make certain everything's working as it should.
Preparation and Tools Needed
Before you start installing your Ring doorbell, make certain you have the necessary tools and equipment ready. Proper preparation is key to a smooth installation process. Here's what you'll need:
- Torx screwdriver
- #2 Phillips Head screwdriver
- 0.25 in drill bit
First, charge the Ring battery fully with the provided orange USB cable. This guarantees peak performance right from the start. Additionally, consider the air quality in your installation area, as poor indoor air can affect your overall comfort while working. For more information on improving air quality, check out air purifiers importance.
Next, gather all hardware that came with your doorbell to facilitate a secure installation.
Review your installation location to confirm it's compatible with your existing doorbell system, and check the Wi-Fi signal strength to assure reliable connectivity. Following safety guidelines is vital, especially if you're hardwiring the doorbell to existing systems. Make certain to turn off power at the circuit breaker before starting any electrical work.
Having all your tools and equipment ready will streamline the installation process, making it easier for you to get your Ring doorbell up and running efficiently. With the right preparation, you'll be well on your way to enjoying your new home security feature.
Battery Installation Steps
Begin by opening the silver nickel faceplate on your Ring doorbell to access the battery compartment. Once you've located the compartment, take your fully charged battery and insert it, making sure it clicks securely into place. This connection is vital for the doorbell's operation.
To confirm you have the best tools for your project, it's important to use the right equipment for any home improvement tasks.
After inserting the battery, close the battery compartment firmly to protect it from weather elements. It's significant to secure everything properly to maintain the device's performance over time.
Align the faceplate with the mounted doorbell and use the included security screws to fasten it. This not only secures the faceplate but also deters theft.
Once you've installed everything, always remember to check the battery status through the Ring app. This will allow you to monitor the charge level and guarantee peak performance. Keeping an eye on the battery will help you avoid any unexpected downtime.
Regular monitoring will enable you to enjoy the full benefits of your Ring doorbell without interruptions. Following these steps will assure a smooth installation and reliable operation of your device.
Testing Doorbell Functionality
After securing the faceplate, it's time to test your Ring doorbell's functionality to confirm everything is working as expected.
Start by pressing the button on your doorbell. You should receive a notification on your connected device. If you don't, double-check your settings.
Next, access the live feed through the Ring app to confirm the camera is operational. You want to see a clear view of the area in front of your doorbell.
Here are a few key steps to follow during testing:
- Confirm you receive alerts when the doorbell is pressed.
- Check for motion notifications to confirm you're alerted to movement.
- Adjust your notification settings in the Ring app to your liking.
Utilizing the 30-day trial of Ring's subscription service can also enhance your doorbell's functionality with features like video recording.
Testing these elements not only confirms everything's functioning properly but also maximizes your security setup.
Connecting the Battery

Connecting the battery to your Ring doorbell is a straightforward process that guarantees your device stays powered and ready to use.
Start by locating the battery compartment, usually accessible by opening the silver nickel faceplate. Once you've found it, take your fully charged battery and insert it into the compartment. Make certain it clicks securely into place to establish a proper connection.
After inserting the battery, close the compartment firmly. This step is vital to prevent the battery from becoming loose or dislodged during operation. If your Ring doorbell model features a battery status indicator, take a moment to check it. This indicator will confirm that the battery is properly connected and has sufficient charge for your device to function effectively.
If you find that the battery isn't fully charged, don't worry. You can easily recharge it using the provided orange USB cable. A fully charged battery is important to guarantee peak performance, so make sure to keep an eye on the battery status and recharge it as needed.
Following these steps will help you maintain a secure and reliable connection for your Ring doorbell.
Testing Functionality

To guarantee your Ring doorbell is functioning properly, press the doorbell button and check for notifications on your mobile device. This initial step is vital for testing functionality.
After that, you can dive deeper into the features your Ring doorbell offers. Here's what to check:
- Access the live video feed through the Ring app to confirm the camera's operational status.
- Walk in front of the camera to verify motion detection; you should receive alerts or see motion events in the app.
- Utilize the 30-day trial of the Ring Protect subscription to explore features like video recording and event history.
These steps will guarantee your Ring doorbell is working effectively.
By confirming that notifications are received, the camera is capturing video, motion detection is alerting you, and audio is clear, you can feel confident in your device's performance.
Proper functionality testing is essential for peak security.
Troubleshooting Common Issues

Even with proper functionality testing, you might encounter common issues when fitting the Ring doorbell battery. First, verify the battery is fully charged and that it's correctly inserted, aligning it with the connectors in the battery compartment.
If your battery feels loose after installation, try removing it and reinserting it to make certain it clicks into place securely. Next, check for any obstructions or debris in the battery compartment that could prevent a proper fit.
If the doorbell doesn't power on after you've inserted the battery, confirm that it's charged and that the device isn't in a low power state. For persistent issues, the Ring app's Device Health section is your best friend.
It allows you to check the battery status and troubleshoot any connectivity concerns you might face. Always keep an eye on the app for alerts related to battery performance; this could help you identify potential issues quickly.
Frequently Asked Questions
How to Install Battery in Ring Doorbell?
To install the battery in your Ring Doorbell, start by locating the battery compartment.
Slide open the front faceplate and verify your battery's fully charged using the orange USB cable.
Next, insert the battery into the compartment until it clicks securely into place.
Close the compartment to protect it from the elements, then reattach the faceplate.
Don't forget to tighten the security screw to keep everything secure and prevent unauthorized access.
How Do You Put a Battery in a Doorbell?
Putting a battery in a doorbell is like giving it a new lease on life!
First, locate the battery compartment, usually on the back or bottom of the doorbell.
Then, take your charged battery and align it properly.
Slide it in gently until you hear that satisfying click.
Finally, close the compartment securely.
If there's a screw, tighten it to keep everything in place.
Your doorbell's now ready to ring!
Can You Change the Battery on All Ring Doorbells?
No, you can't change the battery on all Ring doorbells.
Some models, like the Ring Video Doorbell Pro and Pro 2, are hardwired and don't have removable batteries.
However, if you have models like the Ring Video Doorbell 2, 3, or Battery Doorbell Plus, you can easily swap out the battery.
Just press the release tab, slide out the battery, and replace it with a fully charged one for peak performance.
Can You Install Ring Doorbell Without Battery?
Oh sure, you can totally install a Ring Doorbell without a battery—if you enjoy having a fancy door knocker instead!
Without a battery, it's just a decorative piece, not a functioning device.
You'll miss out on all those lovely notifications and video recordings.
Conclusion
Now that you've fitted your Ring Doorbell battery and completed the installation, take a moment to step back.
Will it capture every moment as intended? As you power it up, anticipation builds—will you hear that satisfying chime?
Don't forget to test its features and guarantee everything's running smoothly. If something seems off, don't panic; troubleshooting is just around the corner.
You're one step closer to enhanced security—what surprises will your new doorbell reveal?