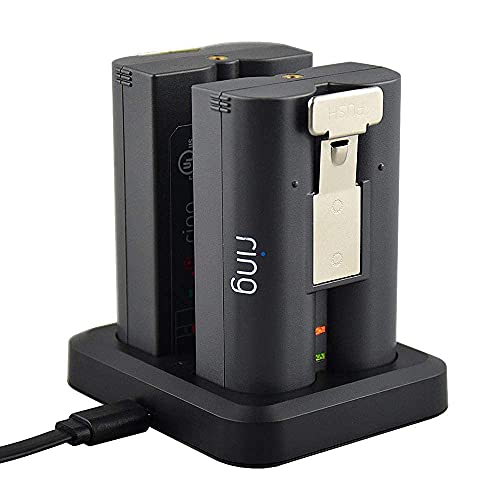
For the installation of your Ring Doorbell 4, begin by charging the battery using the provided USB cable until an LED indicator lights up. Download the Ring app to begin the setup process. Determine a mounting height of 48 inches and use a level tool for proper alignment. Drill holes using a 6mm masonry bit or use screws for wood siding. Secure the device with the included screws and ensure that the wiring connections are secure, indicated by a white light. Attach the faceplate securely. Regularly check the battery status and Wi-Fi connectivity. Stay tuned for more detailed tips and troubleshooting advice to ensure a smooth installation! Follow these essential ring doorbell installation steps to guarantee a successful setup of your Ring Doorbell 4. Verify the stability of the mounting and alignment. Test the functionality of the doorbell and its connection to the app to confirm everything is working correctly. By following these instructions, you can enjoy the enhanced security and convenience of your Ring Doorbell 4.
Key Takeaways
- Charge the battery using the provided USB cable until one LED lights up before starting installation.
- Mount the doorbell at a height of 48 inches for optimal performance and visitor detection.
- Use a 6mm masonry drill bit for brick or concrete surfaces, and ensure all holes are marked accurately.
- Connect wires securely, ensuring a solid white light indicates proper wiring before final assembly.

RIOVO Adjustable 30 to 55 Degree Doorbell Angle Mount Compatible with Ring/Blink Video Doorbell/Battery Doorbell, Replacement Angle Adjustment Adapter Mounting Bracket Wedge Kit
Compatible Model: This angle mount compatible with RlNG Battery Doorbell (2024 Release) / Video Doorbell 2 / Video…
As an affiliate, we earn on qualifying purchases.
As an affiliate, we earn on qualifying purchases.
Installation Preparation
Preparing for the installation of your Ring Doorbell 4 is vital for a smooth setup and ideal performance. Start by charging the provided battery with the orange USB cable until the indicator shows one lit LED, indicating it's fully charged.
Next, download the Ring app and set up your device to guarantee proper configuration before you begin the physical installation. It's also helpful to read reviews and tips from users to understand common challenges, which can enhance your installation experience, similar to how one would consider key factors in choosing a home cleaning service.
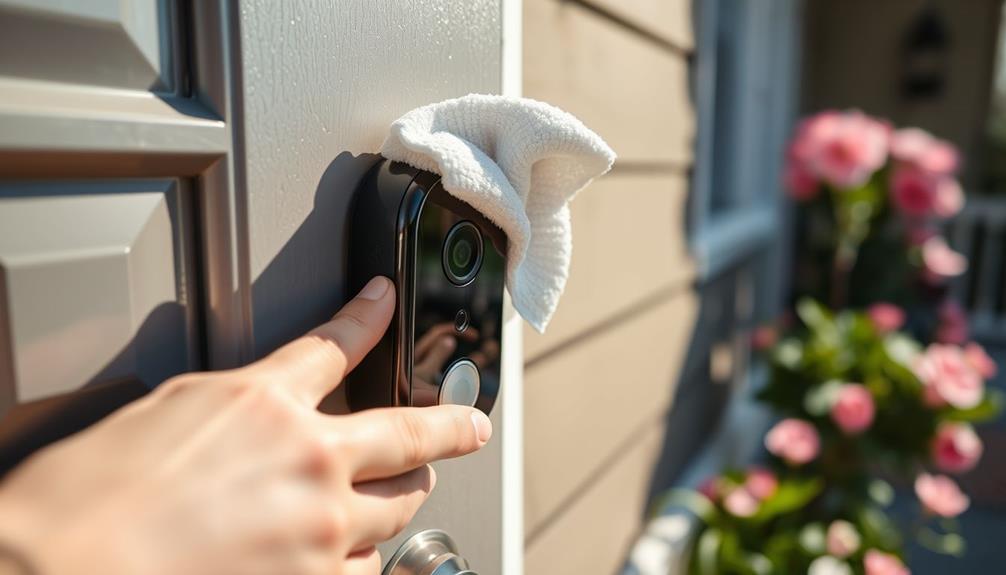
Gather the tools needed for installation, including a 6mm masonry drill bit and a PH2 Phillips screwdriver. Position the Ring Doorbell 4 at a height of about 48 inches (1.2m) from the ground, then accurately mark the mounting hole positions with a pencil.
If you have an existing intercom system, make sure to verify that the power is shut off before you proceed. This step is vital to avoid any electrical hazards when you're disconnecting wires.
Once everything's in place, you'll be ready for the next steps. Confirming these preparations are done will help you secure your Ring Doorbell 4 effectively and set you up for a successful installation.

10-PCS Masonry Drill Bit Set & Concrete Drill Bit Set, Professional Drill Bit Set for Glass/Brick/Plastic/Cement/Wood/Tile/Etc, Industrial Strength Carbide Drill Bit Tip, 1/8"-1/2" by TITGGI
HIGH QUALITY DRILL BIT SET; TITGGI Masonry drill bit set, industrial strength carbide drill bit tip, excellent abrasion…
As an affiliate, we earn on qualifying purchases.
As an affiliate, we earn on qualifying purchases.
Mounting the Device

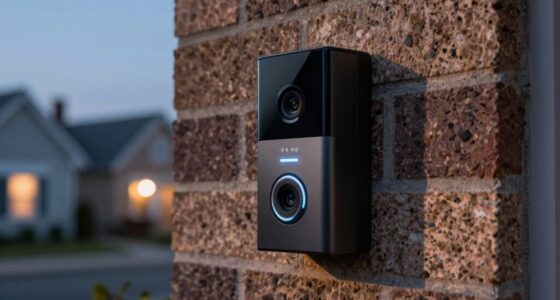
When mounting your Ring Video Doorbell 4, you'll want to start by positioning it at about 48 inches off the ground for the best view. This height guarantees that the camera captures faces clearly and provides an ideal field of vision.
Next, you'll need to decide whether to drill into a solid surface or simply use the screws for wood or vinyl siding.
For more information on enhancing your home security through effective content strategies, check out strategies for increasing topical authority.
Once you've marked your holes and secured the device, you're all set to enjoy enhanced home security.
Ideal Mounting Height
For the best performance, mount your Ring Video Doorbell 4 at a height of about 48 inches (1.2 meters) from the ground. This mounting height guarantees ideal viewing and functionality, allowing for better detection of visitors and packages while minimizing blind spots.
Additionally, consider incorporating thoughtful elements into your home setup, much like how heartfelt verses can bless loved ones on special occasions.
During installation, it's vital to use a level tool to confirm that your Ring Doorbell 4 is straight and properly aligned. Once you've leveled the device, mark the mounting hole positions with a pencil. This step is essential for accurate drilling and installation, making sure that everything is positioned correctly.
While 48 inches is the standard guideline for effective performance, you may need to adjust the height based on specific entryway structures or your personal preferences. This flexibility allows you to customize the installation for your particular setup while still maintaining functionality.
Drilling and Anchoring Tips
Drilling precise holes for your Ring Doorbell 4 is essential to guarantee a secure and stable installation. Start by using a 6mm masonry drill bit for brick, concrete, or stucco. Make sure to drill at the marked positions for proper alignment. If you're mounting on wood or vinyl siding, you can skip drilling and use the included screws directly.
Here's a quick guide to help you:
| Surface Type | Drill Required |
|---|---|
| Brick | Yes (6mm bit) |
| Concrete | Yes (6mm bit) |
| Stucco | Yes (6mm bit) |
| Wood/Vinyl Siding | No (use screws) |
After drilling the holes, insert plastic anchors into them for a secure fit before fastening everything down. Position the mounting holes at a height of approximately 48 inches (1.2 meters) from the ground for ideal placement. Finally, verify all components are tightly secured with the four included screws to prevent the device from being easily removed or tampered with. Following these steps will lead to a successful installation of your Ring Doorbell 4.
Securing the Doorbell
Securing your Ring Doorbell 4 is straightforward once you've marked the mounting hole positions and prepared the surface. Start by positioning the doorbell approximately 48 inches from the ground for ideal viewing. Use a pencil to mark the mounting holes accurately.
If you're installing the doorbell on brick, concrete, or stucco, drill the holes you've marked and insert the included plastic anchors for extra support. Additionally, consider confirming the area is free from any obstructions that could affect the doorbell's camera view, as this will enhance the device's effectiveness in monitoring your home. You might find it helpful to refer to top security features for home devices to maximize your doorbell's functionality.
Next, align the Ring Doorbell 4 over the drilled holes and fasten it securely using all four included screws. This guarantees the device stays in place without any movement. If you're working with wood or vinyl siding, skip the drilling step entirely. Instead, use the optional adapter mounting plate included with your doorbell for an easy fit.
Once everything is in position, double-check that the doorbell is level before tightening the screws fully. This step is vital for maintaining the functionality and aesthetics of your installation. With the doorbell secured, you can enjoy the peace of mind that comes with reliable home monitoring.

Orbitell 1080p Wireless Wi-Fi Video Doorbell Camera with Two Way Audio, Night Vision, Cloud Storage, Smart AI Motion Detection, Support 2.4GHz Wi-Fi only
AI-Powered Smart Detection: Advanced AI technology accurately identifies people while filtering out vehicles and animals, so you only…
As an affiliate, we earn on qualifying purchases.
As an affiliate, we earn on qualifying purchases.
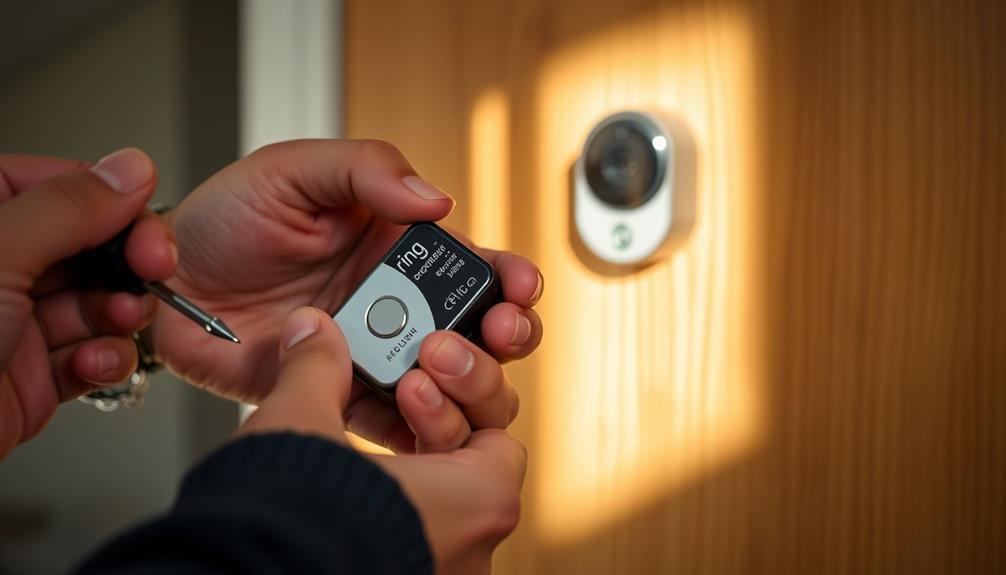
Wiring Connections

Connecting the wires to your Ring Video Doorbell 4 is straightforward, as either wire from your wall can attach to either screw on the device.
Before starting, make certain to shut off power to your existing doorbell system to avoid electrical hazards. Additionally, consider the calming atmosphere of your workspace as you work on this installation, which can enhance focus and productivity, much like how vintage decor elements create a cozy aesthetic in cottagecore design.
Once the power is off, you can proceed with the wiring connections.
If your existing doorbell wiring is too short, don't worry! You can use wire extensions and wire nuts to create a secure connection. Just make sure that all wires and wire nuts are properly fed into the wall before you secure the Ring Video Doorbell 4 to avoid any obstructions.
After making the connections, turn the power back on and check for a solid white light on the device. This light indicates that the wiring connections have been made correctly and that the device is powered.
If the light doesn't appear, double-check your connections to make certain everything is properly wired. Once you've confirmed the solid white light, you're ready to proceed with the installation.
Battery Charger for Ring Rechargeable Battery,Dual Ring Battery Charger Station for Ring Spotlight Cam Battery,Ring Video Doorbell 2/3/4,Ring Stick Up Cam Battery (Ring Batteries NOT Included)
[Dual Charging] This Ring rechargeable battery charger station can charge up to 2 ring batteries simultaneously, allowing you…
As an affiliate, we earn on qualifying purchases.
As an affiliate, we earn on qualifying purchases.
Final Assembly

To complete the installation, align the Ring Video Doorbell 4 over the mounting holes and make certain it's positioned correctly before fastening it to the wall.
Proper air quality is essential for a comfortable home environment, so consider how using an air purifier can complement your smart home devices by ensuring cleaner air while enhancing your overall space eliminate allergens and odors effectively.
Once aligned, use all four included screws to secure your Ring Video firmly. This step is vital for ensuring the device doesn't wobble or shift over time. If you have any exposed wires, carefully feed them and the wire nuts into the wall to keep the installation clean and organized.
After securing the device, it's time to attach the faceplate. Slot it in at the top and press down until it clicks into place, ensuring a snug fit. A properly fitted faceplate not only enhances the appearance but also provides added protection for your device.
Troubleshooting Common Issues

Troubleshooting common issues with your Ring Doorbell 4 can help guarantee it operates smoothly and efficiently.
Start by checking for incorrect wiring during installation, as this can prevent the device from functioning properly. Verify all connections are secure and that the device displays a solid white light. If you notice the doorbell isn't responding, check the battery status. If it's low, simply recharge the battery to restore functionality.
Next, confirm your Ring Doorbell 4 is connected to a stable Wi-Fi network. Poor connectivity can lead to performance issues, so verify your Wi-Fi signal strength. If you're still experiencing problems, turn to the Ring app for specific troubleshooting steps. The app can guide you through resolving common problems and help clarify any installation queries you might have.
Lastly, consider reviewing community posts and discussions, as they often contain shared experiences and solutions that might apply to your situation. By following these steps, you can address connectivity issues and improve the overall device functionality of your Ring Doorbell 4.
Help Resources

Finding help resources for your Ring Doorbell 4 can make installation and maintenance much easier.
Start by visiting the Ring Help Home, where you'll find a variety of articles focused on installation, troubleshooting, and Ring Protect subscriptions. For detailed guidance on mounting your device, look for installation articles that provide step-by-step instructions, including how to properly secure it with security screws.
If you're having connectivity issues, utilize the Wi-Fi Help section to enhance your device's performance. Strong Wi-Fi is essential for your Ring Doorbell 4 to function effectively.
Additionally, if you need assistance with the battery, the Power & Battery Help section offers insights on recharging and hardwiring your doorbell to guarantee it operates smoothly.
Lastly, consider exploring the subscription options for Ring Protect, which can enhance your security experience with features like video recording and cloud storage.
Whether you're troubleshooting or looking to optimize installation, these resources will help you maximize the potential of your Ring Doorbell 4.
Security Features

The Ring Video Doorbell 4 offers a robust set of security features designed to keep your home safe and give you peace of mind. With the right installation practices, you can enhance your device security considerably.
Here are some key features to take into account:
- Security Screws: Use the provided faceplates and secure them with star-shaped security screws to prevent tampering.
- Solid White Light: This indicator shows that your doorbell is correctly wired, guaranteeing peak functionality and security.
To maintain device security, regularly check the battery status through the app. If you notice a low battery, it's time for charging.
During installation, remember to focus on aligning stability for the doorbell. This guarantees that it stays securely in place and operates effectively.
Keeping these features in mind won't only help you in installing the Ring Video Doorbell 4 but also in maximizing its security benefits. By staying proactive, you can enjoy enhanced protection and peace of mind within your home.
Frequently Asked Questions
How Do You Install a Ring 4 Doorbell?
To install a Ring 4 doorbell, start by charging the battery until the LED turns green.
Insert it into the device.
Position the doorbell about 48 inches off the ground, using a level to mark holes for drilling.
If needed, use anchors for stability.
Connect the wall wires, ensuring everything fits inside the wall.
Secure the doorbell with screws, then attach the faceplate and tighten the security screw to finish the installation.
How Do You Position a Ring Doorbell 4?
You might think positioning your Ring Doorbell 4 isn't essential, but getting it right can make all the difference.
Ideally, place it about 48 inches off the ground for the best view. Use a level tool to keep it straight, and mark the mounting holes accurately.
Confirm the camera has a clear line of sight to capture visitors without obstructions.
If needed, adjust the angle to enhance visibility and avoid unwanted background.
Does Ring Doorbell 4 Need to Be Hardwired?
No, the Ring Doorbell 4 doesn't need to be hardwired.
It runs on a rechargeable battery, so you can install it in various places without worrying about wiring.
However, if you want uninterrupted power, hardwiring to an existing doorbell transformer is an option.
Just remember to check the transformer's specifications to avoid any damage.
Ultimately, it's up to you whether you prefer the convenience of hardwiring or the flexibility of battery operation.
How Do You Install a Ring Doorbell 4 Without Drilling?
Imagine a world where you can install a doorbell without ever picking up a drill!
To install your Ring Doorbell 4 without drilling, grab that handy mounting plate made for wood or vinyl siding.
Secure it with the included screws, ensuring it's tight.
Position your doorbell about 48 inches off the ground for the best view.
Connect it to a charged battery or existing wiring, then attach it to the plate and check for stability.
Easy peasy!
Conclusion
Now that you've successfully fitted your Ring Doorbell 4, you can enjoy the peace of mind that comes with modern security tech—no need to send a carrier pigeon for help anymore!
Remember to regularly check for updates and keep an eye on your device's performance.
If you encounter any issues, don't hesitate to refer back to the troubleshooting section.
You're all set to welcome guests and deter unwanted visitors with a simple ring!