Setting up a plug-in Ring doorbell is simple and enhances your home’s security. Begin by switching off the power at the breaker box for safety. Gather your tools, then uninstall the old doorbell if necessary. Install the new doorbell’s mounting bracket, securely attaching it to the wall, and link the power cable. Align the doorbell with the bracket until it snaps into place. Restore power and inspect the LED indicators to confirm it is working. Lastly, connect the doorbell to Wi-Fi using the Ring app, personalizing your notification settings as you go. There is more to learn about maximizing your setup!
Key Takeaways
- Gather necessary tools, including a screwdriver and screws, and ensure the installation area is clean before starting.
- Confirm power is turned off at the breaker box before removing the old doorbell and detaching wiring.
- Securely mount the new Ring doorbell using the provided bracket and connect the power cable to its terminals.
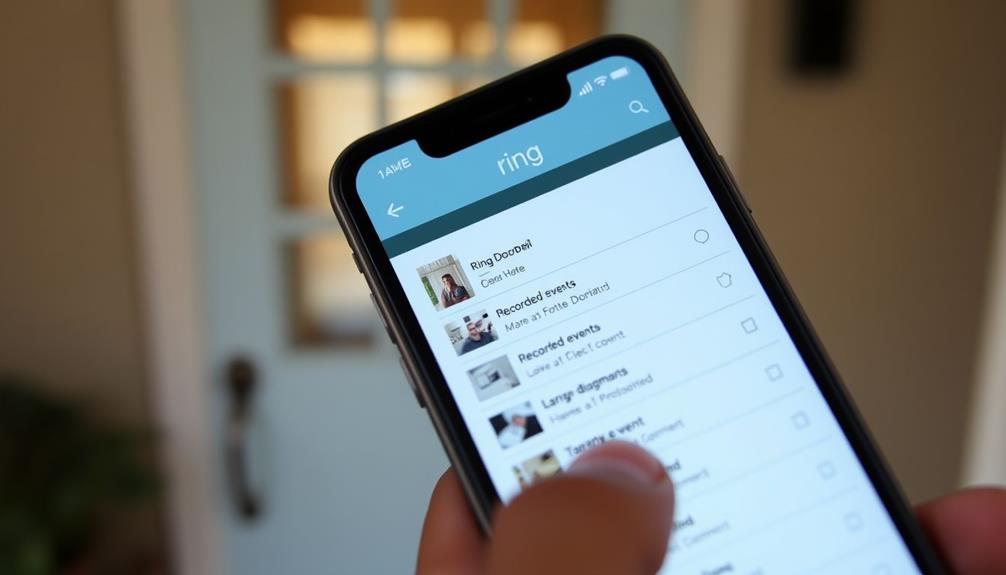
- Restore power and check the LED indicators to confirm functionality, ensuring the doorbell operates via the Ring app.

Ring Spare Parts Kit for Battery Doorbell
Everything you need to setup your Ring Battery Doorbell in just a few minutes.
As an affiliate, we earn on qualifying purchases.
As an affiliate, we earn on qualifying purchases.
Installation Preparation
Before you begin installing your Ring doorbell, make certain you've gathered all the necessary tools and prepared your device for setup. You'll need a screwdriver, screws, and potentially a drill if you're mounting on brick or stucco. If you're replacing an existing doorbell, it's essential to prioritize safety by turning off the power at the breaker box to avoid any electrical hazards.
Additionally, verify that the installation area is clean and free of debris, as this will help prevent any issues during the mounting process. You might also want to take into account reaching out for professional help if you're uncertain about the installation, as trained and insured staff can provide expertise.
Next, check the battery charge on your Ring doorbell. For models that aren't hardwired, confirm it's fully charged, which usually takes about four to six hours. While the battery charges, download the Ring app on your smartphone. This app will guide you through the setup process and help with the Wi-Fi connection, so it's best to position yourself close to where you'll install the doorbell for ideal signal strength.
When you're ready to remove the old doorbell, use your screwdriver or a box cutter carefully, making sure to handle the wiring gently to prevent damage.
With these steps, your installation preparation will be thorough, setting you up for a smooth installation process.

WIFI Doorbell Chime for Google Nest, Ring, Blink – Wireless Doorbell Extender with LED Flash Alert, No Transmitter Needed, Easy Setup Receiver (1 Pack)
Works with Nest, Ring, Blink Video Doorbell – This smart chime connects wirelessly via the App in seconds,…
As an affiliate, we earn on qualifying purchases.
As an affiliate, we earn on qualifying purchases.
Internet Connectivity

Once you've prepared for installation, guaranteeing your Ring doorbell has a solid internet connection is essential for its functionality. The initial setup process involves connecting your doorbell to your Wi-Fi. Download the Ring app and follow the prompts to achieve this. For peak connectivity, make sure your doorbell is within range of a strong Wi-Fi signal.
If you notice a weak signal, consider using a Wi-Fi extender. Additionally, a Ring Chime can help improve the Wi-Fi connection while providing audible alerts when someone rings your doorbell.
Here's a quick overview to help you understand the key components for a successful connection:
| Component | Function |
|---|---|
| Wi-Fi Extender | Boosts Wi-Fi signal for better range |
| Ring Chime | Alerts you and enhances connectivity |
| Firmware Updates | Guarantees the latest performance and security |
Don't forget to regularly check the firmware of both your router and plug-in Ring doorbell. This habit guarantees that you maintain the best performance and security for your device.
Ring Spare Parts Kit for Battery Doorbell
Everything you need to setup your Ring Battery Doorbell in just a few minutes.
As an affiliate, we earn on qualifying purchases.
As an affiliate, we earn on qualifying purchases.
Safety Precautions

Safety is vital when installing your plug-in Ring doorbell, so always turn off the power at the breaker box to avoid electrical shock. This precaution helps protect you from electrical hazards during the installation process.
When guaranteeing a safe environment, consider the impact of indoor air quality; using ozone air purifiers can help eliminate allergens that might affect your respiratory health while you work. Use insulated tools when handling electrical components to further guarantee your safety.
If you're working near existing wiring, carefully inspect the area to avoid damaging any electrical wires. This will help you maintain compliance with safety standards and prevent any unforeseen issues during the installation.
Make sure the location you choose for your doorbell is dry and free from water exposure, as moisture can pose significant electrical hazards. Following the manufacturer's guidelines provided in the user manual is vital; these instructions are designed to help you achieve a secure and compliant installation.
Ring Chime — Enhanced audio for real-time alerts you can hear from anywhere, easy plug-in setup, simple wifi & Bluetooth connectivity, sleek design, White
Hear when someone's there — Receive notifications when motion is detected by your cameras or someone rings your…
As an affiliate, we earn on qualifying purchases.
As an affiliate, we earn on qualifying purchases.
Old Doorbell Removal

To remove your old doorbell, start by carefully detaching the faceplate with a screwdriver or box cutter to reveal the screws underneath.
Once you've exposed the screws, unscrew the old doorbell from the wall. Gently pull it away to access the existing wires connected to the device.
Before you begin this removal process, make certain you turn off power at the breaker box to avoid any electrical hazards. It's also wise to verify that your existing wiring is compatible with your new device, as some smart doorbells require specific voltage levels, which can be found in smart features for remote access.
After the old doorbell is detached, take your time to loosen the screws that secure the wires.
It's essential to detach the wires carefully without causing any damage, as you'll need them for the new installation.
Once you've completely detached the wires from the old device, you can either dispose of or store the components safely.
Mounting the New Doorbell

Position the mounting bracket of your plug-in Ring doorbell over the desired area, making certain it's level and aligned with any nearby power outlets. This step is essential for guaranteeing a streamlined doorbell installation. Once you have it in place, consider the importance of proper techniques for effective painting if you're also painting the surrounding area. This will help maximize the aesthetic appeal of your installation. Installing ring doorbell battery is the next step in the process. Make sure to follow the manufacturer’s instructions for inserting and securing the battery into the doorbell. Once the battery is in place, you can proceed with connecting the doorbell to your Wi-Fi network and testing the functionality. With proper positioning and attention to detail, your Ring doorbell installation will be both visually appealing and fully functional. Fitting ring doorbell battery is an important step in the installation process. It ensures that the doorbell has the power it needs to function properly. Once the battery is securely in place, you can proceed with connecting the doorbell to your Wi-Fi network and testing its functionality. Taking the time to follow each step carefully will result in a seamless installation and a reliable security system for your home.
- Use the provided screws to secure the mounting bracket to the wall. Make certain it's tight to support the weight of the doorbell.
- Connect the power cable to the terminals on the back of the doorbell. This guarantees a secure connection that avoids any power issues later on.
- Align the Ring doorbell with the mounted bracket and press down firmly until it clicks into place. This sound indicates a secure attachment.
After you've mounted your doorbell, it's important to restore power to the outlet. Finally, verify functionality by testing connectivity through the Ring app. This will confirm that everything is working as intended. With these steps, you'll have successfully installed your plug-in Ring doorbell and be ready for the next phase of setup.
Power Restoration and Testing

Power Restoration and Testing
Once you've mounted your plug-in Ring doorbell, it's time to restore the power supply from your breaker box.
Be sure that all connections are secure to prevent any electrical failures, which can be a common issue in devices like heat pumps, as noted in common issues.
After that, test the functionality by pressing the doorbell button and checking the Ring app for notifications.
Don't forget to verify that any existing chime works and inspect wire connections if it doesn't.
Restore Power Supply
After completing the installation of your Ring doorbell, head back to the breaker box to restore power to its circuit. Once you've flipped the breaker back on, it's time to confirm your doorbell is functioning properly. Follow these steps:
- Verify Power: Check for LED indicators on your Ring doorbell. If they're lit, you're good to go. Alternatively, use the Ring app to confirm that the device is connected to your Wi-Fi. It's essential to monitor your device's performance, as understanding cybersecurity measures can help you safeguard your smart home technology.
- Check the Chime: If you have a connected chime and it doesn't sound when the doorbell is pressed, re-examine the wire connections. Verify they're secure and configured according to the installation instructions.
- Digital Chimes: If you're using a digital chime, make sure the diode is oriented correctly for compatibility with your Ring doorbell.
Once power is restored, you can start testing the doorbell's features, such as motion detection and video streaming. This confirms everything is functioning as expected and that your doorbell is ready to keep an eye on your home.
Test Functionality and Chime
With power restored, it's time to test the functionality of your Ring doorbell and confirm your chime works as intended. Start by pressing the doorbell button and watch for a notification on your mobile device. If you receive the alert, the integration between your Ring doorbell and app is successful.
Next, check if your existing chime sounds when you press the button. This indicates successful integration with your chime system. If the chime doesn't ring, you might need to inspect the wire connections for any loose or improper fittings. Making sure these connections are secure is essential for your doorbell's operation.
If you're using digital chimes and they don't activate, try reversing the diode. This adjustment can greatly affect compatibility with the Ring doorbell, so don't overlook it.
Once everything is set, your Ring doorbell should function seamlessly with your chime, enhancing your home security. If any issues persist, revisit the wire connections or consult the installation guide for troubleshooting tips.
Testing functionality confirms that your Ring doorbell and chime system work together effectively, providing you with dependable notifications every time someone rings your doorbell.
Verify Wire Connections
To guarantee your Ring doorbell is operational, first, check the wire connections for secure attachments and any potential short circuits. After restoring power, observe the indicator lights on your doorbell. A steady light means everything is working as it should. If there's no light, follow these steps to verify wire connections:
- Inspect the Connections: Verify all wires are securely attached and not touching each other, as this could cause short circuits.
- Use the Ring App: Open the app to test functionality by triggering a motion alert or pressing the doorbell button. This will confirm that the device is responding correctly.
- Listen for the Chime Sound: If your doorbell is connected to an existing doorbell wiring, check for the chime sound when you press the button. This indicates that the connection is correct.
If the doorbell remains unresponsive after you've verified the wire connections, consult the installation guide for specific troubleshooting steps. Following these measures will help confirm your Ring doorbell functions properly.
App Configuration

Now that you've got your plug-in Ring doorbell set up, it's time to configure the app.
You'll want to adjust your notification preferences so you only get alerts that matter to you, and manage user access for family or friends.
Let's explore how to make these important adjustments in the app.
Notification Preferences Adjustment
Open the Ring app and head to the "Device Settings" of your plug-in Ring doorbell to adjust your notification preferences. Tailoring these settings helps you stay informed while aligning with your security needs. Here's how to get started:
- Customize Notification Types: Select options for motion alerts, live view, and doorbell rings. This lets you receive updates that matter most to you.
- Adjust Frequency: You can enable or disable "Motion Alerts" and even set specific zones to limit notifications to areas of interest. This way, you'll avoid unnecessary distractions.
- Enable People Only Mode: By activating this feature, you reduce notifications from non-human motion, enhancing your focus on relevant events.
Regularly checking and updating your app settings guarantees your notification preferences remain in line with your lifestyle.
Whether you want more alerts for security or fewer distractions, fine-tuning these aspects improves your overall experience with your plug-in Ring doorbell.
Take the time to tailor these settings to fit your daily routine and peace of mind.
User Access Management
How can you effectively manage user access in the Ring app to confirm your home security remains tailored to your needs? Proper user access management is essential for maintaining control over your Ring devices. Start by finding your way to the "Shared Users" section in the app settings. Here, you can add or remove individuals who can access your footage and devices.
You can manage up to 10 shared users per Ring device, allowing trusted family or friends to monitor your home security. For each shared user, you can customize permissions, enabling them to view live video feeds, recordings, or manage device settings. Don't forget to tailor notifications, making sure each user receives alerts based on their personal preferences.
| Action | Description | Notes |
|---|---|---|
| Add Shared User | Invite users via email | Up to 10 users allowed |
| Customize Permissions | Control access to live video feeds | Specify what they can view |
| Manage Notifications | Set personalized alert preferences | Tailor based on user needs |
| Regularly Review Access | Update shared users as needed | Important for security |
Regularly review shared user access to confirm your home security remains robust against unauthorized access.
Smart Home Compatibility

The Ring doorbell easily integrates with various smart home devices, enhancing your home automation experience. Its compatibility with different systems allows you to manage multiple devices from a single interface, simplifying your daily routines.
Here are three key ways it improves your smart home setup:
- Alexa-Enabled Devices: You can control your Ring doorbell using voice commands through Alexa-enabled devices. This feature not only adds convenience but also streamlines notifications, keeping you informed without lifting a finger.
- Smart Locks and Security Systems: The Ring doorbell works seamlessly with smart locks and various security systems. This integration allows you to monitor and control your home's security from the Ring app, providing peace of mind.
- Z-Wave Devices: By serving as a hub for Z-Wave compatible devices, the Ring doorbell allows you to connect and manage a range of smart home gadgets easily. Regular software updates guarantee that your system remains compatible with the latest technologies, enabling an enhanced home automation experience over time.
With these features, the Ring doorbell becomes a pivotal component of your smart home ecosystem.
Security and Privacy Considerations

Integrating your Ring doorbell into your smart home setup brings convenience, but it's important to address security and privacy considerations to protect your data and respect your neighbors' rights.
Start by adjusting the privacy settings in the Ring app to control who can access your live video feeds and recorded footage. This helps guarantee that only authorized individuals can view your camera's output.
Regularly update the Ring app and doorbell firmware to protect against vulnerabilities and enhance security features. Utilizing two-factor authentication for your Ring account adds an extra layer of security against unauthorized access.
Be mindful of the area your doorbell covers; avoid capturing footage of your neighbors' properties to prevent privacy concerns.
Familiarize yourself with local laws and community guidelines regarding video surveillance to guarantee compliance and respect for privacy rights.
Frequently Asked Questions
How to Install a Plug-In Ring Doorbell?
To install a plug-in Ring Doorbell, start by selecting a nearby power outlet and turning off the power if needed. Next, carefully follow the instructions provided with the Ring Doorbell to connect it to the power outlet. This may involve attaching wires and ensuring that the device is securely mounted. If you are fitting a wired doorbell, you will also need to follow the specific steps for connecting it to your existing doorbell system. Finally, test the Ring Doorbell to ensure that it is functioning properly and that the power source is connected securely.
Run the provided power cable to your desired location, using clips to secure it.
Attach the mounting bracket to the wall, making sure it's level.
Connect the power cable to the terminals on the doorbell, ensuring secure connections.
Can You Use a Plug-In Adapter for Ring Doorbell?
Imagine a steady stream of energy flowing like a river, powering your devices without interruption.
Yes, you can use a plug-in adapter for your Ring Doorbell, specifically designed for certain models.
This adapter keeps your doorbell energized, so you won't have to worry about dead batteries.
Just confirm it matches your specific model, and you'll enjoy seamless functionality, including live streaming and motion alerts, enhancing your home's security effortlessly.
Can You Plug a Ring Doorbell Into an Outlet?
You can't plug a Ring doorbell directly into an outlet since it's designed for hardwiring or battery operation.
However, if you're looking for a plug-in solution, you can use a compatible power adapter that converts outlet power to the necessary voltage.
Just make sure the adapter matches your specific Ring model to prevent any damage.
Always prioritize safety when connecting any power source to avoid potential hazards.
Does a Wired Ring Doorbell Have a Plug?
Think of a wired Ring doorbell as a steadfast lighthouse, guiding your home with continuous power.
It doesn't come with a plug because it's designed to connect directly to your existing doorbell wiring, ensuring it stays powered without interruptions.
This setup offers reliability and eliminates the hassle of battery changes.
If you're seeking a plug-in option, consider models specifically designed for that purpose, as wired versions are all about hardwiring for consistent operation.
Conclusion
To sum up, fitting your Ring doorbell can be a straightforward and satisfying project.
With careful consideration and a bit of creativity, you'll enhance your home's safety and convenience.
Remember, a well-connected doorbell not only boosts security but also brings peace of mind.
So, take the time to set it up right, and soon you'll be enjoying the seamless surveillance and splendid service that your new device provides.
Happy home monitoring!