
To attach your Ring Doorbell to siding, start by picking a clear, unobstructed location about 48 inches from the ground. You'll need a power drill, screws, a wedge kit for angle adjustments, and a level for straight alignment. Tape the wedge to the siding, verify it's level, and then drill starter holes. Secure the wedge and back plate before attaching the doorbell itself. If your siding requires special mounting solutions, consider using vinyl clips to avoid drilling. Finding the right method can really enhance your doorbell's performance, and there's more to explore on getting the installation just right.
Key Takeaways
- Choose a suitable installation location, ensuring it's 48 inches high and within Wi-Fi range, with a clear view of the entryway.
- Assess the siding condition for damage and compatibility; repair any issues before installation.
- Use an installation kit with an angled wedge to secure the doorbell for optimal viewing and stability.
- Drill starter holes carefully to avoid damaging the siding and secure the wedge with screws.

ORICO All-Flash 2.5-inch USB-C Docking Station with 5 Gbps Data Transfer Speed, Compatible with 2.5'' SSD, Featuring 10 Gbps Hub Expansion and Support for Up to 40 TB Storage Capacity (4 Bay)
【Next-Gen All-Flash Storage Enclosure】ORICOs first 2.5-inch (7–9.5 mm) all-flash storage enclosure is equipped with a USB 3.2 Gen...
As an affiliate, we earn on qualifying purchases.
Choosing the Right Location
When choosing the right location for your Ring Doorbell, aim for a spot that offers a clear view of your entryway and is within Wi-Fi range. This guarantees the doorbell functions effectively, capturing any motion and providing a reliable video feed.
Ideally, install the doorbell about 48 inches from the ground; this height is perfect for capturing facial details effectively. Additionally, consider the security aspect of the chosen location; placing the doorbell in a visible area can deter potential intruders, enhancing your home's safety, which aligns with the essential items for home security.
Avoid placing the doorbell in direct sunlight or extreme weather conditions, as this can lead to overheating or performance issues.
Also, consider the camera's angle. If your home has sloped siding, you might need a wedge mount to adjust the camera to face directly forward, enhancing its visibility.
As you evaluate your options, make certain the chosen location is free from obstructions like plants or furniture that could block the camera's view or interfere with its motion detection feature.

CENMATE Aluminum 4 Bay Hard Drive RAID Enclosure with Cooling Fan for 2.5/3.5" SATA HDD/SSD with USB A/C 3.0+eSATA Cable, 3.5 Hard Drive Reader Supports 80TB Capacity, 8 RAID Modes, DAS(NO NAS)
【Reliable External Storage System for Individuals】The 3.5 hard drive enclosure supports 2.5/3.5 inches HDD and SSD , max...
As an affiliate, we earn on qualifying purchases.
Required Tools and Materials
Before you start attaching your Ring Doorbell to the siding, you'll need a few essential tools and materials.
Gathering an installation kit, a power drill, and masking tape will guarantee everything goes smoothly.
It's also a good idea to be aware of energy-efficient appliances that can help you save on electricity as you set up your new device.
Don't forget a wedge and a screwdriver bit if you plan to install at an angle.
Essential Installation Tools
To successfully attach your Ring Doorbell to siding, you'll need a few essential tools and materials that will make the installation process smooth and efficient.
Having the right tools on hand helps you create holes in your siding accurately and securely mount the doorbell. Additionally, the presence of a security system, such as a Ring Doorbell, can increase safety and peace of mind in your home, making it a valuable investment for homeowners looking to deter potential burglars increased safety and peace of mind.
Here's a list of essential installation tools:
- Power Drill: This is vital for drilling starter holes in your siding, ensuring a stable installation.
- Screwdriver Bit: You'll need this for the final step of installing screws through the wedge and into the siding to secure the back plate.
- Masking Tape: Use this to temporarily secure components in place during the installation process, helping maintain alignment before drilling.
If you're using an angled installation wedge, it's also an important accessory for achieving the desired viewing angle for your doorbell.
With these tools, you'll be well-prepared to properly mount your Ring Doorbell, making the most of its features while ensuring a secure installation.
Necessary Mounting Materials
Gathering the necessary mounting materials is crucial for a successful installation of your Ring Doorbell on siding. Start with an installation kit, which should include screws and a mount for Ring Video. This kit is designed to provide the specific components needed for your siding type, especially if you're working with vinyl siding.
Additionally, guaranteeing good indoor air quality can enhance your overall home environment, and you might consider using air purifiers to reduce allergens while you work.
You'll also need a power drill to create starter holes in the siding, along with a screwdriver bit to secure the screws firmly. To guarantee everything is level before you drill, masking tape can be handy. Use it to hold the wedge or back plate temporarily in position. If you're using an angled installation wedge, make sure it's taped securely and level for proper alignment.
Lastly, having a mounting level will help you achieve precision during installation, guaranteeing your Ring Doorbell is straight and functional. By gathering these materials beforehand, you'll streamline the installation process, making it easier to attach your Ring Doorbell securely to your vinyl siding. This preparation sets the stage for a successful setup that enhances your home's security.

Synology 4-Bay DiskStation DS423 (Diskless)
Secure private cloud - Safely access and share files and media from anywhere, and keep friends, partners, or...
As an affiliate, we earn on qualifying purchases.
Assessing Siding Condition

Here are three key steps to assess your siding condition:
- Look for Damage: Check your siding closely for cracks, holes, or any signs of wear. Damaged siding can compromise the installation and performance of your Ring Doorbell, much like how safety features are essential for home security systems.
- Consider Compatibility: Different siding types may require specific mounting options. Verify your siding is compatible with your chosen installation method, especially if you have unique styles like triple wall panels or Dutch glue wall panels.
- Schedule Repairs: If you find any damage, consider scheduling an appointment for repairs. Professional services like PJ Fitzpatrick can help restore your siding to its peak condition, enhancing your home's aesthetic while protecting it from the elements.
Taking these steps guarantees a solid foundation for your Ring Doorbell installation and prolongs its lifespan.

SABRENT 5-Bay USB 3.2 Gen 2 SATA Docking Station for 3.5” HDD/SSD, 10Gbps USB-C DAS, Tray-Less Hot-Swap, Aluminum Enclosure with 120mm Cooling Fan, Individual Power Switches, No RAID (DS-SC5B)
5-Bay Direct-Attached Storage (No RAID): Connect up to five 3.5” SATA HDDs or SSDs to one USB-C port....
As an affiliate, we earn on qualifying purchases.
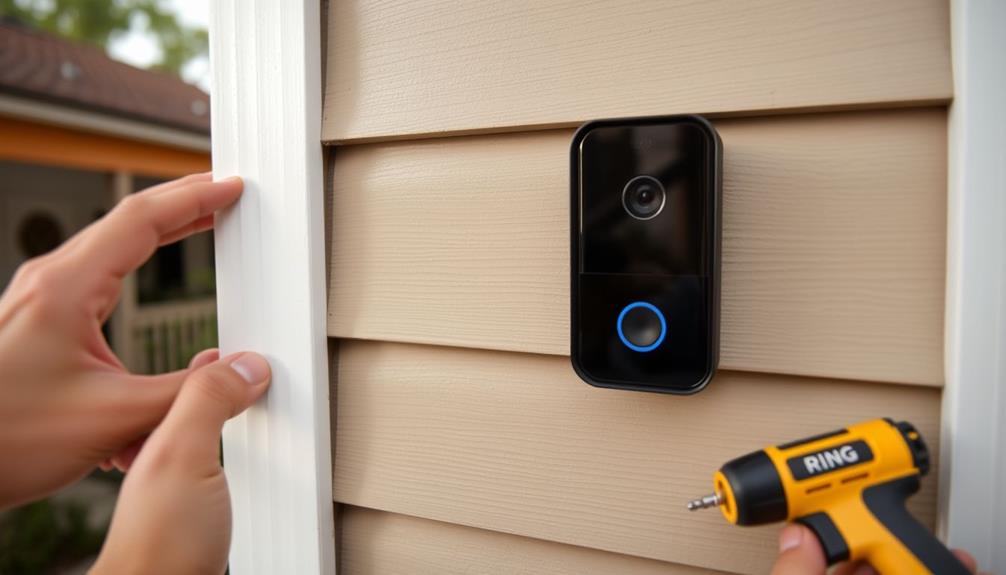
Installation Steps Overview
After confirming your siding is in good shape, you can follow these steps to successfully install your Ring Doorbell.
First, choose a desired location for the installation that's suitable for siding attachment. If you're using a wedge for angle adjustments, tape it in place, making sure it's level before you proceed. It's important to verify that the installation area is free from obstructions, similar to how a pellet stove installation requires assessment of existing systems for peak performance.
Next, drill starter holes through the wedge into the siding. Be careful to avoid any cracks or holes in the siding material during this process.
Once the holes are ready, secure the wedge and back plate by installing screws through the wedge into the siding, guaranteeing a stable mount for your Ring Doorbell.
Using a Wedge Kit

Using a wedge kit can really enhance your Ring Doorbell's performance by allowing you to adjust the angle for ideal viewing.
This is particularly useful if you want to guarantee a clear line of sight to your visitors, similar to how water parks in Washington DC offer various attractions for all age groups.
You'll want to follow a few simple installation steps to verify it's securely attached to your siding.
Let's explore the benefits of the wedge kit and the key steps to get it set up properly.
Wedge Kit Benefits
A wedge kit provides an effective solution for installing your Ring Doorbell at the perfect angle, ensuring the camera captures clear footage without obstructions. This is particularly important for homes that may have unique architectural features or designs, as seen in many island getaways, where varying angles can enhance the overall aesthetic. By allowing for an angled installation, the wedge kit directs the camera to face forward rather than upwards, which is especially useful for homes with sloping siding.
Here are three key benefits of using a wedge kit for your installation:
- Improved Video Quality: The wedge kit minimizes obstructions, enhancing your doorbell's field of view. This allows for better monitoring of visitors and improved overall video quality.
- Easy Installation: Included screws and a mounting level mean you won't need extra tools beyond a power drill and screwdriver bit. This makes the installation process straightforward and efficient.
- Compatibility: The wedge kit is specifically designed for certain Ring Video Doorbell models like Ring 2, Ring 3, and Ring 3 Plus, ensuring a proper fit. Just remember, it's not suitable for Pro versions, so double-check compatibility before starting your installation.
Installation Steps Overview
To begin the installation process with a wedge kit, first choose the ideal spot for your Ring Video Doorbell and tape the wedge in place, making certain it's level. This guarantees that your doorbell functions correctly.
Additionally, consider protecting your installation area from potential weather damage by using high-quality materials, like those found in home theater setup components.
Next, drill starter holes through the wedge into the siding panel using a power drill. This step is vital for creating clean holes for the screws that will secure the wedge.
Once you've drilled the holes, secure the wedge to the siding by installing screws through it. This will provide a stable base for your Ring Doorbell.
After the wedge is firmly in place, attach the back plate of the Ring Video Doorbell to the installed wedge, following the instructions provided in the installation kit carefully.
Before finalizing the installation, inspect the siding for any cracks or holes. These imperfections could affect the mounting stability and may require a professional repair.
Alternative Mounting Solutions
Alternative Mounting Solutions**
Clips designed for vinyl siding let you mount your Ring Doorbell easily without drilling, ensuring your home's exterior stays intact. These clips can be a game changer, similar to how optimal temperatures for cooking can affect the outcome of dishes.
If you're looking for alternative mounting solutions, consider these options that suit various needs and preferences:
- Vinyl Siding Clips: These clips are specifically made for vinyl and allow you to secure your Doorbell Pro without damaging the siding. They keep your doorbell stable and aligned without the hassle of drilling.
- DIY Mounting Solutions: If you're handy, explore custom installations. You can create unique mounts that blend seamlessly with your home's design, giving you flexibility in placement.
- Third-Party Mounting Products: Check out recommendations from community members who've faced similar installation challenges. Many have shared innovative products that could work perfectly for your situation, enhancing your experience with the Doorbell Pro.
Troubleshooting Common Issues

Troubleshooting common issues with your Ring Doorbell can often restore its functionality and improve your overall experience.
If you're facing connectivity problems, try resetting your Ring and confirming it's within range of your Wi-Fi network. Sometimes, a simple reboot can make all the difference.
If you notice poor video quality, check for any Wi-Fi interference. You might want to enhance your router's placement or switch to the 2.4 GHz band, which often provides better compatibility with your Ring.
For hardwired setups, power-related issues can arise; make sure that the wiring is correctly installed and functioning to keep the device powered.
If you're using a battery-operated model, keep an eye on the battery life. Excessive usage or low power can lead to performance dips, affecting your video feed.
Finally, don't forget to regularly update the firmware of your Ring Doorbell. This guarantees you have access to the latest features and best performance.
Community Support and Resources
Community support and resources play an essential role in helping you successfully install your Ring Doorbell on siding. Engaging with the community not only provides you with valuable insights but also fosters a sense of connection as you navigate your installation journey. By leveraging these resources, you can enhance your understanding of installation techniques and troubleshoot any issues you may face.
Here are three key community resources to take into account:
- Ring Help Home: This is your go-to hub for installation guides and troubleshooting tips. You'll find detailed instructions tailored to various siding types.
- Community Forums: Participate in discussions where users share their experiences. You can ask questions and discover innovative solutions that have worked for others.
- FAQs: Explore the frequently asked questions section, addressing specific concerns about mounting your Ring Doorbell on siding. It's a great way to gain clarity on common installation challenges.
Additional Services Available

When preparing to install your Ring Doorbell, you might also consider additional services that can enhance your home's exterior, like professional siding repair from PJ Fitzpatrick. Their expertise in siding repair guarantees your siding is in prime condition, providing a sturdy base for your new doorbell.
Since 1980, PJ Fitzpatrick has been a trusted name in the Delaware Valley, offering a variety of home improvement solutions. Alongside siding repair, they provide additional services such as roofing, window installations, gutter installation, and door installation. This makes them a one-stop-shop for homeowners looking to improve their property.
With free estimates available, you can easily gauge the costs involved before committing to any repairs or installations. Scheduling an appointment is straightforward through their contact information, allowing for efficient service tailored to your needs.
Frequently Asked Questions
Can You Mount a Ring Doorbell on Siding?
Yes, you can mount a Ring Doorbell on siding.
You'll need a specialized siding mount or angle adjustment mount, which allows for secure attachment without damaging your siding.
These mounts work with standard vinyl siding types and can support significant weight.
Installation is straightforward, requiring minimal tools, and you can find helpful video guides online.
Just make certain to follow the guidelines for your specific siding type to guarantee a proper and secure fit.
How to Install Ring Doorbell on Vinyl Siding Without Drilling?
To install your Ring Doorbell on vinyl siding without drilling, start by using a stainless steel metal clip designed for your siding type.
Slide it under the siding seams to secure the mount.
Confirm you choose the right size for your siding, typically 4, 4.5, or 5 inches.
For extra stability, you can add shorter stainless steel screws and optional 3M tape.
This method preserves your siding and keeps everything HOA-approved!
How Do You Attach a Ring Doorbell to a Door Without Drilling?
Imagine standing at your door, ready to enhance your home's security without a single drill in sight.
To attach your Ring Doorbell, simply use a specialized adhesive mount. This mount grips securely, holding it in place like a gentle embrace. This method eliminates the need for drilling, making it a convenient option for renters or those who prefer not to put holes in their walls. If you’re looking to attach Ring Doorbell to brick, however, you may need to ensure the adhesive mount is rated for rough surfaces to achieve a firm hold. Alternatively, drilling may still be the best approach when securing the device to uneven masonry.
You can even add 3M tape for extra stability.
With a quick installation, you'll have your doorbell up and running, welcoming visitors in no time, all without leaving a mark on your door.
Can You Screw Into Vinyl Siding?
Yes, you can screw into vinyl siding, but you need to be cautious.
Use specially designed screws that minimize damage to the material.
Make sure the screws don't go too deep to protect the siding's integrity.
Always check for cracks or damage before you start; weak areas won't hold screws well.
For added security, consider using a siding mount that clips under the seams instead of directly screwing into the siding.
Conclusion
Now that you know how to attach your Ring doorbell to siding, you can enhance your home's security with ease.
Notably, studies show that homes with visible doorbells deter burglars, making your installation not just a tech upgrade, but a smart safety move.
Whether you use a wedge kit or explore other mounting solutions, you're taking an important step toward protecting your space.
Don't hesitate to reach out for help if you run into any issues!