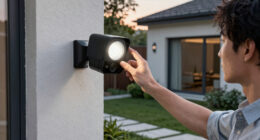
To attach your Ring Doorbell to brick, start by choosing a secure mounting method. You can drill into mortar for a strong hold or use industrial-strength double-sided tape for a no-drill option. If you're drilling, make sure to use masonry bits and insert plastic anchors for stability. Clean the surface before applying tape for better adhesion. Position the doorbell about 125 cm from the ground and guarantee it's level. After securing everything, check the device's functionality. For more tips and detailed installation advice, you might want to explore deeper resources to enhance your setup.
Key Takeaways
- Choose a Mounting Method: Select between DIY tape, drilling into mortar, or no-drill mounts based on permanence and surface texture.
- Prepare the Surface: Ensure the brick surface is clean and dry for better adhesion, especially for tape methods.
- Use Appropriate Tools: If drilling, use masonry drill bits and plastic anchors for secure installation in mortar or brick.
- Position Correctly: Install the doorbell approximately 125 cm from the ground for optimal viewing and alignment.
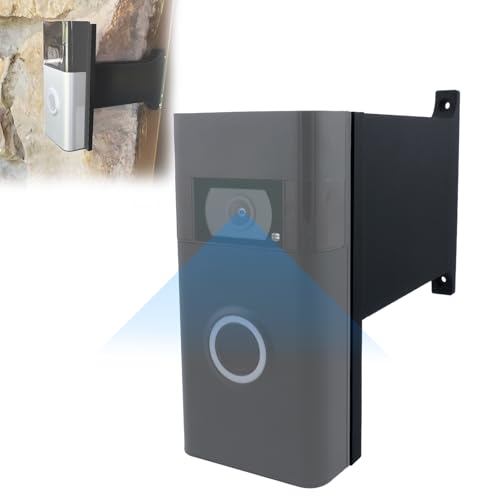
Doorbell Mount Compatible with Ring Doorbell, Extends Doorbell Mount for Brick Wall, Better Visibility and Angle Designed To Fit Compatible with Some Ring doorbell models (2-1/4")
Partial Compatibility: Compatible with Ring doorbells (select models), this doorbell mount ensures a secure fit for supported devices….
As an affiliate, we earn on qualifying purchases.
As an affiliate, we earn on qualifying purchases.
Overview of Mounting Options
When it comes to attaching a Ring Doorbell to brick, you have three primary mounting options to contemplate. Each method has its pros and cons, so you'll want to choose based on your specific needs and the surface conditions. For a seamless installation that blends with your home's aesthetic, consider the stylish appeal of a Mid-Century Modern Design that complements your entryway.
First, you can consider DIY tape methods. This approach allows for customization in adhesive strength and is often more affordable. However, it may not provide the same security as the other options, especially in adverse weather conditions.
Next up is drilling into mortar, which is a solid choice for securely mounting your Ring. By using appropriate masonry drill bits and plastic anchor bolts, you can guarantee a strong hold. Plus, this method allows for easy repairs if any localized damage occurs.
Lastly, some might opt for no-drill mounts, which utilize strong double-sided tape designed for easy removal. While convenient, these may struggle with effectiveness on textured surfaces.
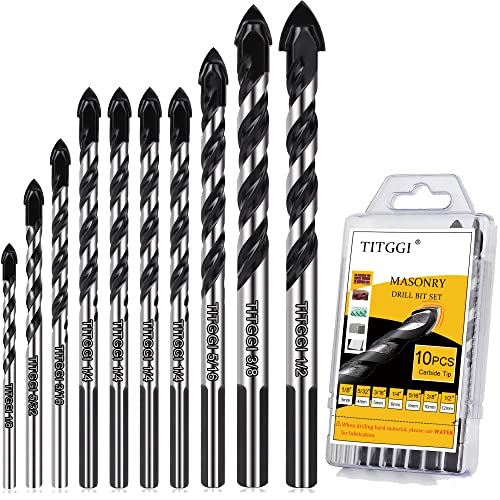
10-PCS Masonry Drill Bit Set & Concrete Drill Bit Set, Professional Drill Bit Set for Glass/Brick/Plastic/Cement/Wood/Tile/Etc, Industrial Strength Carbide Drill Bit Tip, 1/8"-1/2" by TITGGI
HIGH QUALITY DRILL BIT SET; TITGGI Masonry drill bit set, industrial strength carbide drill bit tip, excellent abrasion…
As an affiliate, we earn on qualifying purchases.
As an affiliate, we earn on qualifying purchases.
The No-drill Mount Solution
The No-drill Mount Solution offers a convenient way to attach your Ring Doorbell to brick surfaces without the hassle of drilling.
This official Ring product utilizes strong double-sided tape, providing a quick and easy installation process. If you're looking to avoid damaging your brick, this no-drill mount is an excellent choice.
It's waterproof, making it suitable for uncovered porches and outdoor applications, ensuring your device stays protected from the elements.
Additionally, it's crucial to evaluate the reputation of the product and its reviews, as this can indicate its reliability in various conditions, similar to how you'd assess key factors in choosing a home cleaning service.
While it's a higher-cost option compared to traditional DIY methods, the no-drill mount allows for easy removal without leaving any damage behind.
However, it's vital to assess the specific conditions of your brick surface before proceeding. Some users have reported effectiveness issues on textured brick, so the adhesion mightn't work as well on those surfaces.
Before you commit to the no-drill mount, evaluate your brick's texture and condition. If it's smooth, you're likely to have better results.
Ultimately, this solution provides a hassle-free way to install your Ring Doorbell while ensuring you can remove it later if needed. Additionally, it maintains the integrity of your walls by eliminating the need for drilling permanent holes. This makes it an ideal choice for renters or those who frequently move. For more guidance on managing your Ring Doorbell, such as how to share access on Ring with other household members, the app offers easy-to-follow instructions.

All -New No Drill Mount for Ring Battery Doorbell (newest model), Battery Doorbell Plus (newest model), Battery Doorbell Pro (newest model)
Mount without worry — Attach a compatible Ring video doorbell to your home with the durable, weather-resistant, adhesive-backed…
As an affiliate, we earn on qualifying purchases.
As an affiliate, we earn on qualifying purchases.
Using DIY Tape Method

Using a DIY tape method lets you easily attach your Ring Doorbell to brick surfaces without spending much on official mounts. This approach is perfect for those who want a cost-effective solution and the flexibility to customize the adhesive strength based on their needs.
Additionally, this method allows for the creation of functional and aesthetic spaces, much like the comprehensive professional services provided by experts in the field.
To successfully install your Ring Video Doorbell using this technique, follow these steps:
- Choose the Right Tape: Opt for industrial-strength double-sided tape to guarantee a secure hold, especially on uneven brick surfaces.
- Clean the Surface: Before applying the tape, make sure the brick is clean and dry. This promotes ideal adhesion and longevity.
- Measure and Cut: Cut the tape to size, ensuring it's long enough to support the weight of the doorbell and provide adequate coverage.
- Apply and Press Firmly: Attach the tape to the back of the Ring Doorbell, press it firmly onto the brick surface, and hold for a few seconds to maximize adhesion.

VELCRO Brand Extreme Outdoor Double Sided Mounting Tape Holds up to 15 Pounds on Brick or Other Rough Surfaces UV and Weather Resistant 14Ft Heavy Duty Roll
UV AND WEATHER RESISTANT TAPE – Extreme outdoor mounting tape is water and UV resistant to keep mounted…
As an affiliate, we earn on qualifying purchases.
As an affiliate, we earn on qualifying purchases.
Drilling Into Mortar
Drilling into mortar offers an easier installation option for your Ring Doorbell, as it requires less force and minimizes the risk of damaging surrounding bricks.
Since mortar is softer than brick, you'll find that drilling holes is a smoother process. Proper installation techniques are essential to guarantee longevity, much like understanding heat pump failures helps maintain system efficiency.
To get the best results, use masonry drill bits designed for hard materials; these bits will help you effectively penetrate the mortar without harming the bricks nearby.
Before you start, check the mortar's thickness and condition. Confirm it's thick enough and in good shape to support the weight of your Ring Doorbell.
After drilling the holes, insert plastic anchor bolts to secure your device firmly. These anchors will provide a strong hold, preventing any unwanted movement.
One of the advantages of drilling into mortar is that any localized damage can be easily repaired with additional mortar, making it a less invasive option than drilling directly into brick.
By choosing this method, you not only simplify the installation process but also protect your brickwork from potential harm.
Choosing the Best Method

When deciding how to mount your Ring Doorbell on brick, contemplate the trade-offs between drilling into mortar and exploring alternative methods like no-drill mounts or DIY tape solutions. Each method has its pros and cons, so it's crucial to evaluate what works best for your specific situation.
For instance, if you're also setting up a home theater setup and need to manage wires effectively, the method you choose can impact your overall aesthetics.
Here are four key factors to ponder when choosing the best mounting method:
- Permanence: If you want a long-lasting installation, drilling into mortar may be your best bet.
- Wall Damage: No-drill mounts use strong tape, so they won't damage the brick, but they may not hold as securely.
- Surface Texture: The effectiveness of the no-drill option can vary; textured surfaces mightn't allow for a proper seal.
- Repair Ease: Drilling allows for easy repairs if you need to remove or reposition the doorbell, while adhesive options may leave residue.
Installation Steps for Brick
When installing your Ring Doorbell on brick, you'll need specific tools and materials to get the job done right.
It's important to guarantee a secure setup, much like using safety features in garage door openers to enhance home security.
Let's walk through a step-by-step installation guide to guarantee you have a secure setup.
We'll also cover common installation challenges so you can tackle any issues that might come up.
Required Tools and Materials
To successfully mount a Ring Doorbell on brick, you'll need a drill with masonry bits, screws, plastic anchor bolts, and a level tool for proper alignment. These tools will help you create drill holes in the brick, guaranteeing a secure and stable installation.
Additionally, consider the value of home security systems, as the presence of devices like a Ring Doorbell can deter potential burglars increasing safety and peace of mind.
Here's a quick list of the required tools and materials:
- Drill with masonry bits – Essential for making drill holes in the brick without damaging it.
- Screws – You'll use these to attach the mounting bracket securely.
- Plastic anchor bolts – These provide extra support for the screws, especially if you're drilling into mortar.
- Level tool – This guarantees your doorbell is mounted straight at the recommended height of about 125 cm from the ground.
If you prefer an alternative, you can use double-sided or industrial-strength tape, but make sure the surface is clean and suitable for adhesion.
Always keep a screwdriver handy to secure everything once the drill holes are made and the anchors are in place.
With these tools, you'll be well-prepared for a successful installation.
Step-by-Step Installation Guide
Start by charging your Ring Doorbell battery with the provided orange cable until the indicator light turns green, guaranteeing it's ready for installation.
To guarantee a healthy indoor environment while installing, consider using an air purifier to improve air quality in your workspace, as air purifiers reduce allergens and dust.
Next, position the Ring Doorbell approximately 125 cm from the ground for the best viewing angle. Use a level tool to confirm it's straight before proceeding.
Once you have the correct height, mark the locations for the mounting holes with a pencil. If you need to drill into the brick, use masonry bits to create the holes. After drilling, insert plastic anchors into the holes for added stability. This step is vital, as it helps to secure the mounting bracket.
Now, take the included screws and secure the mounting bracket to the wall. Make sure it's tightly fastened to prevent any movement.
Common Installation Challenges
Installing a Ring Doorbell on brick can present several common challenges that you need to navigate for a successful setup. Here are some key issues you might face:
- Drill Bit Selection: Make sure you have a masonry drill bit, as standard bits won't penetrate brick effectively. Using the wrong bit can lead to frustration and incomplete installation. It's important to take into account airless paint sprayer basics for similar precision when working with different materials.
- Height Alignment: It's vital to install the doorbell at the ideal height, usually around 125 cm from the ground. Uneven or textured surfaces can make this tricky, so take your time with measurements.
- Marking Holes: Properly marking the mounting hole positions before drilling is essential. Misalignment can lead to difficulties in securing the mounting plate or create aesthetic issues.
- Inserting Anchors: Inserting plastic anchors into drilled holes can be cumbersome, especially with dense or crumbly brick. Be prepared for extra effort during this step.
Additionally, make sure that your power connections are secure and that the device powers on after installation. Any issues here may stem from improper drilling or anchor placement, so double-check your work.
Device Setup Instructions

Before you start the installation, you'll want to prepare for device setup by downloading the Ring app on your smartphone.
This app allows for seamless integration, similar to how Mika and Joe's relationship dynamics showcase effective communication in partnerships.
Once you've got the app, follow the installation steps to connect your doorbell to Wi-Fi and customize your settings.
Preparing for Device Setup
Gather your tools, including a drill with masonry bits, screws, and plastic anchors, to guarantee a secure installation of your Ring doorbell on brick. It's essential to be prepared before diving into installing your Ring to ascertain a smooth process.
Here's a quick checklist to follow:
- Charge the Battery: Fully charge your Ring doorbell's battery using the provided orange cable until the light glows green. This guarantees peak performance post-installation.
- Measure the Height: Use a level tool to align the doorbell at approximately 125 cm from the ground. This height provides an ideal camera view and minimizes installation issues.
- Mark the Holes: After leveling the device, use a pencil to mark the positions for mounting holes on the brick surface. Accurate markings lead to precise drilling.
- Choose the Right Drill Bits: If you're drilling into mortar, ascertain you're using the appropriate drill bits to avoid damaging the brick itself.
App Installation Steps
To begin setting up your Ring Video Doorbell, you'll first need to download the Ring app and create an account. This Ring account will allow you to manage your device settings and receive notifications. Once you've installed the app, open it and follow the prompts to create your account.
Next, verify your Ring Doorbell is charged using the provided orange cable. Keep it plugged in until the indicator light turns green; this means your device is ready for setup. After that, follow the in-app instructions to connect your Ring Doorbell to your Wi-Fi network. A stable internet connection is vital for peak performance.
Make sure to remove the level tool from the front of the device before you mount it on your chosen surface. Once you've secured the doorbell, double-check that the faceplate is attached properly.
Tighten the security screw with the included screwdriver bit to confirm everything stays in place. This will finalize the initial setup, allowing you to enjoy the full benefits of your new Ring Video Doorbell.
Finalizing Device Configuration
Once you've secured the Ring Video Doorbell and confirmed everything is in place, it's time to finalize the device configuration. Make sure you've already set it up in the Ring app, created an account, and connected the device to your Wi-Fi network.
Follow these steps to complete the setup:
- Remove the level tool: Once you've aligned the doorbell at the recommended height of approximately 125 cm from the ground, take off the level tool.
- Install the faceplate: Align it at the top and click it into place, ensuring it fits securely over your device.
- Secure the faceplate: Use the provided screwdriver bit to tighten the security screw, which prevents unauthorized removal of the Ring, whether it's wired or battery-operated.
- Verify functionality: Double-check all components are properly secured and conduct a test to make sure the device is functioning correctly and connected to the app.
Troubleshooting Common Issues
Troubleshooting common issues with your Ring Doorbell can save you time and frustration during installation. If you encounter a problem, start by checking the brick surface. Make certain it's free of cracks and loose pieces before drilling; this prevents installation failures.
If your Doorbell doesn't power on post-installation, verify that all power connections are secure and correctly attached.
Wi-Fi connectivity can be another common question. Ensure your router is within adequate range, and check for any obstructions that might affect the signal. If you find the anchors aren't holding properly in the brick, consider using larger or industrial-strength anchors to guarantee stability.
For specific troubleshooting steps related to installation issues, don't forget to consult the Ring app. It can guide you through troubleshooting procedures and verify device settings.
Keeping these tips in mind will help you address issues efficiently and enhance your Doorbell's performance. If you continue to experience problems, a discussion with customer support or the Ring community can provide additional insights.
Community Support Resources

Engaging with the Ring Community can greatly enhance your installation experience, as you'll find a wealth of shared knowledge and practical tips from fellow users.
When you join this vibrant community, you open the door to valuable resources that can make your installation on brick much smoother.
Here are some key benefits you'll discover:
- Expert Advice: Pose your installation questions and get responses from experienced users who've tackled similar challenges.
- Effective Methods: Learn about the best mounting techniques, like drilling into mortar, which can guarantee your doorbell is securely attached.
- Tool Recommendations: Get insights on the best tools and materials to use, including drill bits and anchors, specifically suited for brick surfaces.
- Troubleshooting Tips: Access discussions on common issues, helping you navigate any hiccups during installation.
Additional User Resources
To guarantee a successful installation of your Ring Doorbell on brick, take advantage of the various user resources available online. The Ring support website provides detailed installation guides and video tutorials specifically tailored for brick mounting. These step-by-step instructions make it easier to follow the process and make sure everything's set up correctly.
Don't forget to check the user manuals for your specific Ring model. They contain thorough information on installation requirements, necessary tools, and techniques for brick surfaces.
If you run into any issues, the Ring Community platform is a valuable resource where you can connect with other users. They share experiences and solutions to common installation challenges, fostering a collaborative troubleshooting environment.
You can also access the FAQs on the Ring website, where you'll find quick answers to common concerns about brick installation.
If you need personalized assistance, customer support is just a call away, ready to offer expert guidance when you need it.
Frequently Asked Questions
How Do You Install a Ring Doorbell on Brick Without Drilling?
To install your Ring Doorbell on brick without drilling, you can use a no-drill mount or industrial-strength double-sided tape.
First, make sure the brick surface is clean and dry for better adhesion.
Then, apply the tape or mount according to the product instructions.
Can a Ring Doorbell Be Installed on Brick?
Yes, you can install a Ring Doorbell on brick.
It's a versatile option that lets you choose from several methods, like drilling into the mortar or using a no-drill mount with strong adhesive.
If you prefer a DIY approach, industrial-strength tape can work well on uneven surfaces.
Just make sure you consider the mounting height and alignment for the best camera view, so you get maximum performance from your doorbell.
Can I Glue Doorbell to Brick?
You can't simply glue a doorbell to brick like you'd stick a poster to a wall; it's not going to hold up well.
Standard adhesives won't withstand outdoor conditions, and you might end up damaging the brick when you try to remove it later.
Instead, consider more secure methods, like drilling into mortar or using a no-drill mount.
It'll save you headaches and keep your doorbell firmly in place.
How Do You Attach Something to Brick Without Drilling?
To attach something to brick without drilling, you can use no-drill mounts or strong double-sided tape.
Make certain the brick surface is clean and dry to improve adhesion.
Industrial-strength tape is a good choice, but be cautious as it might damage the wall when removed.
For temporary setups, command strips can work, but they can also cause damage.
Always assess the brick texture to guarantee the adhesive will hold effectively.
Conclusion
In the grand tapestry of your home, the Ring Doorbell is a vigilant guardian, watching over your domain.
By choosing the right mounting method, you're weaving a seamless connection between security and convenience.
Whether you use no-drill solutions or embrace the strength of mortar, you're ensuring your castle remains safe.
With each step, you're not just attaching a device; you're fortifying your haven.
So, go ahead and let your sentinel stand proudly, ready to greet all who approach.