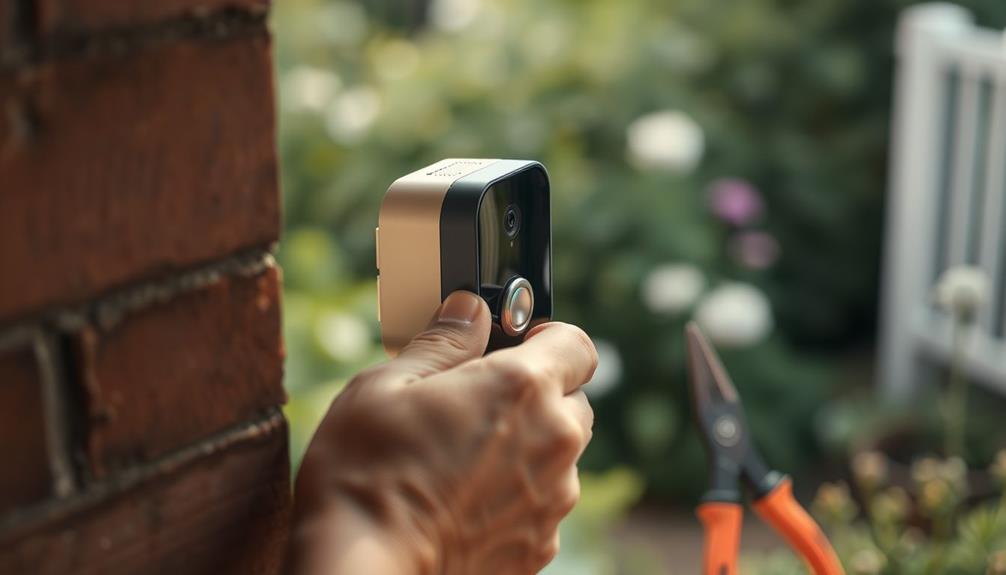
To uninstall your Ring Doorbell, the first step is to ensure that the power is turned off, especially for wired models. You will need a screwdriver to remove the faceplate, and then unscrew the doorbell from the wall. If you have a wired model, make sure to disconnect the wires carefully. A paint scraper may be necessary to detach it from the mounting bracket if it is difficult to remove. Once the doorbell is removed, clean the area and fill any holes with silicone or filler to prevent any issues. Store the doorbell securely for future use. Stay tuned for some helpful tips on tools and techniques to make the process easier.
Key Takeaways
- Ensure the power is off for wired models by switching off the breaker or removing the battery before starting the removal process.
- Remove the faceplate by unscrewing the security screw located at the bottom of the Ring Doorbell.
- Unscrew the Ring Doorbell from the wall using a Phillips-head screwdriver, and disconnect the wires for wired models.
- Carefully detach the mounting bracket and use a paint scraper if needed to remove the doorbell from its bracket.

Video Doorbell Key Removal Tool Compatible with Ring Battery Doorbell 2024 Release, Wired Doorbell Pro (N ewest Model), Wired Doorbell Plus (N ewest Model) 2PACK
COMPATIBILITY: compatible with Ring Battery Doorbell 2024 Release,Compatible with Wired Doorbell Pro (Newest Model), Wired Doorbell Plus (Newest…
As an affiliate, we earn on qualifying purchases.
As an affiliate, we earn on qualifying purchases.
Reasons for Removal
There are several reasons you might want to remove your Ring Doorbell, from upgrading to a newer model to relocating to a new home.
Many users choose to remove a Ring Doorbell when they decide to upgrade for enhanced features and improved functionalities that newer models offer. If you're shifting to a different brand, such as Arlo or Google, removing your Ring device is often part of integrating a new smart home ecosystem.
Additionally, ensuring your home is equipped with essential kitchen gadgets can enhance your overall living experience.
If you're moving to a new residence, taking your Ring Doorbell with you can help maintain your security in an unfamiliar environment.
Additionally, regular maintenance is vital, especially for battery-operated models. You might need to remove the device temporarily for battery charging or to address any potential issues.
Lastly, if you have concerns about security vulnerabilities, you may want to remove your Ring Doorbell from an exposed location to prevent theft or tampering.
Whatever your reason, understanding these motivations can make the process of removal more straightforward and tailored to your specific needs.

Video Screwdriver Bit Set for Battery and Wifi Access – Fits All Video Doorbell Models (Blue)
【Video Doorbell Screwdriver】:Universal screwdriver for All models of video doorbell,include video doorbell,video doorbell 2, pro and elite. All…
As an affiliate, we earn on qualifying purchases.
As an affiliate, we earn on qualifying purchases.
Tools Required

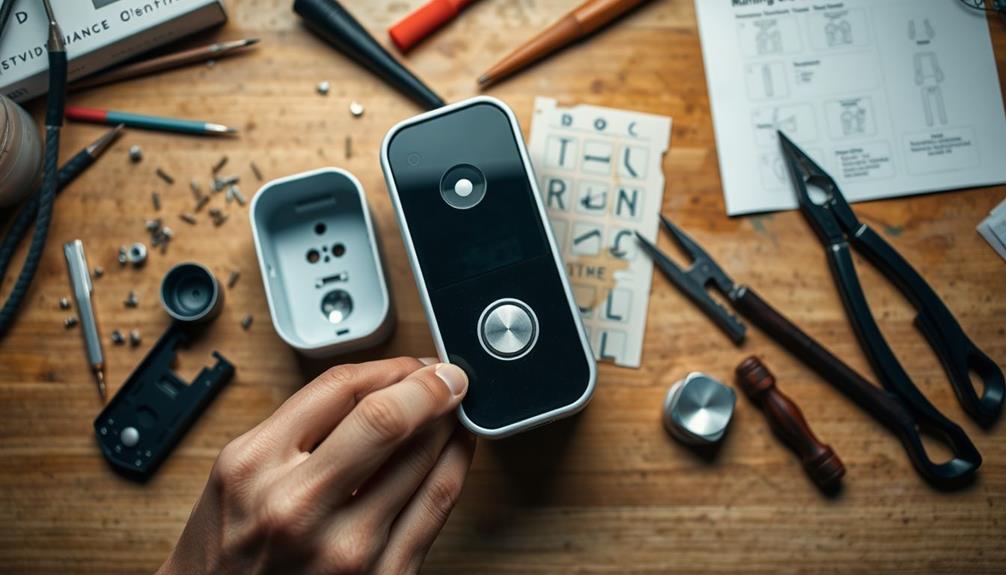
Gather the necessary tools to secure a smooth removal of your Ring Doorbell. You'll need the screwdriver that came with your Ring package, specifically designed for the security screw. If you can't find it, a small flathead screwdriver or a T15 Torx head screwdriver can work as alternatives.
Before you start, verify you have a voltage tester handy if you're dealing with a wired model; this will help confirm that the power is off. It's also wise to check for any eco-friendly cleaning products if you plan to clean the area afterward, as you might want to maintain a green home environment what to look for in a home cleaning service.
In addition to the screwdriver, you might need a paint scraper to help detach the doorbell from its mounting bracket, especially if it's stuck. If your model has a removable faceplate, you'll want to remove that first to access the security screws.
After removing the doorbell, keep some silicone or filler ready to seal any holes left behind. This step is essential to prevent leaks or pest issues.

No-Drill Mount Compatible with Ring Battery Doorbell (2024 Release),Ring Doorbell Mounting Holder Bracket for Apartments Office Houses(1 Pack)
【Compatibility】Our No-Drill Mount is designed for Ring Battery Doorbell (2024 Release),For pleasant shopping experience, please confirm that your…
As an affiliate, we earn on qualifying purchases.
As an affiliate, we earn on qualifying purchases.
Step-by-Step Removal Process

To start the removal process, verify the power is off for wired models by switching off the breaker or removing the battery for battery-operated versions.
It's crucial to prioritize safety during this process, much like the importance of support during pregnancy in family relationships. Use a voltage tester to confirm no power is present.
Next, grab your screwdriver and remove the faceplate by unscrewing the security screw at the bottom. Gently pull the faceplate away from the device to expose the components.
For wired models, unscrew the Ring Doorbell from the wall using a Phillips-head screwdriver. If your model has a mounting bracket, simply pull upward to detach it from the wall.
Now, you need to disconnect the wires connected to the doorbell. Carefully loosen the terminal screws to free the wires, making sure they're not entangled.
Once the wires are disconnected, finish the process by unscrewing and removing the mounting bracket from the wall. Confirm all components are safely detached.
If needed, fill any holes left behind for a clean finish. You've now successfully removed your Ring Doorbell.
Video Doorbell Key Removal Tool Compatible with Ring Battery Doorbell 2024 Release, Wired Doorbell Pro (N ewest Model), Wired Doorbell Plus (N ewest Model) 2PACK
COMPATIBILITY: compatible with Ring Battery Doorbell 2024 Release,Compatible with Wired Doorbell Pro (Newest Model), Wired Doorbell Plus (Newest…
As an affiliate, we earn on qualifying purchases.
As an affiliate, we earn on qualifying purchases.
Alternative Removal Methods

If you prefer a tool-free approach, alternative methods for removing your Ring Doorbell can simplify the process while still ensuring the device's safety.
Start by examining the doorbell for any accessible edges or tabs that might allow for easy detachment. Before attempting to remove the Ring, make sure all security screws are fully removed. This step is vital to prevent damage to the mounting hardware.
If the doorbell is still stuck, try using a dull-edged lever, like a plastic putty knife or paint scraper. Gently pry the doorbell away from the mounting bracket, applying minimal force to avoid damage.
If you find it difficult to detach, try gripping both the doorbell and the mounting bracket separately while applying upward pressure on the doorbell. This method can provide better leverage and help with the removal process.
Always handle with care to maintain the integrity of your device. Avoid aggressive pulling or excessive force, as this could lead to damage or even injury.
Post-Removal Considerations

Once you've removed the Ring Doorbell, it's vital to clean the area thoroughly to eliminate any dust or debris left behind.
Use a damp cloth to wipe down the wall and surrounding surfaces, making sure everything looks tidy.
Don't forget to store the removed doorbell and all components—like screws and brackets—in a safe location. This way, you can easily reinstall or upgrade the device later if needed.
Next, consider updating the Ring app to reflect the removal of your device. This guarantees you won't receive unnecessary notifications related to the uninstalled doorbell.
If you plan to install a new doorbell or simply want to cover the area, fill any holes left in the wall with silicone or filler to prevent leaks or pest issues.
Frequently Asked Questions
How Do I Remove My Ring Doorbell?
To remove your Ring Doorbell, start by ensuring the power's off if it's wired, or take out the battery for battery-operated models.
Grab the provided screwdriver to remove the security screw at the bottom of the faceplate, then gently pull the faceplate down.
If it's wired, unscrew it from the wall and disconnect the wires.
How to Remove Ring Doorbell From Mounting Bracket?
To remove your Ring doorbell from the mounting bracket, start by locating the security screws at the bottom.
You'll need the screwdriver included in the package.
Once you've unscrewed them, gently pull the doorbell straight out.
If it's stuck, grip both the doorbell and bracket, pulling up while pushing down on the bracket.
For extra help, a paint scraper can pry it loose without damaging your wall.
Check for any damage afterward.
How to Unscrew Ring Doorbell Without Tool?
If you need to unscrew a device without a tool, you can try using a small flathead screwdriver to gently manipulate the screw.
You might also find that a T15 Torx screwdriver works as a substitute.
It's important to grip the device and the mounting bracket separately to gain leverage.
If you're cautious, a plastic scraper can help pry it off without causing damage.
Just make sure all screws are removed first to avoid stripping them.
How to Take Faceplate off Ring Doorbell?
Imagine the faceplate of your Ring Doorbell as a protective shield, guarding your home's secrets.
To take it off, first find the security screw at the bottom.
Using the provided screwdriver, unscrew it gently.
Once it's free, pull the bottom of the faceplate down and toward you at a slight angle.
Be careful—force can lead to damage.
When you're done, reattach it by pressing until you hear a reassuring click.
Conclusion
In conclusion, whether you're switching up security systems or simply relocating your Ring doorbell, it's crucial to handle the removal with care.
By following the steps outlined, you'll guarantee a seamless separation.
Remember, proper precautions prevent potential problems, so take your time.
With the right tools and techniques, you can confidently conquer the challenge of removing your Ring doorbell and pave the way for new possibilities in your home security setup.