To properly install your Ring Doorbell on your door, you will need to first gather the necessary tools such as screws, a screwdriver, and a power drill if you are dealing with brick or stucco. Be sure to fully charge the battery for 4-6 hours and select a mounting height of approximately four feet for optimal viewing. Start by removing your old doorbell with a screwdriver, then proceed to attach the Ring Doorbell to the mounting bracket. Once securely in place, connect the doorbell wires to your existing system correctly. Lastly, download the Ring app to complete the setup and customize your settings for full functionality. You can also discover additional tips and tricks to assist with the installation process.
Key Takeaways
- Charge the Ring Doorbell battery for 4-6 hours before installation to ensure it's ready for use.
- Use a small level to position the doorbell at an optimal height of about four feet from the ground.
- Mark screw hole locations with a pencil for accurate drilling and ensure the doorbell is straight.
- Securely connect existing doorbell wires to the Ring Doorbell, ensuring power is off at the breaker during installation.

RIOVO Adjustable 30 to 55 Degree Doorbell Angle Mount Compatible with Ring/Blink Video Doorbell/Battery Doorbell, Replacement Angle Adjustment Adapter Mounting Bracket Wedge Kit
Compatible Model: This angle mount compatible with RlNG Battery Doorbell (2024 Release) / Video Doorbell 2 / Video…
As an affiliate, we earn on qualifying purchases.
As an affiliate, we earn on qualifying purchases.
Tools Needed for Installation
To install your Ring doorbell, you'll need a few essential tools that come with the kit and some extras for specific surfaces.
The kit includes screws, a charging cable, and a screwdriver designed specifically for installing a Ring doorbell. If you're mounting it on brick or stucco, a power drill is necessary, along with a masonry drill bit, which is included with certain models like the Ring Video Doorbell 2 and Pro.
Additionally, having a few essential kitchen gadgets can be beneficial for various home projects.
You might also want to have a box cutter or a flathead screwdriver handy for safely removing the faceplate of an old doorbell, if you have one.
To guarantee accurate placement and alignment while installing a Ring doorbell, a small level and measuring tape can be incredibly helpful.
The great news is that no specialized tools are required for basic installation, making this project accessible for most homeowners.
By using the included tools and gathering a few extras, you'll be well-equipped to complete the installation with ease.
Make sure you have everything ready before you start to keep things efficient and straightforward.
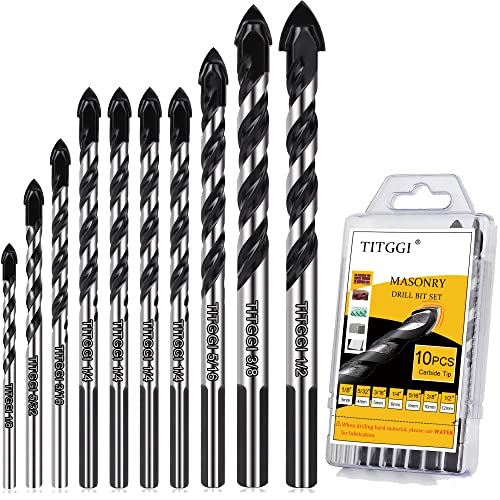
10-PCS Masonry Drill Bit Set & Concrete Drill Bit Set, Professional Drill Bit Set for Glass/Brick/Plastic/Cement/Wood/Tile/Etc, Industrial Strength Carbide Drill Bit Tip, 1/8"-1/2" by TITGGI
HIGH QUALITY DRILL BIT SET; TITGGI Masonry drill bit set, industrial strength carbide drill bit tip, excellent abrasion…
As an affiliate, we earn on qualifying purchases.
As an affiliate, we earn on qualifying purchases.
Preparing for Installation

Now that you've gathered your tools, it's time to prepare for the installation of your Ring Doorbell. First, make certain you charge the Ring Doorbell's battery using the provided orange cable. It typically takes about four to six hours for a full charge, and you'll know it's ready when the green light turns on. While you're waiting, consider how the aesthetics of your home, like the cottagecore aesthetic, can enhance the overall environment for your new device.
Next, consider the ideal mounting height for the device. Aim for around four feet from the ground to make certain you maximize video capture and accessibility. This height helps the camera capture faces clearly while avoiding obstruction from door frames or other elements.
Here's a quick checklist to guide you through this preparation phase:
- Charge the Ring Doorbell's battery until fully charged.
- Determine the best mounting height (around four feet).
- Make certain you have all necessary tools handy (screwdriver, screws, etc.).
Taking these steps will make certain a smooth installation process, setting you up for success with your new Ring Doorbell.

Ring Spare Parts Kit for Battery Doorbell
Everything you need to setup your Ring Battery Doorbell in just a few minutes.
As an affiliate, we earn on qualifying purchases.
As an affiliate, we earn on qualifying purchases.
Removing the Old Doorbell

Carefully remove the faceplate of your old doorbell using a screwdriver or box cutter before unscrewing it to access the power wires. Once the faceplate is off, gently pull out the old doorbell. Be cautious not to damage the wires connected to it.
Next, loosen the screws that secure the wires to the old doorbell and detach them completely. Here's a quick reference table to help you through the process:
| Step | Action |
|---|---|
| 1. Remove Faceplate | Use a screwdriver or box cutter to take it off. |
| 2. Unscrew Doorbell | Remove screws holding the old doorbell in place. |
| 3. Detach Power Wires | Loosen screws to disconnect wires safely. |
Ensure that the old doorbell is fully removed and that no wires are left connected. It's crucial to handle the exposed wires with caution to avoid any potential electrical hazards during the removal process. Taking these steps will make the shift smoother and set you up for a successful installation of your new Ring doorbell.
Ring Chime — Enhanced audio for real-time alerts you can hear from anywhere, easy plug-in setup, simple wifi & Bluetooth connectivity, sleek design, White
Hear when someone's there — Receive notifications when motion is detected by your cameras or someone rings your…
As an affiliate, we earn on qualifying purchases.
As an affiliate, we earn on qualifying purchases.
Mounting the New Doorbell

Begin by positioning the Ring Doorbell above the mounting bracket at a height of about four feet from the ground for the best viewing angle and accessibility. Using a level tool included in the package guarantees the doorbell is perfectly straight, which is vital for its functionality. Once you have it leveled, mark the screw hole locations with a pencil.
Additionally, consider the importance of diversification of retirement portfolio to reduce risk in your financial planning.
Next, follow these steps to securely mount your doorbell:
- For brick or stucco surfaces, use a masonry drill bit to create pilot holes and insert plastic anchors.
- If you're mounting on wood or vinyl, you can skip the anchors.
- Attach the mounting bracket to the wall using the provided screws, making sure not to overtighten, as this could bend the bracket.
With these steps, you'll successfully install your Ring Video doorbell. Make sure everything is secure and straight before proceeding to the next steps in your installation process. Enjoy your new doorbell.
Connecting the Doorbell Wires

Before you start connecting the doorbell wires, make sure the power is off at the breaker to keep yourself safe.
When attaching the wires, follow the proper connections for your existing chime, ensuring they don't touch each other to prevent any short circuits.
With careful handling, you can securely connect everything without risking damage.
Wiring Safety Precautions
Guarantee power is completely disconnected at the breaker to prevent any electrical hazards while connecting the doorbell wires. This step is vital for your safety. Remember, working with electricity can be dangerous if proper precautions aren't taken.
Here are some wiring safety precautions to keep in mind:
- Verify power is off: Double-check that the breaker is off before starting.
- Use the right voltage: Confirm your existing system supplies 8 to 24 VAC; avoid DC or lighting transformers.
- Prevent shorts: Make sure the wires don't touch each other while you connect the wires to avoid short circuits.
After connecting the wires, you can restore power at the breaker. Test the doorbell to confirm everything functions correctly, making sure that your wiring was done safely and properly.
Connecting Wires Properly
To connect the doorbell wires properly, start by loosening the screws on the Ring Doorbell's mounting bracket to prepare for secure wire attachment. Before you do anything, verify the power is disconnected at the breaker to avoid any electrical hazards during the installation process.
Next, use the existing doorbell wires, which should supply between 8 to 24 VAC. Avoid connecting to DC transformers or lighting transformers, as they won't work with your Ring Doorbell. Wrap the wires securely around the terminals, making sure they don't touch each other.
Once the wires are in place, gently tighten the screws to secure the connections. Be careful not to overtighten, as this could damage the bracket or the wires.
If you're using a digital chime, remember to include a diode according to the installation instructions to prevent potential issues with chime activation.
Following these steps verifies you're connecting wires properly, setting you up for a successful installation and smooth operation of your Ring Doorbell.
Securing the Doorbell

Securing your Ring Doorbell properly is essential to prevent theft and guarantee it stays firmly in place. During the installation, be sure to use the provided screws to attach the doorbell to the mounting bracket. This step is critical, as a tightly fastened doorbell is less likely to be detached or stolen.
Follow these key steps for effective securing:
- Align the doorbell with the mounting bracket and press down firmly until you hear a click.
- If you're using existing doorbell wires, connect them to the Ring Doorbell screws, ensuring the wires don't touch each other to avoid short circuits.
- Use the included security screws to attach the faceplate, making it harder for someone to remove the doorbell easily.
Taking these precautions will enhance the security of your Ring Doorbell, ensuring it remains in place and serves its purpose effectively.
Don't underestimate the importance of proper securing; it's a crucial step in protecting your investment.
Setting Up the Ring App

Once your Ring Doorbell is securely mounted, it's time to set up the Ring app to start enjoying its features.
First, download the Ring app from the App Store or Google Play. If you don't have an account yet, create one or log in to your existing account to begin the setup process.
Next, make sure your smartphone is connected to the Wi-Fi network you want the Ring Doorbell to use. This connection for your Ring is essential for the setup.
In the app, follow the in-app instructions to "Set Up a Device." You'll need to select your specific model from the list provided.
When prompted, scan the QR code on your Ring Doorbell or manually enter the device's serial number to link it to your account.
After you've completed the initial setup, take a moment to customize your settings. Adjust motion alerts and notification preferences to tailor the app experience to your needs.
With everything set up, you're ready to start using your Ring Doorbell and enjoy enhanced security for your home!
Frequently Asked Questions
Can I Mount My Ring Doorbell Without Screws?
Yes, you can mount your Ring Doorbell without screws by using adhesive mounts.
These mounts provide a strong bond that supports the device's weight and allow for easy removal.
Just make sure the surface is clean and dry before applying the adhesive.
If you want better visibility, consider using a mounting wedge to angle the doorbell.
Keep in mind, though, that adhesive mounts mightn't be as secure as traditional screw mounts.
How Do You Attach a Ring Doorbell Outside?
Attaching a Ring Doorbell outside is like hanging a new piece of art on your home's canvas.
First, find the perfect spot, ideally about four feet off the ground.
Use the mounting bracket to mark where you'll drill.
If you're working with tough surfaces like brick, grab a masonry drill bit.
Connect any wires if needed, then press the doorbell onto the bracket until you hear that satisfying click.
Your home's new guardian is ready!
What Is the Best Way to Stick Ring Doorbell?
The best way to stick your Ring Doorbell is by using the mounting bracket that comes with it.
Make certain you attach it securely with the included screws to prevent theft and guarantee stability.
If you're renting or don't want to drill, adhesive mounts work, but they mightn't be as secure.
Always clean and dry the surface before applying anything to get the best adherence for your installation.
How Do You Attach a Ring Doorbell to a Wooden Door?
To attach your Ring Doorbell to a wooden door, start by marking the height at about 4 feet.
Use the mounting bracket to mark screw hole positions, ensuring it's level.
Drill pilot holes, then secure the bracket with the provided screws, but don't overtighten.
Once it's firmly attached, align your Ring Doorbell with the bracket and press down until you hear a click.
Conclusion
Now that you've mounted your Ring doorbell, it's like having a watchful guardian at your door, ready to protect and connect you.
By following these steps, you've not only upgraded your home security but also embraced the convenience of modern technology.
Don't forget to explore the Ring app to maximize your doorbell's features.
With everything set up, you'll enjoy peace of mind, knowing who's at your door with just a glance at your phone.