
To remove the mounting bracket from your Ring Doorbell, start by turning off the power if it's hardwired. Use a small screwdriver to unscrew any security screws at the bottom of the doorbell. Gently pull the doorbell upwards to detach it from the mounting bracket. Next, locate the screws holding the bracket to the wall and use a drill or screwdriver to remove them. Once all screws are out, carefully pull the mounting bracket away from the wall. It's important to inspect the area for any remaining hardware. You can find additional tips and techniques to make this task easier. If you encounter any difficulties during this process, refer to the manufacturer’s instructions or look for specific ring doorbell troubleshooting tips online. Additionally, you can reach out to customer support for guidance. After removing the mounting bracket, ensure that the area is clean and free of any debris before installing a new bracket or making any repairs. Remember to follow all safety precautions when working with electrical components, and always consult a professional if you are unsure.
Key Takeaways
- Locate and remove the screws securing the mounting bracket using a drill or screwdriver.
- Gently pull the mounting bracket away from the wall after unscrewing.
- Inspect for any additional screws or hardware that may need removal.
- If the bracket is stuck, use a paint scraper to help pry it off gently.
Preparation Steps
Before you begin removing the mounting bracket from your Ring Doorbell, make certain you've gathered all the necessary tools and taken safety precautions.
Start by turning off the power to your doorbell if it's hardwired, as this will help you avoid any electrical hazards. Wearing safety goggles is essential to protect your eyes from any debris that may come loose during the removal process. It's also wise to contemplate hiring a professional if you're uncertain about the process, as a reliable home cleaning service can provide peace of mind in other areas of home maintenance.
Next, clear the area around the doorbell to guarantee you have enough space to work comfortably. This will allow you to move freely while handling the mounting bracket and any screws. It's a good idea to check the specific instructions for your Ring Doorbell model, as different models may have unique requirements or mounting configurations.
Once you've done that, gather your tools, including a small screwdriver and a drill, which will help you easily remove the screws securing the mounting bracket. Double-check if you need any additional mounting hardware for a smoother removal process.
With everything ready, you can confidently proceed to remove the mounting bracket and guarantee a successful project.
Tools Needed

Gathering the right tools is essential for successfully removing the mounting bracket from your Ring Doorbell.
First, you'll need a small screwdriver, ideally one with a star bit, to tackle the security screws holding the doorbell in place. This tool is often included with your Ring Doorbell, making it handy for the job.
Additionally, having a must-have tool like a high-quality chef's knife can be useful for various tasks around the house, guaranteeing you're well-prepared.
Next, have a paint scraper or a butter knife ready. This can help gently pry the doorbell off the mounting bracket if it's stuck. It's also wise to wear safety goggles during this process to protect your eyes from any debris.
If the mounting bracket is secured to the wall with screws, a drill might be necessary to remove them, especially if they're tightly fastened.
To guarantee you can see clearly while working, a flashlight will be invaluable for illuminating the area around the doorbell and the screws.
With these tools in hand—a screwdriver, paint scraper, safety goggles, drill, and flashlight—you'll be well-equipped to proceed with removing the mounting bracket from your Ring Doorbell.
Removing the Doorbell

To remove the Ring Doorbell, you'll start by taking out the security screws at the bottom of the device.
It's important to handle the doorbell gently to avoid any damage, just like how families enjoy various attractions at top water parks for families.
Once that's done, you can use a few techniques to detach the doorbell from its mounting bracket.
Remember to handle everything carefully to avoid damaging the doorbell or connections.
Security Screw Removal
Locate the two security screws at the bottom of your Ring Doorbell, which are usually fastened with the star bit screwdriver that came with the device. Using this screwdriver, carefully remove the security screws. Make certain they're fully loosened; this will allow your doorbell to slide off the mounting bracket easily.
| Step | Action |
|---|---|
| 1 | Locate the security screws. |
| 2 | Use the screwdriver to remove screws. |
| 3 | Confirm screws are fully loosened. |
| 4 | Gently pull upward on the doorbell. |
| 5 | Store screws safely for reinstallation. |
Once the screws are removed, gently pull the doorbell upward away from the mounting bracket. Apply even pressure to avoid damaging the device. If the doorbell stays stuck, consider using a paint scraper or a similar tool to carefully pry it off. Remember not to apply excessive force, as this could cause damage. Keeping the removed security screws in a safe place is vital for future reinstallation.
Detaching Doorbell Techniques
After removing the security screws, you'll need to apply the right techniques to detach the Ring Doorbell from its mounting bracket.
Start by gripping the doorbell firmly and pulling upward. At the same time, push down on the mounting bracket to gain better leverage during the removal process. This combination of movements will assist you in sliding the doorbell off more easily.
If you encounter resistance, don't panic. Sometimes, the doorbell can be a bit stubborn. In such cases, you can use a flat tool, like a paint scraper or a butter knife, to gently pry the doorbell away from the mounting bracket. Just be careful not to damage the doorbell or the bracket during this step.
Patience is key here—some force might be necessary, but don't overdo it. If you're unsure or need additional guidance, check your installation manual for hints specific to your Ring Doorbell model.
Following these techniques will guarantee a smoother detachment process, allowing you to successfully remove your doorbell without any hassle.
Handling Wired Connections
Safeguarding safety is essential when handling wired connections for your Ring Doorbell removal. First, turn off the power to the doorbell and use a voltage tester to confirm there's no electrical current. This step is vital to avoid any hazards during the process.
Next, identify the wire connections that supply power to your doorbell. Carefully loosen the wire nuts or screws to detach the wires, being mindful of their positions. If the wires are color-coded, label them with tape to simplify the reconnection when you're ready to reinstall your doorbell.
Once you've detached the wires, gently pull the doorbell away from the mounting bracket. Be cautious not to damage the connections or the doorbell itself during this step.
After removing the doorbell, make certain to tuck the exposed wires safely away to prevent any potential damage or hazards until you're ready for reinstallation or replacement.
Following these steps guarantees both safety and efficiency as you handle the wired connections of your Ring Doorbell.
Disconnecting Wired Connections

Before you start disconnecting any wired connections, make certain to check that there's no power running to the doorbell.
Identify the wire connections carefully, as these typically include two wires that need to be detached properly.
Once you're ready, loosen the wire nuts or screws to guarantee a smooth disconnection process.
Identifying Wire Connections
To safely disconnect the wired connections from your Ring Doorbell, start by using a voltage tester to confirm that no power is flowing through the wires. Once you're sure it's safe, identify the wire connections for the power supply. Typically, you'll find two wires: one for power (often labeled "power" or "live") and one for ground.
Next, carefully loosen any wire nuts or screws securing the connections to detach them without causing damage. If there are multiple wires or colors that look similar, it's a good idea to label them with tape for easier reconnection later. After you've removed the doorbell from the mounting bracket, make certain the wires are safely tucked away to prevent accidental contact or short circuits.
Here's a table to help you keep track of the wire connections:
| Wire Type | Color | Purpose |
|---|---|---|
| Power Wire | Red/Black | Supplies power |
| Ground Wire | White/Green | Grounds the system |
| Labeling | Tape | For reconnection |
| Connection Method | Wire nuts | Secure connections |
| Safety Check | Voltage Tester | Confirm no power |
Following these steps will guarantee a smooth disconnection process!
Ensuring Power Safety
Confirming the power is off at the circuit breaker is essential before disconnecting the wired connections from your Ring Doorbell. This step guarantees power safety and helps you avoid any electrical hazards while you work.
After you've turned off the breaker, grab a voltage tester to double-check that there's no power in the wires connected to the doorbell. This extra precaution gives you peace of mind.
Next, identify and label the wire connections to the power supply. This will make it easier to reconnect everything later when you're ready to install your new doorbell.
Carefully loosen the wire nuts or screws holding the wires in place. Take your time with this step to prevent damaging the wire or connectors.
Once you've detached all the connections, it's time to remove the doorbell.
Afterward, make sure that any loose wires are safely tucked away to prevent accidental contact. Keeping things organized and secure during this process minimizes risks and helps you maintain a safe working environment.
Detaching Wires Properly
Start by using a voltage tester to verify there's no power flowing to your Ring Doorbell, keeping safety as your top priority.
Once you confirm that there's no electrical current, it's time to begin disconnecting the wires. Carefully remove any wire nuts or screws securing the wires to the doorbell. Make sure you do this gently to avoid damaging the connections. If your wires are color-coded, label them to make reinstallation easier later on.
Once the wires are detached, safely tuck them away to prevent any accidental contact or damage.
It's essential to keep all removed components, including wires and connectors, in a secure location for potential future use. This guarantees that if you decide to reinstall your Ring Doorbell or use the components again, everything you need is handy.
Removing the Mounting Bracket

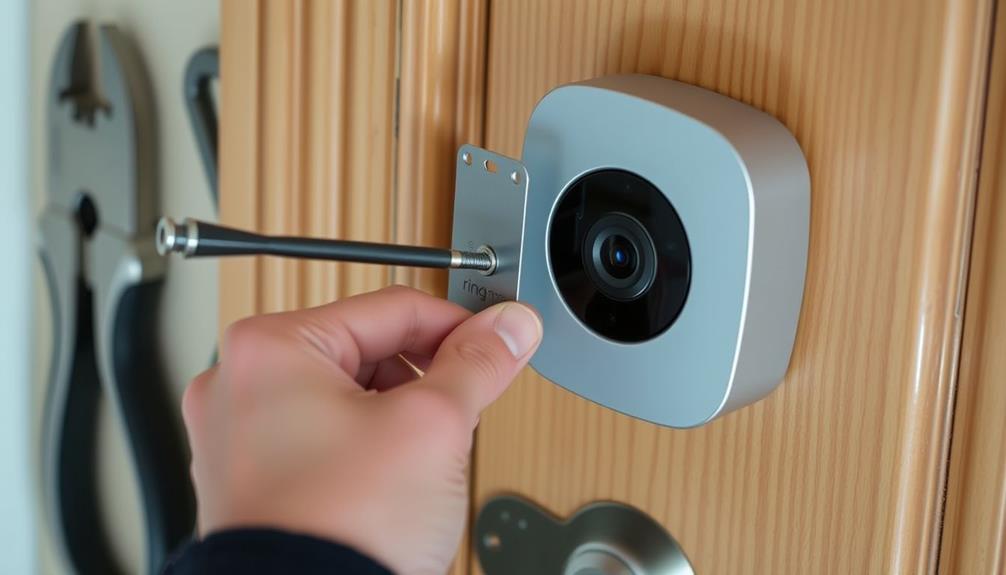
Begin by locating and unscrewing the screws that secure the mounting bracket to the wall. Use a drill or screwdriver for this task. Once you've removed the screws, gently pull the mounting bracket away from the wall. Be cautious during this step to avoid causing any wall damage. If the bracket seems stuck, double-check that all screws have been removed before attempting to detach it.
Here's what to keep in mind during this process:
- Inspect the Area: After removing the bracket, check for any additional screws or hardware that might still be securing it in place.
- Look for Wall Damage: Inspect the wall for any damage caused during removal.
- Consider Wall Filler: If you find holes or imperfections, think about using wall filler to repair the surface.
Once the mounting bracket is fully removed, you'll have a clearer view of the wall and can address any issues that may have arisen. Taking these steps will guarantee a smooth shift for your upcoming installation or repairs.
Common Issues Encountered

Removing the mounting bracket can be frustrating, especially when you encounter unexpected difficulties like stubborn connections or unclear instructions. Many users find themselves struggling even after removing the security screw.
The bracket holds onto the doorbell tighter than expected, making it hard to detach. If you've already lifted the faceplate off the front and still can't get it off, you're not alone—this issue is as common as everyone else's.
You might need to apply a bit of force to separate the doorbell from the bracket. Some users report success by using a paint scraper or similar tool to gain leverage. However, be cautious, as excessive force or improper tools can damage the device.
The process can vary noticeably between different Ring Doorbell models, which adds to the confusion for first-time users. Community forums often share techniques that work, but you may still face challenges if you're unfamiliar with the specific model.
User Techniques for Removal

Many users find success with a few simple techniques to detach their Ring Doorbell from the mounting bracket. By applying the right approach, you can make the removal process smoother and easier. Here are some effective methods to try:
- Check Security Screws: Before you begin, verify all security screws at the bottom of the doorbell are fully removed. This is essential for a successful detachment.
- Use Grip and Leverage: Grip the doorbell and mounting bracket separately. This allows you to pull upward on the doorbell while pushing down on the mounting bracket. The combination of these movements often aids in separation.
- Employ a Paint Scraper: If your doorbell feels stuck, use a paint scraper or a butter knife to gently pry it away from the mounting bracket. This added leverage can help loosen any stubborn connections.
If the doorbell remains firmly attached, don't hesitate to ask someone with strong hands for additional pulling force. Their help can make a significant difference in successfully detaching your device.
Support Resources Available

If you encounter difficulties while removing your Ring Doorbell, several support resources are available to assist you. First, you can reach out to the support team at one of the contact options listed on Ring's official site. However, be prepared for possibly extended wait times due to ongoing COVID-19 precautions.
Additionally, you can explore the Ring Community forums, where users share experiences and seek peer assistance. To join in the discussion about Rings wired and other installation topics, you'll need to log in or create a Ring account to post. This platform is an excellent source for those looking to find solutions or share tips about removal.
Here's a quick overview of the available resources:
| Resource Type | Description | Access Method |
|---|---|---|
| Support Team | Troubleshooting and setup guidance | Contact via official site |
| Community Forums | User discussions and shared experiences | Create a Ring account |
| Additional Resources | Extra steps to protect your installation | Access through forums |
These resources can help guarantee you're able to remove your doorbell successfully.
Community Experiences

Users often share their challenges and successes in removing the mounting bracket from their Ring Doorbell, creating a wealth of experiences to learn from. Many have encountered issues, but they've also discovered effective techniques to make the process smoother.
Here are three common insights from the community:
- Grip Technique: Users recommend gripping the mounting bracket already attached while pulling the doorbell upward. This method can provide better leverage and prevent damage.
- Patience is Key: Several users emphasize that patience and persistence are essential. Sometimes, you may need to pull the bracket downward with a bit of force to detach it successfully.
- DIY Tools: Many have shared their success using everyday tools like paint scrapers or butter knives to help take the faceplate off, making it easier to access the mounting bracket.
These community experiences highlight the importance of support and sharing knowledge. Knowing that others have faced similar challenges can motivate you to try different methods until you find one that works. So, don't hesitate to reach out and learn from others who've tackled the same task!
Post-Removal Cleanup

Once you've removed the mounting bracket, it's essential to clean the area to get rid of any dust or debris left behind.
You'll also want to responsibly dispose of any screws or hardware you no longer need, ensuring they don't harm the environment.
Keeping your space tidy will help you maintain a safe and organized environment for your next steps.
Area Cleaning Tips
After removing your Ring Doorbell, it's essential to gather your cleaning supplies to make certain the area is spotless and free of any debris. Here's what you'll need:
- Damp cloth and mild soap – for cleaning surfaces.
- Vacuum – to eliminate any dust and debris.
- Adhesive remover or rubbing alcohol – to tackle any adhesive residue.
Start by inspecting the area for any dust or dirt accumulated during the installation process. Use the vacuum to thoroughly clean the surface, making sure you pick up any stray debris.
If you find adhesive residue left by the mounting bracket, apply a small amount of adhesive remover or rubbing alcohol to a cloth and gently wipe the area, taking care not to damage the paint.
Next, check for any holes or damage in the wall left by the screws. If you spot any, fill them with appropriate wall filler for a clean finish. This not only improves the aesthetics but also helps maintain the integrity of your wall.
Safe Hardware Disposal
Properly disposing of hardware like screws and anchors helps reduce your environmental impact and keeps your workspace clutter-free.
Start by checking your local recycling guidelines for screws and anchors. Many areas have specific programs for recycling metal components, so take those to a metal recycling facility. This guarantees they're processed correctly and reused, minimizing waste.
For any plastic parts, find out if your local recycling program accepts them. If not, consider reusing these items for future projects around your home. It's a great way to reduce plastic waste and save money at the same time.
If you have any functional parts left from the mounting bracket, think about donating them to local community centers or makerspaces. These organizations often appreciate materials they can repurpose for various projects.
Lastly, always follow proper disposal methods for any electronic components you may have removed. This is essential to comply with e-waste regulations and protect the environment.
Frequently Asked Questions
How to Get the Ring Doorbell off the Bracket?
To get the Ring Doorbell off the bracket, first, make sure you've removed all security screws at the bottom.
Then, grip the doorbell and bracket separately for better leverage.
Gently pull upward on the doorbell while pushing down on the bracket.
If it's still stuck, try using a paint scraper to pry it off carefully, ensuring you apply even pressure.
If that doesn't work, reach out to Ring support for help.
How Do I Remove the Cover on a Ring Doorbell?
To remove the cover on your Ring Doorbell, start by locating the two small security screws at the bottom.
Use the included screwdriver to unscrew them completely.
Once the screws are out, gently pull the doorbell cover upward to detach it from the mounting bracket.
Make sure the screws are fully loosened to avoid damage.
If it's tough to slide off, you can use a paint scraper to help pry it gently.
How Do You Remove the No Drill Mount on Ring Doorbell?
To remove the No Drill Mount on your Ring Doorbell, start by gently pulling the doorbell away from the mount.
Make sure all adhesive strips are detached from the wall.
If there are screws, grab a screwdriver and remove them first.
For adhesive mounts, using a heat gun or hairdryer can warm the adhesive, making it easier to peel off.
How Do You Remove a Ring Sensor From a Bracket?
You're enthusiastic to detach your Ring sensor, but it seems stuck.
First, find those tiny security screws at the bottom—grab a star bit screwdriver and remove them carefully.
Now, with a bit of upward pressure, gently pull the sensor away from the bracket.
If it resists, a butter knife can help pry it loose.
Check for any damage afterward and keep your screws safe; you might need them later!
Conclusion
Once you've successfully removed the mounting bracket from your Ring doorbell, you can take pride in knowing that over 30% of homeowners have opted for smart doorbells in recent years.
This shift highlights the growing importance of security and convenience in our lives.
Whether you're upgrading or relocating your device, you've taken a step toward enhancing your home's safety.
With a bit of patience and the right tools, you've made the process smoother than most!