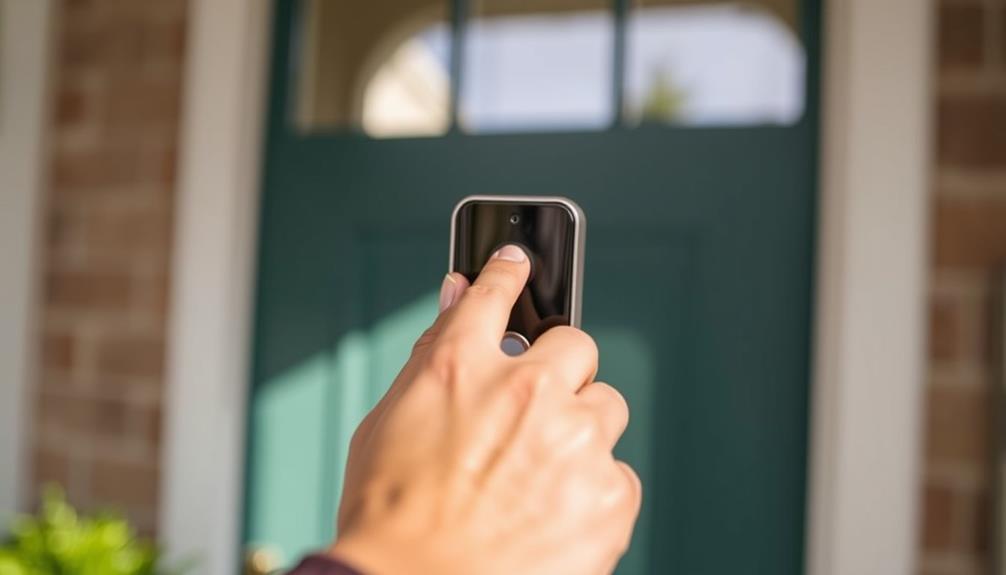
To begin opening your Ring Doorbell Wired, it is essential to first deactivate the power at the circuit breaker to avoid any risk of electric shock. Use a T15 Torx screwdriver to unfasten the screws holding the faceplate in place. Carefully remove the faceplate to gain access to the internal components. Once you have confirmed that the power is indeed off, you can proceed to disconnect the wires and examine or replace any components that may require attention. Be sure to take note of the wire positions in order to correctly reassemble them later. Once the maintenance is complete, reattach the faceplate, reestablish power, and then follow the provided setup instructions. If you need more detailed guidance, there are additional helpful tips available to assist you.
Key Takeaways
- Turn off power at the circuit breaker to ensure safety before opening the Ring Doorbell Wired.
- Use a T15 Torx screwdriver to remove screws securing the faceplate for access.
- Gently pull the faceplate away to avoid damaging internal wires and components.
- After removing the faceplate, inspect internal components for maintenance or repairs.
Safety Precautions Before Opening
Before you start opening your Ring Doorbell Wired, make certain to turn off the power at the circuit breaker to avoid any risk of electrical shock. This step is vital for your safety and guarantees you won't accidentally come into contact with live wires while working.
Additionally, having a clean workspace is essential for maintaining organization and preventing damage to your device; consider implementing some smart organization techniques to keep your area tidy.
Once you've confirmed the power is off, gather the appropriate tools for the job. Using a T15 Torx security screwdriver is vital, as it'll help you avoid damaging the screws during the process.
Next, set up a clean, dry workspace. This minimizes the risk of accidentally losing small components or damaging the doorbell itself.
It's also wise to wear safety glasses. They'll protect your eyes from any small parts that might spring out unexpectedly when you open the device.
Finally, take a moment to review the user manual specific to your model, as it'll provide valuable information on safe opening procedures.
Tools Required for Opening

You'll need a few specific tools to successfully open your Ring Doorbell Wired. Start with a T15 Torx security screwdriver, as most models use this type of screw for the faceplate. This screwdriver is essential for removing the screws that secure the faceplate to the device. Additionally, having a small flathead screwdriver may also be helpful for prying open the faceplate once the screws are removed. If opening the Ring Doorbell Pro, you may also need a small Phillips head screwdriver for removing any additional screws holding the device in place. These specific tools will ensure that you can safely and effectively open your Ring Doorbell Wired or Pro without causing any damage to the device. You’ll also need a small Phillips head screwdriver to access the interior of the device and make any necessary adjustments. Additionally, having a replacement Ring Doorbell battery on hand is also important for maintenance and longevity of your device. When replacing ring doorbell battery, make sure to follow the manufacturer’s instructions for proper installation and disposal of the old battery.
If the faceplate is stuck, a small flathead screwdriver can come in handy for prying it off gently. It's also important to remember to guarantee your workspace is clean and organized, just like what you'd consider when hiring a home cleaning service for efficiency.
Additionally, having a PH2 Phillips screwdriver on hand is wise, as it may be necessary to access internal components during troubleshooting or repairs. To protect your device while working, gather a soft cloth or microfiber towel to avoid scratching it.
If you plan on replacing any internal parts or wires, consider keeping wire cutters and connectors nearby for proper installation and repair. Having these tools ready will guarantee you can efficiently tackle the job without unnecessary interruptions or delays.
Removing the Faceplate

To remove the faceplate of your Ring Video Doorbell Wired, you'll need a few specific tools and follow some straightforward steps.
First, make sure you have the small security screw from Bag B handy, as you'll need it to secure the faceplate during reassembly.
This process is essential for maintaining the device's functionality and ensuring a seamless installation, much like the way celebrating family bonds fosters connections.
With everything set, you can easily pull the faceplate off without causing any damage to the device.
Tools Needed for Removal
When removing the faceplate of your Ring Video Doorbell Wired, you'll need a T15 Torx security screwdriver to tackle the screws that hold it in place. This specialized screwdriver is essential for ensuring you can safely and effectively remove the faceplate without damaging it.
Here are a few other tools and materials you should gather before you start:
- T15 Torx Security Screwdriver – Necessary for unscrewing the faceplate.
- Small Flathead Screwdriver – Helpful for gently prying off the faceplate if it's snug.
- Soft Cloth – Protects your doorbell from scratches when you place it down.
- Safety Gloves – Keeps your hands safe while handling tools and components.
Before you engage in the removal process, make sure to turn off the power to the doorbell at the breaker. This precaution is essential for your safety as you work with the wiring.
Once you have everything ready, you're set to take off the faceplate and access the internals of your Ring Video Doorbell Wired.
Step-by-Step Instructions
Start by ensuring the power to the doorbell is turned off at the breaker for your safety. Now, let's get to removing the faceplate.
Follow these steps:
| Step | Action | Tools Needed |
|---|---|---|
| 1 | Locate the small security screw | T15 Torx screwdriver |
| 2 | Use the screwdriver to remove it | T15 Torx screwdriver |
| 3 | Gently pull the bottom of the faceplate away | None |
| 4 | Detach the faceplate completely | None |
| 5 | Check internal components | None |
Once you've removed the screw, gently pull the bottom of the faceplate away from the doorbell. Be careful not to use excessive force, as it might damage the faceplate or the doorbell itself. After successfully removing the faceplate, you'll have access to the internal components for any maintenance or troubleshooting you need to perform. Now you're ready to proceed with your task!
Accessing Internal Components

Now that you've removed the faceplate, you can safely access the internal components of your Ring Doorbell Wired.
Make sure you disconnect the power before touching any internal connections to prevent accidents.
With everything powered down, you're ready to inspect or repair the device as needed.
Removing Faceplate Securely
To access the internal components of your Ring Video Doorbell Wired, securely remove the faceplate by carefully unscrewing the small security screw at the bottom using the T15 Torx screwdriver. Once you've got that screw out, gently pull the faceplate away from the device. It's essential to avoid using excessive force, as this can cause cracks or breaks in the plastic.
Here are some tips to help you navigate this process smoothly:
- Stay Calm: Take your time; rushing can lead to mistakes.
- Be Gentle: The faceplate is delicate; a gentle touch goes a long way.
- Check Your Tools: Confirm your T15 Torx screwdriver is the right fit to avoid stripping the security screw.
- Keep Track of the Screw: Losing it can complicate reattachment later.
Once the faceplate is off, you'll have access to the internal components for any necessary troubleshooting or adjustments. Remember to reattach the faceplate securely after you're done to protect your device from environmental elements and make sure it functions properly.
Disconnecting Power Safely
Before accessing the internal components of your Ring Video Doorbell Wired, it's important to turn off the power at the circuit breaker to assure your safety. This step is vital in preventing any electric shock while you work on the device.
Take a moment to locate the breaker that controls your doorbell and flip it to the 'off' position.
Once you've confirmed the power is disconnected, you can proceed with the process. Use a T15 Torx security screwdriver to remove the security screw at the bottom of the doorbell, which holds the faceplate in place.
Carefully pull the faceplate away from the main body to avoid damaging any wires.
If you need to access the internal wiring, you may have to disconnect the doorbell wires from the terminals. Loosen the screws on the terminals gently to detach the wires without causing any harm.
Always follow safety guidelines and refer to the installation manual for specific instructions related to your model.
Accessing Internal Connections
Accessing the internal connections of your Ring Video Doorbell Wired requires carefully removing the faceplate and any additional screws that secure its back cover.
First, verify the device is powered off by turning off the circuit breaker. This step is essential for your safety. You'll need a T15 Torx security screwdriver to remove the small screw at the bottom of the doorbell.
Once you've removed the faceplate, you'll expose the internal wiring and connections. If you need further access, look for additional screws securing the back cover. Removing these will allow you to inspect or troubleshoot the internal components. Remember, always prioritize safety when handling electrical components.
Here's a quick checklist to keep in mind while accessing the internal connections:
- Turn off the circuit breaker – Protect yourself from electrical shock.
- Gather necessary tools – You'll need a T15 Torx screwdriver.
- Carefully detach the faceplate – Handle with caution to avoid damage.
- Inspect internal connections – Look for any visible issues or wear.
Following these steps will help you safely access the internal connections of your Ring Video Doorbell Wired.
Disconnecting Power Supply

Make certain you've turned off the power at the circuit breaker to eliminate any risk of electrical shock while working on your Ring Doorbell Wired.
Once the power is off, you can safely proceed with disconnecting the doorbell from its power supply.
Start by removing the faceplate using a T15 Torx screwdriver to access the screws securing the doorbell unit to its mounting bracket.
After unscrewing, gently pull the doorbell away from the wall. Be careful not to damage any attached wires during this process.
With the doorbell now accessible, you'll see the wires connected to the terminals.
It's vital to guarantee that the power remains off before you start disconnecting these wires.
Carefully disconnect the doorbell wires from the terminals, taking note of their arrangement for easy reconnection later.
This step is essential for safely handling the doorbell and performing any necessary maintenance or adjustments.
Once you've disconnected the power supply, you're ready to move on to the next steps in opening and servicing your Ring Doorbell Wired.
Handling Electrical Parts

When handling electrical parts, safety should always be your top priority.
Make certain you identify the correct components and use proper techniques to avoid any accidents.
Following these precautions will help guarantee a smooth installation process for your Ring Doorbell Wired.
Safety Precautions Required
Before you start installing your Ring Doorbell Wired, it's vital to prioritize safety by turning off the power at the circuit breaker to prevent any risk of electrical shock. Ignoring this step can lead to serious injuries, so take it seriously.
Here are some important safety precautions to follow:
- Wear safety goggles to protect your eyes from debris while working.
- Use insulated tools specifically designed for electrical work to minimize the risk of accidental contact with live wires.
- Ensure the area is dry and free from water. Moisture can create dangerous electrical hazards.
- Keep your hands dry and avoid distractions to maintain focus on the task at hand.
Identifying Electrical Components
Identifying the electrical components of your existing doorbell system is vital for a successful installation of the Ring Doorbell Wired. First, make certain you've turned off the power at the breaker to avoid any risk of electric shock.
Next, locate your existing doorbell transformer; it should supply between 8 to 24 VAC. This voltage range is important for the proper functioning of your new doorbell.
Once you've found the transformer, use a multimeter to check the voltage at the doorbell wires, making sure they fall within the required range. Familiarizing yourself with the color coding of the wires will help prevent confusion. Typically, red wires indicate power (trans), while white or another color is used for the chime (front or rear).
When it's time to disconnect the wires, make certain you're using insulated tools to handle them safely. If you notice any irregularities or aren't sure about the wiring, it's best to consult a licensed electrician for assistance.
Taking these steps will set you up for a smooth installation and help your Ring Doorbell Wired function perfectly.
Proper Handling Techniques
Always prioritize safety by verifying the power is off at the circuit breaker before you start handling any electrical components. This is vital to prevent electrical shock and create a secure working environment. Following proper handling techniques is essential for a successful installation or maintenance of your Ring doorbell.
Here are some key steps to keep in mind:
- Use insulated tools: These minimize the risk of accidental contact with live wires, providing an extra layer of protection.
- Carefully note wire positions: As you disconnect wires, take time to observe their colors and placements. This will help you avoid confusion when you reconnect them.
- Avoid touching exposed wire ends: This prevents short circuits and keeps you safe. Always verify they're insulated with wire connectors when not in use.
- Handle the device with care: Excessive force can damage delicate internal components, jeopardizing the integrity of your Video Doorbell.
Troubleshooting Common Issues

Troubleshooting common issues with your Ring Video Doorbell Wired can save you time and frustration, guaranteeing your device operates smoothly.
If your doorbell isn't powering on, first check that the circuit breaker is on and that it's connected to a compatible transformer (8-24 VAC).
Sometimes, the installation of the Pro Power Kit and jumper cable can lead to connectivity issues, so double-check those setups.
Next, verify that all wiring connections are secure and correctly aligned. Loose or incorrect wiring connections can prevent your doorbell from functioning properly.
If you're still having trouble, use the Ring app to check the device status. If it shows offline, confirm that your Wi-Fi connectivity is stable and within range.
Should these steps not resolve the issue, try resetting the doorbell by holding the setup button for 15 seconds.
After resetting, reconfigure the device through the Ring app to see if that resolves the problem.
Reassembling the Doorbell

To reassemble your Ring Video Doorbell Wired, start by aligning the faceplate with the doorbell body and pressing it into place until you hear a click. This secure fit is essential for your device's functionality. Before you proceed, double-check that all wiring connections are properly tucked into the wall to avoid pinching any wires when you attach the faceplate.
Next, grab the small security screw from Bag B. This step is significant—securing the faceplate with this screw helps prevent unauthorized removal, ensuring your doorbell stays safe and sound.
Here's a quick checklist to keep in mind during reassembly:
- Make sure all wiring is neatly tucked away.
- Press the faceplate until it clicks securely.
- Insert the security screw to lock the faceplate in place.
- Restore power at the circuit breaker.
After securing everything, watch for the power-on indication from your doorbell. Finally, follow the setup instructions in the Ring app to complete the reassembly process. You're now one step closer to enjoying the added security of your Ring Video Doorbell!
Testing After Reinstallation

After reinstalling your Ring Video Doorbell Wired, it's important to test its functionality to confirm everything's working as intended. Start by restoring power at the circuit breaker, which guarantees your device receives the necessary electricity. Wait for the doorbell to power on; you'll see a light activation and hear vocal prompts indicating it's ready.
Next, open the Ring app to complete the setup process. Make sure the doorbell is connected to your Wi-Fi network for remote access. Now it's time for some testing:
| Action | Expected Outcome | Notes |
|---|---|---|
| Press the doorbell button | Receive a notification on your device | Check both video and audio |
| Verify linked devices | Receive alerts from all linked devices | Confirm Ring Chime is operational |
| Check app functionality | Live view and two-way audio work | Test response time and clarity |
Additional Support Resources

If you need further assistance beyond testing your Ring Doorbell Wired, there are plenty of support resources available to help you. Don't hesitate to tap into these options for a seamless experience:
- FAQs on Ring's Website: Find quick answers to common questions about installation and functionality. It's a great starting point for troubleshooting.
- Video Tutorials: Watch step-by-step guides on Ring's website. These videos can make installation and setup much easier.
- Customer Support: You can contact customer support through the Ring app or website. They're ready to help with any technical issues or questions you might have.
- Ring Community Forums: Engage with other users who've faced similar challenges. Sharing experiences can offer valuable insights and tips for your installation journey.
Staying connected with these resources guarantees you receive the best support possible.
Frequently Asked Questions
How Do You Open a Ring Doorbell Wired Cover?
To open the Ring Doorbell Wired cover, you'll need a T15 Torx security screwdriver.
Start by removing the small security screw at the bottom. Once that's out, gently pull the faceplate away from the device.
Make sure you've turned off the power at the breaker for safety. If the cover feels stuck, check for any remaining screws.
After removing the cover, you can access the internal components for maintenance.
How Do You Open up a Ring Doorbell?
Did you know that over 70% of homeowners use smart doorbells for enhanced security?
To open your Ring doorbell, start by locating the security screw at the bottom of the device.
Use the T15 Torx screwdriver to remove it.
Once that's done, gently pull off the faceplate.
Make sure the device's powered off to avoid any hazards.
Handle the internal components carefully to prevent damage or voiding your warranty.
How Do You Remove the Battery From a Hardwired Ring Doorbell?
You can't remove the battery from a hardwired Ring doorbell because it doesn't have one.
This model is designed to be powered continuously through your existing doorbell wiring.
If you're experiencing issues, try disconnecting and reconnecting the power supply instead. This often resolves problems without needing to access internal components.
Just remember, if you have a model with a removable battery, the process is different, but that doesn't apply here.
How Do You Open a Ring Doorbell Mount?
To open a Ring Doorbell mount, first, make sure the power's off for your safety.
Grab the T15 Torx security screwdriver and remove the small screw at the bottom of the faceplate.
Gently pull the faceplate away from the doorbell body.
If you see any mounting screws, take those out with the right screwdriver.
Just be careful not to force the faceplate off, as that could damage your device.
Conclusion
By following these steps, you can confidently access your Ring Doorbell wired and tackle any issues that come your way.
Think of it like opening a treasure chest; once you've got it open, you're rewarded with the ability to diagnose and fix problems yourself.
Just remember to handle everything with care, like a delicate piece of art, to guarantee your doorbell remains in excellent condition.
With a little patience, you'll keep your home secure and connected!


