To install your Ring Doorbell with tape, start by cleaning the wall with alcohol to guarantee a smooth, adhesive-friendly surface. Use the double-sided tape included with your doorbell, which works best on wood, metal, and plastic. Align the doorbell carefully and press it firmly against the wall for at least 30 seconds. Let the adhesive cure for a few hours before using the doorbell. Monitor its adhesion over the first few days and reapply tape if needed. For additional tips and troubleshooting advice, you might want to explore the many options available for a successful installation.
Key Takeaways
- Clean the wall surface with alcohol and ensure it is smooth, dry, and free from debris for optimal adhesive bonding.
- Use the double-sided tape included with the Ring Doorbell, specifically designed for smooth surfaces.
- Align the doorbell mount accurately, press firmly for at least 30 seconds to activate the adhesive, and allow curing time before use.
- Monitor the installation for the first few days to ensure the adhesive holds; reapply tape if needed.

Qjin Double Sided Tape for Ring Video Doorbell (2nd Generation), Mounting Tape (No Drilling Required) 5 Pack
- Secure Mounting: Ensures stable hold for your doorbell
- Easy Installation: No screws or drilling needed
- Package Includes: Five double-sided tapes for easy setup
As an affiliate, we earn on qualifying purchases.
As an affiliate, we earn on qualifying purchases.
Preparing the Surface
To guarantee a strong bond for your Ring Doorbell, start by thoroughly cleaning the wall surface to eliminate any oils, dirt, or debris.
Using alcohol is effective for this task, as it confirms the surface is completely clean. A smooth and dry surface greatly enhances the effectiveness of the adhesive tape, so take your time with this preparation step.
Additionally, it might be helpful to think about using a microfiber cloth to further confirm no dust remains, as this is a key factor in achieving a clean surface. Essential items for a home cleaning kit can assist in this process.
Before you install the doorbell, check that the wall is free from any rough patches or dust, as these can compromise the performance of the tape.
Remember, surfaces like shingles, stucco, or glass aren't ideal for best adhesion, so choose a suitable location.
You should also prepare enough space for the No-Drill Mount, as proper spacing confirms a secure fit.
Following the manufacturer's guidelines for surface preparation is important, as it can further enhance the performance of the adhesive.
By paying attention to these details, you'll increase the chances of a successful installation, allowing your Ring Doorbell to function effectively for years to come.
Prioritizing this preparation sets the foundation for a reliable and long-lasting bond.
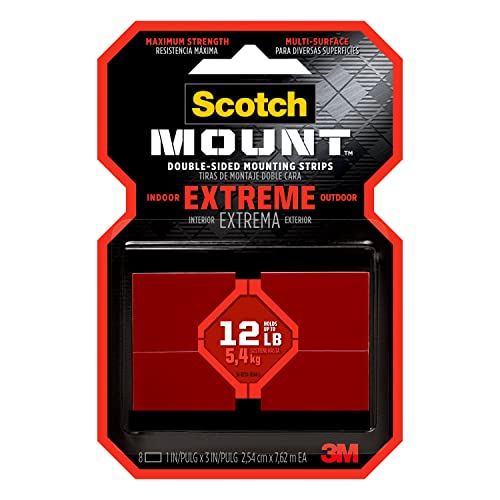
Scotch Extreme Mounting Strips, Double-Sided Heavy Duty Tape, 8 Strips, 1 in x 3 in, Use Instead of Nails or Screws, Works on Painted surfaces, Metals, Acrylic, Hard Plastics and More (414H-ST)
- Replacement for Nails or Screws: Use instead of nails or screws
- Versatile Surface Compatibility: Works on painted surfaces, metals, acrylic, plastics
- High Load Capacity: Holds up to 12 pounds with 8 strips
As an affiliate, we earn on qualifying purchases.
As an affiliate, we earn on qualifying purchases.
Choosing the Right Tape

When you're choosing the right tape for your Ring Doorbell, it's vital to take into account the types available and their compatibility with your surface.
For best results, think about the environmental conditions where the doorbell will be installed, as some tapes are better suited for outdoor use.
You'll want to focus on adhesive strength to guarantee a secure installation that lasts, especially since ozone air purifiers can be beneficial in maintaining indoor air quality, which is an essential factor in any installation.
Let's break down what you need to know about tape types, surface compatibility, and adhesive factors.
Tape Types Comparison
Choosing the right tape for your Ring Doorbell installation is essential for ensuring a secure and lasting hold.
The double-sided tape included with the Ring Video Doorbell (2nd Generation) is specifically designed for easy installation on smooth surfaces, making it a convenient option for homeowners.
To achieve ideal adhesion, it's vital to clean the wall surface with alcohol beforehand, as this removes any oils, dirt, or debris that could weaken the bond.
Additionally, be mindful of any potential safety precautions necessary when working with various wall materials.
While this tape offers a secure hold on materials like wood, metal, plastic, and painted walls, keep in mind that its performance may diminish on rough surfaces.
Users have praised its adhesion strength, but be aware that extreme temperature fluctuations can affect its effectiveness.
Since this tape is a one-time use adhesive, you'll need additional tape if you ever have to remove and reinstall the doorbell.
Surface Compatibility Considerations
Understanding the surface compatibility of different materials is key to achieving a secure installation for your Ring Doorbell. Using double-sided tape effectively depends primarily on the surface type. Here's a quick reference table to help you choose wisely:
| Surface Type | Compatibility | Notes |
|---|---|---|
| Smooth Surfaces | Excellent | Ideal for peak adhesion |
| Clean Surfaces | Good | Clean with alcohol cleaning |
| Rough Surfaces | Poor | Reduces adhesive strength |
| Textured Surfaces | Very Poor | Avoid for installation |
| Porous Surfaces | Very Poor | Compromises secure hold |
For the best results, make sure you're applying the tape to smooth and clean surfaces like wood, metal, or plastic. Before application, clean the surface with alcohol to remove any oils or debris that could hinder adhesion. Keep in mind that extreme temperatures and high humidity can affect the tape's adhesive strength. Allow the tape to set for a few minutes after applying it, ensuring a secure hold before mounting your Ring Doorbell.
Adhesive Strength Factors
The strength of the adhesive you choose plays an important role in guaranteeing your Ring Doorbell stays securely in place. To achieve the best adhesion, begin by prioritizing surface cleanliness; clean the area with alcohol to eliminate oils, dust, or debris.
Smooth surfaces, like metal or painted walls, yield better adhesive strength compared to rough or dusty ones. In the area of credit card trends, understanding the importance of secure installations parallels the need for consumers to prioritize security in their financial transactions.
When selecting double-sided tape, remember that it often features a waterproof adhesive, allowing it to withstand various weather conditions without losing its grip. However, keep in mind that extreme temperature and humidity can weaken the bond, so aim to install your doorbell in moderate weather for the finest results.
It's also important to note that this adhesive is designed for one-time use. Once removed, it won't retain its original strength for reapplication, making proper initial placement essential.

Windex Electronic Cleaning Wipes, Pre-Moistened Screen Wipes for TVs, Phones, and Other Electronics, Resealable for a Freshness Lock, 25 Count
- Package Contents: 25 pre-moistened electronic cleaning wipes
- Gentle Cleaning Formula: Removes dust, fingerprints, smudges safely
- Anti-static Cloths: Ideal for electronics and household surfaces
As an affiliate, we earn on qualifying purchases.
As an affiliate, we earn on qualifying purchases.
Tape Application Process

Applying the double-sided tape correctly is essential for guaranteeing your Ring Doorbell stays securely attached to the wall. Start by cleaning the wall surface with alcohol, making sure it's smooth and dry for ideal tape adhesion. Once the surface is prepared, it's time to apply the tape.
| Step | Action | Tip |
|---|---|---|
| 1. Clean Surface | Use alcohol to clean the wall | Guarantee a dry and smooth surface |
| 2. Align Device | Position the Ring Doorbell straight with the tape | Take your time for accurate alignment |
| 3. Press Firmly | Hold the device against the wall for 30 seconds | This allows the adhesive to bond well |
Be careful not to touch the adhesive side of the tape with your fingers, as this can affect its sticking power. After pressing it firmly against the wall, let the adhesive set and cure for a few hours before using your doorbell. This guarantees the best performance and a secure installation.

USANOOKS Microfiber Cleaning Cloth Grey – 12 Pcs (12.5"x12.5") – High Performance – 1200 Washes, Ultra Absorbent Microfiber Towel Weave Grime & Liquid for Streak-Free Mirror Shine – Car Washing Cloth
- High Absorbency Microfiber: Locks away 8-10x its weight in liquids
- Durable 2.5mm Thickness: Resists lint, scratches, and shedding
- Long-Lasting Use: Over 1200 washes for extended durability
As an affiliate, we earn on qualifying purchases.
As an affiliate, we earn on qualifying purchases.
Mounting the Doorbell

Mounting your Ring Doorbell correctly is essential for guaranteeing it functions effectively and remains securely in place.
Start by selecting a smooth surface for the mount, as a rustic charm can enhance your overall home aesthetics. Rough or textured surfaces can hinder the adhesive tape's bonding ability. Clean the area with alcohol to make sure it's dry and free of debris. This attention to detail can also contribute to a serene and cozy workspace, similar to the principles of a cottagecore home office.
Next, measure and align the mount accurately. It's important to position it properly, as any misalignment could affect the doorbell's performance. Once you have it in the right spot, press firmly against the wall for at least 30 seconds to secure the attachment.
Remember these key points:
- Use double-sided adhesive tape designed for one-time use.
- Allow the adhesive to set for a few hours before you install the actual doorbell.
Ensuring Proper Adhesion

To achieve a strong hold for your Ring Doorbell, guaranteeing proper adhesion is key after you've mounted the bracket securely. Start by preparing the wall surface. Clean it thoroughly with alcohol to remove any oils, dirt, or debris that could interfere with the adhesive. Make sure the surface is smooth and dry before applying the tape, as rough surfaces may reduce the bond strength.
Here's a quick reference table to guide you through the steps:
| Step | Action |
|---|---|
| 1 | Clean the surface with alcohol |
| 2 | Guarantee the surface is smooth and dry |
| 3 | Apply the double-sided tape |
| 4 | Press the mount firmly for 30 seconds |
| 5 | Allow the adhesive to set for a few hours |
Avoid touching the adhesive with your fingers during installation to prevent contamination, which could weaken the bond. By following these steps, you're setting your Ring Doorbell up for a strong and lasting installation.
Removing the Doorbell

Removing your Ring Doorbell is a straightforward process that requires careful attention to avoid damaging the wall or the device.
Begin by using the transparent pull tabs to initiate the removal. As you pull, make sure to tape slowly in line with the direction of the tape. This method helps maintain tension, guaranteeing a clean removal without leaving adhesive residue behind. Additionally, it's crucial to verify that your home security system, like a garage door opener, is intact during this process to enhance overall safety.
Here are some key points to remember during the removal:
- Maintain tension while pulling the tape to guarantee a smooth process.
- Check for any remaining tape pieces after you've removed the doorbell to keep the wall surface intact.
Troubleshooting Installation Issues

If you're facing issues with your Ring Doorbell installation, it often comes down to adhesive problems or surface preparation.
Make sure the area is clean and smooth before applying the tape, as any dirt or texture can compromise the bond.
If the adhesive fails, don't hesitate to try additional tape or alternative mounting methods for a secure fit.
Common Adhesive Problems
Adhesive problems can arise during the installation of your Ring Doorbell, so understanding common issues helps assure a secure attachment. One of the most critical factors is verifying that the surface is clean and dry before applying the tape. Oils, dirt, or debris can weaken the adhesive strength, leading to potential detachment.
Here are a few common adhesive problems to watch for:
- Using the wrong tape: Always use the double-sided tape included with your Ring Doorbell. Other adhesives mightn't provide the necessary support.
- Surface texture: Avoid installing on textured or uneven surfaces, as they can greatly diminish the tape's effectiveness.
If the tape fails to adhere, re-clean the surface and let it dry completely before trying again.
It's also wise to monitor your installation during the first few days to confirm the doorbell remains securely attached.
Surface Preparation Tips
How can you guarantee a smooth and effective surface for your Ring Doorbell installation? Start with thorough surface preparation.
First, clean the wall surface with alcohol to remove oils, dirt, and debris. This step is vital for achieving ideal adhesion of the adhesive tape. Make sure the surface is smooth and dry; rough or grainy surfaces can greatly reduce the tape's effectiveness.
Allow the cleaned area to dry completely before applying the tape, as trapping moisture underneath can compromise the installation. It's also important to avoid applying tape in extreme temperatures or high humidity. These conditions can weaken the tape's bond and affect its strength.
Once you've applied the tape and secured the doorbell, test the bond by gently tugging on the device. This guarantees it's securely attached and ready for use.
Following these surface preparation tips will help you avoid common installation issues and guarantee your Ring Doorbell stays firmly in place, giving you peace of mind.
Alternatives to Tape

Screws offer a more secure attachment for your Ring doorbell, especially on textured or porous surfaces. While tape might seem convenient, it can lose its adhesive quality over time, leading to potential falls.
If you're looking for alternatives, consider the following options:
- No-Drill Mount: This is perfect for renters or anyone who can't drill holes in their walls. It uses strong double-sided adhesive for a reliable hold.
- Pre-Drilling and Anchors: For hard surfaces like brick or concrete, pre-drilling holes and using anchors with screws can greatly enhance stability. This method prevents damage while ensuring your doorbell stays put.
Maintenance Tips for Longevity

To guarantee your Ring doorbell lasts, regularly check its mounting and clean the area to maintain peak adhesion.
Start by using alcohol wipes to clean the mounting surface before installation. This helps remove oils and debris that could weaken the grip of the adhesive tape. After installation, make it a habit to regularly check adhesion, especially after extreme weather conditions.
If you notice any weakening in the tape's hold, consider removing and reattaching the doorbell. Use the additional tape included in the package for maximum adhesion during reinstallation. Be mindful of the environment where you install your doorbell; avoiding areas with high humidity or extreme temperature fluctuations can greatly improve tape performance.
Don't forget to monitor battery life, too. Keeping your doorbell fully charged guarantees its functionality and longevity.
Frequently Asked Questions
Can I Attach a Ring Doorbell With Tape?
Yes, you can attach a Ring Doorbell with tape! The 2nd Generation model includes double-sided tape for easy mounting.
Just make certain the wall surface is clean and smooth before applying it. Press the mount firmly against the wall for a few minutes to guarantee a strong bond.
Can You Install a Ring Doorbell Without Drilling?
Absolutely, you can install a Ring Doorbell without drilling!
Think of it as giving your wall a gentle hug instead of a harsh poke.
By using a No-Drill Mount, you'll secure your doorbell with strong, double-sided adhesive tape.
Just make sure to clean the surface well for a lasting bond.
This method's perfect for those who want a hassle-free installation while ensuring your device stands strong against the elements.
What Is the Best Way to Stick Ring Doorbell?
To stick your Ring Doorbell securely, you should clean the wall surface with alcohol to remove any dirt or oils.
Next, use the double-sided tape that comes with your device for easy installation.
Press the mount firmly against the wall for a few minutes to guarantee a strong bond.
Allow the adhesive to set for a few hours before attaching the doorbell, verifying the surface is smooth for ideal adhesion.
Can You Put a Ring Doorbell up With Command Strips?
Did you know that nearly 30% of smart doorbell users experience installation issues?
You can't rely on Command Strips to put up a Ring Doorbell. The adhesive isn't strong enough for the device's weight and outdoor conditions.
Instead, use the double-sided tape provided, as it's designed specifically for this purpose.
If you're renting and can't drill, consider a No-Drill Mount, which uses a strong adhesive tailored for your Ring Doorbell.
Conclusion
Installing your Ring doorbell with tape is a quick and effective solution, especially if you're not ready to drill holes. This method provides flexibility in case you need to reposition the device or are in a rental property where drilling isn’t allowed. Additionally, using heavy-duty adhesive tape ensures the doorbell remains securely in place. If you’re also considering installing Ring Stick Up Cam devices, similar adhesive methods can be utilized for a hassle-free setup.
Did you know that homes with video doorbells can deter up to 50% of package theft?
By following the steps outlined, you can secure your doorbell and enjoy peace of mind.
Remember to regularly check the adhesive and clean the surface for best performance.
With proper care, your doorbell will serve you well for years to come!