Connect with us

Ring Security Cameras

How to Install Ring Doorbell on Stucco Without Drilling

You can easily install your Ring Doorbell on stucco without drilling; discover the simple steps to achieve a secure and lasting mount.

Published

on

stucco installation no drilling

To install your Ring Doorbell on stucco without drilling, start by using a no-drill mount with strong double-sided adhesive. First, clean the stucco surface thoroughly to guarantee ideal adhesion. Then, measure and mark where you want the doorbell to go. Apply the adhesive tape to the back of the mount, press it firmly against the stucco for a few minutes, and let it set for several hours, ideally overnight. Once the adhesive bonds well, you can attach the Ring Doorbell. If you follow these steps correctly, you'll guarantee a secure installation and discover even more helpful tips along the way. After the adhesive has fully set, carefully follow the manufacturer’s instructions to attach the Ring Doorbell to stucco. Make sure the device is aligned properly, and apply firm pressure to ensure a solid attachment. By skipping the drilling process, you can maintain the aesthetic integrity of your stucco surface while still enjoying a secure and reliable installation.

Key Takeaways

  • Clean and dry the stucco surface thoroughly to enhance adhesive bonding before installation.
  • Apply double-sided adhesive tape to the back of the No-Drill Mount, ensuring a smooth application.
  • Firmly press the mount against the stucco and hold it for several minutes to ensure effective adhesion.
  • Wait several hours, preferably overnight, before attaching the Ring Video Doorbell for optimal bonding strength.

Understanding the No-Drill Mount

The No-Drill Mount offers a simple solution for installing your Ring Video Doorbell (2nd Gen) on stucco without the hassle of tools or drilling. This innovative mount uses double-sided adhesive to securely attach the doorbell, making your installation quick and easy.

Measuring 5 inches by 2.5 inches (12.8cm x 6.2 cm), it's designed specifically for smooth, even surfaces. While it works well on stucco, confirm the surface is properly prepared for ideal results. Additionally, a well-prepared surface can prevent issues that might arise during your home cleaning service, as proper maintenance guarantees that the adhesive sticks better reputation and reviews from past clients.

One key feature of the No-Drill Mount is its waterproof adhesive, which withstands various weather conditions. However, you should keep in mind that it's a one-time use option. That means you'll need to apply it carefully for the best adhesion. When installing, hold the mount firmly for a few minutes to confirm it sticks well.

It's also important to note that the No-Drill Mount isn't compatible with other Ring models or surfaces like glass, brick, or rough materials. So, before you make your purchase, verify that your setup is compatible with the No-Drill Mount and your Ring Video Doorbell.

Preparing the Surface

surface preparation techniques explained

Before you install the No-Drill Mount, make certain your stucco surface is clean and dry to guarantee the best adhesion.

Start by using a mild detergent mixed with water to scrub away any dirt, dust, or debris. This step is vital in preparing the surface, as any residue can weaken the bond between the mount and the stucco.

Advertisement

Additionally, confirming good indoor air quality is essential for health, as air purifiers reduce allergens and harmful particles that can linger in your environment.

After cleaning, let the surface dry completely to make sure the adhesive will stick properly.

Next, inspect the stucco for any uneven or rough areas. It's important not to apply the No-Drill Mount on these surfaces, as they can greatly decrease adhesive effectiveness.

Besides that, check for any loose stucco that might compromise the stability of the mount. If you find any, repair it before proceeding.
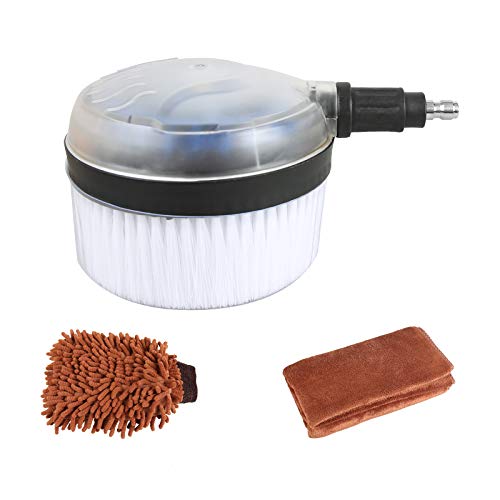
Applying Adhesive Properly

adhesive application techniques explained

Carefully apply the double-sided adhesive tape to the back of the No-Drill Mount for the best results. Before you do this, verify that the stucco surface is thoroughly cleaned. Any dirt or debris can hinder the adhesive's ability to bond effectively.

The provided tape is specially designed to withstand inclement weather and can support up to 2 lbs total, making it ideal for your Ring Doorbell. Additionally, it's important to take into account that, much like the importance of regular HVAC maintenance, verifying a clean surface can greatly enhance the effectiveness of your installation.

Advertisement

Once you've placed the adhesive on the mount, firmly hold it against the stucco for a few minutes. This step is essential as it initiates the bonding process.

After applying the No-Drill Mount, it's best to wait several hours—preferably overnight—before you proceed with installing the Ring Doorbell. This waiting period allows the adhesive to fully cure, guaranteeing a strong hold.

Avoid applying the mount to uneven surfaces, as this can compromise the adhesive's effectiveness and the mount's stability. By following these steps carefully and using the adhesive correctly, you'll set a solid foundation for your Ring Doorbell installation, minimizing the risk of it coming loose in the future.

Installation Steps

setup procedure guidelines

To get started with the installation, you need to prepare the stucco surface by cleaning it thoroughly.

It's crucial to verify the surface is free from dust and debris to allow for proper adhesion, as comprehensive in-home care services can improve overall outcomes.

Next, you'll apply the adhesive mount in the right spot for the best results.

Advertisement

Once that's done, you can move on to securing the Ring Video Doorbell itself.

Prepare the Surface

Start by cleaning the stucco surface with a mild detergent and water to get rid of any dirt and debris. This step is essential to prepare the surface, ensuring ideal adhesion for the No-Drill Mount for your Ring Video Doorbell. A well-prepared workspace can enhance your overall project experience, similar to how a cozy cottagecore home office can boost productivity and well-being.

After cleaning, dry the area thoroughly. Any moisture left can interfere with how well the adhesive bonds.

Next, measure and mark the desired location for your doorbell. It's important to mount it at a height that allows for effective visitor detection and good video capture. Once you've marked the spot, take the No-Drill Mount and press it firmly against the stucco. Hold it in place for a few minutes to let the adhesive begin to bond effectively.

Allow several hours for the adhesive to set fully before attaching the Ring Video Doorbell. This waiting period is key to ensuring that the mount adheres properly to the stucco surface, providing a secure installation. By following these steps, you'll create a reliable foundation for your doorbell, allowing it to function ideally without the need for drilling.

Advertisement

Apply Adhesive Mount

How do you guarantee the No-Drill Mount is applied securely to the stucco surface? Start by cleaning the area thoroughly to confirm ideal adhesion. Any dust or debris can weaken the bond, so take your time with this step. Embracing the process of ensuring a solid installation can be likened to personal growth often follows relationship endings, as both require patience and attention to detail.

Once the surface is clean, remove the backing from the double-sided adhesive tape on the No-Drill Mount. Firmly press the mount against the stucco, making sure to apply even pressure for several minutes. This helps the adhesive mount stick properly.

Before you move on, double-check that the mount is aligned correctly and has enough room for your Ring Doorbell. It's vital to confirm that the mount is in the right position before the adhesive sets.

After applying the adhesive mount, wait at least a few hours for it to set. This waiting time is essential for confirming a strong hold. When you're ready to attach the Ring Doorbell, simply slide it onto the mount. If you ever need to remove the mount, gently pull upward on both tape strips simultaneously to avoid damaging the stucco surface.

Troubleshooting Common Issues

resolving frequent technical problems

Troubleshooting common issues with your Ring Doorbell installation can save you time and guarantee a secure setup on stucco surfaces. Here are some common problems and solutions you might encounter:

Issue Possible Cause Solution
Mount won't stick Surface not clean or smooth Clean the wall thoroughly before applying.
Detachment after installation Insufficient adhesive setting time Allow more time for the adhesive to cure.
Incompatible mount Using wrong mount model Verify mount compatibility with your doorbell.
Weak bond Outdoor conditions affecting adhesive Use additional outdoor adhesive strips.
Difficult removal Improper detachment technique Pull up gently on both sides of the tape.

If the No-Drill Mount fails to adhere properly, don't hesitate to reinforce it with extra adhesive strips designed for outdoor use. Remember, confirming the surface is clean and smooth before installation maximizes the effectiveness of the adhesive. By following these troubleshooting tips, you can enhance your installation experience and confirm your Ring Doorbell stays securely in place.

Advertisement

User Experiences and Tips

insights on user experiences

When installing your Ring Doorbell on stucco, you'll want to contemplate how effective the adhesive is on uneven surfaces.

Many users have shared their experiences dealing with installation challenges and alternative mounting options that can make the process smoother.

Let's explore these insights and tips to help you get the best results.

Adhesive Effectiveness Insights

Many users have experienced challenges with adhesive mounting on stucco, noting that uneven surfaces can hinder adhesion and lead to detachment over time. To improve adhesive effectiveness, make certain to thoroughly clean the wall surface before applying any adhesive. This simple step can greatly enhance how well the adhesive bonds with the stucco.

When considering adhesive options, many users recommend using a strong construction adhesive, like Gorilla White Interior-Exterior Multi-Purpose. While this can create a secure bond, keep in mind it might complicate future removal if you ever decide to take down the Ring doorbell.

Community feedback shows that while adhesive options are convenient, you should be cautious in harsh weather conditions. Regular checks are necessary to confirm your doorbell remains securely attached, especially after storms or extreme temperatures.

Advertisement

Also, it's important to wait several hours for the adhesive to set before installing the Ring doorbell. This wait time is vital for ideal adhesion and can help prevent premature detachment, making certain your doorbell stays in place reliably for a longer duration.

Installation Challenges Faced

Installing a Ring doorbell on stucco can present unique challenges that users often encounter, from securing the device to guaranteeing it withstands weather conditions. One of the main installation challenges is the effectiveness of adhesive mounts on stucco's uneven texture. Many users find that this irregular surface can reduce the stability of the mount over time, leading to potential issues.

To improve your chances of a successful installation, it's vital to thoroughly clean the surface before applying any adhesive. This step assures ideal bonding, as dirt and debris can hinder adhesion. Some users have also reported mixed results when it comes to removing construction adhesives from stucco, with instances of surface damage during removal.

If you're concerned about permanence, consider using double-sided foam compression tape instead of construction adhesive. This option may provide a less permanent solution if you face drilling restrictions. Additionally, testing the adhesive strength on a small area of your stucco can help gauge effectiveness before committing to the full installation.

Alternative Mounting Solutions

Users frequently explore alternative mounting solutions for Ring doorbells on stucco, seeking options that balance security and ease of installation.

Advertisement

Many have successfully used double-sided adhesive, like Gorilla White Interior-Exterior Multi-Purpose Construction Adhesive, which creates a strong bond suitable for outdoor conditions. Before applying any adhesive, make certain the surface is clean and smooth to maximize effectiveness.

In community discussions, some users recommend 3M adhesive strips for their ease of removal and repositioning, allowing you to adjust the placement without damaging the stucco. However, it's crucial to test the adhesive's strength, particularly in extreme weather conditions, as feedback indicates that some adhesives may struggle under such circumstances.

When choosing an adhesive, consider the weight of the Ring doorbell (about 2 lbs) and verify compatibility with the stucco surface to avoid removal issues later.

Always read user experiences and tips, as they can provide valuable insights into the best practices for mounting your device securely.

With the right adhesive and preparation, you can achieve a stable installation without drilling, enhancing your home's security effortlessly.

Advertisement

Frequently Asked Questions

Can You Install a Ring Doorbell on Stucco?

Yes, you can install a Ring Doorbell on stucco.

To do this effectively, make sure the surface is clean and smooth to help the adhesive bond well.

Using a No-Drill Mount specifically designed for the Ring Video Doorbell (2nd Gen) can simplify the process.

Just remember that this option is a one-time use and may not be suitable for uneven surfaces.

If you need extra support, consider additional adhesive solutions.

Advertisement

How Can You Stick Something to Stucco Without Drilling?

To stick something to stucco without drilling, you can use strong construction adhesive, apply double-sided foam tape, or try removable adhesive strips.

Clean the stucco surface thoroughly to guarantee a solid bond, and consider the weight of the item you're attaching.

Always test the adhesive on a small area first, and choose products designed for outdoor use to withstand weather changes.

This way, you'll achieve a secure attachment without damaging the stucco.

Is There a Way to Install Ring Doorbell Without Drilling?

Yes, you can install a Ring Doorbell without drilling.

Advertisement

Using a No-Drill Mount with double-sided adhesive is an effective option. Make sure to clean the surface first for better adhesion.

If you're looking for extra support, you might consider applying a strong construction adhesive.

Just hold the mount in place for a few minutes and let it set for several hours before attaching your doorbell.

This method keeps your wall intact while securing your device.

Is There a Ring Doorbell That Doesn T Require Drilling?

Yes, there's a Ring Doorbell that doesn't require drilling!

Advertisement

The No-Drill Mount is specifically designed for the Ring Video Doorbell (2nd Gen). It uses strong double-sided adhesive for installation, making it easy to set up without damaging your walls.

Just remember, it's not compatible with other models, and it works best on smooth surfaces.

Clean the area well before applying, and let the adhesive set for a few hours for the best results.

Conclusion

Installing your Ring Doorbell on stucco without drilling can be a breeze when you follow these steps.

Remember, "where there's a will, there's a way." By using a no-drill mount and proper adhesive, you can enjoy the security of your doorbell without damaging your walls.

Advertisement

Don't hesitate to troubleshoot any issues and rely on user experiences for extra tips.

With a little patience, you'll have your doorbell up and running in no time!

Advertisement

Ring Security Cameras

How to Fix Ring Doorbell

Get your Ring doorbell working again with these essential troubleshooting tips, and discover the key steps to restore its functionality.

Published

on

fixing ring doorbell issues

To troubleshoot your Ring doorbell, start by checking the Wi-Fi connection through the Ring app. Ensure your battery is fully charged and all connections are secure. If your doorbell is not responding, try restarting it by holding the setup button for 10 seconds. Make sure the Ring app is up to date and your notification settings are enabled. Examine the device and its components for any visible damage or wear. If issues continue, utilize the app’s troubleshooting tools or reach out to customer support. There are numerous detailed tips available that can assist you in effectively resolving ongoing problems.

Key Takeaways

  • Check your Wi-Fi connection using the Ring app, ensuring strong signal strength (green RSSI) for optimal performance.
  • Regularly monitor battery levels and charge or replace as needed to maintain device functionality.
  • Restart the Ring doorbell by holding the orange setup button for 10 seconds to resolve minor connectivity issues.
  • Verify app permissions and notification settings to ensure alerts for motion detection and two-way audio are enabled.

Check Wi-Fi Connection

Checking your Wi-Fi connection is vital for guaranteeing your Ring doorbell functions properly. A stable Wi-Fi connection is essential, as your doorbell relies on it to send and receive data.

Start by using the Ring app to check the device's health. Navigate to the Device Health section, where you'll find the RSSI (Received Signal Strength Indicator). If it shows a green signal, your connection is strong; if it's yellow or red, you may need to improve the signal. For best performance, consider how air quality can also affect electronic devices in your home; maintaining a clean environment can help sustain their functionality, as noted in air purifiers reduce allergens.

If you notice connectivity issues, consider relocating your Wi-Fi router closer to the doorbell. Reducing physical obstructions, like walls or furniture, can greatly enhance the signal strength. The Ring app also has built-in tools that allow you to test the Wi-Fi connection directly, helping you confirm whether your doorbell is receiving a strong signal.

Additionally, keep an eye on your internet connection. Temporary outages can disrupt your Ring doorbell's functionality. Regularly checking your Wi-Fi guarantees that the doorbell remains operational, allowing you to enjoy all its features without interruption.

Check Battery or Power Source

inspect battery or power supply

Confirming your Ring doorbell has a sufficient battery or power source is crucial for maintaining its functionality.

For wireless devices, regularly check the battery levels using the Ring app. If the battery is low, it can hinder your device's performance, so make it a habit to monitor battery health.

Advertisement

Additionally, just like with modern garage door openers that often require regular maintenance to guarantee peak performance, your Ring doorbell needs attention to its battery too. When the battery runs low, it usually needs a charge of 5-10 hours to regain full operational capacity.

If you've got a wired device, inspect for any power outages or disruptions, as these can also impact how well your device works.

Make certain to check that any removable batteries are securely clicked into place, as a loose battery can lead to power issues.

It's also wise to inspect the chargers and cables for any signs of damage because faulty equipment can prevent your device from receiving power.

Inspect Device for Damage

check device for damage

Inspect your Ring doorbell for any visible signs of damage that could affect its performance.

Start by examining the charger and USB cable for any wear or fraying. A damaged cable can disrupt the charging process, so testing the device with a different USB cable might help rule out issues caused by a faulty one. It's important to guarantee your doorbell is in a safe environment, as environmental factors affecting cats can lead to unexpected behavioral changes if pets are nearby.

Advertisement

Next, check any removable batteries to guarantee they're securely clicked into place. If they're not properly installed, your doorbell won't function correctly. For wired devices, inspect all connections for looseness or signs of fraying. Loose or damaged connections can lead to power disruptions, which will impact the overall performance of your doorbell.

While inspecting, remember to observe safety precautions when handling electrical components. This protects you from potential injury and prevents further damage to the device.

If you notice any significant damage, consider reaching out to Ring's customer support or a qualified technician for assistance. Taking these steps will help guarantee your Ring doorbell operates smoothly and reliably.

Restart Ring Doorbell

reset ring doorbell device

Restarting your Ring Doorbell is a simple yet essential step to maintain its performance.

Regular maintenance, including a restart, can enhance the device's efficiency and connectivity.

If you're facing connectivity issues, a quick reset can often resolve them effectively.

Advertisement

Plus, it's a good practice to restart your device regularly to keep everything running smoothly.

AI-driven solutions adapt to emerging cyber threats, emphasizing the role of technology in security.

Importance of Restarting

Regularly restarting your Ring doorbell can resolve connectivity issues and enhance the device's overall performance. Just like any electronic device, your Ring doorbell can experience glitches over time. A simple restart can refresh its systems, helping to eliminate minor bugs that may disrupt its functionality.

Additionally, maintaining a good connection with your doorbell is essential for celebrating special occasions, guaranteeing you never miss important moments.

To restart your Ring doorbell, hold the orange setup button for 10 seconds until the light flashes, signaling that a reset is in progress. This quick action can considerably improve your doorbell's connectivity, making certain it's always ready to alert you when someone is at your door.

Advertisement

It's a good practice to restart your doorbell periodically, as it can help maintain peak performance. If you notice any persistent issues, try restarting before considering deeper troubleshooting steps.

Just remember, before you perform a restart, save any important videos, as data may be lost during the process. After restarting, follow the setup instructions from the Ring website to make sure your device reconnects to Wi-Fi properly.

Keeping your doorbell refreshed can go a long way in guaranteeing you get the best out of your Ring experience.

Resetting for Connectivity Issues

If your Ring doorbell is struggling with connectivity issues, resetting it can often restore its functionality. Many users have found that troubleshooting their devices, similar to how one might explore DIY Halloween makeup ideas to enhance their costume creativity, can lead to effective solutions.

To reset your device, simply hold the orange setup button for 10 seconds. You'll know the reset was successful when you see a spinning white light, signaling that your doorbell is ready to be set up again.

Advertisement

Before you proceed with resetting, make sure to save any important videos, as data may be lost during the process. Regularly restarting your Ring doorbell can also help maintain its performance and tackle ongoing connectivity issues.

If your doorbell remains offline after the reset, it's a good idea to check your Wi-Fi connection and signal strength. Poor connectivity may still be the root of the problem, and addressing this can help restore your doorbell's functionality.

Verify App and Device Settings

check app device configurations

Verifying your app and device settings is vital to guarantee your Ring Doorbell operates smoothly and effectively.

Start by making certain your Ring app is up to date. Regular updates promote peak performance and provide new features and security improvements.

Next, check your notification settings within the app. You want to confirm that alerts for motion detection and doorbell presses are activated, so you don't miss important events.

Additionally, verify that microphone permissions are enabled for the Ring app. This is critical for two-way audio communication during Live View sessions.

Advertisement

Speaking of Live View, access this feature through the app to test real-time video streaming and confirm your doorbell's functionality.

Here are some key steps to follow:

  • Restart the Ring app to resolve connectivity issues.
  • Check and enable microphone permissions in your device settings.
  • Confirm notifications for motion and doorbell presses are turned on.

Help Resources

support and assistance services

When you're facing issues with your Ring doorbell, there are plenty of help resources at your fingertips.

You can access troubleshooting guides, engage with the community for shared experiences, and reach out to customer service for direct support.

These options can make resolving your problems much easier.

Accessing Support Options

Accessing support for your Ring doorbell is simple and can be done through the Ring app, where you'll find device management tools and troubleshooting resources at your fingertips. This app is designed to help you resolve issues quickly, especially if you're having trouble with your Wi-Fi router or the device itself.

Advertisement

Here are some support options you can explore:

  • Device Health Info: Check the health status of your Ring doorbell to see if it's properly connected to your Wi-Fi router.
  • Troubleshooting Guides: Access tailored guides that address common issues specific to your device, making it easier to fix problems.
  • Support Articles: Browse an extensive range of articles on installation, setup, and troubleshooting to enhance your understanding of the device.

If you can't resolve your issue through these resources, don't hesitate to contact customer service directly via the app or support website for personalized assistance. With these support options, you'll be well-equipped to tackle any challenges with your Ring doorbell.

Troubleshooting Guides Available

You can find a variety of troubleshooting guides in the Ring app that cater specifically to your device's issues. These guides help you address common problems you might encounter with your Ring Doorbell.

By accessing the support section, you can explore articles related to installation, device management, and performance concerns. Each guide provides step-by-step instructions that simplify the troubleshooting process, making it easier for you to resolve issues on your own.

If you're facing a more complex problem, don't hesitate to reach out to Ring's customer service. They offer personalized assistance to help you navigate through any difficulties that the troubleshooting guides mightn't cover. This way, you can verify that your Ring Doorbell is functioning at its best.

Whether you're looking for quick fixes or detailed information, the Ring app has a wealth of resources available. Remember, utilizing these troubleshooting guides can save you time and help you get your device back up and running efficiently.

Advertisement

Community Interaction Benefits

Engaging with the Ring community opens up a valuable resource for troubleshooting and sharing experiences. By participating in this vibrant community, you can tap into a wealth of knowledge that can help resolve your Ring doorbell issues more efficiently. When you post a question, you might find that others have faced the same challenges and can offer solutions or tips that work.

Here are some benefits of community interaction:

  • Shared Experiences: Gain insights from other users who've resolved similar issues.
  • Quick Resolutions: Find answers faster by learning from community members who've been there.
  • Emotional Support: Connect with others who understand the frustration of tech troubles, providing reassurance.

Common Issues & Fixes

typical problems and solutions

Common issues with Ring doorbells can often be traced back to connectivity problems, sound quality glitches, or unresponsiveness, each of which has specific fixes to get your device back on track.

If you're experiencing connectivity problems, check the RSSI reading; a low score suggests you might need to boost your Wi-Fi signal or reposition the router closer to the doorbell.

For sound quality issues, like crackling or distortion, inspect the device for moisture or damage. Regular maintenance can help prevent these problems.

If your doorbell becomes unresponsive, even after recharging the battery, try performing a factory reset. Simply press the orange button on the back for a few seconds to reset the device.

Advertisement

Should the doorbell show a solid white light but remain unresponsive, power cycling it by unplugging for a few minutes could restore its functionality.

If you've tried all the fixes and still face issues, document what you've done and reach out to Ring support for further assistance.

Troubleshooting Steps

systematic problem solving process

To effectively troubleshoot your Ring doorbell, start by rebooting the device through the Ring app, which can refresh the connection and resolve minor issues.

If you're still facing problems after that, try power cycling the device. Shut off the power for a few minutes before restoring it.

Next, check the Device Health section in the app to verify your doorbell is receiving a strong Wi-Fi signal. If the issues persist, consider performing a factory reset. Press and hold the orange setup button for 20-25 seconds to restore the doorbell to its original settings.

Here are some key troubleshooting steps you can take:

Advertisement
  • Reboot the doorbell through the Ring app.
  • Power cycle the device by turning off the power briefly.
  • Check the Wi-Fi signal strength in Device Health.

If all troubleshooting steps fail, document your actions and don't hesitate to contact Ring support for personalized assistance. They can help you resolve any lingering issues and verify your Ring doorbell works effectively.

User Community Engagement

fostering user participation initiatives

Connecting with the Ring user community can provide valuable insights and solutions from others who've encountered similar issues with their doorbells. Engaging in these forums allows you to share your troubleshooting experiences while learning from those who've faced similar challenges. When you post questions, you're likely to receive quick responses and advice that can help you resolve your issues faster.

Creating an account or logging in enhances your experience, enabling you to actively participate in discussions and access a broader range of community resources. Regular interactions within the user community keep you informed about common problems and effective fixes, ensuring you're not left in the dark.

You might uncover alternative troubleshooting methods that aren't detailed in official support documentation. This collaborative environment fosters a sense of belonging and support, making it easier to navigate any difficulties you encounter with your Ring doorbell.

Frequently Asked Questions

Why My Ring Doorbell Stopped Working?

If your Ring Doorbell stopped working, it could be due to a few reasons.

First, check your Wi-Fi connection using the Device Health page in the Ring app.

Low battery levels can also be an issue, so make sure it's charged.

Advertisement

Look for any power disruptions or physical damage that might be affecting performance.

If none of these seem to be the problem, try resetting the device or reach out to Ring support for help.

How Can I Reset My Ring Doorbell?

Resetting your Ring doorbell is like restarting a computer that's frozen—sometimes it just needs a little nudge.

To reset yours, find the orange setup button, hold it for 10 seconds until the light flashes.

Just like saving files before a restart, make sure you've saved any important videos first.

Advertisement

After the reset, follow the setup instructions in the Ring app to get everything working smoothly again.

If it's still unresponsive, power cycle the device.

Why Isn T My Ring Doorbell Working Inside?

If your Ring Doorbell isn't working inside, start by checking your Wi-Fi connection. A weak signal can cause issues.

Make sure the battery's charged or the device is properly wired.

Look for any physical damage or loose connections, as these can hinder performance.

Advertisement

Don't forget to restart the device by holding the orange setup button for 10 seconds.

How Do You Fix a Ring Doorbell on a Front Door?

Imagine standing at your front door, ready to greet visitors, but your Ring doorbell's not working.

First, check your Wi-Fi signal in the app—ensure it's strong.

Next, inspect the battery; if it's low, recharge it for a few hours.

Don't forget to restart the device by holding the orange button for ten seconds.

Advertisement

If it still isn't responding, consult the app or reach out to customer support for help.

Conclusion

By following these steps, you can quickly troubleshoot your Ring Doorbell issues and get it back in action. First, check if your Ring Doorbell is connected to a stable Wi-Fi network. Poor or unstable internet connection is often the culprit behind issues with Ring Doorbells. If the Wi-Fi connection seems to be the problem, try moving the router closer to the doorbell or using a Wi-Fi extender to improve the signal strength. Another common ring doorbell troubleshooting step is to ensure that the device has the latest software updates installed. Sometimes, simply updating the software can resolve any glitches or malfunctions.

Did you know that nearly 30% of smart doorbell users report connectivity problems?

Don't let that statistic discourage you; with a few checks and adjustments, you'll often find the solution at your fingertips.

Remember, staying connected is key to your home security, so take the time to maintain your device for peace of mind.

Advertisement
Continue Reading

Ring Security Cameras

How to Adjust Ring Doorbell Camera Angle

Keep your Ring doorbell camera perfectly positioned for optimal security by learning how to adjust its angle effectively. Discover the simple steps inside!

Published

on

adjust ring doorbell angle

To modify the angle of your Ring doorbell camera, begin by detaching the doorbell from its mounting bracket. Then, insert the appropriate wedge kit between the bracket and the doorbell. Loosen the screws on the bracket to adjust to your preferred angle, which can vary from 15 to 45 degrees. Once you have achieved the correct angle for improved visibility and motion detection, securely tighten the screws. Ensure that the installation height falls within the range of 5 to 20 feet for optimal performance. By making these adjustments, you can enhance security, reduce false alarms, and find more information on this topic. It is also important to ensure that the camera’s view is not obstructed by any objects, such as plants or decorations, for clearer monitoring. For more in-depth guidance on adjusting Ring camera settings, you can explore support articles provided by Ring for troubleshooting tips and best practices. By fine-tuning these settings, you can maximize the camera’s performance and improve your home security system. Properly adjusting Ring doorbell camera settings will help you capture relevant footage and minimize unnecessary notifications. Pay attention to motion zones and sensitivity adjustments, as these can further improve the accuracy of alerts. Whether you are installing the camera for the first time or making adjustments, modifying Ring doorbell camera placement and settings is crucial for maintaining a reliable and effective home security system.

Key Takeaways

  • Verify your Ring doorbell model in the Ring app to ensure compatibility with the wedge kit for angle adjustments.
  • Remove the Ring doorbell from the mounting bracket to access the installation area easily.
  • Insert the wedge kit between the mounting bracket and the doorbell unit to achieve the desired angle (15, 30, or 45 degrees).
  • Adjust and loosen the screws on the mounting bracket, then secure them tightly after setting the preferred angle.

Importance of Proper Installation

Proper installation of your Ring doorbell is fundamental for maximizing its motion detection and making sure you don't miss any visitors.

To achieve this, you need to properly position the doorbell to capture the intended viewing angle. The fixed camera angle can lead to blind spots if not installed correctly, so it's important to take into account your installation environment.

Homes equipped with effective security systems often benefit from well-placed surveillance devices, enhancing overall safety. If your home has stairs or uneven surfaces, using a wedge kit can help adjust the angle for ideal surveillance. This adjustment allows the camera to cover a wider field of view, which is necessary for catching visitor motion effectively.

Aim to install the Ring doorbell at an ideal height of 5 to 20 feet. This height not only enhances visibility but also decreases the likelihood of false alerts triggered by passing vehicles or small animals.

Ultimately, the goal is to make sure that the Ring doorbell captures the area you want to monitor without missing any activity. Pay attention to these installation details to enjoy the full benefits of your Ring doorbell's motion detection capabilities.

Advertisement

Identifying the Right Wedge Kit

To identify the right wedge kit for your Ring doorbell, you need to start by verifying your doorbell model in the Ring app.

It's also helpful to take into account factors such as key factors in choosing a service that may impact the installation process.

Additionally, contemplate the surface where you'll install the doorbell—whether it's level or sloped—to make certain you choose a kit that fits your specific needs.

Picking the correct wedge kit not only guarantees proper installation but also enhances your camera's performance.

Verify Doorbell Model

Verifying your Ring doorbell model is essential for selecting the right wedge kit that guarantees ideal camera angle adjustments. With ten different models available, you need to ascertain compatibility to optimize motion detection and minimize false alerts. Start by checking the settings in the Ring app to identify your specific doorbell model.

Advertisement

Here's a quick reference table to help you with the different Ring doorbell models and their corresponding wedge kits:

Ring Doorbell Model Recommended Wedge Kit
Ring Video Doorbell Wedge Kit 1
Ring Video Doorbell 2 Wedge Kit 2
Ring Video Doorbell Pro Wedge Kit 3
Ring Video Doorbell Elite Wedge Kit 4
Ring Doorbell (2020) Wedge Kit 5

Choosing the correct wedge kit not only enhances your camera angle but also ascertains proper installation adjustments. If you're ever uncertain about the compatibility of a wedge kit with your doorbell model, always consult the manufacturer's guidelines for accurate information. This step will save you time and help secure your home effectively.

Surface Compatibility Considerations

Choosing the right wedge kit involves not just knowing your doorbell model but also understanding the surface where it'll be installed. Different surfaces can affect how well your Ring doorbell performs, especially when it comes to adjusting the camera angle. Additionally, taking into account the aesthetic and functional aspects of your installation can enhance your overall home environment, much like how cottagecore emphasizes nature in design.

Here are three key factors to take into account for surface compatibility:

  1. Surface Type: Is it level or sloped? A wedge kit designed for your specific surface will enhance stability.
  2. Installation Scenarios: If you have raised entrances or siding, the right wedge kit can minimize false motion alerts and improve detection capabilities.
  3. Model Compatibility: Confirm the wedge kit matches your Ring doorbell model for the best results in achieving the desired camera angle.

Using the Wedge Kit

utilizing wedge kit tools

Using the Wedge Kit is a straightforward process that can greatly improve your Ring doorbell's camera angle.

Proper alignment can enhance the effectiveness of your security device, much like how quorum sensing in bacteria allows for coordinated group behaviors.

Advertisement

You'll need to verify the kit is compatible with your model, then follow the installation steps to adjust the angle to your liking.

Once everything's in place, you can enjoy better monitoring and fewer false alerts.

Wedge Kit Installation Steps

To begin the installation of the Wedge Kit, first remove your Ring doorbell from its mounting bracket for easy access. This step is essential for a smooth installation process. Once you have the doorbell off, follow these steps: Many homeowners appreciate the aesthetic enhancements that come with modern updates, just like the luxurious finishes seen in glass tile trends.

  1. Insert the wedge: Place the wedge between the mounting bracket and the doorbell unit, ensuring it's compatible with your specific Ring model.
  2. Adjust the angle: Loosen the screws on the mounting bracket to allow for the desired tilt. This adjustment is important for capturing the ideal viewing area.
  3. Securely tighten: After you've achieved your preferred angle, tighten the screws securely to hold the doorbell in place.

Adjusting Camera Angles

Adjusting the camera angle of your Ring doorbell enhances its effectiveness in capturing motion and providing a clearer view of your entryway.

A well-positioned camera can help increase your home's security and provide peace of mind, especially when paired with breathtaking destinations for a well-deserved vacation.

To start, remove the doorbell unit from its mounting bracket, which allows you to access the wedge kit installation points.

Advertisement

The Wedge Kit provides options for angle adjustments of 15, 30, or 45 degrees, making it ideal for homes with stairs or uneven surfaces.

Next, insert the appropriate wedge between the mounting bracket and the doorbell unit.

It's essential to refer to the manufacturer's instructions for your specific model to guarantee compatibility.

Once the wedge is in place, loosen the screws on the mounting bracket to enable adjusting the angle.

Tilt the doorbell to achieve your desired viewing angle, focusing on optimizing motion detection.

Advertisement

After positioning the Ring correctly, tighten the screws back in place.

Compatibility With Doorbell Models

Compatibility with various Ring doorbell models is important when selecting the right wedge kit for ideal camera angle adjustment. With ten different models available, knowing your specific doorbell model is essential to guarantee the wedge kit you choose fits perfectly.

This compatibility affects not just installation but also the effectiveness of your camera's performance. Proper installation is similar to making sure regular filter changes in air purifiers for best performance, as both can greatly enhance functionality.

Here are three key benefits of using the right wedge kit:

  1. Customizable Adjustments: You can adjust the viewing angle to 15, 30, or 45 degrees, making it easier to tackle unique installation challenges like raised entrances.
  2. Minimized False Motion Alerts: A properly angled camera can greatly reduce false motion alerts, leading to a more efficient security experience.
  3. Enhanced Field of View: The right wedge kit will improve your camera's field of view, allowing you to capture more of your entryway.

When installing the wedge kit, make sure it's placed correctly between the mounting bracket and the doorbell unit. This step is crucial for achieving the desired angle and maximizing your Ring doorbell's functionality.

Scenarios for Wedge Kit Application

Installing a Wedge Kit can make a significant difference for homeowners with elevated doorways or sloped siding, guaranteeing your Ring doorbell captures every visitor effectively.

Advertisement

If your doorbell is mounted above ground level, particularly near stairs, a Wedge Kit allows you to adjust the camera angle to enhance visitor detection. This adjustment is similar to how optimal use and cleanup are vital for achieving the best results with an airless paint sprayer, making sure you don't miss important details.

In homes with unique entryway configurations, the Wedge Kit becomes essential, enabling precise adjustments to focus on specific areas like walkways or stairs. This guarantees that motion detection is optimized, minimizing blind spots that could lead to missed alerts.

For those with sloped siding, the Wedge Kit helps avoid upward camera angles that might trigger false positives from passing traffic, improving monitoring of your entry points.

Product Recommendations

tailored suggestions for you

For ideal surveillance, consider the Ring 8KKCS6 Wedge Kit, which allows you to easily modify your doorbell's viewing angle for better visitor detection. This affordable option, priced at $27.99, guarantees you get the best viewing experience while keeping your home secure.

Additionally, making sure that your home theater setup is well-configured can complement your security measures, as proper lighting and sound can be beneficial for overall awareness in your environment essential components.

Here are three product recommendations to enhance your Ring doorbell setup:

Advertisement
  1. Ring Pro 2 Video Doorbell – At $399.99, this advanced model offers superior features that may greatly benefit from using a wedge kit for the perfect camera angle.
  2. Floodlight Cam – This device provides extensive security with adjustable angles, making it an excellent addition to your home protection strategy.
  3. Stick Up Cam – Versatile and easy to install, this cam lets you adjust the angle for tailored surveillance, making sure you don't miss a thing.

Installation Guidelines

To guarantee your Ring doorbell camera captures the best view, follow these installation guidelines for adjusting the angle correctly.

First, verify compatibility with the Wedge Kit by checking your specific Ring doorbell model using the Ring app. If you're mounting on aluminum siding, using the Wedge Kit will help avoid missed visitor detections and minimize false alerts. Additionally, understanding local zoning laws and regulations can be beneficial if you plan to make further modifications to your home security setup.

When you're ready to adjust the camera angle, start by removing the doorbell from the mounting bracket. With the doorbell detached, you can insert the wedge for the desired angle adjustment. Loosen the screws on the mounting bracket to facilitate this change. Once you've set the angle, make sure to tighten the screws securely to keep everything in place.

Always adhere to the manufacturer's installation guidelines specific to your Ring doorbell model for effective monitoring and proper setup. Following these steps guarantees your camera is positioned most effectively, enhancing its functionality and reducing the risk of issues down the line. Proper installation not only improves your security but also guarantees you capture every moment without interference.

Addressing Common Issues

resolving frequent challenges together

Addressing common issues with your Ring doorbell camera often starts with ensuring it's mounted correctly for ideal performance. If your camera angle isn't right, you might face several frustrating problems.

Here are three common issues:

  1. Missed visitor detections: Improper positioning can lead to your camera missing important guests.
  2. False motion alerts: If your camera faces busy streets or high pedestrian traffic, you'll receive unnecessary notifications.
  3. Ineffective security: A poorly angled camera reduces your overall security effectiveness.

Using a wedge kit can help adjust your viewing angle to eliminate these concerns.

For instance, if your doorbell is installed high, a wedge kit can lower the camera angle, ensuring it captures approaching visitors effectively.

Advertisement

Additionally, paintable wedge kits allow you to maintain aesthetics while enhancing functionality.

Enhancing Motion Detection

Enhancing the angle of your Ring Doorbell camera can greatly boost its motion detection capabilities. By properly angling the camera, you'll focus the PIR sensors on high-traffic areas, which considerably improves alert accuracy.

If your home has varying elevations or features like stairs and walkways, adjusting the camera angle is vital to catch motion effectively. Using a wedge kit allows you to modify the angle between 15 to 45 degrees, enhancing the field-of-view for better detection of approaching visitors.

Keep in mind that the effective motion detection range for the Ring Video Doorbell generally falls between 5 to 15 feet. Ensuring your camera is angled correctly is essential for maximizing this coverage.

Incorrect camera angles can lead to missed alerts or false positives, which can be frustrating. By taking the time to adjust your camera angle, you can considerably enhance its performance.

Advertisement

This simple tweak not only helps in catching motion but also reduces the chances of unnecessary alerts, making your home security system more reliable.

Frequently Asked Questions

Can You Change the Camera Angle of a Ring Doorbell?

Yes, you can change the camera angle of a Ring Doorbell.

It typically has a fixed angle, but using a wedge kit allows you to adjust it for better coverage.

These kits give you options to tilt the camera at 15, 30, or 45 degrees.

Just remove the doorbell from its bracket, insert the wedge, and tighten the screws after you find the right angle for your needs.

Advertisement

How Do I Adjust the Camera Range on My Ring Doorbell?

Imagine your Ring Doorbell as a watchful guardian, ready to catch every moment.

To adjust its camera range, start by using a Wedge Kit to tilt the doorbell for the best view.

Make sure it's installed between 5 to 20 feet high, keeping an eye on your surroundings to avoid blind spots.

Follow the manufacturer's instructions closely, and you'll enhance its motion detection, ensuring you never miss a visitor.

Can You Tilt a Ring Doorbell Camera?

Yes, you can tilt your Ring Doorbell camera!

Advertisement

Using a wedge kit designed for your specific model lets you adjust its angle for the best view. This can help you capture key areas while reducing false motion alerts.

Just remove the doorbell from its bracket, insert the wedge, and adjust the angle by loosening and tightening the screws.

Make sure the wedge kit is compatible with your model for ideal results!

How to Adjust the Angle of a Ring Doorbell?

Imagine standing in front of your doorbell like it's a vintage camera, enthusiastic to capture the perfect shot.

To adjust the angle, you'll first remove the doorbell from its bracket. Then, insert the wedge kit to tilt it as desired.

Advertisement

Loosen the screws, adjust the camera, and tighten them once you've found the perfect angle.

If it's in a corner, consider a Corner Kit for better positioning.

Now, enjoy a clearer view of your visitors!

Conclusion

In summary, adjusting your Ring Doorbell camera angle is essential for ideal performance and security.

By using a wedge kit, you can guarantee your camera captures the best view of visitors and activity.

Advertisement

Have you considered how a slight adjustment could make a big difference in your home's safety?

With the right tools and techniques, you can enhance both motion detection and your overall peace of mind.

So, don't hesitate to make those adjustments today!

Continue Reading

Ring Security Cameras

How to Fix Poor Connection on Ring Doorbell

Boost your Ring Doorbell’s connection with expert tips, but discover the crucial steps you might be missing for optimal performance.

Published

on

improve ring doorbell connectivity

To improve the weak connection on your Ring Doorbell, start by checking your Wi-Fi signal strength using the Ring app. Aim for an RSSI value below 50 for optimal performance. If it exceeds 60, consider relocating your router closer, ideally within 200 feet, and avoiding obstacles like walls and metal objects. You can also enhance router settings by switching to a less crowded channel. If issues persist, a Wi-Fi extender may help enhance your signal. This way, you can ensure smoother operation for your Ring Doorbell and enhance overall connectivity. There is more to discover about effectively enhancing your setup. If you continue to experience a poor connection after trying these steps, it may be necessary to troubleshoot any problems with the Ring Doorbell itself. One common issue is the “troubleshooting ring doorbell streaming error,” which can be caused by various factors such as outdated firmware or a malfunctioning device. In such situations, contacting Ring’s customer support for further assistance can assist in pinpointing and resolving the problem. By addressing both your Wi-Fi signal strength and potential device issues, you can guarantee that your Ring Doorbell functions smoothly and reliably.

Key Takeaways

  • Relocate your Wi-Fi router within 200 feet of the Ring Doorbell to enhance signal strength and connectivity.
  • Monitor the RSSI values using the Ring app; aim for values below 50 for optimal performance.
  • Avoid physical obstructions and interference from devices like microwaves by positioning the router centrally and elevated.
  • Use Wi-Fi extenders to boost signal strength in areas with weak connectivity, ensuring they are placed strategically.

Common Connection Issues

Poor connection on your Ring Doorbell often reveals itself through high RSSI values, with anything above 60 indicating a weak signal and potential connectivity troubles.

You'll likely experience poor WiFi connection, resulting in delayed notifications or video feeds. It's crucial to identify these connection issues to guarantee your Ring device operates smoothly.

One common culprit is the placement of your Wi-Fi router. If it's over 200 feet away or blocked by walls or furniture, the wifi signal can weaken considerably.

Try relocating your router closer to the Ring Doorbell and verify there are minimal obstructions.

Additionally, overcrowded Wi-Fi channels can interfere with your connection. If other networks are using the same channel, you may experience delays.

Advertisement

Switching to a less crowded channel can improve your signal strength.

For enhancing your indoor environment, consider using an air purifier to reduce allergens and improve air quality, which can indirectly support better device performance.

Causes of Poor Wi-Fi

interference distance network congestion

Several factors can contribute to a weak Wi-Fi connection for your Ring Doorbell, impacting its overall performance and reliability. Understanding these causes can help you identify potential issues and improve your device's connectivity.

Cause Impact on Wi-Fi Signal Solution
Overcrowded Wi-Fi Channels Can lead to poor RSSI and delayed notifications Switch to less crowded channels
Poor Router Placement Affects wifi reception, weakening the signal Place router within 200 feet of Ring
Interference from Devices Disrupts signal strength, causing connection drops Keep devices like microwaves away from router

Obstacles like walls or metal doors can also obstruct the wifi signal, leading to increased latency. Additionally, check your network configuration; if your Ring device connects to a faulty suggested network, it may struggle with poor reception. By tackling these issues, you can enhance your Ring Doorbell's wifi performance and enjoy a more reliable connection.

Improving Router Placement

optimizing wi fi signal strength

To enhance your Ring Doorbell's connectivity, it's essential to strategically place your Wi-Fi router for ideal signal strength.

Heat pumps, similar to your Ring Doorbell, rely heavily on effective communication between components, so guaranteeing your Wi-Fi is strong can be likened to maintaining heat pump efficiency.

Start by positioning your router within 200 feet of the Ring Doorbell. This distance helps guarantee a strong Wi-Fi signal, which is vital for effective communication between the devices.

Advertisement

Elevate your router by placing it on a shelf or mounting it high on a wall. This minimizes obstructions and boosts the signal reach.

Avoid locating the router near walls or large furniture, as these physical barriers can greatly weaken your Wi-Fi strength.

It's also important to keep the router away from major electronic devices like microwaves or cordless phones. These can interfere with your Wi-Fi signal, causing connectivity issues.

After you've adjusted the router placement, test the connection to see if there's an improvement in your Ring Doorbell's performance.

You should notice a more stable connection and fewer interruptions.

Advertisement

Checking Signal Strength

assessing network connectivity levels

Checking the signal strength of your Ring Doorbell is essential for guaranteeing a reliable connection and optimal performance. You can easily check this using the Ring app. Navigate to the Device Health section, where you'll find the current Received Signal Strength Indicator (RSSI) value for your doorbell.

Here's a quick reference table for understanding RSSI values:

RSSI Value Signal Strength
0 – 49 Strong Connection
50 – 67 Moderate Connection
68 – 75 Weak Connection
76+ Poor Connection

For ideal performance, aim for an RSSI value below 50. Values above 60 indicate a weak connection, potentially leading to issues with your Wi-Fi. If you notice an RSSI of 68 or higher, it may be time to troubleshoot or reposition your router. Monitoring your signal strength regularly can help you identify trends and make necessary adjustments to improve your connection. Keeping an eye on the RSSI values guarantees your Ring Doorbell operates effectively, providing you with reliable notifications and smooth video streaming.

Optimizing Router Settings

enhancing network performance configuration

To boost your Ring Doorbell's connection, start by optimizing your router settings.

Ensuring that your router operates on the least congested channel can help mitigate interference from other devices.

Additionally, considering the impact of environmental factors, such as temperature variations, can enhance your network's reliability, similar to how wind energy relies on air pressure differences.

Focus on selecting the best channel and placing your router in an ideal location to minimize interference.

Advertisement

These adjustments can greatly enhance the performance of your device.

Channel Selection Strategies

Selecting the right Wi-Fi channel is essential for enhancing your Ring Doorbell's connectivity and performance. By implementing effective channel selection strategies, you can considerably improve the Wi-Fi signal and reduce interference, which is particularly important given the increasing number of devices connected to home networks.

As noted in recent trends regarding cybersecurity measures, ensuring a strong and reliable connection also helps protect your devices from potential vulnerabilities.

Here are some steps to help you optimize your router settings:

  1. Analyze Channel Congestion: Use Wi-Fi Analyzer tools to check which channels are crowded in your area. This will help you identify less congested options.
  2. Choose Less Common Channels: Avoid the commonly used channels (1, 6, and 11) when configuring your Wi-Fi router. Opt for channels that are less populated to improve the Wi-Fi.
  3. Manually Adjust Settings: While many routers automatically select channels, manually adjusting the channel settings can sometimes yield better results.
  4. Test and Reassess Regularly: Periodically check your router's channel performance and make adjustments as needed. This helps maintain a stable connection for your Ring Doorbell.

Router Placement Tips

Optimizing your router's placement can greatly enhance the connectivity of your Ring Doorbell, ensuring a stronger and more reliable signal.

Start by positioning your router centrally in your home and at an elevated height. This helps maximize coverage while reducing obstructions between the router and your Ring device.

Advertisement

Additionally, consider using a smart device that can help manage your network traffic for better performance. Aim to keep the router within 200 feet of the doorbell to maintain a strong signal and reduce latency.

Avoid placing the router near walls, metal objects, or electronic devices that could interfere with the Wi-Fi signal, as these can lead to poor signal quality.

If possible, use the 2.4GHz frequency band for your Ring Doorbell, since it provides better range and can penetrate obstacles more effectively than the 5GHz band.

After relocating your router, regularly test the connection strength to confirm improved signal quality. Ideally, you should aim for an RSSI value below 50 for best performance.

Using Wi-Fi Extenders

enhancing wireless network coverage

If you're struggling with your Ring Doorbell's connection, using a Wi-Fi extender can make a significant difference.

These devices boost your router's signal, ensuring better coverage for your doorbell, especially in those tough spots.

Advertisement

Additionally, a well-connected home can enhance the overall experience of modern living, creating a seamless environment for relaxation and entertainment, much like a living room transformation.

Let's go over the benefits and some tips for installation and setup to maximize your extender's potential.

Benefits of Wi-Fi Extenders

Using a Wi-Fi extender can dramatically enhance your Ring Doorbell's connection, making it more reliable and efficient even in areas with weak signals. By boosting signal strength, you can guarantee your device operates smoothly.

Here are some key benefits of using Wi-Fi extenders:

  1. Improved Signal Strength: Wi-Fi extenders can help achieve lower Received Signal Strength Indicator (RSSI) values, ideally under 50, for peak performance.
  2. Extended Coverage Area: They increase the coverage area of your home network, allowing your Ring Doorbell to stay connected even in hard-to-reach spots.
  3. Reduced Interference: When positioned strategically between the router and your Ring Doorbell, Wi-Fi extenders can minimize interference, leading to better responsiveness.
  4. Dual Functionality: Some extenders, like the Ring Chime Pro, double as a chime for alerts, enhancing both connectivity and functionality.

Installation and Setup Tips

To guarantee your Ring Doorbell gets the best connection possible, it's important to correctly install and set up your Wi-Fi extender. Start by positioning the extender centrally between your router and the Ring Doorbell. This optimizes the signal path, reducing latency and improving connectivity. Make certain the extender is connected to a strong Wi-Fi signal; a weak connection will only worsen your issues.

For a successful installation, consider the following factors:

Advertisement
Factor Importance Tips
Location of Extender Central placement enhances signal Avoid walls and obstructions
Connection Strength A strong connection at the extender is crucial Check using the Ring app
Device Compatibility Verify your extender is compatible with Ring Refer to the manufacturer's guide
Regular Monitoring Use the Ring app's Device Health for updates Regularly check signal strength

Once installed, regularly monitor the signal strength using the Ring app. This will help you confirm improvements and adjust the extender's position if necessary. Following these tips can greatly enhance your Ring Doorbell experience. If you continue experiencing issues, consider looking up additional resources on **how to boost Ring Doorbell signal** for more advanced troubleshooting tips. Simple actions like reducing interference from other devices or upgrading your Wi-Fi router may also significantly improve performance. Ultimately, maintaining a stable connection will ensure your doorbell functions optimally at all times. Furthermore, positioning your router closer to the doorbell or using a mesh Wi-Fi system can help achieve a better signal for Ring Doorbell. Be mindful of walls or other barriers that might obstruct the signal, and try relocating your extender for the clearest path between the doorbell and your Wi-Fi source. Taking these proactive steps will ensure consistent performance and a better overall user experience.

Understanding RSSI Values

interpreting rssi signal strength

RSSI values are vital for determining the strength of your Ring Doorbell's Wi-Fi connection. RSSI, or Received Signal Strength Indicator, measures how well your doorbell receives the Wi-Fi signal. Understanding these values can help you diagnose poor signal issues and improve your device's performance.

Here's a quick overview of RSSI values to guide you:

  1. Below 50: Excellent signal strength, peak performance.
  2. 50-60: Good connection, but keep an eye on performance.
  3. 60-70: Weak signal; you may experience connectivity issues.
  4. Above 70: Poor signal; serious performance problems likely.

To check the RSSI values, log into your Ring account and navigate to the device settings. If you notice high RSSI values, consider relocating your router closer to your Ring Doorbell, removing obstructions, or using Wi-Fi extenders.

Community Support Resources

local assistance and guidance

The Ring Community offers a valuable platform for users to connect, share experiences, and find solutions to connectivity issues with their Ring devices.

By logging in or creating an account, you can participate in discussions and ask questions about your specific problems. This interactive environment fosters collective problem-solving, allowing you to benefit from the insights of fellow users who've faced similar challenges.

Within the community, you'll find a wealth of user-generated content focused on troubleshooting poor Wi-Fi connectivity and other common issues. Engaging in these discussions can help you discover effective solutions that you mightn't find elsewhere.

Plus, the Ring Help Center integrates seamlessly with community resources, providing articles and guides on various topics, including detailed troubleshooting steps for Ring devices.

Advertisement

Frequently Asked Questions

Why Does My Ring Doorbell Keep Saying Poor Connection?

If your Ring Doorbell keeps saying poor connection, it's likely due to a weak Wi-Fi signal.

This could happen because of physical barriers like walls or metal doors that block the signal.

It might also be too far from your router, or other devices could be interfering with the connection.

Overloaded Wi-Fi channels can add to the issue, causing delays in notifications and video feeds.

It's crucial to troubleshoot these factors.

Advertisement

How to Improve Signal Strength on Ring Doorbell?

Imagine standing at your door, excitedly waiting for a visitor, only to find the Ring Doorbell's signal flickering weakly.

To boost that signal strength, make sure your doorbell's within 200 feet of your Wi-Fi router.

Check the RSSI value in the app; aim for below 50.

Switch to a 2.4GHz connection for better penetration, and consider using a Wi-Fi extender like the Ring Chime Pro to enhance coverage where it matters most.

Why Does My Ring Doorbell Keep Losing Connection?

If your Ring Doorbell keeps losing connection, it's likely due to weak Wi-Fi signal strength or interference.

Advertisement

Consider the distance between your doorbell and the router; if it's over 200 feet or blocked by obstacles, that could be the issue.

Check for other devices causing interference and verify your Wi-Fi channel isn't overcrowded.

Will a Wifi Booster Help My Ring Doorbell?

Imagine your WiFi signal as a bridge connecting you to the world outside. If that bridge is crumbling, it's tough to reach your destination.

Yes, a WiFi booster can strengthen that connection for your Ring Doorbell. By extending your WiFi coverage, it helps build a sturdier bridge, especially if your doorbell's far from the router.

Positioning the booster wisely can make a significant difference, ensuring you stay connected to those important moments at your doorstep.

Advertisement

Conclusion

In the same way a tree needs strong roots to withstand the wind, your Ring Doorbell needs a solid connection to keep your home secure.

By addressing common connection issues and optimizing your Wi-Fi setup, you can guarantee your device functions smoothly.

Remember, even the best technology can falter if it's not properly supported.

Don't let a weak connection leave you vulnerable; take action today to fortify your doorbell's link to the world outside.

Advertisement
Continue Reading
Advertisement

Affiliate Disclaimer
As an affiliate, we may earn a commission from qualifying purchases. We get commissions for purchases made through links on this website from Amazon and other third parties.

Advertisement

Title

fixing ring doorbell issues fixing ring doorbell issues
Ring Security Cameras5 days ago

How to Fix Ring Doorbell

Get your Ring doorbell working again with these essential troubleshooting tips, and discover the key steps to restore its functionality.

verizon home security availability verizon home security availability
Home Security Systems5 days ago

Does Verizon Offer Home Security Systems?

Curious about Verizon's home security systems? Discover customizable options, pricing, and features that could enhance your safety—find out more now!

verizon home security systems verizon home security systems
Home Security Systems5 days ago

Does Verizon Have Home Security Systems?

Wondering if Verizon offers home security systems? Discover their advanced options and features that might surprise you!

adjust ring doorbell angle adjust ring doorbell angle
Ring Security Cameras5 days ago

How to Adjust Ring Doorbell Camera Angle

Keep your Ring doorbell camera perfectly positioned for optimal security by learning how to adjust its angle effectively. Discover the...

improve ring doorbell connectivity improve ring doorbell connectivity
Ring Security Cameras5 days ago

How to Fix Poor Connection on Ring Doorbell

Boost your Ring Doorbell's connection with expert tips, but discover the crucial steps you might be missing for optimal performance.

adjust ring doorbell view adjust ring doorbell view
Ring Security Cameras5 days ago

How to Adjust Ring Doorbell Camera View

Learn how to optimize your Ring Doorbell camera view for the best coverage, and discover essential tips that can transform...

improve ring doorbell wifi improve ring doorbell wifi
Ring Security Cameras5 days ago

How to Fix Poor Wifi Connection on Ring Doorbell

Navigating WiFi issues with your Ring Doorbell can be frustrating, but simple adjustments can dramatically enhance your connection quality. Discover...

removing ring doorbell faceplate removing ring doorbell faceplate
Ring Security Cameras5 days ago

How to Remove Faceplate From Ring Doorbell 2

Make removing the faceplate from your Ring Doorbell 2 easy with these simple steps, and discover essential tips for maintenance...

fixing ring doorbell live view fixing ring doorbell live view
Ring Security Cameras5 days ago

How to Fix Live View on Ring Doorbell

Unlock the secrets to troubleshooting Live View on your Ring Doorbell; discover essential tips to restore connectivity and enhance your...

adjust ring doorbell settings adjust ring doorbell settings
Ring Security Cameras5 days ago

How to Fix Overexposure on Ring Doorbell

Adjust your Ring Doorbell settings to combat overexposure and discover expert tips that can transform your video clarity dramatically.

troubleshooting ring doorbell issues troubleshooting ring doorbell issues
Ring Security Cameras5 days ago

How to Fix My Ring Doorbell

Amid connectivity issues or unresponsiveness, discover essential troubleshooting tips for your Ring doorbell that could restore its functionality. What steps...

adjust ring doorbell camera adjust ring doorbell camera
Ring Security Cameras5 days ago

How to Adjust Ring Doorbell Camera

Customize your Ring Doorbell camera settings to enhance security and convenience; discover the essential adjustments you need to make for...

Trending

Copyright © 2024 Security Zone Info Affiliate disclaimer As an affiliate, we may earn a commission from qualifying purchases. We get commissions for purchases made through links on this website from Amazon and other third parties.