To get your Ring Doorbell off, start by turning off the power at the electrical panel to avoid hazards. Then, locate the security screw at the bottom and use the included screwdriver to remove it. Gently pull the faceplate down at a 45-degree angle to expose the battery or wiring. For wired models, carefully disconnect the wires from the terminal. Once this is done, check for screws securing the bracket before removing the doorbell itself. Make sure to handle everything with care to avoid damage, and if you stick around, you'll discover more tips for a smooth removal process. Once the doorbell is safely detached, store any screws and hardware in a safe place to ensure you don’t lose them during reinstallation or storage. If you’re unsure about any steps, refer to the manual or watch online tutorials on **how to remove Ring Doorbell** for additional guidance. Taking your time and following all instructions carefully will help prevent unnecessary damage to your device or home.
Key Takeaways
- Turn off power at the electrical panel for safety before attempting to remove the Ring Doorbell.
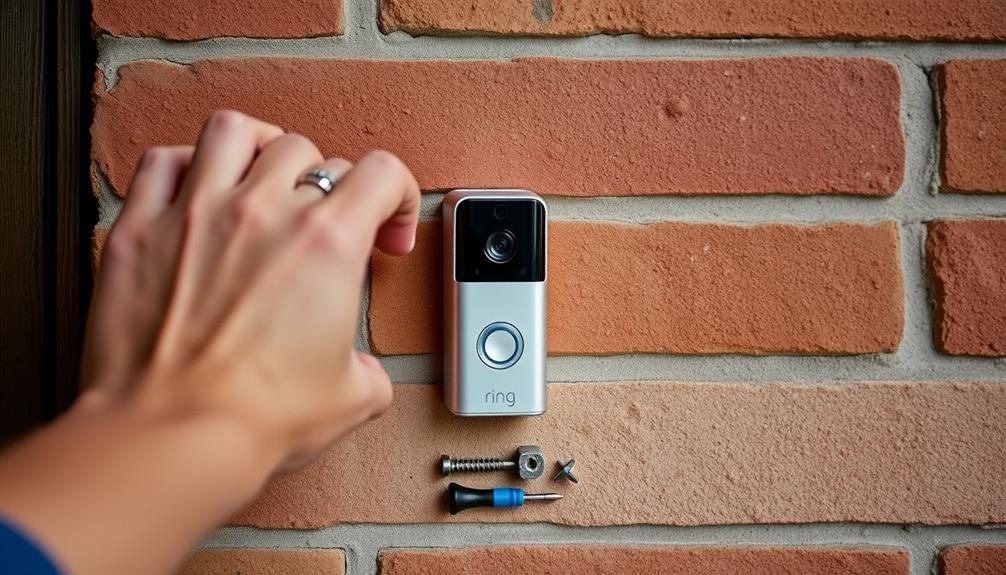
- Use the security screwdriver to unscrew the security screw at the bottom of the faceplate.
- Gently pull the faceplate down at a 45-degree angle to detach it from the device.
- For wired models, carefully disconnect the wires from the terminal screws after ensuring power is off.
Overview of Ring Doorbell Models
Ring frequently offers a range of doorbell models, each designed to meet different installation needs and user preferences.
When choosing a Ring Doorbell, you'll notice both wired and battery-operated options. Wired models, like the Ring Doorbell Wired and Ring Doorbell Pro, require a constant power source, making them ideal for permanent installations. On the other hand, battery-powered models, such as the Ring Doorbell (2nd Generation) and Ring Doorbell 4, give you flexibility in placement, allowing you to install them without worrying about wiring.
Understanding the common issues associated with heat pumps can also provide insights into the importance of reliable home security devices.
Each Ring Doorbell is equipped with advanced security features, including HD video recording, two-way audio, and motion detection, enhancing your home security.
Before you decide to remove a Ring Doorbell, it's crucial to understand which model you have, as this knowledge will influence both the removal process and the tools you'll need.
Whether you're upgrading, relocating, or performing maintenance, knowing your specific model helps guarantee a smooth experience.
Tools Required for Removal

To successfully remove your doorbell, you'll need a few specific tools tailored to your model. The primary tool required is a security screwdriver, which usually comes included with the Ring Doorbell. This tool is designed to manipulate the security screw located at the bottom of the faceplate.
If you've misplaced the original screwdriver, don't worry; a small flathead screwdriver or a T15 Torx screwdriver can serve as suitable alternatives. For added convenience, consider having safety glasses handy, as they're critical for eye protection while using tools in your home improvement projects, especially when working with devices like safety glasses.
For wired models, you'll also need a Phillips-head screwdriver to unscrew the doorbell from its mounting bracket. Additionally, having a drill on hand can be beneficial, especially if you encounter screws in hard-to-reach areas.
To protect your eyes during the removal process, wearing safety goggles is a smart choice.
Safety Precautions

Before you begin the removal process, it's vital to prioritize your safety to avoid any accidents or injuries. Start by turning off the power at the electrical panel. This important step helps prevent electrical hazards while you're removing the entire Ring Doorbell unit.
Island Getaways offer unique experiences that can serve as a rejuvenating break after a DIY project, so make sure you’re well-prepared.
Next, wear safety goggles to protect your eyes from any debris or potential falls of tools and components during the process. It's also wise to use a soft cloth or towel beneath the doorbell to catch any falling screws or parts, protecting your flooring and surrounding areas from damage.
Verify the removal area is well-lit and free of obstructions. This will help you work efficiently and safely, minimizing the risk of accidents.
Additionally, take a moment to review the specific removal instructions for your Ring Doorbell model. Each model may have unique safety precautions that are important to follow.
Step-by-Step Removal Process

To safely remove your Ring Doorbell, you'll need to start by disconnecting the power.
It's important to guarantee that you're working in a safe environment, similar to how you'd handle sensitive electronics like a Home Theater Setup to prevent any damage.
Next, you'll tackle the faceplate removal and wiring detachment.
Let's walk through each step to guarantee you do it smoothly and without any hassle.
Disconnect Power Safely
Start by turning off the power at the electrical panel to eliminate any risk of electrical hazards.
If your Ring Doorbell is battery-powered, you'll need to remove the battery first. Access it through the faceplate to confirm no power is running to the device.
For hardwired models, grab a screwdriver and carefully disconnect the wires from the terminal screws. Make sure the wires are safely detached from the doorbell unit. It's important to handle the wiring with care, similar to how professionals manage their equipment during a home cleaning service to avoid any mishaps.
Once you've disconnected the power, check that the device is completely powered off. Look for any indicator lights; if they're off, you're good to proceed.
Always handle the wiring with care to avoid damage. It's essential to verify no wires are left exposed after the removal process, as this can pose safety risks.
Faceplate Removal Techniques
Removing the faceplate from your Ring Doorbell is a straightforward process that requires just a few simple steps.
First, grab the included security screwdriver and locate the security screw at the bottom of the faceplate. Unscrew it completely and set it aside for later. Understanding the importance of clarity and conciseness in communication can also help you explain the removal process to others effectively, as seen in professional email etiquette.
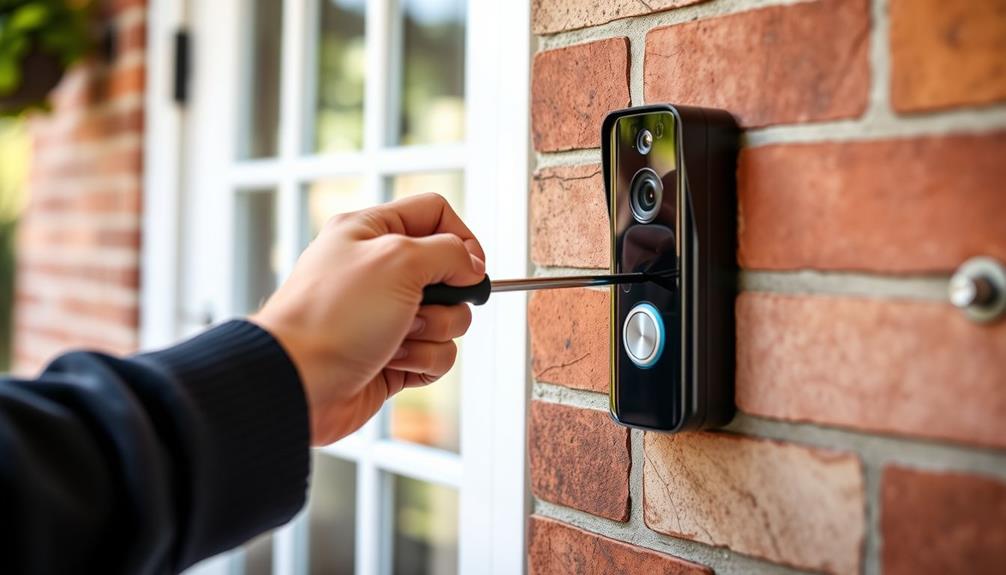
Once the screw is removed, gently pull the bottom portion of the faceplate down and towards you at a 45-degree angle. This action will help detach the faceplate from the device. If you have a battery-powered model, you can access the battery compartment now to charge or replace the battery as needed.
For wired models, be cautious of any plastic tabs that may secure the faceplate. When you pull the faceplate away, do so gently to avoid damaging these tabs.
Make sure you're working in a well-lit area and have a soft cloth or towel handy to catch any parts that might fall during the removal process. Following these steps will guarantee that you can efficiently and safely remove the faceplate from your Ring Doorbell.
Wiring Detachment Instructions
Before you begin detaching the wiring from your wired Ring Doorbell, make sure to turn off the power at the electrical panel to prevent any electrical hazards.
Once the power is off, grab a screwdriver and locate the terminal screws at the back of the device. Loosen these screws to free the wires connected to the doorbell.
Carefully pull the wires away from the terminal connections, making sure not to tug on the wires themselves to avoid any damage. If your doorbell is mounted with a bracket, check for additional screws securing the bracket in place before fully removing the doorbell from the wall.
After you've detached the wires, it's vital to store them safely. To prevent accidental contact, wrap any exposed wiring ends with electrical tape. This step is essential for safety, especially if you plan to install a new doorbell or leave the wiring exposed for any period.
Following these wiring detachment instructions will help you safely remove your Ring Doorbell without complications.
Charging the Battery

Charging your Ring Doorbell's battery is straightforward once you know the steps.
You'll start by accessing the battery compartment, and then you can easily charge the battery until it's ready to go.
After charging, you'll simply reinstall the battery and secure the faceplate to get your doorbell back in action.
Battery Access Steps
To access the battery of your Ring Doorbell, simply use the included security screwdriver to remove the screw at the bottom of the faceplate.
Once the screw is out, gently pull the bottom of the faceplate down and towards you to detach it from the device.
With the faceplate removed, you can now locate the battery pack.
To remove the battery, slide the small silver lever to release it from the doorbell.
Make sure you handle the battery carefully as you take it out.
After you've removed the Ring Doorbell's battery, it's time to charge it.
Use the appropriate charging method until it's fully charged.
Remember, it's important to verify the battery is completely charged before reinserting it to maintain peak performance.
Once the battery is charged, slide it back into the doorbell.
Finally, reattach the faceplate by aligning it properly onto the device.
Secure it with the security screw to verify everything is closed and secured.
Following these steps will help you manage your Ring Doorbell's battery effectively!
Charging Duration Tips
Monitoring the battery's status through the Ring app helps you determine when it's time to charge for peak performance. For battery-powered models, it's best to charge when the battery level drops to around 20%. This guarantees you maintain ideal performance and prolong the battery's lifespan. Typically, charging the battery takes about 5-10 hours using the provided charging cable, so plan accordingly.
To enhance charging duration, consider where you charge the battery. It's ideal to charge indoors at room temperature. Extreme temperatures can negatively impact charging efficiency and battery health, so avoid charging in very hot or cold environments.
Additionally, adjusting motion detection settings and reducing the frequency of alerts in the Ring app can help extend battery life between charges. By staying proactive about your battery's status and charging habits, you can guarantee your Ring Doorbell remains ready to protect your home without interruption.
Always keep an eye on notifications from the app, so you're aware when it's time to recharge. This way, you'll enjoy uninterrupted performance and peace of mind from your Ring Doorbell.
Reinstallation Process Overview
After ensuring the battery is fully charged, you're ready to reinstall your Ring Doorbell and get it back in action.
Start by inserting the charged battery back into the device. Slide it in until you hear a satisfying click, indicating it's secured in place.
Next, it's time to mount the doorbell. You can do this by reconnecting it to the mounting bracket or wall, making sure to align it properly with any screws or tabs.
For wired models, restore power by reconnecting it to the electrical source.
Once mounted, grab your smartphone and open the Ring app. Follow the on-screen prompts for the reinstallation process, which includes connecting your doorbell to your Wi-Fi network and tweaking any settings you wish to adjust.
Removing Without Special Tools

Using common household tools, you can easily remove your Ring Doorbell without needing any special equipment.
Start by finding the security screw located at the bottom of the device. If you've misplaced the orange security screwdriver, don't worry! A small flathead screwdriver or a T15 Torx screwdriver works just fine. Gently unscrew the security screw to avoid stripping the head.
Once the security screw is removed, you'll be able to detach the removable faceplate. Simply pull the bottom of the faceplate down and towards you. This will expose the battery pack, allowing you to charge it or disconnect the device if necessary.
If you need to remove the doorbell itself from the mounting bracket, apply steady pressure while gently prying it away. Be patient during this step to avoid damaging the device or the wall. Remember, it's important to handle the doorbell carefully, ensuring you don't force it off.
Following these steps will help you successfully remove your Ring Doorbell using just a few common tools from around your home.
Permanently Uninstalling the Doorbell

When you're ready to permanently uninstall your Ring Doorbell, it's essential to disconnect any wiring safely first.
After the doorbell is off, you'll want to secure the wall to prevent any issues like pests or water leaks.
This process guarantees both your safety and the integrity of your home.
Disconnecting Wiring Safely
To guarantee your safety while disconnecting the wiring from your wired Ring Doorbell, first turn off the power at the electrical panel. This step is vital to prevent any electrical hazards during the process.
Once the power is off, follow these steps to disconnect the wiring safely:
- Use a screwdriver to loosen the terminal screws.
- Carefully detach the electrical wires from the doorbell unit.
- Remove any screws securing the doorbell's mounting bracket.
After loosening the terminal screws, carefully pull the wires free from the doorbell. If the doorbell is mounted on a bracket, make certain all screws are removed before detaching the wiring.
Once you've disconnected everything, take a moment to inspect the wires for wear or damage. It's important to verify they're capped or insulated to prevent accidental contact after removal.
With these steps, you can safely disconnect the wiring and remove your Ring Doorbell without issues.
Afterward, you might want to reflect on sealing any holes left in the wall to prevent moisture and pests from entering.
Securing Wall After Removal
After you've disconnected the wiring and removed the Ring Doorbell, it's important to secure the wall by sealing any holes left behind.
Start by cleaning the area to guarantee ideal adhesion for the sealant. Use silicone sealant or wall filler to fill in the holes. This step is essential to prevent water intrusion, pests, or drafts from entering your home.
Once you've applied the filler, allow it to dry completely. After it's dry, sand the area smooth to achieve a seamless finish that blends with the surrounding wall. If you're using a paintable filler, apply a coat of paint that matches your wall color for a polished look.
For textured walls, you might want to replicate the original texture. Consider using a texturizing spray or a sponge technique before painting to confirm the surface looks uniform.
Troubleshooting Common Issues

Removing your Ring Doorbell can be tricky, especially if you're dealing with stubborn security screws or a stuck faceplate. Here are some common issues you might face and how to tackle them:
- Stubborn Security Screws: Use the specific screwdriver included with your device or a T15 Torx screwdriver for best results.
- Stuck Faceplate: Gently pull the faceplate at a 45-degree angle, but be careful not to damage any internal components.
- Wired vs. Battery-Operated Models: Confirm which model you have, as this affects the tools and steps needed for removal.
If you're still having trouble after trying these tips, don't hesitate to consult the Ring Help Center or community forums. Many users share their experiences and solutions there, so it's a great resource.
Post-Removal Considerations

Once you've successfully taken off your Ring Doorbell, it's important to contemplate what to do next to protect your space and the device.
First, securely store the doorbell in a safe location to prevent any damage or loss—this is especially vital if you plan to reinstall it later.
Next, patch any holes or marks left on the wall with silicone or filler. This not only maintains your wall's appearance but also prevents potential issues like bug infestations or leaks.
If you've decided not to reinstall the device, research proper disposal methods for any non-reusable components to guarantee you're practicing environmentally responsible methods.
Should you opt for a new doorbell, follow the manufacturer's instructions carefully to guarantee proper installation and functionality.
Lastly, don't hesitate to post a question to the support team if you encounter issues or need clarification during the installation of your new doorbell. They can provide valuable assistance to guarantee everything runs smoothly.
Taking these post-removal steps can help you maintain your space and prepare for whatever comes next.
Managing Device Settings in App

To manage your Ring Doorbell settings effectively, open the Ring App and select your device from the profile page. This will give you access to various management options that enhance your experience and security.
Here are key settings you can customize:
- Notification Preferences: Control how and when you receive alerts for motion events and video recordings.
- Motion Detection Zones: Review and adjust these areas to optimize security and minimize unnecessary notifications.
- Battery Status: Monitor your device's battery life and charge levels directly in the app to guarantee it's always ready to go.
Frequently Asked Questions
How Do I Remove My Ring Doorbell?
To remove your Ring Doorbell, you'll need the security screwdriver that came with it.
First, unscrew the security screw at the bottom of the faceplate.
Then, gently pull down the faceplate to access the battery or components.
For wired models, unscrew it from the wall or bracket after removing the faceplate.
If you don't have the special screwdriver, a small flathead or T15 Torx can work too.
How to Remove Ring Doorbell From Mounting Bracket?
To remove your Ring Doorbell from the mounting bracket, start by locating the security screw at the bottom of the faceplate.
Use the provided screwdriver to unscrew it.
Once that's done, gently pull the bottom of the faceplate down and out towards you.
For wired models, unscrew the main unit from the bracket with a Phillips-head screwdriver.
If it's battery-powered, just pull it straight out at a 45-degree angle to avoid any damage.
How to Unscrew Ring Doorbell Without Tool?
If you're trying to unscrew your Ring Doorbell without a tool, you can use everyday items as makeshift solutions.
A sturdy coin might fit into the slot of the security screw, allowing you to turn it counterclockwise.
Alternatively, try using a small piece of plastic, like a credit card, to pry the screw if it's loose.
Just be careful not to damage the doorbell or the wall while you're at it!
How Do You Unmount a Ring Doorbell to Charge?
Unmounting a Ring Doorbell to charge it's like opening a treasure chest.
First, grab the security screwdriver and remove the screw at the bottom of the faceplate.
Gently pull the bottom of the faceplate down and away to access the battery compartment.
Slide the lever to release the battery pack.
Charge the battery until it's full, then slide it back in, reattach the faceplate, and secure the screw.
Conclusion
To sum up, removing your Ring doorbell can be a straightforward process when you follow the steps outlined.
Curiously, studies show that homes with video doorbells see a 55% reduction in package theft, highlighting their effectiveness in enhancing security.
Whether you're charging the battery or permanently uninstalling the device, knowing how to manage it properly guarantees you maintain your home's safety.
Always keep your device settings updated in the app for peak performance and peace of mind.