To remove your Ring Doorbell, start by confirming whether it's battery-powered or hardwired. For battery models, simply take off the faceplate and disconnect the battery. If it's wired, turn off the power at the electrical panel, remove the security screw, and carefully detach the wires, noting their color codes. Once the device is free, clean the area and prepare for a potential reinstall or replacement. Always cap any exposed wires safely. Want to explore more tips and tricks for a smooth removal? There's plenty more to uncover that can help guarantee your project goes seamlessly.
Key Takeaways
- Turn off the power at the electrical panel to ensure safety before beginning the removal process.
- For battery-powered models, remove the faceplate to access and disconnect the battery.
- For wired models, locate and remove the security screw, then carefully detach the wiring while noting color codes.
- Remove the mounting bracket screws and angle the doorbell for safe extraction from the wall.
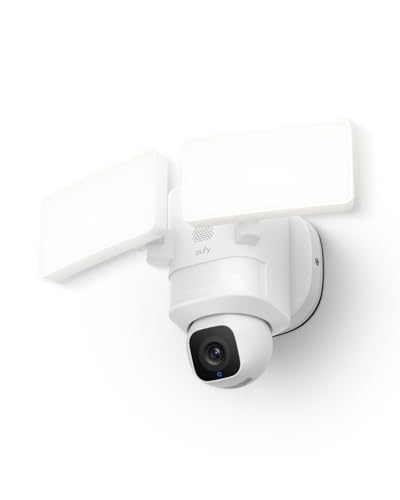
eufy Security Floodlight Camera E30, Security Camera Outdoor, 360° Pan and Tilt, AI Detection and Tracking, 2K Video, 2.4GHz Wi-Fi, 2,000 Lumens, Built-in Siren, 24/7 Recording,No Monthly Fee
360° Surveillance, Your All-Seeing Guardian: Enjoy complete 360° coverage of your property. Set the camera to patrol automatically...
As an affiliate, we earn on qualifying purchases.
Overview of Ring Doorbell Removal
Removing your Ring doorbell may seem intimidating, but with the right tools and knowledge, you can do it safely and easily.
First, you'll need to determine whether your model is battery-powered or hardwired. This distinction affects how you'll remove a Ring doorbell. Battery-powered models typically have a removable faceplate that can be taken off easily, allowing you to access the battery for replacement or removal. Additionally, it's significant to verify that you have the proper cleaning supplies on hand, as maintaining the area around your doorbell is vital for a tidy appearance, especially after removal. You might want to think about using a vacuum cleaner with appropriate attachments for a thorough clean.
For hardwired models, start by locating the security screw on the faceplate. You'll need a special screwdriver to remove this screw, so make sure you have that handy. Once the faceplate is off, carefully disconnect the wires. Pay attention to their color coding; this will help you verify everything is correctly reconnected if you plan to reinstall the device later.
After you've successfully removed your Ring doorbell, it's important to seal any holes left in the wall. Using silicone or filler will prevent bugs or leaks from entering your home.

Ring Floodlight Cam Wired Plus (newest model), Outdoor home or business security with motion-activated 1080p HD video and floodlights, White
*Powerful protection for any property* — 1080p HD security camera for your home or business with motion-activated LED...
As an affiliate, we earn on qualifying purchases.
Preparation for Removal

Before you tackle the removal, make certain to turn off the power supply at the electrical panel to confirm your safety. This step is vital to avoid any electrical hazards while you're working. Additionally, it's wise to be aware of any potential factors that might affect your work environment, including emotional attachment in cats, which can be important if you have pets that may be curious about the process.
Next, gather all the necessary tools for the job. You'll need a screwdriver, drill, safety goggles, and a soft cloth to catch any falling parts during the process.
It's also important to review the specific instructions for your Ring Doorbell model, as different models may have slightly different removal processes. This guarantees you know exactly what to expect and how to proceed efficiently.
Clear the area around the doorbell to provide easy access. Make sure you have adequate lighting to see what you're doing clearly.
Finally, consider checking the Ring app for any updates that might assist you in managing device settings before starting the removal.
With careful preparation, you can make the removal process smoother and safer. Remember, taking the time to prepare properly will help you avoid unnecessary complications during the actual removal.

eufy Security Camera Floodlight Camera E340 Wired, Security Camera Outdoor, 360° PTZ, 24/7 Recording, 2.4G/5G Wi-Fi, 2000 LM, Motion Detection, Built-In Siren, Dual Cam, HB3 Compatible, No Monthly Fee
24/7 Recording for Peace of Mind: Always on and always recording when local storage has been enabled by...
As an affiliate, we earn on qualifying purchases.
Disconnecting the Doorbell

To disconnect your Ring doorbell, you'll first need to turn off the power supply at the electrical panel for safety.
It's also wise to make certain that the air quality in your home is ideal during home repairs, as air purifiers can reduce allergens and create a healthier environment.
Next, you'll carefully remove the doorbell from its mounting bracket and detach any wiring if it's hardwired.
Let's go through the essential steps to make sure you do this safely and efficiently.
Power Disconnection Steps
Start by turning off the power supply to your Ring doorbell at the electrical panel to secure safety during the disconnection process. This step is essential to avoid any electrical hazards while you work.
If your model is battery-operated, you can simply remove or disconnect the battery instead. Before you begin, it might be beneficial to familiarize yourself with common household electrical safety practices to guarantee a smooth process. For more details on maintenance practices that can help prevent issues, refer to plumbing maintenance tips.
For hardwired models, you'll need to remove the security screw at the bottom of the doorbell first. This will allow you to access the terminal screws on the back of the device.
Carefully unscrew these terminal screws to detach the electrical wires. Make sure to note the color coding of the wires, so you can easily reconnect them later if needed.
Once all power sources are disconnected, gently pull the doorbell away from the mounting bracket. To secure safety, consider using wire nuts to cap any exposed wires after disconnection. This precaution will help prevent accidental contact with the wires while you complete your project.
With these power disconnection steps, you're well on your way to safely removing your Ring doorbell.
Detaching Wiring Safely
Make certain the power is off at the electrical panel before you begin detaching the wiring from your Ring doorbell. This step is essential to prevent any electrical hazards, especially since appliances can pose risks during disconnections.
Once you're sure the power's off, locate the terminal screws on the back of your doorbell. Using a screwdriver, loosen these screws to detach the electrical wires connected to the device.
Take note of the color coding of the wires—typically, red for power and white for neutral. This information is significant if you plan on reinstalling the doorbell later. As you remove the wires, make sure you cap any exposed ends with wire nuts. This helps prevent accidental contact and enhances safety during the removal process.
If you have gas appliances in your home, remember that they can still operate without power, but safety precautions are necessary for proper ventilation.
If you feel uncertain about handling the wiring, it's wise to consult a professional. They can help guarantee everything is done correctly and safely.
Removing the entire doorbell doesn't have to be complicated, but taking the right precautions will keep you safe and protect your home's electrical system. Follow these steps carefully, and you'll have your Ring doorbell detached without any issues.
Removing Mounting Bracket
Once you've safely detached the wiring, removing the Ring doorbell from its mounting bracket is the next step. First, make sure you've got the right tools handy, such as a Phillips-head screwdriver. It's important to handle the device carefully to avoid any damage, especially when considering the top models of garage door openers that share similar installation techniques.
Follow these steps to remove the Ring doorbell:
- Locate the screws: Find the screws securing the doorbell to the wall. These are usually Phillips-head screws.
- Remove the screws: Carefully unscrew them, making sure not to drop them or damage the wall.
- Angle the doorbell: Gently pull the doorbell away from the mounting bracket at a 45-degree angle. This prevents any damage to the device or the wall surface.
- Detach if hardwired: If it's hardwired, loosen the terminal screws to safely detach the electrical wires, noting their colors for reinstallation later.
For battery-operated models, simply lift the doorbell straight up from the base after removing any securing screws.
Once you've completed these steps, you've successfully removed your Ring doorbell from the mounting bracket.

Blink Wired Floodlight Camera, Smart security camera, 2600 lumens, HD live view, enhanced motion detection, built-in siren, Works with Alexa, 1 camera (White)
Help protect your home day or night with Blink Wired Floodlight Camera — a smart security camera with...
As an affiliate, we earn on qualifying purchases.
Handling Wires

When handling wires during the removal of your Ring doorbell, make sure you identify whether they're low voltage for wired models or battery connections for wireless ones. If you're dealing with a wired model, you'll need to carefully loosen the terminal screws to detach the electrical wires. Keep track of the color coding to guarantee proper reconnection later if you plan to reuse them.
To safely manage exposed wires, use wire nuts to cap them off, preventing any accidental contact with electrical components. Tape any loose wires to the wall to keep them secure and avoid potential hazards during the removal process. If you don't plan to reuse the wires, store them safely to prevent damage or confusion in future installations.
Here's a handy table to guide you through the wire handling process:
| Step | Action | Notes |
|---|---|---|
| 1. Identify Wires | Check if they are low voltage or battery | Essential for safety |
| 2. Cap Wires | Use wire nuts for exposed wires | Prevents accidental contact |
| 3. Tape Loose Wires | Secure them to the wall | Avoids hazards during removal |
| 4. Disconnect Wires | Loosen terminal screws | Note color coding for reconnection |
| 5. Store Wires | Keep them in a safe location | Prevents damage or confusion later |
Cleaning and Maintenance

Regularly cleaning your Ring doorbell is essential for guaranteeing ideal video quality and performance. A clean doorbell not only enhances footage clarity but also helps maintain its functionality over time. Here are some key cleaning and maintenance tips to keep in mind:
- Wipe the Surface: Use a soft, lint-free cloth with a mild soap solution to gently clean the camera lens and housing. This prevents dirt build-up that can obscure the camera view.
- Inspect the Mounting Area: Check the area around the mounting surface for dirt or debris. Removing any buildup helps maintain the adhesive seal, guaranteeing your doorbell stays securely attached.
- Check Screws and Faceplate: Periodically inspect the screws and faceplate for wear or corrosion. Tighten any loose screws to prevent loosening over time.
- Clean Battery Contacts: For battery-operated models, guarantee you clean the battery contacts and check for corrosion. This will help maintain a reliable power connection.
Reinstallation or Replacement

Reinstalling or replacing your Ring doorbell can reinvigorate your home security system, guaranteeing it operates at peak performance. If you're planning a reinstallation, make certain you have the original installation instructions for your specific Ring Doorbell model. These guidelines will help you navigate the process smoothly.
When replacing your Ring Doorbell, double-check that the new model is compatible with your existing wiring and infrastructure. This compatibility will save you time and potential frustration during installation.
After reinstalling, don't forget to update your settings in the Ring app to reflect the new device and connect it to your home Wi-Fi network.
Once everything's set up, test the functionality by pressing the button and checking the video feed and notifications on your smartphone. This step is essential to verify your doorbell is working correctly.
If you encounter any issues during the reinstallation, don't hesitate to consult Ring's support resources or community forums for troubleshooting tips. They can provide valuable assistance and help you get your Ring Doorbell back in action quickly. A properly functioning doorbell enhances your peace of mind and overall security.
Alternative Removal Techniques

Several alternative removal techniques can help you safely detach your Ring Doorbell without the original tools. If you find yourself in a bind, consider these methods:
- Use a Flathead or T15 Torx Screwdriver: If you don't have the specific Ring screwdriver, a small flathead or T15 Torx screwdriver can work to manipulate the security screw for faceplate removal.
- Rubber Band Trick: For stubborn screws that won't budge, place a rubber band over the stripped screw head. This can enhance grip and facilitate removal.
- Hand Manipulation: Examine the doorbell's mounting method closely. Look for any levers or tabs that you might be able to manipulate by hand for easier removal.
- Dull Edge Tool: If needed, employ a dull edge tool, like a paint scraper, to gently pry the doorbell away from the mounting bracket. This minimizes the risk of damage during the removal process.
If you're still struggling, don't hesitate to reach out to the Ring Community for shared experiences and additional tips. These alternative removal techniques can make your task easier and guarantee a smooth removal process.
Customer Support Considerations

When you need help with your Ring Doorbell, understanding support availability and hours is essential.
You can choose from various contact methods, like phone, chat, or email, to get the assistance you need.
Plus, utilizing troubleshooting resources can make resolving your issues much smoother.
Support Availability and Hours
To get the help you need with your Ring Doorbell, customer support is available through various channels like phone, email, and live chat. The support team is dedicated to ensuring you have the assistance you require. It's crucial to note that support hours may vary by region, but typically, you can reach them from 5 AM to 9 PM PST.
Here are some key points to keep in mind:
- Check Local Hours: Make sure to verify the specific support hours for your region on the Ring website.
- Plan for Peak Times: Response times might be longer during busy hours or due to COVID-19 precautions, so try to reach out during off-peak times.
- Use Available Numbers: Keep the available numbers handy for quicker access to support.
- Explore the Ring Community: For faster resolutions, consider engaging with the Ring Community, where you can find peer support and shared troubleshooting experiences.
Contact Methods Overview
Ring provides various contact methods, guaranteeing you can easily reach customer support for any inquiries or issues you may encounter. You can choose from phone, email, and live chat options, which cater to your preferences for communication.
If you're located outside the U.S., don't worry—Ring directs you to specific regional support resources designed to provide effective assistance based on your location.
Keep in mind that due to increased demand, especially during COVID-19 precautions, you might experience longer wait times when you reach out for help. To make the most of your support experience, it's essential to document any issues thoroughly before contacting customer support. This preparation can expedite the process and give the representatives a clearer understanding of your situation.
If you need to manage your Ring account to post inquiries or track your support requests, having your account information ready will save you time and hassle. By utilizing these contact methods effectively, you can guarantee that your questions are answered and issues resolved in a timely manner.
Troubleshooting Assistance Resources
Accessing troubleshooting assistance resources can greatly enhance your experience with the Ring doorbell, ensuring your issues are resolved quickly and efficiently. Here are some steps you can take to get the help you need:
- Visit the Official Ring Website: Check for various contact methods, including phone, chat, and email options.
- Document Your Issues: When reaching out for troubleshooting assistance, jot down specific problems and relevant details to speed up the resolution process.
- Consider Timing: Due to high demand, you might encounter longer wait times. Try to reach out during off-peak hours for quicker support.
- Join in the Discussion: Participate in the Ring Community platform. Here, you can share experiences and solutions with other users who might've faced similar issues.
Frequently Asked Questions
How Do You Take off a Ring Doorbell?
To take off a Ring Doorbell, start by turning off the power at your electrical panel if it's wired, or remove the battery for battery-operated models. Next, use a screwdriver to loosen the security screws located at the bottom of the device. Once the screws are removed, gently pull the doorbell away from its mounting bracket. To remove Ring Doorbell completely, disconnect any wiring that may still be attached if it’s a wired model.
Grab the security screwdriver included in your package and remove the security screw at the bottom of the faceplate.
Pull the faceplate down and unscrew the doorbell from its mounting bracket.
If it's wired, carefully disconnect the wires, noting their colors for reinstallation.
Are Ring Doorbells Easy to Take Off?
You might be wondering, just how easy is it to take off a Ring doorbell?
Well, it's generally a straightforward task. Most users find that with the right tools and a little patience, you can have it removed in just minutes.
The only tricky part can be the security screws, which might give you some trouble if they've been stripped.
But don't worry, you've got this!
How to Get Ring Doorbell off Mount?
To get your Ring Doorbell off its mount, start by ensuring the power's off.
Use the security screwdriver to remove the screw at the bottom of the faceplate.
Gently pull the bottom of the faceplate down and towards you.
If it's a wired model, unscrew the mounting screws and carefully detach the doorbell from the bracket.
For battery-operated versions, simply pull it off the base after taking off the faceplate.
How to Unscrew Ring Doorbell Without Tool?
If you don't have a tool to unscrew your Ring doorbell, try using a small flathead screwdriver or a T15 Torx screwdriver if you have one lying around. Be careful not to apply too much force, as this could strip the screw or damage the doorbell housing. It’s important to handle the device gently to avoid tampering with its integrity and risking any warranty coverage. However, tampering with or bypassing Ring doorbell detection is not advisable, as it could lead to security vulnerabilities or unauthorized activity being flagged.
Apply pressure while turning the screw counterclockwise to avoid stripping it.
If the screw's stubborn, a rubber band can give you better grip.
Be careful and make certain the power is off before attempting any removal to stay safe and avoid electrical hazards.
Conclusion
To summarize, removing your Ring Doorbell can be straightforward if you follow the right steps.
Did you know that over 50% of households with smart doorbells report feeling more secure?
By safely disconnecting and handling the wires, you can guarantee a smooth removal process.
Whether you're reinstalling it or exploring new options, keeping your home secure is always a priority.
So, take your time, and enjoy the benefits of smart home technology!