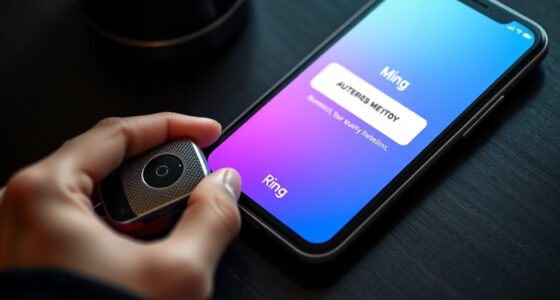
To fix your Ring Doorbell to a uPVC door, start by avoiding drilling, as it can compromise the door's integrity. Use self-tapping screws for a sturdy attachment without pilot holes. If you're not keen on drilling, consider adhesive options, but be cautious of potential paint damage. Make sure you have adequate wall space and mount the doorbell at about 1.2 meters for best functionality. Check the screw tightness to prevent wobbling. Facing challenges? Engaging with the community can provide helpful insights and solutions to guarantee a secure installation that works seamlessly with your door. If you encounter any difficulties with fixing ring doorbell issues, remember to consult the manufacturer’s instructions or customer support for troubleshooting advice. Additionally, online forums and discussion groups can offer valuable tips from individuals who have encountered similar challenges. Stay proactive and patient to ensure a successful installation and optimal performance of your Ring Doorbell on a uPVC door.
Key Takeaways
- Use self-tapping screws for easy installation on uPVC, avoiding the need for pilot holes.
- Consider adhesive no-drill mounting options to prevent damage to the door frame.
- Ensure adequate wall space and install the doorbell at a height of about 1.2 meters (4 feet).
- Verify that screws are tightened securely to prevent wobbling and maintain stability.
Installation Challenges
Installing a Ring Doorbell on a uPVC door presents several unique challenges that can complicate the process.
First, the smaller uPVC door frame often limits your mounting options, making it tricky to find the right spot. You might feel tempted to drill into the uPVC, but that's generally discouraged since it can affect the door's aesthetics and integrity. Instead, you need to explore alternative ways to install the doorbell without compromising your door's appearance. Understanding the importance of key factors in choosing a service can also help you think creatively about installation methods that don't involve drilling.
Another significant concern is ensuring a secure installation method to prevent theft. You want a setup that keeps your Ring Doorbell firmly in place, especially since users report varying experiences during installation. Some find success despite tight fits, while others struggle with the process.
Engaging with the community can be invaluable here; many users share their tips for overcoming specific challenges related to uPVC doors. Take the time to explore these insights and reach out for help when needed.
Alternative Installation Methods

If the standard installation methods aren't working for you, consider some alternative options that can enhance your installation experience.
For instance, utilizing effective content strategies can guide you in selecting the right mounting solutions tailored to your specific needs.
You might install your Ring Doorbell on an adjacent wall, use self-tapping screws, or explore mounting brackets specifically designed for uPVC surfaces.
Each of these methods can provide a secure and effective solution for your doorbell setup.
Adjacent Wall Installation
Mounting your Ring Doorbell on an adjacent wall can be a practical solution when your uPVC door frame presents challenges. This method not only offers a more secure installation but also guarantees better accessibility for you and your visitors.
To get started, check for sufficient wall space that can accommodate the doorbell on the wall. Aim to position the doorbell at about 1.2 meters (4 feet) from the ground for the best camera view and functionality. Additionally, consider the benefits of enhancing your home security with modern technology, as you can also explore various garage door openers that offer smart features for remote access.
When you're ready to install the doorbell, you'll want to use self-tapping screws for a sturdy attachment. Make sure to level the doorbell before securing it to avoid any functional issues later on. Once you've drilled the holes and started the screws, tighten them adequately to prevent any wobbling.
Many community members have shared their experiences with adjacent wall installations, providing valuable insights that can help you along the way. Whether you're facing issues with your uPVC frame or just prefer this location, installing your Ring Doorbell on an adjacent wall can enhance your home security and convenience.
Self-Tapping Screw Usage
How can self-tapping screws simplify the installation of your Ring Doorbell on a uPVC surface? Using self-tapping screws can greatly streamline the process. These screws are perfect for securely attaching your doorbell without the hassle of drilling pilot holes.
In some cases, confirming proper installation can also prevent damage to your door or doorbell, similar to the importance of regular HVAC maintenance for peak performance.
You'll find two types of self-tapping screws: thread-forming, which require a pilot hole, and thread-cutting, which don't. Opt for thread-cutting screws for a quicker installation on your uPVC door.
To get the best camera view, install the doorbell at a height of about 1.2 meters (4 feet). As you install, confirm that the screws are tightened adequately to avoid any wobbling, providing a stable and secure fit for your doorbell.
Be mindful of the screw length; you want to avoid interfering with the door's operation while confirming the doorbell is firmly attached.
Mounting Brackets Options
Choosing the right mounting bracket for your Ring Doorbell can make installation easier and enhance its functionality on a uPVC door. With the right setup, you can enjoy a seamless integration that complements your home's exterior, much like how a modern farmhouse bedroom creates a serene atmosphere. Here are some options to take into account:
- Wedge and Corner Mounts: These brackets allow you to adjust the angle of the doorbell, which is especially helpful on curved or textured uPVC surfaces. This guarantees you get the ideal camera view.
- Self-Tapping Screws: Ideal for uPVC surfaces, these screws securely attach your Ring Doorbell without needing pilot holes. Their thread-cutting design means a firm fit, keeping your device safe and stable.
- Adhesive Mounting Solutions: If you're concerned about aesthetics or potential damage, adhesive options provide a no-drill solution. However, be cautious since removing them may damage the paint on your door.
User Experiences

When it comes to installing your Ring Doorbell on a uPVC door, you'll find a mix of success stories and common struggles shared by fellow users.
Some have nailed the process with helpful tips, while others faced challenges that required creative solutions.
For instance, many users highlighted the significance of proper measurements and tools in ensuring a smooth installation, which can greatly enhance your user experience.
Let's explore these experiences to help you navigate your own installation journey.
Success Stories Shared
Numerous users have shared their success stories of installing Ring Doorbells on uPVC doors, often highlighting the effectiveness of self-tapping screws for a secure fit. Here are three key takeaways from their experiences:
- Self-Tapping Screws: Many users found that these screws provided a reliable installation method, ensuring the doorbell remained firmly in place.
- No-Drill Mounts: Some community members successfully used adhesive no-drill mounts, bonding their doorbell to the uPVC frame without any damage, which is ideal for those hesitant to drill.
- Installation Images: Sharing installation images has become a valuable resource. Users often post photos of their setups, helping others visualize the process and make informed choices.
Feedback from the community emphasizes the importance of adjusting screw lengths to prevent interference with the door's operation while maintaining stability.
Additionally, various mounting techniques, like wedges or corner mounts, have been documented to optimize camera angles on curved surfaces.
Common Installation Struggles
While many have shared their success stories, others face common installation struggles when mounting Ring Doorbells on uPVC doors.
One major issue is the limited frame size and compatibility of standard installation kits designed for wooden doors. You might find that self-tapping screws don't hold securely, raising concerns about the security and stability of your mounting techniques on uPVC surfaces.
Additionally, many users report tight fits that can hinder achieving a superior camera view without interfering with door operation. This can be frustrating, especially when you want to guarantee your security system performs at its peak.
Community feedback often emphasizes checking screw tightness and verifying you have adequate wall space for secure mounting.
Since installation experiences can vary greatly, it's crucial to seek tailored advice for your specific uPVC door configuration. This way, you can avoid common pitfalls and make the installation process smoother.
Tips From Community Members
Many community members have shared valuable tips that can simplify your Ring Doorbell installation on uPVC doors. Here are three key takeaways to reflect on:
- Self-Tapping Screws: These screws are highly recommended for securely attaching your Ring Doorbell. They provide a strong hold without needing pilot holes, making installation much easier.
- No-Drill Mounting: If you prefer a no-drill option, many users found success with it. Just remember to apply pressure for a few minutes to guarantee a solid bond with the adhesive.
- Height Adjustment: Adjusting the installation height to around 1.2 meters (4 feet) can improve your doorbell's field of view and functionality. This height is ideal for capturing clear footage of visitors.
Additionally, sharing images and specific installation tips within the community can greatly assist others who may face challenges, such as securing the mount against theft.
Troubleshooting Tips

If you encounter issues with your Ring Doorbell after installation, start by verifying it's securely mounted and positioned for peak performance. Additionally, ensure that your Wi-Fi signal strength is sufficient, as a weak signal can cause problems with video streaming and notifications. If you’re fixing poor connection on Ring, try moving your router closer to the doorbell or use a Wi-Fi extender to improve signal strength. Finally, check for any firmware updates in the Ring app, as installing the latest updates can often resolve performance issues.
Make sure there's sufficient wall space beside your uPVC door for the doorbell, ideally at a height of around 1.2 meters (4 feet). This height offers the best camera view. Check that all screws are adequately tightened; any wobbling can affect functionality.
Next, verify the doorbell's positioning. It should be free from obstructions like the door frame or nearby structures, as these can hinder its operation and alert capabilities. Additionally, ensure the doorbell is mounted at an optimal height, typically around four feet from the ground, to provide good visibility and easy access. If the doorbell or chime does not function correctly, you may need to troubleshoot and look up guides such as “how to repair ring chime” for specific instructions. Keeping the system properly maintained ensures reliable performance and prevents missed alerts.
After you've confirmed the installation, test the doorbell's functionality. Confirm it's properly connected to your Wi-Fi network and that it can record and send alerts as intended.
If you're still facing problems, don't hesitate to seek advice from the Ring community. Many users share valuable troubleshooting tips based on their experiences with uPVC installations, which can help you resolve specific issues you may encounter.
Community Engagement

Engaging with the Ring Community can provide invaluable support as you navigate the challenges of installing your Ring Doorbell on a uPVC door. By becoming an active member of this community, you can access a wealth of knowledge and experiences that can greatly ease your installation journey.
Here are three key benefits:
- Expert Advice: You can post a question about specific installation issues, getting tailored solutions from seasoned users.
- Shared Experiences: Learn from others who've tackled similar challenges, offering insights that you mightn't find elsewhere.
- Tips and Tricks: Members regularly share effective methods for securely mounting Ring Doorbells on uPVC surfaces, enhancing your success rate.
Installation Options

When installing your Ring Doorbell on a uPVC door, you have several effective options to assure a secure and stable fit. One of the best methods is using self-tapping screws. These screws allow you to attach the doorbell directly without needing pilot holes, guaranteeing a firm hold.
Be sure to position the Ring Doorbell at an ideal installation height of about 1.2 meters (4 feet) from the ground; this height maximizes its field of view.
If you prefer a less invasive approach, consider using a no-drill mount with double-sided adhesive. This method allows for quick installation directly on the uPVC frame, without compromising the surface.
For areas with textured or curved surfaces, mounting brackets or wedges can help achieve the right angle and view for your doorbell.
Regardless of the installation method you choose, assure that all screws are tightened adequately. This helps prevent wobbling and maintains stability over time.
Frequently Asked Questions
Can You Attach a Ring Doorbell to an Upvc Door?
Yes, you can attach a Ring Doorbell to a uPVC door.
You'll need self-tapping screws or a no-drill mount with adhesive strips designed for that surface.
Make certain to install it at about 1.2 meters (4 feet) high for the best camera view.
If you opt for screws, tighten them well to prevent wobbling.
Double-sided foam tape is an option too, but make sure the surface is clean and dry for a strong bond.
Can You Drill Through an Upvc Door Frame for a Doorbell?
Yes, you can drill through a uPVC door frame for a doorbell, but you should be cautious.
Drilling might weaken the frame's structure, so it's best to use self-tapping screws specifically designed for uPVC. These screws can secure your doorbell without needing pre-drilling.
However, consider alternative methods like wall mounting or adhesive mounts to avoid drilling altogether.
Always check local regulations and guidelines before making any modifications to your uPVC door.
How Do You Attach a Ring Doorbell to a Door Without Drilling?
If you're looking to enhance your home's security without making a fuss, attaching your Ring Doorbell without drilling is a breeze.
Start by using the no-drill mount that comes with it. Position it about 48 inches from the ground, mark your spot, and press it firmly against the door frame.
After securing the mount, attach the doorbell using the provided screws.
This way, you'll enjoy peace of mind without any hassle!
How Do I Fix My Ring Doorbell to Door?
To fix your Ring Doorbell to your door, start by choosing the right method for attachment.
You can use self-tapping screws for a secure fit, or opt for a no-drill mount with double-sided adhesive if you want a damage-free option.
Confirm the doorbell's installed at about 1.2 meters high for the best view.
Always tighten screws properly and check the manual for specific instructions to make certain everything's set up correctly.
Conclusion
In the end, securing your Ring doorbell to a UPVC door doesn't have to be an intimidating task.
With a little patience and the right approach, you'll have it installed in no time.
Remember, it's not just about mounting; it's about connecting with your home and enhancing your security.
So, embrace the process, get creative, and soon enough, you'll have peace of mind right at your fingertips—because a safer home is just a doorbell away.