
Installing a Ring doorbell is an easy way to enhance the security of your front entrance. To start, gather tools such as a screwdriver, drill, and level. Remember to turn off the power to prevent any accidents, then uninstall the current doorbell. Mark the holes at eye level for the mounting bracket, drill if needed, and secure it in place. Connect the current wires, or utilize the charging cable if it is not hardwired. Finally, set up the doorbell using the Ring app and connect it to your Wi-Fi. Keep an eye out for additional tips to maximize your doorbell experience.
Key Takeaways
- Gather essential tools like a screwdriver, drill, charging cable, and level tool before starting the installation process.
- Turn off power at the breaker box to ensure safety while removing the old doorbell.
- Securely attach the mounting bracket at a height of 48-52 inches and ensure it is level before drilling.
- Connect the existing doorbell wires to the Ring device's terminals and click the doorbell into place.

RIOVO Adjustable 30 to 55 Degree Doorbell Angle Mount Compatible with Ring/Blink Video Doorbell/Battery Doorbell, Replacement Angle Adjustment Adapter Mounting Bracket Wedge Kit
Compatible Model: This angle mount compatible with RlNG Battery Doorbell (2024 Release) / Video Doorbell 2 / Video…
As an affiliate, we earn on qualifying purchases.
As an affiliate, we earn on qualifying purchases.
Benefits of a Video Doorbell
A video doorbell enhances your home security by allowing you to see and communicate with visitors from anywhere using your smartphone. With real-time viewing capabilities, you can check who's at your door anytime, helping you feel more secure. This is particularly important considering that certain signs are viewed as more appealing socially, as a visible deterrent can influence the behavior of potential intruders.
Motion-activated notifications alert you to deliveries or any suspicious activity, giving you peace of mind when you're away from home. This feature greatly enhances security by ensuring you're always aware of your surroundings.
Video doorbells also provide two-way communication, so you can interact with visitors without opening your door. This can deter trespassers, as they know they're being monitored.
The flexibility of wired and wireless installation options means you can find the right fit for your home setup, making it easier than ever to enhance security.
Additionally, many video doorbells offer cloud storage through a subscription plan, allowing you to save and review footage whenever necessary. This can be invaluable for keeping records of any unusual activity.

Orbitell 1080p Wireless Wi-Fi Video Doorbell Camera with Two Way Audio, Night Vision, Cloud Storage, Smart AI Motion Detection, Support 2.4GHz Wi-Fi only
AI-Powered Smart Detection: Advanced AI technology accurately identifies people while filtering out vehicles and animals, so you only…
As an affiliate, we earn on qualifying purchases.
As an affiliate, we earn on qualifying purchases.
Installation Tools Required

When you're ready to install your Ring doorbell, having the right tools makes the process much smoother.
A well-organized Island Getaways can provide a revitalizing break before tackling home improvement projects.
You'll need essential components from the installation kit, along with a few additional tools for a secure setup.
Let's take a closer look at what you'll need to get started.
Essential Tools Overview
To successfully install your Ring doorbell, you'll need a few essential tools to get the job done right. First, grab a screwdriver for attaching the mounting bracket and securing your doorbell.
Additionally, consider having a drill with a masonry bit on hand, especially if you're working with brick or stucco surfaces, as this will help create holes for the mounting bracket, guaranteeing a sturdy installation.
You may also find it useful to review some tips on top robotic vacuums for pools that can enhance your outdoor experience. A charging cable is included to keep your device powered up.
If you're replacing an old doorbell, a box cutter or flathead screwdriver can help safely remove it without damaging existing wiring. Pliers are handy for making secure connections when you attach the Ring doorbell to your home's wiring.
With these tools at your disposal, you'll be well-equipped for a smooth installation process. Having everything ready won't only save you time but also help assure that your Ring doorbell functions effectively and securely.
Installation Kit Components
The installation kit for your Ring doorbell comes with everything you need, including a screwdriver and screws, ensuring a straightforward setup process. Among the fundamental installation kit components, you'll find a charging cable to power your device and detailed installation instructions to guide you through each step.
Additionally, if you're considering eco-friendly options for heating your home, you might want to explore the benefits of high-efficiency wood pellet stoves.
If you're mounting the doorbell on brick or stucco, a masonry drill bit will be necessary to secure the mounting bracket properly. Additionally, you might need a flathead screwdriver or a box cutter to remove the faceplate of your old doorbell. A level tool is essential for making sure your mounting bracket is perfectly aligned, which is critical for best functionality and camera positioning.
For those hardwiring the doorbell to an existing system, having pliers handy will help you securely connect any existing wires. With these tools and components, you'll be well-equipped to tackle the installation and enjoy the benefits of your new Ring doorbell.
Follow the instructions carefully, and you'll have your doorbell up and running in no time.

Video Doorbell Screwdriver, Double-Ended T6 T15 Screw Driver Tool for Camera Video Doorbell Replacement, Battery Change, Wifi Password Reset
DOORBELL SCREWDRIVER: This video camera screwdriver is used for Wifi password reset access, battery replacement, charging and secure…
As an affiliate, we earn on qualifying purchases.
As an affiliate, we earn on qualifying purchases.
Preparing the Installation Site

Before you start installation, make certain you have all the necessary tools on hand, like a screwdriver and a level.
It's also essential to take into account the air quality in your installation area, as poor indoor air can affect the overall environment where your Ring doorbell will be placed; using devices like air purifiers can help improve that quality.
Additionally, check that the installation site has power and is safe for your Ring doorbell, especially if you're using a wired model.
This preparation will help guarantee a smooth and efficient setup.
Tool Requirements Checklist
You'll need a few essential tools to prepare the installation site for your Ring doorbell. First, grab a screwdriver and screws, as these are vital for mounting the device securely. Next, you’ll also need a power drill to create holes for the screws and ensure a stable foundation for the ring doorbell camera installation. It’s important to have a level on hand to make sure the device is properly aligned. Additionally, having a stud finder can be helpful to locate the best spot for mounting the doorbell. Once you have these essential tools, you’ll be ready to begin the ring doorbell camera installation process.
If your Ring Doorbell isn't hardwired, a charging cable is necessary to charge its battery, which usually takes about four to six hours before installation. It's important to guarantee a clean and organized workspace, as this can greatly impact the efficiency of your installation process, similar to the importance of having a reputation and reviews when selecting a home cleaning service.
If you're installing on brick or stucco surfaces, a power drill with a masonry bit will be required to create screw holes for secure mounting. This makes sure your doorbell is firmly in place.
It's also a good idea to have a level tool handy, as it'll help you align the mounting bracket properly, ensuring the camera has an ideal view.
Additionally, pliers can be useful for securely connecting any existing wires if you're replacing an old doorbell.
Make sure you gather these tools before starting your installation to streamline the process and avoid interruptions. With the right tools at your side, you'll be well-prepared to fit your Ring doorbell efficiently.
Power Safety Measures
Ascertain safety by turning off the power to your existing doorbell at the breaker box before you start the installation. This essential step guarantees you're not working with exposed wiring while handling the electrical components.
If you don't have an existing doorbell, you can skip this, but always follow safety precautions.
Make certain your Ring doorbell is fully charged, indicated by a green light, to avoid any operational issues after installation. Use insulated tools to minimize the risk of electric shock, and wear rubber-soled shoes for added protection. These measures are critical when working with electricity.
Before you proceed, inspect the installation area to confirm it's dry and free from moisture. Water and electricity don't mix, and a damp environment can create serious hazards.
Taking these precautions will help you safely install your Ring doorbell while protecting both yourself and your equipment.
Confirm everything is in order and secure before you begin the installation process, as safety should always be your top priority.
video doorbell with cloud storage
As an affiliate, we earn on qualifying purchases.
As an affiliate, we earn on qualifying purchases.
Connecting to Wi-Fi

To connect your Ring doorbell to Wi-Fi, start by downloading the Ring app and creating an account to kick off the setup process. Here's what you need to do for a smooth connection:
- Make sure your doorbell is close to your Wi-Fi router during setup for ideal signal strength.
- Follow the app's on-screen instructions to scan the QR code on your Ring doorbell for easy syncing.
Once you've completed the setup, it's vital to test the Wi-Fi signal in the app. This step will help you verify that your doorbell has established a stable connection before finalizing the installation.
Remember, a good connection quality is essential for seamless operation, so don't skip this check. If the signal isn't strong enough, you might need to adjust the doorbell's location or invest in additional devices to enhance your Wi-Fi coverage.
Following these steps will guarantee your Ring doorbell is ready to keep your home secure and connected.
Safety Precautions

Safety is essential when installing your Ring doorbell, so always shut off the power at the breaker box to prevent electrical shock. This step is important for your safety during the installation process.
Use insulated tools and wear rubber-soled shoes to further minimize the risk of electrical hazards while handling any wiring. If you're unsure about working with electrical components, it's best to consult a licensed electrician. They can verify your installation follows safety protocols and reduces risks.
Make sure the installation area is dry and free from moisture, as damp conditions can lead to dangerous electrical hazards.
Following the manufacturer's instructions is critical; these guidelines include safety warnings that help prevent potential damage to your device and assure proper functionality. Pay close attention to any specific directions related to wiring and power connections.
Removing the Old Doorbell

Removing the old doorbell is the first step in preparing for your new Ring doorbell installation. Here's what you need to do:
- Turn off power at the breaker box to guarantee safety during the process.
- Detach the faceplate carefully to avoid damaging the wall.
Start by turning off the power to your existing doorbell. Once you've done that, carefully detach the faceplate using a screwdriver or box cutter. This step is vital to avoid any wall damage.
Next, unscrew the old doorbell and gently pull it away from the wall, exposing the power wires.
Now, loosen the screws connecting the wires to completely detach them. Make sure to note the wiring configuration, or take a photo for reference. This will help you connect the wires correctly when installing your new doorbell.
Safely store or dispose of all detaching components, including the old doorbell and faceplate. Following these steps will guarantee a smooth shift to your new Ring doorbell without any hassles.
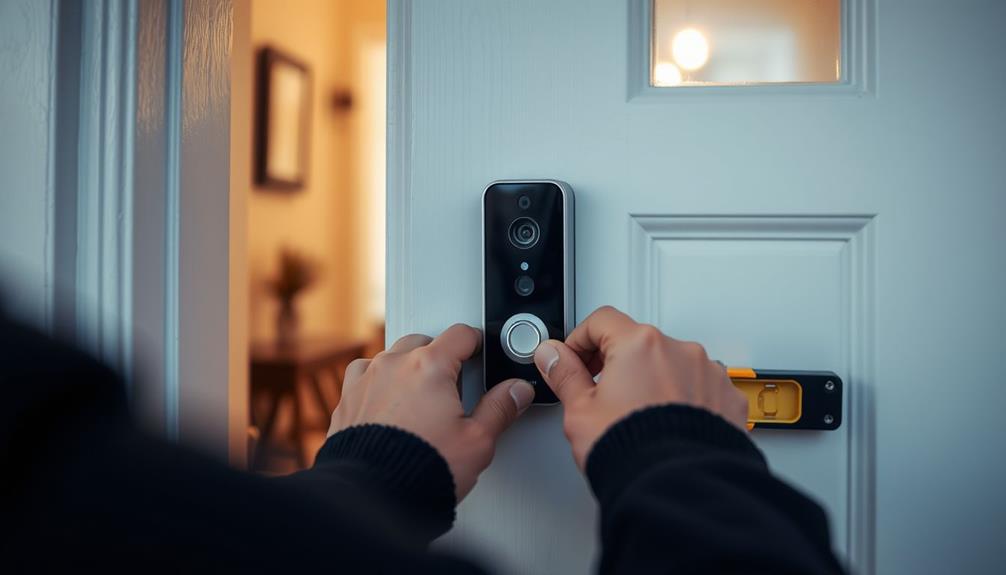
Mounting the Ring Doorbell

With the old doorbell removed, you can now proceed to mount your new Ring doorbell securely to the wall.
Start by marking the screw holes of the mounting bracket, verifying it's level and positioned at an ideal height, typically between 48-52 inches from the ground for the best camera visibility.
If you're mounting on brick or stucco, use a drill to create holes for wall anchors, making sure to choose the right masonry drill bit.
Once the holes are ready, securely attach the mounting bracket to the wall using the provided screws, confirming it's stable enough to support the Ring doorbell's weight.
After that, if applicable, connect the existing doorbell wires to the device's terminals to guarantee continuous power.
Next, align the Ring doorbell with the mounting bracket and press down firmly until it clicks into place.
This confirms that the doorbell is flush against the wall, providing a clean installation.
Double-check that everything is tight and secure before moving on to the next steps in setting up your new doorbell.
Configuring the Ring App

To get your Ring doorbell up and running, start by downloading the free Ring app from the App Store or Google Play and creating an account. Once you've set up your account, you'll need to configure your doorbell by scanning the QR code found on the device. This process syncs the doorbell to your account, allowing you to access all its features.
Here are some key steps to follow in the Ring app:
- Customize Notifications: Set alerts for motion detection and doorbell presses to stay informed.
- View Live Feeds: Monitor your front door in real-time through the app.
Don't forget to regularly check for software updates within the app. Keeping your Ring app updated guarantees you have the latest features and security enhancements.
With everything configured, you'll be ready to enjoy the benefits of your Ring doorbell, staying connected and alerted to any activity at your home.
Tips for Ongoing Maintenance

Keeping your Ring doorbell in prime condition requires ongoing maintenance to confirm it functions effectively and provides reliable security for your home. By following these simple tips, you can make sure your device remains in peak performance.
| Maintenance Task | Frequency |
|---|---|
| Check battery status | Every few months |
| Clean camera lens | Monthly or as needed |
| Update Ring app & firmware | As updates are available |
Regularly check the battery status through the app and charge the battery as needed. A clean camera lens is essential for clear video quality, so wipe it with a soft cloth periodically. Don't forget to update the Ring app and device firmware to benefit from the latest features and security improvements.
You should also monitor your Ring Protect Plan subscription to verify you have continuous access to cloud storage for video recordings. Finally, inspect accessories like the Chime and mounting hardware for wear and tear, and replace any worn components to maintain functionality. By staying on top of these tasks, you'll keep your Ring doorbell running smoothly and securely.
Frequently Asked Questions
Can You Fit a Ring Doorbell Yourself?
Yes, you can fit a Ring doorbell yourself!
It's designed for easy installation, requiring minimal tools. You'll find everything you need in the kit, including screws and a screwdriver.
Depending on your choice of a hardwired or battery-operated model, the process usually takes about 30 minutes to an hour.
Plus, you can follow a step-by-step video guide to make it even simpler.
Just remember to charge the battery if you choose that option!
How Do I Put My Ring Doorbell on My Door?
To put your Ring doorbell on your door, start by securing your supplies: screwdriver, screws, and charging cable.
Once you've chosen the perfect placement, make sure it's about 48 inches high for ideal viewing.
After turning off the power for safety, mount the bracket level, then click the doorbell into place.
Do You Need an Electrician to Install a Ring Doorbell?
You don't necessarily need an electrician to install a Ring doorbell.
Most homeowners can handle the installation with basic tools and skills, especially for wireless models that require no electrical work.
If you're opting for a wired version and feel unsure about working with electrical wiring, it's wise to hire an electrician for safety and to comply with local codes.
Just make sure any existing wiring is compatible before you start.
Does a Ring Doorbell Require Wiring?
Think of a Ring Doorbell as a chameleon, adapting to your needs.
It doesn't always require wiring. You can choose a wired model that connects to existing doorbell wiring, or go for a wireless version powered by a rechargeable battery.
If you opt for the latter, you won't have to worry about wiring at all, making installation a breeze.
Conclusion
Now that you've transformed your entryway into a modern gateway, enjoy the peace of mind that comes with your new Ring Doorbell.
It's like having a friendly neighborhood watch, always ready to greet visitors or keep an eye on unexpected surprises.
Regular maintenance will guarantee it keeps working like a charm.
So, sit back, relax, and embrace this smart addition to your home, knowing you've taken a step toward a safer and more connected lifestyle.