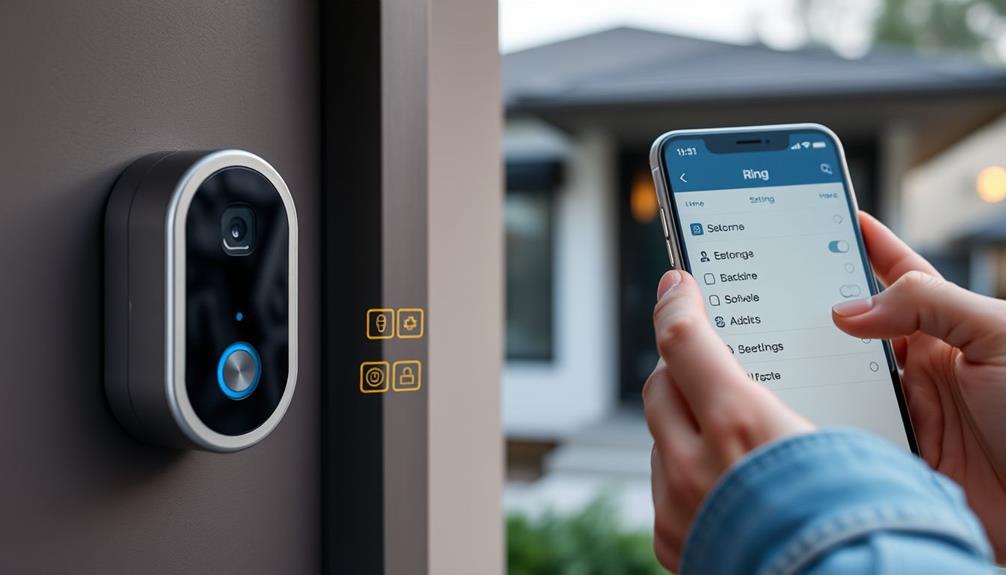
To delete privacy zones on your Ring Doorbell, open the Ring app on your smartphone or tablet and select the specific doorbell. Navigate to "Camera" in the device settings, then go to "Detections & Privacy Zones." Tap on "Privacy Zones" to view current zones. Select the zone you want to remove and hit the bin icon to delete it. Confirm the deletion, then save your settings. If you don't see immediate updates, try renewing the app. There's more you can do to manage privacy effectively, so keep exploring your options for the best results.
Key Takeaways
- Open the Ring app, select your Ring Doorbell, and navigate to "Camera" in device settings to access privacy zones.
- Go to "Detections & Privacy Zones," tap "Edit Privacy Zones," and select the specific zone you wish to delete.
- Tap the bin icon to initiate the deletion process and confirm your choice to remove the identified zone.
- Save your changes and reload the camera view to ensure the updates take effect and reflect accurately.
Understanding Privacy Zones
Privacy zones on your Ring doorbell let you specify areas that the camera won't monitor, giving you better control over your privacy. This feature is fundamental for ensuring that sensitive areas, like your neighbor's yard or your front porch, remain outside of your camera's view.
Understanding the importance of cybersecurity and your privacy is vital, especially in a world where cybersecurity measures are increasingly scrutinized. You can easily create and customize these privacy zones through the Ring app, ensuring your security system aligns with your privacy preferences.
Setting up privacy zones can be done during the initial configuration of your Ring doorbell or adjusted later in the app settings. If you ever need to remove a privacy zone, it's a straightforward process. Just navigate to Camera > Detections & Privacy Zones > Edit Privacy Zones in the Ring app. You'll find a delete icon next to the specific zone you want to remove.
Keep in mind that changes to privacy zones may not be visible immediately. After saving your settings, you might need to refresh the app to see the updates take effect. This feature empowers you to tailor your security experience while keeping your personal space secure and private.
Accessing the Ring App
To get started with deleting privacy zones, you'll need to access the Ring app on your smartphone or tablet.
Open the app, and you'll see a list of your devices. Find and tap on the specific Ring Doorbell associated with the privacy zones you want to delete. This will take you to the device's main settings. With the increasing focus on AI ethics and privacy concerns, managing your privacy settings is more important than ever.
Once you're in the device settings, look for the "Camera" option. Tapping on this will lead you to various camera-related settings, including the section for privacy zones. Here, you'll find everything related to the privacy zones you've set up.
To edit or delete these zones, select "Detections & Privacy Zones." This section will show you all the existing privacy zones you've established. You can now proceed to delete them if needed.
Navigating to Privacy Zone Settings

After opening the Ring app and selecting your device, you'll want to head straight to the 'Device Settings' to find the 'Detection Settings' option where privacy zones are listed. This is where you can manage your privacy settings effectively.
Home security systems, including video doorbells like Ring, play an essential role in enhancing your safety and peace of mind, as they deter potential intruders and allow for monitoring of your property, especially in high-risk areas increased safety benefits.
Once you're in the Detection Settings, look for the 'Privacy Zones' section. Tap on it to view all the existing privacy zones that you've established. Here, you can see which areas are currently marked for privacy, and you can easily access the editing options. This will allow you to make any necessary adjustments or updates to your zones as needed.
If you want to delete a privacy zone, select the specific zone you wish to remove. You'll notice a bin icon appearing next to it; tapping on this icon will initiate the deletion process.
After making your changes, don't forget to save your settings. If the updates don't show up right away, consider reloading the camera view to confirm that everything's been updated correctly. This way, you can verify that your privacy zones are exactly how you want them.
Deleting Established Zones
To delete established privacy zones on your Ring doorbell, you'll first access the Privacy Zone settings in the app.
It's crucial to verify that your device is functioning properly, as any common issues can hinder the process.
Once you've identified the zones you want to remove, you can easily confirm the deletion process.
If you run into any issues, there are troubleshooting steps available to help you out.
Accessing Privacy Zone Settings
Access the privacy zone settings by opening the Ring app and steering to your device settings for the specific camera you want to manage.
Once there, tap on "Detections & Privacy Zones." This is where you'll find the privacy zones you've established. Understanding how these settings work can enhance your overall security, much like how astrology explores the influence of external factors on personal traits.
To edit or delete any of these zones, select "Edit Privacy Zones." You'll see each zone represented, along with a bin icon next to them. If you want to delete a specific privacy zone, simply tap the bin icon next to it. This action prepares the zone for deletion.
Remember, after you delete a privacy zone, the changes mightn't show up instantly in the camera view. It's a good idea to save your settings and reload the app to verify that the deletion has taken effect.
If you encounter any issues with the deletion process, consider restarting your Ring device. Also, make certain that your app is updated to the latest version, as this can help resolve any glitches in the settings.
Following these steps will guarantee you're effectively managing your privacy zones.
Confirming Zone Deletion Process
Confirming the deletion of established privacy zones on your Ring Doorbell is straightforward once you've accessed the relevant settings. First, open the Ring app and navigate to the Camera settings, then select "Detections & Privacy Zones." Here, you can view all your created privacy zones.
| Step | Action | Result |
|---|---|---|
| 1. Access Settings | Open the Ring app | Navigate to Camera settings |
| 2. Edit Zones | Select "Edit Privacy Zones" | View zones with bin icon |
| 3. Select Zone | Tap the bin icon next to the zone | Initiates deletion process |
| 4. Confirm Deletion | Confirm the deletion | Zone is removed |
| 5. Save & Reload | Save settings and reload the app | Changes reflect in view |
Once you've tapped the bin icon, you need to confirm the deletion to guarantee it's removed from the settings. Keep in mind that the changes may not show up immediately in the camera view. To confirm the deletion, save your settings and reload the app. This process will help you effectively manage your privacy zones by deleting any that you no longer need.
Troubleshooting Zone Removal Issues
If you're having trouble removing established privacy zones on your Ring Doorbell, several common issues might be causing the problem.
First, verify you're maneuvering the app correctly: go to Camera > Detections & Privacy Zones > Edit Privacy Zones. Here, you should see a trash bin icon next to each privacy zone, which you can tap to delete. If the zones aren't appearing for editing, this could indicate a glitch in the app.
To enhance your efficiency in managing devices like your Ring Doorbell, consider utilizing tools that help with optimal setup and maintenance.
Another important step is to check if your Ring app is updated to the latest version. Outdated apps can lead to various issues, including problems with deleting privacy zones. After attempting to delete a zone, remember that changes mightn't show up immediately in the camera view. If this happens, try saving your settings and reloading the app.
If you've followed these steps and still can't delete the privacy zones, consider restarting your device or reinstalling the app. Sometimes, a fresh start can fix unexpected issues.
Troubleshooting Deletion Issues

When you're trying to delete privacy zones, you might run into a few common challenges.
Issues with the app's functionality can prevent you from making changes, so it's important to keep it updated.
Additionally, ensuring your device is connected to a stable network can also help facilitate the process.
If deletion doesn't seem to work, there are a few troubleshooting steps you can take to resolve the problem, such as checking for common juicing questions that could provide insights into similar tech issues.
Common Deletion Challenges
Deleting privacy zones on your Ring Doorbell can often be frustrating due to various technical glitches and app limitations. Many users encounter challenges during the deletion process, especially if they experience temporary glitches during the initial setup.
Sometimes, after you attempt deletion, the change may not reflect immediately in your camera view. You'll need to save your settings and reload the app to verify the updates. This issue can be compounded by the importance of maintaining a clean contact list, just like in email marketing strategies.
Additionally, some users find that the app doesn't display existing privacy zones, making it difficult to edit or remove them. You might discover that you can add new privacy zones but can't delete the ones you've previously created. This can lead to confusion and frustration.
Overlapping zones can also contribute to technical difficulties, as unclear visual indicators may make it hard to pinpoint which zones need adjustment. If you're struggling with the deletion process, take a moment to double-check your settings and confirm there are no overlapping zones interfering with your attempts.
App Functionality Issues
App functionality issues often complicate the deletion of privacy zones on your Ring Doorbell, making it frustrating to manage your settings effectively. If you're struggling to delete privacy zones, you're not alone. Here are some common problems and solutions to help you navigate editing the privacy settings:
| Issue | Possible Solution | Additional Tips |
|---|---|---|
| Changes aren't saving | Verify your app is updated | Check for updates regularly |
| Updated camera view not showing | Restart the app or your device | Try logging out and back in |
| Confusion with overlapping zones | Carefully redraw the privacy zones | Zoom in for precise editing |
When you go to Camera > Detections & Privacy Zones > Edit Privacy Zones, a bin icon should appear next to each zone for deletion. If you notice jagged edges while drawing, it may complicate your editing process. Verifying you have clear, non-overlapping zones will help you manage them better. Regular app updates from Ring can also address many app functionality issues, so keep your app up-to-date for the best experience.
User Experience Feedback
Steering through the process of deleting privacy zones on the Ring Doorbell can leave you feeling confused, especially with the current user interface design and default naming conventions.
Many users report uncertainty when trying to remove these zones, often questioning whether their actions were successful. The default label "New Zone" doesn't help, as it can lead to confusion about which zones you want to edit or delete. Unique identifiers for each zone would greatly improve the user experience.
Additionally, having a clear understanding of the essential items for a home cleaning kit could help users better manage their cleaning needs while maneuvering through these tech challenges.
Furthermore, delays in visual representation can complicate matters further. You might find that deleted zones don't immediately disappear from your camera view, forcing you to reload the settings to see the updates. This lag can be frustrating and create a sense of doubt about whether the changes were applied correctly.
Overlapping privacy zones also add to the visual confusion, making it hard to determine which areas are actively monitored or unmonitored. Users have suggested clearer visual indicators and better guidance during the deletion process to enhance the overall user experience.
Implementing these changes could greatly ease your navigation and confidence when managing privacy zones.
Community Support Resources

Finding support from the Ring Community can greatly enhance your experience when managing privacy zones and addressing any challenges you face. By creating your Ring account, you gain access to a wealth of resources and a platform where you can join in the discussion with other users.
This community is filled with individuals who share their experiences, ask questions, and offer practical solutions related to privacy zones. Additionally, engaging in discussions about cleaning best practices can provide insights on maintaining your device and its settings.
When you log in, you can explore various threads that focus specifically on deleting privacy zones. Members often post troubleshooting tips and workarounds that can save you time and frustration. If you encounter a unique issue, don't hesitate to post your question; the community is generally responsive and keen to help.
Additionally, the Ring help center is an invaluable resource. You can access detailed guides and FAQs that can complement the advice you receive from community discussions.
Engaging with both the community and the help center guarantees you stay updated on the latest tips and best practices for effectively using your Ring privacy settings. Don't miss out on these support resources—they can make your Ring experience much smoother.
Frequently Asked Questions
How Do I Edit Zones on Ring Doorbell?
To edit zones on your Ring Doorbell, you'll want to open the Ring app and head to your device settings.
Select the 'Camera' option, then navigate to 'Detections & Privacy Zones.'
Here, you can tap 'Edit Privacy Zones' to adjust the size or position of existing zones.
After making your changes, remember to save your settings.
Reload the camera view to see your updates take effect!
How Do I Remove a Neighborhood From My Ring Doorbell?
Imagine your Ring Doorbell as a garden, and each neighborhood is a unique flower.
To remove a neighborhood, you'll need to prune it back. Open the Ring app, find the "Neighborhood" section, and tap on the neighborhood you want to leave.
Select "Leave Neighborhood" and confirm your choice.
Like trimming away overgrown plants, you'll stop receiving updates from that area, allowing your digital garden to flourish with only the connections you desire.
How Do I Delete Old Locations on My Ring?
To delete old locations on your Ring, start by opening the Ring app.
Navigate to the Camera settings and look for the location you want to remove.
Tap on it, and you should find an option to delete.
After confirming the deletion, make sure you save your settings; otherwise, the changes mightn't take effect immediately.
If you run into trouble, try restarting the app or checking for updates.
What Are Privacy Zones on a Ring Doorbell?
Privacy zones on a Ring Doorbell let you choose specific areas that won't be monitored or recorded by the camera.
This feature gives you greater control over your surveillance and enhances your privacy.
You can set these zones during the initial setup or adjust them later through the Ring app.
Conclusion
By mastering the process of deleting privacy zones on your Ring doorbell, you're not just safeguarding your space; you're reclaiming your peace of mind.
With a few taps in the app, you can guarantee that your home feels secure and that your privacy is respected.
Remember, your doorbell is your vigilant guardian, watching over what matters most.
Engage with it confidently, and let it serve you to the fullest, protecting both your home and your heart.
