One common mistake in DIY alarm setup is poor sensor placement, which can create blind spots or false alarms; make sure to place sensors where they cover entry points and high-traffic areas. Wiring errors, like loose connections or ignoring manufacturer instructions, can cause system failures—double-check all connections and secure them properly. Also, avoid skipping sensor calibration or regular maintenance, as these ensure reliable detection. To build a secure system, it’s essential to follow best practices—keep going to learn how to perfect your installation.
Key Takeaways
- Properly assess your home’s vulnerabilities and plan sensor placement to cover entry points and high-traffic areas effectively.
- Ensure all wiring is secure, neat, and follows manufacturer guidelines, testing connections thoroughly before finalizing.
- Calibrate sensors after installation and test them to prevent false alarms or missed detections.
- Perform regular system maintenance, including cleaning sensors and updating software, to maintain optimal performance.
- Follow a systematic installation process, avoiding shortcuts to ensure reliable security coverage and system longevity.

Installing a home alarm system yourself might seem like a cost-effective choice, but it often leads to common mistakes that can compromise your security. One of the most critical errors involves sensor placement. If sensors aren’t positioned correctly, they can leave blind spots or trigger false alarms. You might be tempted to install motion detectors or window sensors in convenient spots without considering their effectiveness. For ideal security, sensors should be placed strategically—covering entry points and high-traffic areas—while avoiding areas with frequent pets or drafts that can cause false triggers. Take the time to assess your home’s vulnerabilities and plan sensor locations accordingly. Proper placement ensures you get reliable alerts and full coverage, reducing the risk of leaving your home exposed.
Proper sensor placement is key to avoiding blind spots and false alarms.
Wiring errors are another prevalent mistake that can undermine your alarm system’s performance. When installing wiring yourself, you might overlook the importance of secure, neat connections. Loose or poorly connected wires can result in system failures or false alarms. Sometimes, in your enthusiasm to finish the job quickly, you might skip testing connections or ignore manufacturer guidelines. This can lead to interruptions in power or signal transmission, rendering your alarm ineffective when it matters most. To avoid wiring errors, always double-check connections, follow the wiring diagram meticulously, and use quality connectors. Keep wires tidy and hidden to prevent accidental damage or disconnection over time. If you’re unsure about handling wiring, it’s better to seek professional help rather than risk compromising your system’s integrity. Additionally, understanding alarm system components can help you identify potential weak points during installation.
Another common mistake is neglecting to calibrate sensors properly after installation. Even if you’ve placed sensors perfectly, they need to be adjusted to minimize false alarms and maximize detection accuracy. Many DIY installers overlook this step, leading to sensors being overly sensitive or not sensitive enough. This often results in either frequent false alarms or missed detections when an intruder tries to breach your home. Take the time to test each sensor after installation and adjust their sensitivity settings accordingly. Consult the user manual for specific calibration instructions, and don’t assume they’re set correctly out of the box.
Finally, many DIY enthusiasts underestimate the importance of regular system maintenance. A system that isn’t checked periodically can become unreliable due to dust, loose connections, or outdated settings. Regularly inspect sensors, test alarms, and update software if applicable. This proactive approach helps catch potential issues early, keeping your security system functioning at its best. By paying attention to sensor placement, avoiding wiring errors, calibrating sensors properly, and maintaining the system, you greatly increase your home’s safety. It’s worth investing the time and effort to do it right—your security depends on it.

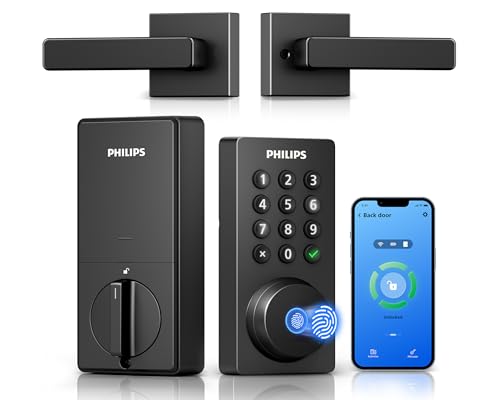
Philips Wi-Fi Door Lock, WiFi Smart Lock Keyless Entry Deadbolt for Front Door, Compatible with Alexa & Google Assistant, Remote Control, Built-in WiFi, APP Fingerprint Passcode Unlock, Auto Locking
𝐅𝐥𝐞𝐱𝐢𝐛𝐥𝐞 𝐖𝐚𝐲𝐬 𝐭𝐨 𝐔𝐧𝐥𝐨𝐜𝐤: Unlock the way you want: app, passcode, fingerprint, physical key, or voice via Alexa/Google...
As an affiliate, we earn on qualifying purchases.
Frequently Asked Questions
Can I Install a DIY Alarm System Without Professional Help?
Yes, you can install a DIY alarm system without professional help, but it’s important to follow proper DIY installation steps carefully. You should seek professional guidance when needed, especially for complex wiring or sensor placement. Make sure to read the manufacturer’s instructions thoroughly, double-check your work, and test the system before finalizing the setup. While DIY installation saves money, professional guidance guarantees maximum security and avoids common mistakes.
What Are the Legal Requirements for Installing Home Security Alarms?
You need to guarantee legal compliance when installing home security alarms by following local alarm regulations. Check your city or state’s specific requirements, such as obtaining permits or registering your alarm system. Avoid violations by reviewing these rules beforehand. Properly installing alarms that meet legal standards protects you from fines and ensures the system functions correctly, giving you peace of mind and secure home protection.
How Often Should I Test My DIY Alarm System?
Think of your alarm system as a loyal guard dog—regular checks keep it alert and ready. You should test your alarm system monthly to guarantee it’s functioning perfectly. Regular alarm system maintenance and testing frequency help catch issues early, preventing false alarms or failures when it matters most. Don’t wait for an emergency; stay proactive by scheduling monthly tests, so your security stays strong and dependable.
Are There Specific Tools Needed for Alarm Installation?
You’ll need basic alarm installation tools like a drill, screwdriver, wire strippers, and a level to set up your DIY security equipment properly. Having a voltage tester and mounting brackets also helps guarantee everything stays secure and functions correctly. These alarm installation tools make the process smoother and safer, helping you avoid mistakes. Make sure you gather all the necessary DIY security equipment beforehand so your installation goes as planned.
What Are the Signs of an Improperly Installed Alarm System?
When your alarm system echoes false alarms or struggles with weak signals, it’s a sign you might’ve installed it improperly. Like a broken symphony, the system’s harmony is disrupted, leaving you vulnerable. You may notice alerts triggering without cause or sensors failing to detect intruders. These issues indicate poor placement or connection problems, which compromise your security. Address these signs promptly to restore the system’s rhythm and keep your home safe.

REOLINK Smart 5MP 8CH Home Security Camera System, 4pcs Wired PoE IP Cameras Outdoor with Person/Pet/Vehicle Detection, 4K 8CH NVR with 2TB HDD for 24-7 Recording, RLK8-520D4-5MP
CAPTURE CRIME FROM DETAILS: Discover potential crime has never been so easier with superior 5MP HD. With advanced...
As an affiliate, we earn on qualifying purchases.
Conclusion
To avoid common DIY alarm installation mistakes, you need to plan carefully, follow instructions precisely, and test thoroughly. Skipping steps, rushing the process, or neglecting to double-check your work can compromise your security. By paying attention to details, maintaining patience, and verifying every connection, you guarantee your system works effectively. Remember, proper installation isn’t just about putting parts together—it’s about creating a reliable, secure environment for you and your loved ones. Focus on quality, accuracy, and diligence every step of the way.

Hiseeu 3K PTZ Wired Security Camera System Outdoor with Color Night Vision,Audio,8 x 5MP IP67 CCTV Cameras,5MP DVR 8CH,3TB HDD,360°Coverage,Person/Vehicle Detection,Alarm Spotlight,24/7 Recording
【360° Surveillance & Dual Control Security System】Flexibility 355° Pan + 90° Tilt Coverage - Eliminate blind spots with...
As an affiliate, we earn on qualifying purchases.
Philips WiFi Keypad Door Lock with Handle, Built-in WiFi, APP Remote Control, Voice & Fingerprint Unlock, Smart Locks for Front Door with Auto Lock, Digital Front Door Lock Set, Keyless Entry Deadbolt
Connect to 2.4GHz WiFi, No Hub Needed:Connect your Philips 4200 Series Wifi Door Lock Deadbolt directly to your...
As an affiliate, we earn on qualifying purchases.