Ring Security Cameras
How to Delete Old Ring Doorbell
You can easily delete your old Ring doorbell, but are you sure you know the steps to avoid losing important settings? Discover how inside!
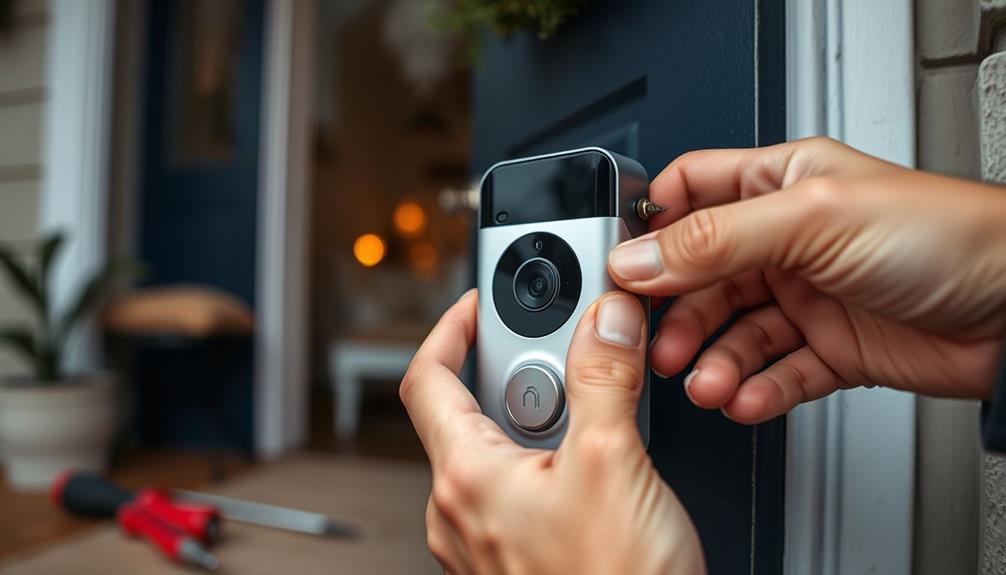
To delete your old Ring doorbell, open the Ring app and go to the Main Menu by tapping the three lines. Select 'Devices' to view your connected devices. Find the old doorbell and tap on it to access 'Device Settings.' From there, navigate to 'General Settings' and choose 'Remove this Device.' Confirm the removal, and your old doorbell will be deleted from your account. If you run into issues, make certain you're using the latest app version and logged into the right account. There's more you can explore to guarantee a smooth experience with your devices.
Key Takeaways
- Open the Ring app and tap the three lines to access the Main Menu.
- Select 'Devices' to find your old doorbell in the list of connected devices.
- Tap on the old doorbell, then go to 'Device Settings.'
- Choose 'General Settings' and select 'Remove this Device' to initiate deletion.
Understanding Device Deactivation
When you deactivate your Ring doorbell, it stays visible in your app with a crossed-circle icon, making it easy for you to manage your device list. This feature allows you to keep track of your deactivated devices without cluttering your inventory. While they're no longer active, you still have access to these devices for future management.
The presence of security systems, such as your Ring doorbell, can notably deter potential intruders, contributing to your home's overall safety and peace of mind, as discussed in the value of home security systems.
If you decide you want to delete a deactivated doorbell, simply tap the crossed-circle icon. This action opens a deletion confirmation dialog, ensuring you're making an informed choice. At the bottom of this dialog, you'll find the option to delete the device, making it straightforward to remove items from your device list.
Managing your device settings is essential for a clean and organized experience. By keeping deactivated devices visible, you can easily review and decide whether to keep or delete them. This approach not only helps you maintain an efficient inventory but also provides clarity on what devices you currently own.
Understanding how to manage deactivated devices is vital, as it allows you to optimize your Ring app experience.
Steps to Remove Old Doorbell
To remove an old Ring doorbell from your account, start by opening the Ring app and accessing the Main Menu by tapping on the three lines (≡) in the top left corner.
From there, select 'Devices' to view your list of connected devices. It's important to keep your devices updated, just as you'd with your heating systems like the BTU Rating of Englander 10-Cpm Corn Wood Pellet Stove for maximum efficiency.
Locate the old doorbell you wish to remove. Once you've found the device, tap on it to access its 'Device Settings.'
Next, navigate to 'General Settings.' Here, you'll find the option to 'Remove this Device.' Select this option to initiate the deletion process.
When prompted, you'll need to confirm the removal to verify the old doorbell is successfully deleted from your account. This step is vital, as it verifies that you truly want to remove the device.
After confirming, the old device will no longer be linked to your account, and you can manage your remaining devices more effectively.
Troubleshooting Deletion Issues

If you're having trouble deleting your old Ring doorbell, there are several factors you can check to resolve the issue effectively.
First, verify you're using the latest version of the Ring app, as continuous learning in tech fields emphasizes the importance of keeping your software updated. Outdated versions can hinder the deletion process.
Next, verify that you're logged into the correct Ring account associated with the device you wish to delete. This can prevent ownership issues.
Once you're sure about your account, open the app and tap on the device you want to remove. Check if it appears in the right location within the app, as location settings might affect device visibility. If you can't access the Device Settings, try restarting the app or your device to fix any temporary glitches.
If these steps don't work, consider visiting the General Settings section for additional options. For persistent deletion issues, don't hesitate to reach out to the Ring support team. They can provide specific troubleshooting steps tailored to your situation, guaranteeing you can successfully remove your old doorbell without further complications.
Community Support Options
Engaging with the Ring Community provides valuable support options for users looking to troubleshoot and delete old devices like doorbells. By creating your Ring account, you can access a wealth of knowledge shared by fellow users. If you have specific questions, don't hesitate to post a question in the forum. You'll find that many community members are enthusiastic to help, and you can join in the discussion to share your experiences and learn from others.
If you still need assistance, consider giving the Ring support team a call. They're equipped to guide you through the process.
When you're ready to delete your old doorbell, simply tap the three lines in the app, select Remove, and follow the prompts. Keep an eye on the thread for the last reply and new replies, as they may offer additional tips.
For more detailed guidance, visit [here](https://support.ring.com/hc/en-gb/articles/213608406) to see extensive resources. Engaging with the community not only helps you solve your issue but also contributes to ongoing improvements in Ring's products and services.
Managing Subscription Transfers

When you delete your old Ring doorbell, the linked subscription plans usually transfer automatically to your new device, simplifying the process of maintaining your coverage.
However, it's important to manage this transfer effectively to guarantee everything works smoothly. Understanding AI advancements can help you appreciate how technology streamlines such processes.
First, after you delete the old device, check your Ring account on the website. You might need to complete a verification step to confirm that the new doorbell is associated with your account. This verification helps the system guarantee that your subscription is correctly linked and that you continue receiving the features you need.
Once you've verified your new device, review the subscription options available. Depending on your needs, you may want to adjust the tier of coverage you have. Ring offers various levels of protection, so make sure you select the one that suits you best.
Frequently Asked Questions
How Do I Remove an Old Ring Doorbell From My Account?
To remove an old Ring doorbell from your account, you start by opening the Ring app and going to the 'Devices' section.
Locate your old doorbell and select it.
Tap 'Device Settings,' then go to 'General Settings.'
Here, choose 'Remove this Device' and confirm the action.
Make sure you're logged into the correct account, as you'll need to verify ownership.
Once done, your old doorbell will be removed successfully.
How Do I Remove an Old Device From My Ring?
Did you know that over 80% of households in the U.S. use smart home devices?
To remove an old device from your Ring app, open the app and tap the three lines in the top left corner.
Select 'Devices' to find your old device, then go to 'Device Settings.'
Look for the option to remove it, confirm by tapping 'Remove this Device,' and you're all set!
Make sure you're logged into the right account.
How Do I Reset My Ring Doorbell Left by Previous Owner?
To reset your Ring doorbell left by the previous owner, find the reset button, usually located on the back or bottom of the device.
Press and hold that button for about 15 seconds until the light starts flashing.
Once it's flashing, release the button and wait for the doorbell to reboot, which can take up to a minute.
After that, you can set it up as a new device using the Ring app.
How to Deregister a Ring Doorbell?
To deregister your Ring Doorbell, open the Ring app and tap the three lines in the top left corner to access the Main Menu.
Select 'Devices' and choose the doorbell you want to remove.
Go to 'Device Settings,' then 'General Settings,' and look for 'Remove this Device.'
Follow the prompts to confirm the removal; you might need to verify your account.
Once done, your doorbell won't be linked to your account anymore.
Conclusion
To sum it up, deleting your old Ring doorbell isn't rocket science; you just need to follow the right steps.
Once you've deactivated it, you can easily remove it and troubleshoot any issues that pop up.
Don't forget to check out community support if you hit a snag.
And if you've got a subscription, transferring it's a breeze.
So, gear up and give your home security a fresh start—no need to call in the cavalry!
Ring Security Cameras
How to Put Together a Ring Doorbell
Connect your Ring Doorbell effortlessly with our simple guide, but don’t miss essential tips for optimizing your setup! Discover more inside.

Setting up your Ring Doorbell is a straightforward process. Begin by collecting your tools from the kit and allowing the battery to charge for 4-6 hours. Prior to installation, ensure to turn off the power at the breaker box for safety precautions and then remove your old doorbell. Install the new Ring Doorbell by aligning it with the previous screw holes, double-checking that it is level before drilling. Follow the wiring instructions, being mindful of turning off the power, and remember to include the diode if you have a digital chime. Lastly, download the Ring app on your smartphone to personalize your settings and receive notifications. There is much more to discover about enhancing your setup!
Key Takeaways
- Charge the Ring Doorbell battery for 4-6 hours until the green light indicates a full charge before installation.
- Carefully remove the old doorbell, ensuring to keep the wiring intact and avoid damage.
- Mount the new Ring Doorbell by leveling the bracket and marking screw holes before drilling.
- Connect the existing wiring to the new doorbell, ensuring power is off and using a diode if necessary.
Installation Preparation
Before you begin installation, gather all the tools from your Ring doorbell kit and make sure the battery is fully charged for peak performance. This includes screws, a screwdriver, and a charging cable. If you're using a battery-operated Ring doorbell, charge the battery for four to six hours until the green light indicates a full charge. It's also wise to reflect on your doorbell placement in relation to the surrounding decor, making sure it complements your home's style, much like choosing the perfect farmhouse sink can enhance a kitchen's aesthetic.
Next, confirm your safety by shutting off power to the existing doorbell at the breaker box. This step is vital to avoid any electrical hazards during the installation. If you're replacing an old doorbell, carefully remove it by unscrewing and detaching the power wires without damaging anything.
Now, it's time for installation preparation. Use a pencil to mark screw hole locations for the mounting bracket. This will guarantee a secure fit when you install your Ring. Before you drill, check the alignment for the video angle using the Ring app. This way, you'll capture the best view of your entryway.
Removing the Old Doorbell

Now that you've prepared for installation, it's time to remove the old doorbell to make way for your new Ring Doorbell. Follow these steps to guarantee a smooth changeover while keeping everything intact. It's important to be cautious during this process, as damaging the wiring can lead to issues later on, just like how proper equipment is essential for maintaining a clean home, as highlighted in what to look for in a home cleaning service.
- Detach the Faceplate: Use a screwdriver or box cutter to carefully detach the faceplate. This exposes the screws holding the old doorbell in place.
- Unscrew the Old Doorbell: Carefully unscrew the old doorbell from the wall, paying close attention to avoid damaging the power wires connected to it.
- Remove the Power Wires: Gently pull out the old doorbell, ensuring the wires remain intact. Loosen the screws that secure the power wires and detach them completely.
Mounting the New Doorbell

To mount your new Ring Doorbell, position it over the hole left by the old doorbell, ensuring it's aligned for the best viewing angle using the Ring app. Once you've found the ideal viewing angle, use a pencil to mark the screw hole locations on the wall. Make sure the mounting bracket is level and straight before drilling.
| Surface Type | Required Tools | Additional Steps |
|---|---|---|
| Brick or Stucco | Masonry bit, anchors | Create pilot holes |
| Wood or Vinyl | Standard drill | Typically no anchors |
| All Surfaces | Screwdriver | Attach doorbell wires |
For brick or stucco surfaces, use a masonry bit for drilling holes and install anchors. For wood or vinyl, you usually won't need anchors. Attach the doorbell wires to the mounting bracket by loosening the screws, wrapping the wires around, and ensuring they don't touch each other for safety. Finally, press down firmly on the Ring Video Doorbell until you hear a click, confirming it's securely in place.
Connecting to Power

It's vital to guarantee power is disconnected at the breaker before you start connecting the Ring Doorbell to existing wiring. This step safeguards your safety during the installation process.
The Ring Doorbell requires a compatible power supply of 8 to 24 VAC, so avoid connecting it to DC transformers or lighting transformers.
Additionally, maintaining clean air in your environment can enhance overall well-being, making it easier to focus on tasks like installation air purifiers can help.
Here's what you need to do:
- Prepare the Wires: Loosen the screws on the mounting bracket. Wrap the existing wiring around the screws, making sure the wires don't touch each other to maintain safety.
- Add a Diode: If you're using a digital chime, remember to include a diode as instructed. This prevents any damage to your device during operation.
- Restore Power: Once your connections are secure, go back to the circuit breaker and restore power.
After that, test the Ring Doorbell to verify its functionality. Following these steps guarantees a safe and effective installation, allowing your new doorbell to operate as intended.
Configuring the Ring App

Configuring the Ring app is vital for setting up your Ring Doorbell and managing its features effectively.
Start by downloading the Ring app from the App Store or Google Play. If you don't have an account, create one, or simply log in to your existing account. Once you're in, follow the in-app instructions to set up a device. Select "Set Up a Device" and choose your Ring Doorbell from the list.
Next, connect your Ring Doorbell to your Wi-Fi network. Select your network and enter the password when prompted. This step is essential for guaranteeing your doorbell operates smoothly.
After connecting, customize your notification preferences in the app settings. This allows you to receive alerts for motion detection or when someone rings the doorbell, keeping you informed in real-time.
Lastly, don't forget to regularly check for app updates. Keeping the Ring app updated guarantees you have the latest features and security enhancements for peak performance of your Ring Doorbell.
Frequently Asked Questions
How Do You Set up a Ring Doorbell for the First Time?
To set up your Ring Doorbell for the first time, start by charging its built-in battery for 4 to 6 hours using the orange cable.
Once charged, turn off the power at the breaker for safety.
Use the Ring app to connect it to your Wi-Fi.
Mount the doorbell about four feet high, secure it with screws, and finally, restore power to test its functionality and customize settings.
How Do You Install a Ring Doorbell by Yourself?
Installing a Ring Doorbell by yourself can feel like assembling a piece of modern art.
First, charge the battery for about 4 to 6 hours.
Next, turn off the power and remove the old doorbell.
Position the mounting bracket at about four feet, mark the screw holes, and drill as needed.
Connect the wires, snap the doorbell into place, restore power, and test it with the app.
You've just upgraded your home's security!
How Do You Set up a Second Hand Ring Doorbell?
To set up a second-hand Ring Doorbell, first, make sure the previous owner's removed it from their account.
Charge the battery for 4 to 6 hours using the orange cable.
Next, download the Ring app and log into your account.
Follow the in-app instructions to put the doorbell in setup mode by pressing the setup button until the light flashes, then connect it to your Wi-Fi network for full functionality.
How Do I Set up an Existing Ring Doorbell?
To set up your existing Ring Doorbell, start by ensuring it's charged or hardwired. If necessary, turn off the power at the breaker.
Open the Ring app to log in or create an account, then select "Set Up a Device" and choose your model.
Follow the prompts to connect to your Wi-Fi, making sure you're near your router.
Conclusion
Once you've got your Ring Doorbell set up, you'll be part of the 30% of homeowners who've upgraded to a smart doorbell, enhancing security and convenience.
You'll love the peace of mind it brings, letting you monitor your front door from anywhere.
Plus, with easy access to video footage, you won't miss a thing.
So, enjoy your new device, and remember to explore all its features to get the most out of your investment!
Ring Security Cameras
How to Put Ring Doorbell on Siding
Optimize your home’s security by learning the best way to install a Ring Doorbell on siding, ensuring a seamless and effective setup. Discover essential tips!
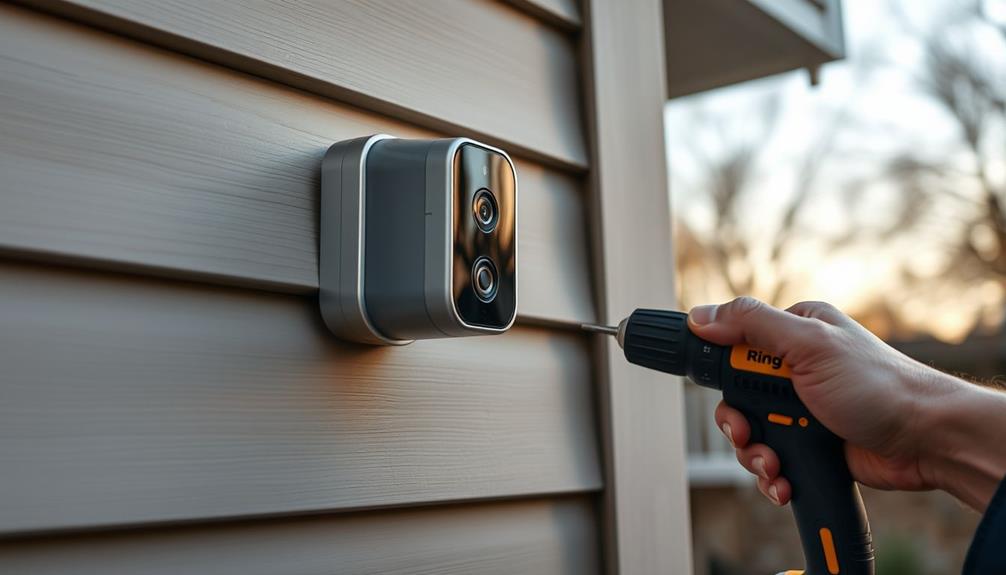
To install your Ring Doorbell on siding, first select a spot that is clear and easy to reach. If your siding is slanted, consider using an angled wedge mount to improve visibility. Use masking tape to keep it level before drilling pilot holes. Then, use a power drill to secure the screws included in your installation kit. Before proceeding, make sure the siding is in good condition without any cracks for a secure installation. With the proper tools and precise installation, you will enhance the security of your home. There are additional tips and techniques to ensure a smooth installation process, so keep going!
Key Takeaways
- Select a location on the siding that provides clear video capture and protects from harsh weather conditions.
- Use a Wedge Kit for better visibility if direct mounting is not feasible due to siding slope.
- Secure the wedge with masking tape to ensure it is level before drilling starter holes.
- Drill starter holes and install screws into the siding using the included installation kit for secure attachment.
Installation Steps
To get started, choose the perfect spot for your Ring Doorbell, making certain it's at a height that offers the best view and accessibility. This guarantees that you capture clear video footage of visitors approaching your home.
When selecting the location, consider how easy it will be to access for maintenance and confirm it's protected from harsh weather conditions. If your chosen location isn't ideal for direct mounting, consider using a Wedge Kit to angle the doorbell for better visibility, which can be vital for peak performance in various lighting conditions what to look for in a home cleaning service.
Once you've selected the right spot, secure the wedge in place with masking tape. Make sure it's level and straight, as this will impact the doorbell's performance.
Next, drill starter holes through the wedge into the siding, confirming you're drilling into a stable area. Afterward, install screws through the wedge and into the siding to firmly attach the back plate. This step is essential for keeping your Ring Video Doorbell securely in place.
Tools and Materials

Having the right tools and materials on hand is key to a smooth installation of your Ring Doorbell on siding.
First, make sure you have a power drill ready. This will help you drill starter holes and secure the doorbell to your siding effectively.
Additionally, consider using essential kitchen gadgets to enhance your overall home setup, as they can contribute to a well-organized environment.
The installation kit usually includes screws and a mounting level, which are essential for proper alignment during setup.
You'll also want to have masking tape handy. This is useful for temporarily securing components, like wedges, in place before you drill.
If your siding is sloping or made of vinyl, consider using an angled wedge mount to achieve ideal positioning.
Selecting the right wedge based on your installation method can make a significant difference in functionality.
Siding Condition

Inspect your siding for any cracks or holes, as this guarantees a secure mount for your Ring Doorbell. If your siding is damaged, it can undermine the integrity of your installation, leading to potential issues down the line.
Properly maintained siding not only supports the doorbell securely but also protects it from the elements, making certain it functions properly. Additionally, using high-quality materials can enhance your home's exterior, similar to how the best garden hoses improve gardening efficiency.
If you spot any damage, consider reaching out to professionals like PJ Fitzpatrick, who've been fixing siding issues since 1980. They can help restore your siding to its best condition, giving you peace of mind.
Addressing any repairs beforehand will enhance the longevity of your Ring Doorbell, preventing weather-related issues that could arise from a compromised mounting surface.
Remember, a well-maintained siding condition benefits both the installation process and the overall performance of your doorbell unit. Don't skip this essential step; it plays an important role in how effectively your Ring Doorbell will operate and withstand the elements.
Take the time to make certain your siding is ready for this important home addition.
Mounting Options

When choosing the right mounting options for your Ring Doorbell, consider the type of siding you have to guarantee a secure and effective installation. The Ring Video Doorbell can be mounted on various siding types like cement slab, aluminum, cedar, and vinyl wall panels. However, avoid triple wall and Dutch glue wall panels, as they won't provide a proper fit.
For ideal visibility, you might want to explore angled mounts, such as the Ring Doorbell Siding Mount. These are particularly useful on sloping or vinyl siding, ensuring the camera captures the best view.
If you're using the Ring Pro, take advantage of its two anchor plates, which allow for slight upward or downward adjustments.
Additionally, Wedge Kits can enhance your setup by offering vertical and horizontal adjustments tailored to different siding types. These kits help improve camera positioning, making sure you get clear visuals of anyone approaching your door.
User Experiences

Users often share how much the angled mounts enhance their Ring Doorbell's visibility, especially on sloping or vinyl siding. Many find that the adjustable wedge kits allow them to achieve the perfect angle without sacrificing their home's aesthetics.
When you install your Ring or Video Doorbell Pro, you'll appreciate how these mounts improve your field of view, giving you better security coverage.
Feedback from other users highlights the ease of installation. With the provided kit containing all necessary screws and hardware, you can mount your Ring Doorbell on various siding types, including cedar and aluminum, without hassle. This convenience makes the installation process smoother and more enjoyable.
Some users have even creatively combined different mounting options to further enhance their Ring Doorbell's placement. This flexibility guarantees that you can customize your setup to fit your specific needs and home design.
Frequently Asked Questions
Can You Install a Ring Doorbell on Siding?
Yes, you can install a Ring Doorbell on siding. Just make sure to check the type of siding you have, as some materials work better than others.
You might need an angled mount for ideal visibility, especially on sloped surfaces.
Before you start, inspect the siding for any damage.
Once you're ready, follow the installation instructions, and you'll have your Ring Doorbell set up in no time!
How to Install Ring Doorbell on Vinyl Siding Without Drilling?
Imagine the crisp morning air as you decide to enhance your home's security.
To install your Ring Doorbell on vinyl siding without drilling, you can use strong adhesive mounts or a compatible bracket designed specifically for siding.
These solutions easily attach, allowing you to reposition if needed.
Just guarantee the adhesive is weatherproof, so your doorbell stays secure and functional, capturing every visitor with clarity and precision.
Enjoy your newfound peace of mind!
How to Attach Ring Camera to Vinyl Siding?
To attach your Ring camera to vinyl siding, start by using a Vinyl Siding Angle Adjustment Mount for the best viewing angle.
Before installation, check your siding for any damage; you might need to repair it first.
Secure the mount with masking tape to keep it level, then drill starter holes.
Use the screws and back plate from the installation kit to attach your camera securely.
If needed, consider additional wedge kits for better positioning.
How to Install a Doorbell Button on Vinyl Siding?
To install a doorbell button on vinyl siding, first choose a location that's easily accessible. Make certain it's near the power source.
Use a level to mark where you'll drill holes. Carefully drill starter holes, then attach the mounting bracket with screws.
Once that's secure, connect the wiring and attach the button.
Don't forget to check the button's function before finishing up. This way, you'll guarantee everything's working perfectly.
Conclusion
To summarize, installing your Ring Doorbell on siding can enhance your home's security and curb appeal.
Did you know that homes with security cameras are 300% less likely to be targeted by burglars?
By following the right installation steps and using the correct tools, you'll guarantee your device is both functional and stylish.
Don't forget to check your siding's condition and choose the best mounting option for a seamless look.
Happy installing!
Ring Security Cameras
How to Put in the Ring Doorbell
Achieve seamless installation of your Ring Doorbell with these essential steps, and discover expert tips for optimal performance and maintenance.
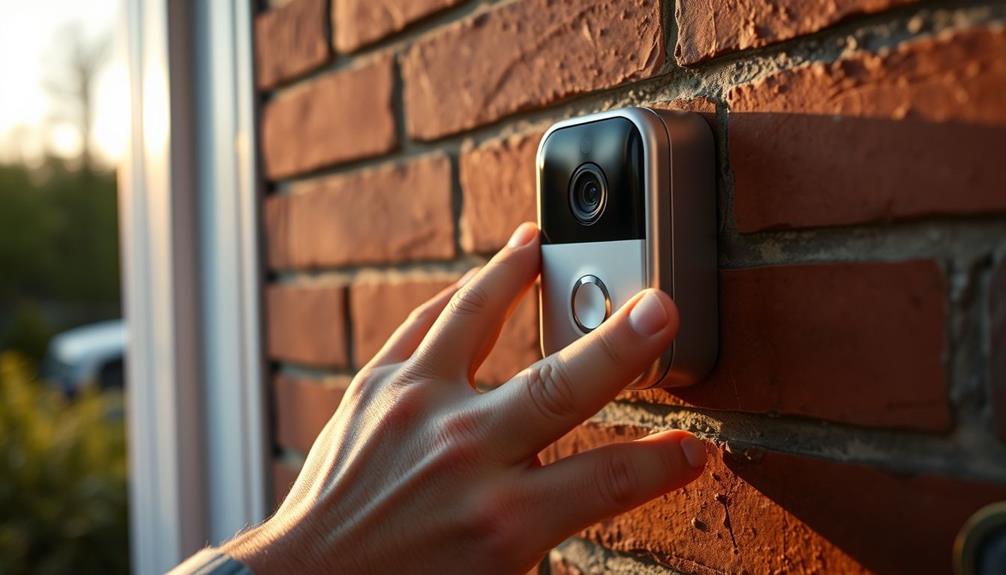
To install your Ring Doorbell, begin by charging the battery with the orange cable that comes with it. Set it up in the Ring app near your Wi-Fi router. Install the doorbell at a height of about four feet and make sure the power is turned off before connecting the existing doorbell wiring. Fasten the device using the provided screws. Once everything is connected, turn the power back on and test the doorbell by pressing the button. Ensure that your Wi-Fi signal is strong for optimal performance. There is more helpful information coming up to assist you in refining your installation and maintenance process.
Key Takeaways
- Charge the built-in battery using the provided orange cable before installation.
- Mount the doorbell at about four feet above ground and ensure secure attachment of existing wiring.
- Connect the existing doorbell wires to the Ring Doorbell screws after turning off power at the breaker.
- Set up the device in the Ring app while positioned near your Wi-Fi router for optimal connectivity.
Overview of Video Doorbells
Video doorbells are becoming a popular choice for homeowners who want to enhance their security and stay connected with visitors from anywhere using a smartphone app.
These devices allow you to remotely view who's at your door, providing peace of mind and convenience. With features like motion-activated notifications, you'll get alerts about deliveries or any suspicious activity, allowing you to capture video evidence of incidents right from your phone. As part of a thorough home security system, consider integrating features such as security alerts to maximize protection.
Video doorbells come in both wired models and battery-operated options. Wired models integrate with your existing doorbell systems, using low-voltage wiring compatible with 8-24 VAC setups. If you prefer a more flexible approach, battery-operated models require no wiring at all, making installation straightforward.
The choice between these two options often depends on your current doorbell setup and your preference for installation convenience. Regardless of which type you choose, video doorbells considerably enhance your home security, offering a reliable way to monitor your front door and communicate with visitors seamlessly.
Installation Process

To get started with your Ring Doorbell installation, first charge the built-in battery using the provided orange cable. Once charged, you can begin the installation process.
Next, set up the Ring Doorbell in the Ring app while near your Wi-Fi router to guarantee a strong connection. Mount the doorbell at a height of approximately four feet above the ground. Use the mounting bracket as a template to mark the screw holes.
Here's a quick reference table to help you through the installation:
| Step | Action | Reminder |
|---|---|---|
| 1. Charge | Charge the built-in battery | Use the orange cable |
| 2. Setup | Install via the Ring app | Stay close to the Wi-Fi router |
| 3. Mount | Securely mount the doorbell | Mark screw holes accurately |
| 4. Connect | Attach existing doorbell wiring | Guarantee power is off at the breaker |
After securing the device, restore power at the breaker. Finally, test the Ring Doorbell by pressing the button to confirm its video functionality. You're all set!
Wiring and Power

Before connecting your Ring Doorbell, verify that your doorbell system supplies low voltage between 8 to 24 VAC, as it's not compatible with DC or lighting transformers. For ideal audio quality, consider integrating your doorbell with a home theatre system to enhance communication.
Start by disconnecting power at the breaker to prevent electrical hazards while you work with the wiring. Safety is key during this installation.
Next, take the existing doorbell wiring from your wall and connect it to the screws on the back of the Ring Doorbell. Make sure you use the provided screws to secure the device, as using incorrect screws can damage the doorbell and lead to malfunctions. The order of connection doesn't affect functionality, so you can choose either wire for each screw.
Once everything is connected, double-check your work to make certain there are no loose wires. Now, it's time to restore power at the breaker. When you do this, your Ring Doorbell should light up, indicating that it's ready for configuration.
Following these steps will help you successfully set up your doorbell and enjoy the added security it provides.
Wifi Connectivity

Guaranteeing strong wifi connectivity is vital for your Ring Doorbell to function effectively and deliver seamless notifications and video streaming. When you set up your doorbell, place it near your wifi router to confirm peak performance. Regularly check your wifi signal strength to maintain a reliable connection; this is essential for uninterrupted video streaming.
Additionally, using AI in Cybersecurity can help guarantee your smart devices remain protected from potential threats, which is increasingly important as more devices connect to your home network.
If you encounter issues with connectivity, consider adding a Ring Chime Pro. This device not only enhances connectivity but also extends the wifi range for your Ring devices. If you're facing video quality problems, troubleshoot by adjusting your router's placement to reduce interference and improve signal strength.
Make certain your Ring Doorbell connects to a 2.4GHz network, as many smart devices perform better on this frequency compared to a 5GHz network. This way, you'll maximize compatibility and guarantee stable connections.
Safety Precautions

Installing your Ring Doorbell safely requires taking proper precautions to prevent electrical hazards and guarantee compliance with local regulations. Here are some essential safety measures to keep in mind:
| Safety Precautions | Importance | Action Required |
|---|---|---|
| Disconnect Power | Prevents electrical hazards | Turn off the breaker before starting |
| Consult Local Laws | Secures compliance with building codes | Research local regulations |
| Use Provided Screws | Avoids damage and secures a secure fit | Only use screws included with the device |
| Hire a Professional Installation | Reduces risks when handling electrical wiring | Consider hiring an expert if unsure |
| Regularly Inspect Installation | Maintains safety and functionality | Check for wear or damage regularly |
Maintenance and Care

Regular maintenance is essential for keeping your Ring Doorbell functioning effectively and guaranteeing that you get the most out of its features. Follow these simple steps to maintain peak performance:
- Check battery levels regularly to make certain your device is charged and ready. If it's low, make sure you're charging your Ring promptly.
- Clean the camera lens periodically to prevent dust and debris from obstructing video capture. A clean lens assures clear visuals for your security needs.
- Update the Ring app frequently. Keeping it current helps you access the latest features, security improvements, and performance enhancements.
- Monitor your subscription status to enjoy all desired features, such as video recording and playback, especially if you're on the Ring Protect Plan.
Additionally, consider seasonal adjustments, like repositioning a solar charger, to improve battery life and device efficiency.
Frequently Asked Questions
How Do I Put My Ring Doorbell on My Door?
To put your Ring Doorbell on your door, start by charging its battery with the USB cable until it's fully charged. Then, download the Ring app on your smartphone and follow the instructions to connect the doorbell to your Wi-Fi network. Once it’s connected, use the provided screws and mounting bracket to securely attach the doorbell to your door frame. If you are installing ring doorbell on siding, be sure to use the appropriate screws and anchors to ensure a secure fit. Be sure to adjust the angle of the doorbell to get the best view of your entryway.
Once it's ready, turn off the power at the breaker for safety.
Use the mounting bracket to mark where to drill, keeping it about four feet high.
Connect any existing wires, secure the doorbell in place, restore power, and press the button to test if it's working.
You're all set!
How Easy Is It to Put in a Ring Doorbell?
You'd think installing a high-tech gadget like a Ring Doorbell would require a rocket scientist, but it's actually a breeze!
It takes less than 10 minutes, and you just need basic tools like a screwdriver.
You'll find that following the simple instructions and using the included mounting bracket makes the process even smoother.
Plus, with security screws, you can rest easy knowing your doorbell's safe.
It's an easy win for any homeowner!
How Do You Install a Ring Doorbell by Yourself?
To install a Ring Doorbell by yourself, start by charging the built-in battery for about 8 hours.
Use the Ring app to set up the device close to your Wi-Fi router for a strong signal.
Mount the doorbell at about four feet high, using the included screws.
Connect the existing doorbell wires, ensuring power is off at the breaker.
Does Ring Doorbell Require Wiring?
Imagine standing at the entrance of your home, where a little guardian watches over you.
The Ring Doorbell's wiring needs depend on which model you choose.
If you opt for a wired version, yes, you'll need low-voltage wiring for power.
But if you prefer the flexibility of a wireless model, you won't need any wiring at all.
Just charge it up, and it's ready to keep an eye on your doorstep.
Conclusion
Installing your Ring Doorbell is like setting up a security guard for your home—ready to keep a watchful eye on your property 24/7.
With just a bit of patience and the right tools, you can guarantee your doorstep is always monitored.
Remember, regular maintenance is key to keeping your doorbell functioning smoothly.
So, treat it like a trusty companion; check its battery and connection often, and it'll always be there to greet your visitors.
-

 Vetted2 weeks ago
15 Best Home Security Cameras in Sydney for Ultimate Peace of Mind
-

 Vetted1 week ago
15 Best Home Security Systems of 2025 – Protect Your Home With Confidence
-

 Vetted1 week ago
15 Best Exterior Home Security Cameras of 2025 – Protect Your Property With Confidence
-
 Vetted1 week ago
15 Best Fake Home Security Cameras to Deter Intruders on a Budget
-

 Vetted1 month ago
5 Best Ring Doorbells for Townhouses – Security Solutions That Fit Your Home
-

 Vetted2 weeks ago
15 Best DIY Home Security Systems With Cameras for Ultimate Peace of Mind in 2025
-

 Home Security Systems4 months ago
How Wireless Home Security System?
-

 Home Security Systems4 months ago
How Much to Replace Home Security Systems?


