Installing a Ring Doorbell over your existing doorbell is simple. First, gather the necessary tools and hardware, then verify the power is off at the circuit breaker. Use a jumper cable to connect the existing doorbell wires, bypassing the chime if needed. Mount the Ring using provided screws and anchors for stability. Once secured, restore power and check that the Ring lights up or produces sounds. Finally, reattach the faceplate and use the security screw. If you're keen to troubleshoot or optimize your setup, you can discover more helpful tips and tricks ahead. Additionally, ensure you have properly connected the wires to avoid any issues with power or functionality. If you’re unsure how to install Ring Doorbell with wiring, refer to the included manual or online tutorials for step-by-step guidance. A successful installation ensures reliable monitoring and adds an extra layer of home security.
Key Takeaways
- Gather necessary tools and hardware, ensuring the installation area is well-lit and free of obstructions.
- Disconnect power at the circuit breaker to ensure safety during installation.
- Use a Jumper Cable to connect the Front and Trans terminals, verifying compatibility with existing doorbell voltage.
- Securely mount the Ring Doorbell using provided screws and wall anchors if necessary, ensuring correct wire connections.

TERUNSOUl 1K+1080 Dash Cam, 2 pcs in-Visor Mounted
TERUNSOUl 1K+1080 Dash Cam, 2 pcs In-Visor Mounted
As an affiliate, we earn on qualifying purchases.
Installation Preparation
Before you begin installing your Ring Doorbell, make certain you've gathered all the necessary hardware and tools to guarantee a smooth process. Check that you have the mounting bracket, screws, and any additional components included in the package.
You'll also need tools like a screwdriver, drill, and level tool for accurate mounting. Additionally, confirm that your installation area is well-lit and free from any obstructions, as this will help you work more efficiently. Consider reviewing options for garage door openers that enhance home security while you prepare.
Next, prioritize safety by verifying that power is disconnected at the circuit breaker. This step is vital to prevent any electrical mishaps during installation. While you're at it, consult local regulations regarding electrical work to confirm compliance with any permits or codes required in your area.
Identify your existing doorbell by listening for its sound; this will help you understand its compatibility with your new Ring device. Preparation is key, so lay everything out in an organized manner.
Having all your hardware and tools ready, along with a clear understanding of your installation steps, will make the process much smoother. With everything in place, you're now set to move forward with the installation confidently.

ROVE R2-4K DUAL Dash Cam Front and Rear, STARVIS 2 Sensor, FREE 128GB Card Included, 5G WiFi - up to 20MB/s Fastest Download Speed with App, 4K 2160P/FHD Dash Camera for Cars, 3" IPS, 24H Parking Mode
4K FRONT + 1080P REAR RECORDING – ROVE R2-4K DUAL dash cam offers dual-channel recording capabilities, capturing footage...
As an affiliate, we earn on qualifying purchases.
Jumper Cable Connection

To connect the Jumper Cable, attach one end to the Front terminal and the other to the Trans terminal on your Ring Doorbell.
This step is essential for bypassing the existing chime, especially if it's incompatible with your new doorbell.
Before you start, verify that your existing doorbell system operates at a voltage of 10-24 volts AC for compatibility with the Jumper Cable connection.
Proper installation is key to avoid issues similar to heat pump failures, such as electrical malfunctions.
Follow all safety precautions during installation.
Shut off the power at the circuit breaker to avoid electrical hazards.
Once you've made the connections, make sure the Jumper Cable is securely connected by tightening the terminal screws.
This guarantees that the cable can handle the power required for your Ring Doorbell to function properly.

REDTIGER 4K Dash Cam Front Rear, STARVIS 2 Sensor, Free Card Included, 5.8GHz WiFi-20MB/s Fast Download, Dash Camera for Cars with GPS, WDR Night Vision, 170°Wide Angle, 24H Parking Mode(F7NP)
[4K+1080P Front & Rear Recording] REDTIGER F7NP dash cam captures every detail with stunning 4K front and 1080P...
As an affiliate, we earn on qualifying purchases.
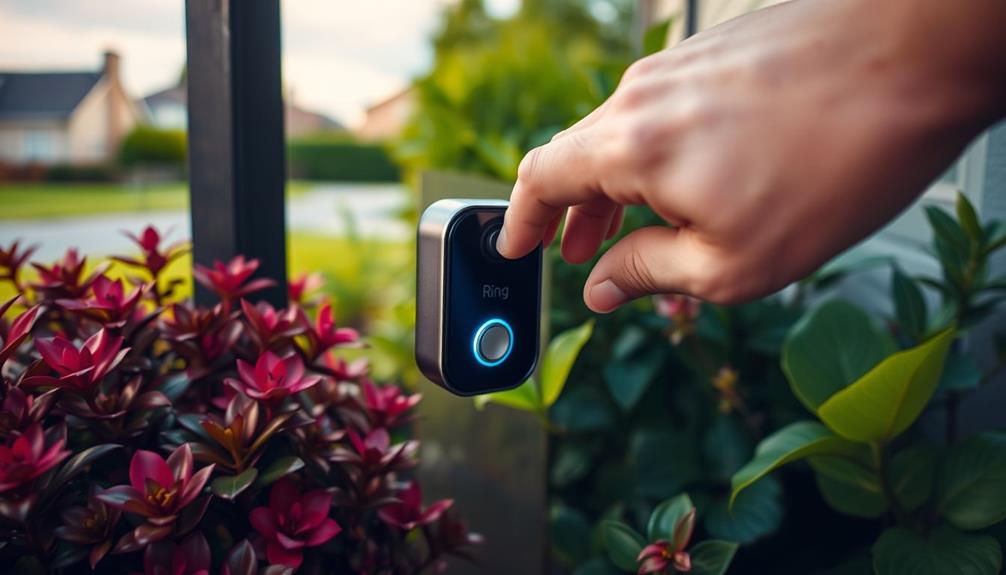
Mounting the Doorbell

Start by marking the screw hole locations with the Ring Video Doorbell as your template for precise placement. This guarantees your mounting will be accurate and secure.
If you're working with a wall type like brick, concrete, or stucco, you may need to install wall anchors to provide extra support for your doorbell. Additionally, consider the placement of your doorbell to guarantee it captures clear video footage, similar to how water parks in Washington DC have attractions suitable for all ages.
Next, connect the existing doorbell wires to the corresponding terminals on the video doorbell. Make sure to create secure connections, as this is vital for the device's functionality.
Once the wiring is in place, position the doorbell against the wall and use the provided mounting screws to secure it. Be careful not to over-tighten the screws, as this can damage the device.
After securely mounting the doorbell, reattach the faceplate to give it a polished look. To prevent unauthorized removal, don't forget to use the security screw that comes with your installation kit.
This final touch guarantees your video doorbell stays protected while providing you with the security you need. Now you're ready for the next steps in the installation process.

Pelsee P1 Duo 4K Dash Cam Front and Rear, 64GB SD Card, 4K+1080P Dual Dash Camera for Cars, Wi-Fi & App Control, 1.5’’IPS Display Car Camera, Voice Control, Night Vision, 24H Parking Mode, G-Sensor
4K+1080P Dual Dash Cam- Pelsee dash cam offers clarity with its single front camera, capturing exquisitely clear 4K...
As an affiliate, we earn on qualifying purchases.
Final Steps and Power Restoration

Once you've secured the Ring doorbell, it's time to restore power at the breaker to activate the device. Flip the switch back on, and wait for the doorbell to power up. You'll know it's working when you see a light or hear a sound, confirming a successful installation.
Next, reattach the faceplate to the doorbell unit. Make sure it's aligned correctly for a secure fit. This step is vital to guarantee the doorbell functions properly and maintains its sleek appearance. Use the provided security screw to firmly secure the faceplate, preventing unauthorized removal and guaranteeing long-term safety.
Here's a quick reference table for your final steps:
| Step | Action | Importance |
|---|---|---|
| Restore Power | Flip the breaker switch | Activates the doorbell |
| Reattach Faceplate | Align and secure with the security screw | Guarantees functionality and fit |
| Follow Safety Guidelines | Avoid electrical hazards during setup | Protects you and your device |
Troubleshooting Common Issues

After confirming your Ring doorbell is securely installed and powered up, you might encounter some common issues that need troubleshooting.
If your doorbell doesn't power on, double-check the existing doorbell wires for secure connections and verify the power at the circuit breaker. For persistent power issues, consider reviewing your home's electrical setup, as plumbing issues can sometimes indicate broader electrical concerns.
For intermittent connectivity issues, make sure your wifi router is within range and free from obstructions.
If you have a mechanical doorbell, consider installing diodes to prevent damage to your Ring device; proper installation is vital for avoiding further issues. If the Ring app doesn't detect your doorbell, confirm that the doorbell is within the recommended distance from the router and that your phone's Bluetooth and location services are enabled.
In cases of video quality issues, assess whether your internet bandwidth meets the minimum required speed, typically at least 1 Mbps for standard video quality.
Frequently Asked Questions
Can You Install Ring Over Existing Doorbell?
Yes, you can install a Ring doorbell over your existing doorbell.
Just make sure the existing wiring is compatible and operates on a transformer rated between 8 to 24 VAC.
If you have a digital doorbell, you might need to add diodes for proper functionality.
Before starting, always turn off the power at the circuit breaker to avoid any electrical hazards.
You can use existing mounting holes or a template for accurate placement.
Can Ring Doorbell Ring My Existing Doorbell?
When it comes to your existing doorbell, you're in luck!
The Ring Doorbell can ring your current chime if your system operates on 10-24 volts AC.
If you've got a mechanical doorbell, it's usually a straightforward connection. However, if you have a digital one, you might need to add diodes for compatibility.
Don't forget to turn off the power at the breaker before you start tinkering to keep things safe!
How to Set up a Ring Doorbell That Has Already Been Installed?
To set up your already installed Ring Doorbell, start by ensuring it's powered on and connected to Wi-Fi through the Ring app.
Open the app, tap on "Set Up a Device," select "Doorbell," and follow the prompts.
Check the device's health to confirm the battery's charged or it's hardwired.
If it's linked to another account, remove it first.
How Do You Install Two Wired Ring Doorbells?
To install two wired Ring doorbells, start by ensuring you have a transformer rated between 8-24 VAC.
Connect the existing doorbell wires to the first Ring doorbell using a jumper cable, then run additional wires from the first to the second doorbell in parallel.
Make sure both doorbells match the voltage and current specs, and if needed, install diodes for power stability.
Conclusion
With your Ring Doorbell now installed, you've transformed your entryway into a modern sentinel, standing guard over your home.
As you restore power and watch those lights twinkle to life, you're not just connecting a device; you're weaving a safety net that wraps your family in security.
If issues arise, remember, every challenge is just a stepping stone to mastery.
Embrace the journey, and your home will resonate with the harmony of technology and peace of mind.