To eliminate the previous owner’s access to your Ring Doorbell 2, ask the original owner to uninstall the device using the Ring app. They should log in, navigate to “Devices,” choose the doorbell, and click on “Remove This Device.” An email will be sent to confirm the removal. After this process, you can proceed to download the Ring app, create your own account, and set up the doorbell under your name. If the previous owner encounters any difficulties during the uninstallation process, reaching out to Ring support is recommended. Additional steps and suggestions for a seamless transfer process are available for your reference.
Key Takeaways
- The previous owner must uninstall the Ring Doorbell 2 from their Ring app to initiate the ownership transfer process.
- Open the Ring app, navigate to "Devices," select the doorbell, and choose "Remove This Device" under settings.
- Confirm the removal to ensure the doorbell is disconnected from the previous owner's account.
- If the uninstallation fails, contact Ring's customer support for assistance with the ownership transfer.
Ownership Transfer Process
To transfer ownership of your Ring Doorbell 2, the previous owner needs to uninstall the device from their Ring app first. This step is vital to remove the previous owner from the device's account and initiate the Change of Ownership process.
Once they uninstall the doorbell, you should receive an email notification confirming the removal, keeping everyone informed about the ownership shift. It may also be helpful to understand that similar to electronics return policies at Target Electronics regarding hassle-free processes, Ring aims to make ownership transfers straightforward and efficient.
It's essential to verify that the device is completely removed from the previous owner's account before you attempt to set it up under your account. If they don't respond or can't uninstall the device for any reason, don't worry. You can reach out to Ring's support team for assistance in completing the ownership transfer.
For detailed instructions on this process, check out Ring's support page on the Change of Ownership. By following these steps carefully, you'll successfully navigate the ownership transfer and enjoy your Ring Doorbell 2 without any hitches.
Challenges With Second-Hand Devices

Buying a second-hand Ring Doorbell 2 can come with unexpected challenges, especially if the previous owner didn't properly reset the device. When you acquire such a device, you might struggle with transferring ownership, which can lead to frustration.
If the original owner hasn't unlinked the device from their account, you'll find yourself unable to access its features. This situation could be particularly disheartening for those aiming to maintain a healthy lifestyle where security measures are important.
Additionally, there's a risk of purchasing stolen second-hand devices, as Ring has limited control over this market. This not only complicates ownership but can also put you in a tricky legal situation.
If the device hasn't been connected to any account for 60 days, you may have a chance to reset it and gain rightful ownership; however, many users report that the process can be more complicated than expected.
Furthermore, if the original owner has passed away, the emotional distress of dealing with the ownership transfer can add to your challenges. It emphasizes the need for clearer policies and procedures from Ring to assist users maneuvering these situations with second-hand devices.
Always research and verify the device is reset before making a purchase to avoid these headaches.
Customer Service Experience

Maneuvering the customer service experience can be frustrating for users trying to resolve ownership transfer issues with their Ring Doorbell 2. Many have reported long wait times and unhelpful interactions when reaching out to customer support. This can leave you feeling dissatisfied, especially when you're just trying to change the owner of your device.
Here's a quick overview of common customer service experiences related to ownership transfer:
| Issue | User Experience | Customer Support Response |
|---|---|---|
| Long Wait Times | Increased frustration | Often leads to dissatisfaction |
| Lack of Effective Solutions | Discounts instead of help | Rarely addresses ownership issues |
| Empathy Deficiency | Feeling unheard | Limited understanding from reps |
Additionally, many users struggle with providing the required documentation for ownership transfer, which complicates the process further. While you may hope for a seamless experience, the reality is often filled with obstacles. It's crucial to stay persistent when dealing with customer support to navigate these challenges effectively.
User Sentiments

Users often feel overwhelmed by the complicated ownership transfer process for their Ring Doorbell 2, leading to significant frustration and anxiety. The steps required to transfer ownership can seem intimidating, especially for those who've purchased a second-hand device. Many express concerns about previous owners not properly resetting devices, resulting in additional headaches when trying to claim ownership.
Additionally, the emotional burden of managing these issues can be compounded by the unpredictability of market trends, similar to how gold prices have shown resilience during economic downturns.
Emotional impacts are particularly pronounced when dealing with deceased previous owners. In these cases, users describe the distress of needing documentation like death certificates to complete the transfer, which adds an unnecessary burden to an already sensitive situation.
Moreover, interactions with customer support often leave users dissatisfied. Many report feeling a lack of empathy and support during these challenging ownership transfer issues. This negative sentiment around customer service only exacerbates the frustration users face, making the process feel more intimidating.
Recommendations for Users

When you're managing the process of removing a previous owner from your Ring Doorbell 2, engaging with community support can be incredibly helpful.
Make sure to keep effective documentation of your interactions and steps taken, as this can streamline the process.
If you run into challenges, don't hesitate to reach out for direct assistance from Ring's customer support for a smoother experience.
Community Support Engagement
Engaging with the community can be incredibly beneficial as you navigate the process of removing a previous owner from your Ring Doorbell 2. By participating in discussions, you can share your experiences and learn from others who've faced similar challenges. This collective knowledge can make the ownership transfer process smoother and less stressful.
Take the time to browse through posts to identify common issues and effective solutions that other users have discovered. You might find tips that directly apply to your situation, saving you time and effort. Additionally, don't hesitate to ask questions; many users are enthusiastic to help and share their insights.
Creating an account allows you to contribute to these discussions, enhancing the community's overall support. By sharing your unique experiences, you can help others facing the same challenges.
Consider using social media platforms to raise awareness about the difficulties encountered during ownership transfers. This can foster a more engaged community, where users feel supported and informed.
Effective Documentation Practices
To successfully transfer ownership of your Ring Doorbell 2, it's vital to keep thorough documentation of every step in the process.
Start by making sure the original owner uninstalls the device from their Ring app. Document any communication you have with them about this uninstallation, as it could be important if you need to reach out to Ring support later.
If the previous owner isn't responsive, gather proof of ownership or purchase documentation. This evidence can help expedite the transfer when you contact Ring's support team.
Keeping a record of your interactions and steps taken—like dates of attempts to uninstall or transfer—will provide a clear account if complications arise.
Familiarizing yourself with Ring's support resources and guidelines regarding ownership transfer can also aid in the process. Their documentation can offer valuable insights and guarantee you follow the correct procedures.
Remember, maintaining thorough documentation not only assists you in the transfer but also protects your interests should any issues occur.
Direct Assistance Options
Contemplate reaching out directly to Ring's customer support for immediate assistance if the previous owner can't be contacted. They can guide you through the process of removing the previous owner's account from your Ring Doorbell 2.
Here are a few options to contemplate:
- Contact Customer Support: Use the Ring app or website to find the customer service number or chat feature.
- Community Forums: Engage with other Ring users in community discussions for tips and shared experiences.
- User Manuals: Refer to the official user manual for step-by-step instructions on managing your device and account.
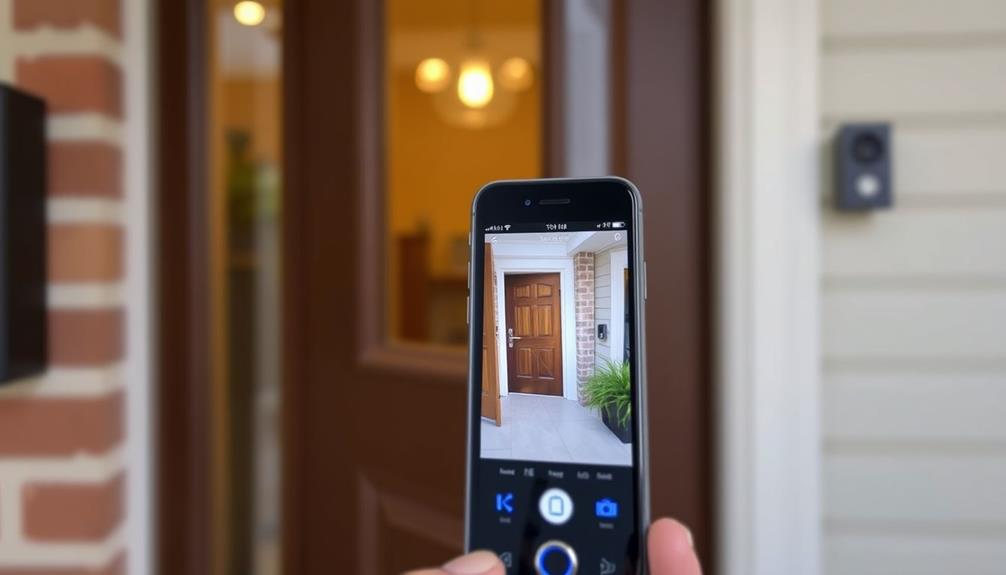
Steps to Remove Previous Owner

Start by opening the Ring App on your smartphone or tablet and guarantee you're logged into the account linked to your Ring Doorbell 2.
Once you're in, navigate to the Menu and select "Devices" to access the list of registered devices associated with your account. Locate the specific device name for the Ring Doorbell 2 that you want to remove the previous owner from. Click on the device and select "Settings" to access specific device settings. From here, you can remove the previous owner by following the provided steps. Additionally, if you are experiencing any issues with the Ring Doorbell 2, try reducing sensitivity on doorbell to minimize false alerts and improve performance.
Next, tap on the device name to enter its settings. Go to "Device Settings," then proceed to "General Settings." Here, you'll find the option "Remove This Device." Selecting this option will uninstall the device from the previous owner's account.
After you tap on "Remove This Device," you'll need to confirm the removal. This step is essential as it finalizes the process, ensuring the device is no longer linked to the previous owner.
Once confirmed, the Ring Doorbell 2 will be ready for the new owner to set up under their account. Following these steps will help you successfully remove the previous owner from your device and allow for a smooth changeover.
Official Ownership Change Process

Changing ownership of a Ring Doorbell 2 requires the previous owner to uninstall the device from their Ring account. This process is essential for a successful ownership transfer. Here's how it works:
- The previous owner must open the Ring app and navigate to the device settings.
Once uninstalled, you can download the Ring app and create your own account. If you don't see the option for ownership transfer during setup, reach out to Ring Community Support for help.
After the previous owner has completed the uninstallation, you can seamlessly set up your Ring Doorbell 2. Just follow the on-screen prompts in the Ring app to connect the device to your new account.
Don't forget to check the "User options" in your settings to verify any shared user profiles associated with the previous owner have been removed.
For further guidance, refer to the Ring support article on the ownership transfer process, which provides detailed instructions and resources to assist you.
Resetting the Ring Doorbell

Resetting the Ring Doorbell 2 is a straightforward process that prepares the device for a new owner.
First, you'll need to remove the faceplate or the device from its mounting bracket using a security screw. This step is essential as it gives you access to the setup button, which is typically marked in orange.
Once you've located the setup button, press and hold it for 10 seconds to initiate the reset process. During this time, the device will remove any previous configurations and enter setup mode, making it ready for the new owner.
Before you proceed with the reset, verify that the device has been removed from the previous owner's Ring app. This will help prevent any complications during the change of ownership.
After the reset, the doorbell will be ready for configuration. You'll need to connect it to Wi-Fi and install any necessary software updates.
Following these steps will guarantee a smooth setup experience, allowing the new owner to enjoy all the features of their Ring Doorbell 2 without any lingering ties to the previous owner.
Post-Transfer Considerations

After successfully removing the previous owner from the Ring Doorbell 2, you'll want to contemplate a few important factors to confirm your device operates smoothly and securely.
First, remember that both parties will lose access to any shared video recordings, so make sure to download any important footage beforehand if necessary.
Next, immerse yourself in your Device Settings on the Ring app and customize them to fit your preferences. Here are some key areas to focus on:
- Adjust motion zones to limit unnecessary alerts.
- Set up family sharing options to keep your loved ones in the loop.
- Troubleshoot any Wi-Fi connection issues, as connectivity may need re-establishing.
It's also a good idea to post a question in online forums or join in the discussion with other Ring users. This way, you can gather tips and insights that can enhance your experience.
Frequently Asked Questions
How to Reset a Ring Doorbell for a New Owner?
To reset a Ring Doorbell for a new owner, start by removing the faceplate or the device from its bracket using a security screw.
Next, locate the orange setup button on the back. Press and hold that button for 10 seconds to initiate the reset process.
Once it's reset, the device will enter setup mode, allowing you to configure it for the new owner.
Don't forget to remove it from the previous owner's Ring app.
How Do I Change the Ownership on My Ring Doorbell?
You're excited to set up your Ring Doorbell, but there's a catch—it's still linked to someone else.
First, the previous owner must remove it from their Ring app.
Once that's done, you can download the app, create your account, and follow the prompts.
If you don't see the transfer option, don't worry! Just reach out to Ring Community Support for help.
You'll be monitoring your home in no time!
How to Factory Reset Ring Doorbell 2?
To factory reset your Ring Doorbell 2, start by removing the faceplate using a security screw.
Next, locate the orange setup button on the back of the device.
Press and hold this button for 10 seconds to initiate the reset.
Once the reset is complete, your doorbell will enter setup mode, ready for a new configuration.
Don't forget to remove the device from the Ring app afterward to unlink any previous accounts.
How Do I Remove Someone From My Ring Doorbell Account?
Imagine your Ring Doorbell as a vigilant guardian, watching over your home.
To remove someone from your account, open the Ring App and access the Menu.
Tap "Devices" to find your vigilant watchman, then select the device you want to manage.
Navigate to "Device Settings" and then "User Options."
Locate the user you want to remove, tap it, and confirm.
Just like that, your guardian stands watch, free from unwanted eyes.
Conclusion
To sum up, removing a previous owner from your Ring Doorbell 2 isn't just a technical hurdle; it's a rite of passage into modern home security.
By following the outlined steps and engaging with customer service when necessary, you can regain control of your device.
As you navigate this process, remember that patience and persistence are key.
Embrace the digital age, and soon you'll enjoy the peace of mind that comes with your newly acquired smart home technology.