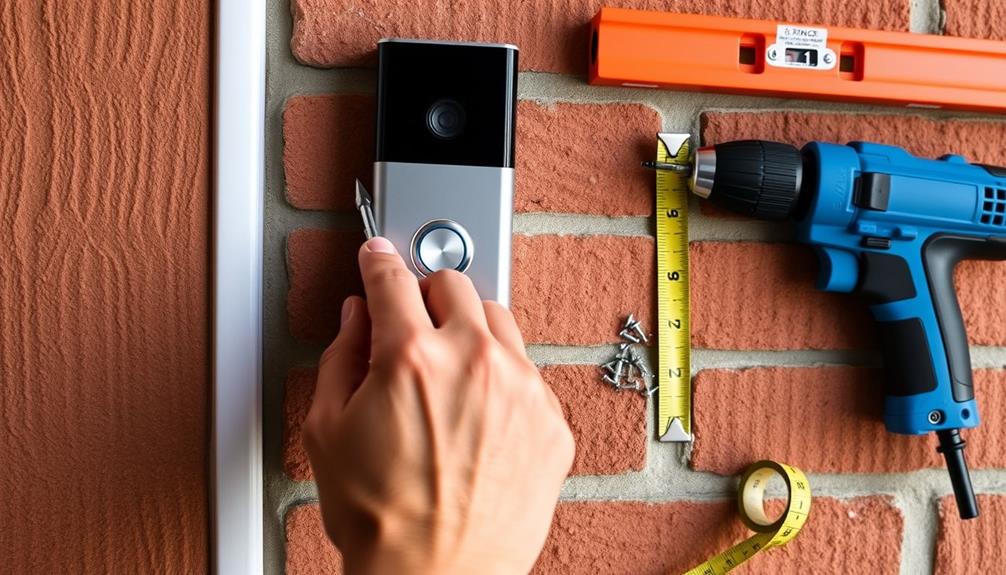

In order to attach your Ring Doorbell to the wall, you will need a screwdriver, a level, and the mounting hardware provided. Select a secure spot at chest height and mark where you will be drilling. Use the level to ensure the bracket is properly aligned. Drill the necessary holes and insert anchors if needed, then secure the mounting bracket in place, making sure it is stable but not overly tight to prevent damage. Once the doorbell is securely in place, double-check its alignment and stability. For tips on optimizing performance or exploring setup details, there is more information available. Consult the Ring doorbell installation guide for additional advice and troubleshooting by clicking on this link: Ring doorbell installation guide. It is crucial to confirm that the doorbell is connected to a reliable Wi-Fi network and the corresponding app is properly configured. You can also explore features such as motion detection and customize alert settings to suit your specific requirements. By following these steps, you can make the most of your Ring Doorbell.
Key Takeaways
- Gather tools like a screwdriver, level tool, and mounting hardware before starting the installation process.
- Align the mounting bracket at chest height using a level tool to ensure a straight installation.
- Mark screw hole locations accurately and drill holes, inserting anchors if necessary, based on wall type.
- Secure the mounting bracket with included screws, avoiding over-tightening to prevent damage.

Ring Spare Parts Kit for Battery Doorbell
Everything you need to setup your Ring Battery Doorbell in just a few minutes.
As an affiliate, we earn on qualifying purchases.
As an affiliate, we earn on qualifying purchases.
Help Resources
When you're ready to mount your Ring Doorbell, check out the wealth of resources available to help you through the process. The Ring support website is a treasure trove of detailed articles on installation, providing step-by-step guides for securely mounting your device.
You might also find helpful tips on airless paint sprayer benefits to guarantee your installation area looks great. Make sure to refer to the printable mounting diagram for a visual reference during your installation.
If you have questions or need tips, community forums are a great place to connect with other users. You can share experiences and learn best practices for mounting your Ring Doorbell.
Don't forget to check if there are any local laws and building codes that might affect your installation.
In case you run into issues, Ring's troubleshooting articles address common installation problems you might face. If you still need help for your Ring, don't hesitate to contact customer service for personalized assistance.
They can guide you through challenges, guaranteeing you successfully mount your Doorbell. With these resources at your fingertips, you'll feel confident in your installation process, leading to a secure mounting and enhanced home security.

Video Screwdriver Bit Set for Battery and Wifi Access – Fits All Video Doorbell Models (Blue)
【Video Doorbell Screwdriver】:Universal screwdriver for All models of video doorbell,include video doorbell,video doorbell 2, pro and elite. All…
As an affiliate, we earn on qualifying purchases.
As an affiliate, we earn on qualifying purchases.
Installation Preparation

Before you start mounting your Ring Doorbell, make sure you're well-prepared by gathering all the necessary tools and checking your installation location. This installation preparation is essential for a smooth setup. Here's what you need to have on hand:
- Screwdriver for securing screws
- Level tool to align the bracket accurately
- Charging cable to verify the doorbell is fully charged
Additionally, consider the importance of confirming your home is clean and free of debris around the installation area, as a tidy environment contributes to a streamlined setup. You may also want to review what to look for in a home cleaning service to maintain your surroundings.
Next, confirm that your installation location is about four feet above the ground. This height provides the ideal camera angle for capturing visitors. If you're connecting to existing wiring, don't forget to shut off power at the circuit breaker to prevent any electrical hazards. Also, make sure the battery is charged using the orange charging cable for 4 to 6 hours if applicable.
With your tools ready and the installation location set, you're well-equipped to proceed. Proper installation preparation can save you time and guarantee your Ring Doorbell functions effectively once it's mounted.

No-Drill Mount Compatible with Ring Battery Doorbell (2024 Release),Ring Doorbell Mounting Holder Bracket for Apartments Office Houses(1 Pack)
【Compatibility】Our No-Drill Mount is designed for Ring Battery Doorbell (2024 Release),For pleasant shopping experience, please confirm that your…
As an affiliate, we earn on qualifying purchases.
As an affiliate, we earn on qualifying purchases.
Mounting Steps

To mount your Ring Doorbell, start by aligning the mounting bracket properly at chest height.
Make certain to choose a location that's well-lit and within range of your Wi-Fi for peak performance, as noted in the recommendations based on expert evaluations.
Once you've secured it with the included screws, confirm its stability to guarantee a reliable installation.
Following these steps will set you up for success with your new doorbell.
Align Mounting Bracket Properly
Aligning the mounting bracket properly guarantees your Ring Doorbell captures the best angle for monitoring your entryway. Here's how to make sure everything is set perfectly:
- Use a level tool to keep the mounting bracket straight. This helps you achieve ideal viewing angles.
- Position the bracket at chest height to make certain it captures faces clearly and monitors activity effectively.
- Mark the screw hole locations on the wall using the bracket as a template. This step is vital for drilling holes accurately.
As you secure the bracket, remember to avoid over-tightening the screws. It can damage the mounting bracket and affect its stability.
Secure With Included Screws
With the mounting bracket securely in place, it's time to fasten it using the included screws for a stable installation. If you're working with wood or vinyl surfaces, you can directly secure the mounting bracket using the screws without needing wall anchors. Simply align the bracket and use a pencil to mark the positions for the mounting holes before drilling.
For harder surfaces like brick or stucco, drill holes for wall anchors first. Once the anchors are in place, insert the included screws. As you tighten the screws, verify they're secure, but be cautious not to over-tighten, as this could damage the mounting bracket.
After you've fastened everything, take a moment to check the stability of the installation. Apply some pressure to the mounted Ring Doorbell; it should feel solid and not have any looseness. This step is essential to guarantee that your doorbell will function correctly and withstand the elements.
Following these steps will help you achieve a secure and stable installation, making certain your Ring Doorbell is ready for use.
Confirm Stability After Installation
After securing your Ring doorbell, gently tug on it to verify it's firmly attached and doesn't wobble. This step is essential for confirming the stability of your installation. If you notice any movement, check that all screws are tightened appropriately but avoid over-tightening, which could cause damage.
To make certain everything's in place, consider these key points:
- Check alignment: Make sure the doorbell is aligned properly with the mounting bracket to prevent future misalignment.
- Use security screws: Utilize the included security screws; these enhance stability and help prevent unauthorized removal of the doorbell.
- Inspect the installation: Look for any signs of instability or loose screws that may need attention.

Picture Hanging Tool with Level – Magnetic Alignment Ruler for Frames & Mirrors, Wall-Friendly DIY Hanger for Home Decor
【3-in-1 All-in-One Hanging Tool】 – Combines a precision bubble level, measuring ruler (14.5 inches), and magnetic nail starter…
As an affiliate, we earn on qualifying purchases.
As an affiliate, we earn on qualifying purchases.
Power Restoration

How can you guarantee your Ring Doorbell powers up properly after installation?
First, make sure you flip the breaker switch back on to restore power to the device.
Once that's done, check for the indicator light on the doorbell. A solid white light means your Ring Doorbell is operational.
If your device is connected to an existing chime, press the doorbell button to test if the chime activates as expected.
If you're using a digital chime and it doesn't ring, it's time to check the polarity of the diode connection. Reversing the connection may resolve the issue, ensuring your chime functions correctly.
After restoring power, always monitor your Ring Doorbell for signs of functionality.
Look out for notifications on the Ring app shortly after installation; these alerts confirm that your doorbell is working as it should.
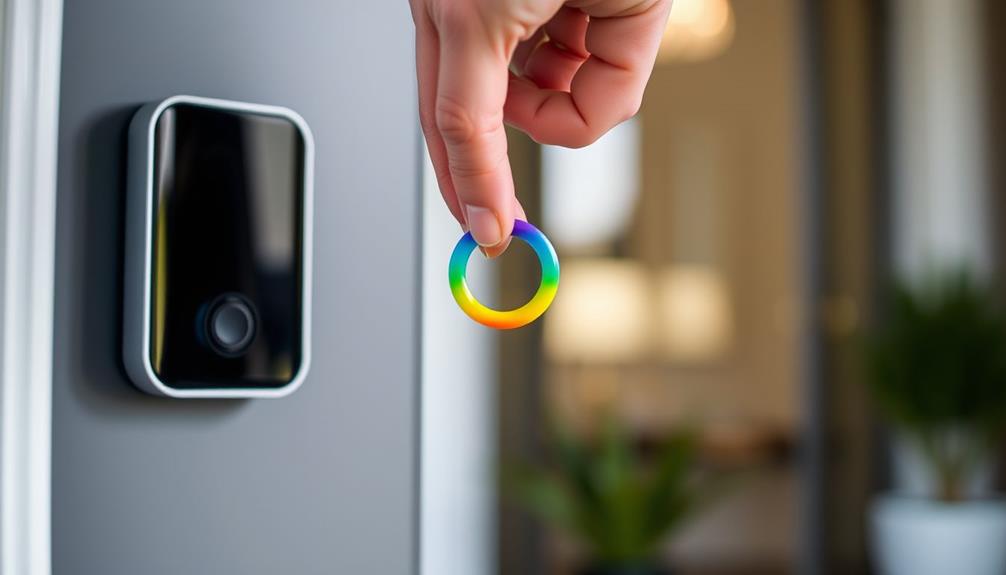
App Setup

Once your Ring Doorbell is powered up, the next step is to set up the Ring app on your smartphone. Start by opening the app and either creating a new account or logging into your existing account. This is crucial for connecting your Ring Doorbell to your home network.
Follow the in-app instructions to select your device type and connect it to your Wi-Fi for peak performance.
Here's what you'll do next:
- Customize your notification settings to alert you when someone's at your door or when motion is detected.
- Access the live video feed through the Ring app to monitor activity around your home.
- Review recorded clips for any missed events or deliveries.
Troubleshooting Tips

If you're experiencing issues with your Ring Doorbell, don't worry—you're not alone.
Common installation problems, power connection troubles, and video quality concerns can often be resolved with a few simple checks.
Let's go through some troubleshooting tips to help you get everything running smoothly.
Common Installation Issues
Common installation issues can often stem from misalignment or improper connections, so it's crucial to verify everything is set up correctly for peak performance. Here are some common pitfalls to watch out for:
- Use a level tool to verify your mounting bracket is straight before marking screw holes. Misalignment can lead to an unstable installation.
- Always choose the appropriate wall anchors when securing to hard surfaces like brick or stucco to prevent the screws from pulling out.
- If you find it difficult to secure the doorbell, check that the screws aren't overtightened. This can bend the bracket and affect stability.
If the doorbell doesn't power on after installation, make sure power has been restored at the breaker controls and that all wires are correctly attached.
Power Connection Troubles
Make certain to turn off the power at the breaker before you start working on the Ring doorbell to avoid any electrical hazards during installation.
If your doorbell isn't powering on after installation, check that the wires are securely connected to the correct screw terminals on the device.
If you're using an existing doorbell chime, verify chime compatibility, as some digital chimes need a diode to operate effectively.
When setting up your power source using a transformer, confirm it supplies the correct voltage between 8 to 24 VAC.
Connecting to a DC transformer or an incorrect voltage can cause power issues and prevent your doorbell from working.
After you've secured the Ring doorbell to the wall, restore power at the breaker and monitor power-on indications, such as lights on the device.
If the doorbell still doesn't activate, review all connections and troubleshoot accordingly.
Check connections once more to confirm everything is securely connected to either screw.
Following these steps will help you resolve power connection troubles effectively, confirming your Ring doorbell functions properly.
Video Quality Problems
After ensuring your Ring doorbell has a solid power connection, it's important to address any video quality problems that may arise during use. Poor video quality can be frustrating, but with a few troubleshooting steps, you can enhance the performance of your device.
- Check the strength of your Wi-Fi signal in the area where the Ring doorbell is installed. A weak signal can lead to lagging video footage or disconnection issues.
- Make sure the camera lens is clean and free from obstructions like dirt or debris that can hinder video quality.
- Adjust the installation angle of your Ring doorbell to minimize unnecessary motion alerts triggered by passing cars or pedestrians, which can impact clarity.
Safety Precautions

Before beginning the installation, always disconnect power at the breaker box to prevent electrical hazards when handling the doorbell wiring. This is one of the fundamental safety precautions you should take.
Using the provided screws specifically designed for the Ring Doorbell is essential; they help avoid damage during installation and guarantee a secure fit.
Before you start, consult local building codes and regulations to verify compliance with safety standards. Ignoring these guidelines can result in unsafe installations or potential fines.
When attaching the mounting bracket, use a level tool to align it properly. This step helps prevent strain on the screws and guarantees the doorbell remains stable over time.
Once the installation is complete, regularly inspect the installation for any signs of wear or damage. This ongoing maintenance is crucial for maintaining both safety and functionality.
Frequently Asked Questions
How Do I Attach My Ring Doorbell to the Wall?
To attach your Ring Doorbell to the wall, start by marking the screw hole locations using the mounting bracket as a guide.
Drill holes at those spots, adding wall anchors for extra support if needed.
Secure the mounting bracket with screws, ensuring it's level.
Connect the doorbell wires to the terminals, making sure they're secure.
How Do You Mount a Ring Doorbell With Screws?
To mount a Ring Doorbell with screws, start by marking the screw hole locations using the mounting bracket as a guide.
Drill holes at these points, using anchors for tougher materials like brick or stucco. For wood or vinyl, you can skip the anchors.
Once the bracket's secured, place the doorbell on top and press down until you hear a click.
Can You Attach a Ring Doorbell Without Drilling?
Yes, you can attach a Ring Doorbell without drilling by using adhesive mounts.
These mounts offer a temporary solution, perfect for renters or those who prefer not to damage walls.
Just make sure the surface is clean and dry for the best adhesion.
However, keep in mind that this method mightn't hold up on uneven surfaces, so consider your environment before relying solely on adhesive options for stability.
How Do You Anchor a Ring Doorbell?
Did you know that about 30% of home burglaries occur through unlatched doors or windows?
To anchor your Ring Doorbell securely, start by marking screw hole locations with the mounting bracket as a guide.
If you're mounting on brick or concrete, drill holes and insert plastic anchors.
For wood or vinyl, screw directly into the wall.
Make sure the screws are snug but not overly tight to avoid damage.
Then, attach the doorbell to complete the installation.
Conclusion
Now that you've successfully installed your Ring Doorbell, think about the peace of mind it brings.
With every visitor captured and every alert sent, you're not just securing your home; you're embracing a smarter way to live.
So why wait? Immerse yourself in the app, explore its features, and enjoy the convenience at your fingertips.
Remember, a safer home is just a doorbell away—because your security shouldn't be left to chance!