To open the cover of your Ring Doorbell Pro, you will need a star-shaped screwdriver and a flat, slender tool such as a butter knife. Begin by turning the security screw counterclockwise to release the faceplate. Use gentle upward pressure with your thumbs to detach it. If it is difficult to remove, carefully use the flat tool to pry it off without causing any damage. Once the faceplate is removed, you will be able to access the battery compartment. Make sure to keep your workspace tidy to prevent losing any screws, and don’t forget to look online for additional tips and detailed instructions on how to handle your Ring Doorbell Pro.
Key Takeaways
- Use the Ring screwdriver to turn the security screw counterclockwise to loosen the faceplate.
- Apply upward pressure with your thumbs to detach the faceplate from the doorbell.
- If resistance occurs, gently pry off the faceplate using a flat object like a butter knife.
- Ensure your workspace is clean to prevent losing small screws during the removal process.

Ring Battery Doorbell (newest model) — Retinal 2K with wide-angle video, up to 6x Enhanced Zoom, Two-Way Talk, and Built-In Battery, Speckled Gray
- Video Resolution: Retinal 2K with wide-angle view
- Zoom Capability: Up to 6x Enhanced Zoom
- Two-Way Communication: Real-time audio and video
As an affiliate, we earn on qualifying purchases.
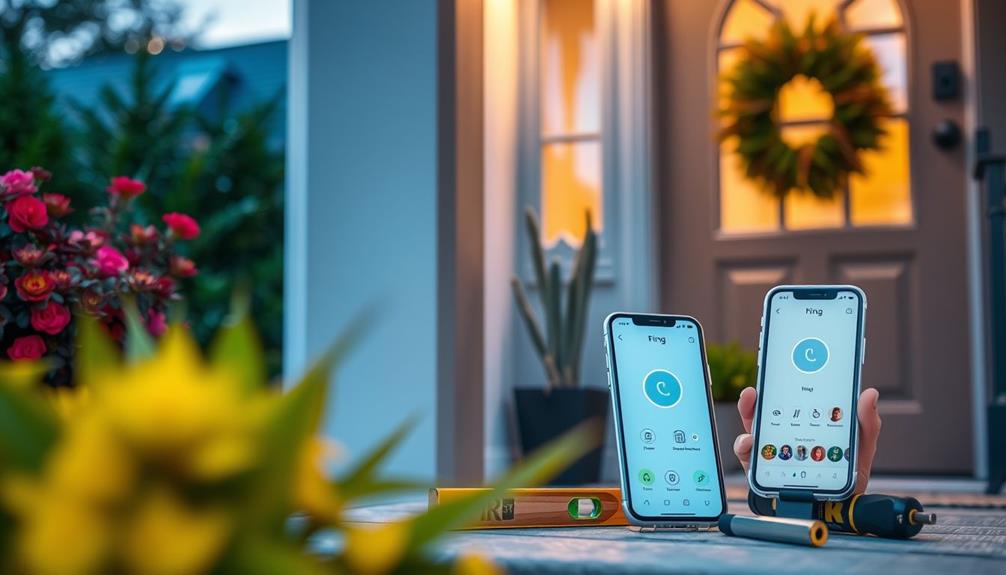
Overview of Ring Doorbell Pro
The Ring Doorbell Pro offers advanced home security features that keep you connected to your front door, no matter where you are. With its HD video streaming, you can see who's at your door in real-time, while two-way audio lets you communicate directly with visitors. Plus, the motion detection alerts notify you instantly whenever someone approaches, adding an extra layer of security.
For those looking to enhance their home entertainment, home cinema setups may also integrate well with smart devices like the Ring Doorbell Pro.
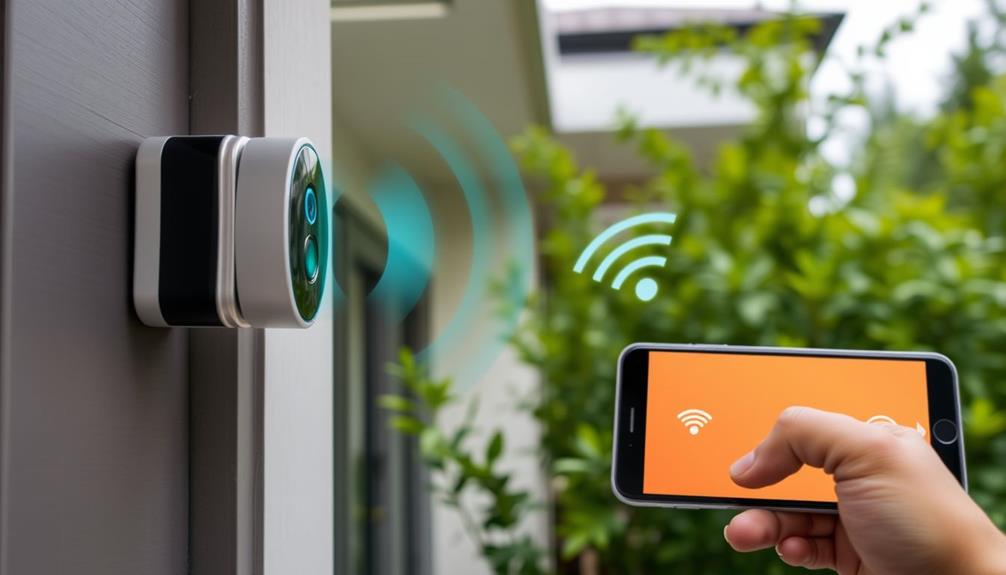
This Doorbell Pro operates on both wired and battery power options, making it flexible for different home setups. You can easily integrate it with the Ring app, allowing you to monitor your front door remotely from your smartphone, whether you're at home or away. Additionally, it's compatible with various smart home systems, making it a seamless addition to your home automation.
When it's time to access the inner workings of the Doorbell Pro, you'll need to remove the faceplate. This process allows you to check power connections or perform maintenance.
Understanding the features and functionalities of the Ring Doorbell Pro enhances your home security experience, ensuring you always stay connected and informed about your front door.
Ring Battery Doorbell (newest model) — Retinal 2K with wide-angle video, up to 6x Enhanced Zoom, Two-Way Talk, and Built-In Battery, Matte Mocha
- Video Resolution: Retinal 2K wide-angle video
- Zoom Capability: Up to 6x Enhanced Zoom
- Two-Way Communication: Real-time see, hear, speak
As an affiliate, we earn on qualifying purchases.
Tools Needed for Removal

When you're ready to remove the cover of your Ring Doorbell Pro, you'll need a few specific tools to get the job done efficiently.
First, you'll require the special star-shaped screwdriver that comes with the device to loosen the security screw. If you happen to misplace this screwdriver, a T6 torx-head screwdriver works as a solid alternative for removing the screw. It's essential to guarantee you have proper tools for home maintenance to avoid any mishaps during the process.
Once you've successfully removed the screw, you'll need a flat and skinny object, like a butter knife or a plastic pry tool. This will help you gently pry off the faceplate without damaging it. Make sure to keep your workspace clean and organized as you work; losing small parts like the security screw can be frustrating.
If you need replacement tools or screws, you can easily order them through customer service or browse online marketplaces. Having the correct tools on hand will streamline the process, making it easier for you to remove the cover and access the components you need to work with.
With these tools ready, you can confidently proceed to the next steps in your Ring Doorbell Pro removal.

Ring Battery Doorbell (newest model), Matte Mocha with Indoor Cam Plus, Black
- Home Security Bundle: Battery Doorbell, Indoor Cam Plus, Matte Mocha, Black
- 2K Retinal Video: Clear, detailed footage with 6x zoom
- Color Night Vision: See in true color even in low light
As an affiliate, we earn on qualifying purchases.
Step-by-Step Faceplate Removal

To remove the faceplate from your Ring Doorbell Pro, you'll need a few tools and some preparation.
It's important to handle the device carefully to avoid any damage, especially if you're familiar with airless paint sprayer benefits that emphasize smooth finishing without marks.
Follow these step-by-step instructions to guarantee a smooth removal process.
Let's get started.
Required Tools and Preparation
Gather the necessary tools, including a Ring screwdriver and a PH-000 screwdriver, to prepare for the faceplate removal process.
The Ring screwdriver features a star-shaped end, which is essential for loosening the security screw at the bottom of the faceplate. The PH-000 screwdriver will help with any specific screws that may be present.
Before you begin, make sure you have a clean workspace to avoid losing any small parts, like screws. It's also helpful to have a flat object, like a plastic pry tool or a credit card, on hand in case you need assistance prying the faceplate off.
Once you have everything ready, you'll be set to proceed with the faceplate removal.
Just remember to turn the security screw counterclockwise using the Ring screwdriver, then apply upward pressure with your thumbs to detach the faceplate from the device.
If you encounter any resistance, gently insert your flat object to help pry it off without damaging the device.
With these tools and preparations in place, you're ready to tackle the next steps confidently.
Step-by-Step Instructions
Now that you're prepared with the right tools, follow these step-by-step instructions to remove the faceplate from your Ring Doorbell Pro.
First, locate the security screw at the bottom of the device. Use the provided Ring screwdriver or a T6 Torx screwdriver to remove the security screw.
Once it's out, apply downward pressure on the glass part of the doorbell. Next, use your thumbs to push up from the bottom. This action will help loosen the cover for easier removal.
If you find it difficult to pull the faceplate away, gently insert a flat object, like a butter knife, to pry it away from the device. Be careful not to scratch the glass while doing this.
Once you've successfully loosened it, carefully lift the faceplate away from the doorbell body. Make sure you handle it delicately to avoid any damage.
After removing the faceplate, place it in a secure location to prevent any harm before you proceed with battery access or any other maintenance tasks.
Following these steps will guarantee a smooth and safe removal process.

Ring Wired Doorbell Pro (newest model), Home or business security, Retinal 4K with wide-angle video, 10x Enhanced Zoom, and Low-Light Sight, Deep Silver
- 4K Retinal Video: Ultra-clear 4K resolution for detailed footage
- 10x Enhanced Zoom: Magnify distant details up to 10 times
- Two-Way Audio: See, hear, and speak to visitors remotely
As an affiliate, we earn on qualifying purchases.
Accessing the Battery Compartment

Accessing the battery compartment of the Ring Doorbell Pro requires removing the faceplate first. To do this, grab a screwdriver and unscrew the security screw located at the bottom of the faceplate. Once the screw is out, carefully pry the faceplate off without damaging the device.
After removing the faceplate, you'll see the battery located at the bottom of the device. Look for the black tab on the battery itself. To detach the battery, press down on this black tab while gently pulling the battery outwards toward the bottom of the device. Make certain to handle the battery with care to avoid dropping or damaging it.
Before you start this process, verify the device is powered off to prevent any electrical issues. If you're planning to replace the battery, double-check that the new battery is fully charged before reinserting it into the compartment.
Following these steps will help you access the battery compartment efficiently, allowing for easy maintenance of your Ring Doorbell Pro.
Troubleshooting Removal Issues

Removing the cover of your Ring Doorbell Pro can sometimes present challenges, but there are effective strategies to troubleshoot common issues. Here are three key tips to help you overcome removal obstacles:
- Use the Right Tools: Make sure you're using the correct Ring screwdriver. Using the wrong tool can lead to a stripped screw, making removal frustrating.
- Improve Grip: If the screwdriver isn't catching the screw, try placing a rubber band over the screw head for better traction. Flipping the screwdriver tip might also enhance engagement.
- Illuminate the Area: Visibility is essential. If you're struggling to locate screws, use a flashlight to highlight them, especially in dim lighting.
If you find that your screw is stripped, you might need to resort to needle-nosed pliers to grip and remove it.
Don't hesitate to reach out to the Ring support team for assistance—they're there to help! Documenting your challenges can also be beneficial, as discussing them with the Ring Community may provide valuable insights from others who've faced similar removal issues.
Community Support Resources

Finding solutions to your Ring Doorbell Pro issues can be easier with the support of the Ring Community, where users share experiences and advice. You can log in or create an account to post a question and connect with others who've faced similar challenges. This platform not only provides a space for sharing tips but also enhances your overall experience with the device.
If you need quick troubleshooting, you can access various articles and guides. However, if your problems persist, don't hesitate to give the support team a call for direct assistance. Here's a quick glance at the community support options:
| Community Resource | Purpose | How to Access |
|---|---|---|
| Community Forums | Share tips and solutions | Log in and post a question |
| Troubleshooting Guides | Navigate common issues | Visit the support section |
| Customer Support Team | Direct help for persistent issues | Call for immediate assistance |
Engaging with the community can provide valuable insights and make your experience smoother. Remember, you're not alone in this!
Tips for Smooth Disassembly

To guarantee a hassle-free disassembly of your Ring Doorbell Pro, start by using the star-shaped Ring screwdriver to loosen the security screw at the bottom of the faceplate.
Once that's done, gently support the front of the faceplate with your fingers while applying upward pressure with your thumbs. This technique helps assure a smooth detachment.
If you run into any resistance, don't panic! You can try inserting a flat object, like a butter knife, to help pry the faceplate away gently.
Here are a few tips to keep in mind:
- Keep your workspace organized: A clean area prevents you from losing small screws and components.
- Use a rubber band: If you encounter stripped screws, wrapping a rubber band around them can give you better grip.
- Needle-nosed pliers: These can be helpful if screws are stubborn and won't budge.
With these steps and tools in hand, you can confidently remove your Ring Doorbell Pro's cover without a hitch. Happy disassembling!
Reassembling the Doorbell

After successfully disassembling your Ring Doorbell Pro, reassembling it requires careful alignment and secure fastening to confirm it functions properly.
Start by taking the faceplate and aligning the top hook with its corresponding hole. Hold the faceplate at a 45-degree angle to make placement easier. Once aligned, snap the bottom of the faceplate back into position, confirming it fits snugly without any gaps.
Next, replace the security screw located at the bottom of the faceplate. Use the provided Ring screwdriver to tighten it fully, which will secure the faceplate and prevent it from coming loose. If you've lost any screws during disassembly, don't worry—replacement security screws can be ordered online in packs of at least two.
Before finishing up, double-check that all components are properly seated and that the device is functioning correctly. This final check confirms that everything is in order before you mount the doorbell back in its original position.
Taking these steps will help confirm your Ring Doorbell Pro operates smoothly and securely after reassembly.
Maintenance and Care Tips

Maintaining your Ring Doorbell Pro is essential for guaranteeing its longevity and peak performance. With proper care, you can enjoy reliable security support for years to come. Here are three key maintenance tips to keep your doorbell in top shape:
- Clean the Camera and Faceplate: Regularly wipe down the camera lens and faceplate with a soft, lint-free cloth. This helps maintain clear video quality and prevents smudges that could obscure footage.
- Monitor Battery Level: Check the battery charge periodically, especially after heavy use. Replace or recharge it as needed to guarantee your doorbell operates at peak performance.
- Firmware Updates: Keep your device's firmware updated through the Ring app. This allows you to benefit from the latest features and security improvements.
Additionally, inspect the mounting screws and faceplate to guarantee everything is secure. Protect your doorbell from harsh weather by placing it in a sheltered location or using silicone skins for added durability.
Additional Help and Tutorials

If you're looking for more guidance on removing the cover of your Ring Doorbell Pro, there are plenty of resources available.
You can check out video tutorials for a visual step-by-step approach, or browse community forums where users share their own tips and tricks.
Additionally, expert articles can provide insights that make the process easier and safer for your device.
Video Tutorials Available Online
You'll find a wealth of video tutorials online that guide you through the process of removing the cover from your Ring Doorbell Pro, making it simple to follow along. These resources can be incredibly helpful, especially if you're new to handling a video doorbell.
Here are three great reasons to check out these tutorials:
- Visual Guidance: Watching someone else perform the task can make it much easier for you to grasp the necessary steps.
- Identifying Tools: Many tutorials highlight the specific tools you'll need, like the special star-shaped screwdriver that comes with your ring doorbell.
- Avoiding Mistakes: You'll learn about common pitfalls, such as stripping screws or damaging the faceplate, ensuring you avoid these frustrating issues.
Platforms like YouTube are packed with content from experienced DIYers who share their insights and techniques for successful disassembly. Some videos even offer troubleshooting advice for any challenges you might encounter along the way.
With these resources at your fingertips, you'll feel confident tackling the task of removing your Ring Doorbell Pro cover.
Community Forum Contributions
Engaging with the Ring Community Forum offers valuable insights and support for anyone looking to remove the cover from their Ring Doorbell Pro. Here, you'll find a wealth of shared experiences and troubleshooting tips from users who've successfully tackled similar challenges. If you have specific questions regarding the removal process, posting them can lead to helpful advice from fellow community members.
You'll often find discussions about Rings wired and the unique issues they present. Many contributors share creative solutions, like using a rubber band for better grip on stripped screws, making your removal process smoother. Accessing video tutorials and detailed guides posted by other members can also provide visual assistance that makes disassembly more manageable.
Additionally, engaging with the community might reveal alternative tools and methods others have discovered effective for removing the faceplate. If you find yourself stuck, don't hesitate to ask for help; the community is there to support you.
And if you need further assistance, remember you can always give our support team a shout for additional guidance.
Expert Tips and Tricks
The insights gained from the community can be complemented with expert tips and tricks that simplify the process of removing the cover from your Ring Doorbell Pro. Follow these steps to guarantee a smooth experience:
- Use the right tools: Grab the special star-shaped screwdriver included with your Ring Doorbell Pro. This screwdriver is essential for removing the security screw at the bottom of the faceplate, allowing you to access the device easily.
- Enhance grip: If you encounter stripped screws, use a rubber band between the screwdriver and the screw head. This simple trick can provide extra grip and make removal much easier.
- Protect your device: When detaching the faceplate, utilize a plastic pry tool along the edges. This helps you safely detach the faceplate without risking damage to the glass or internal components.
Frequently Asked Questions
How Do You Remove a Ring Cover to Charge It?
To remove the Ring cover for charging, you'll first need to find the security screw at the bottom of the faceplate.
Use the included Ring screwdriver to unscrew it.
Once you've done that, apply upward pressure on the bottom of the faceplate with your thumbs to loosen it.
Carefully pull the faceplate away, avoiding any scratches on the glass.
How to Remove Door Bell Cover?
To remove your doorbell cover, start by locating any screws or clips securing it in place.
You'll typically need a screwdriver to loosen these.
Once you've unscrewed everything, gently pry the cover off, using your thumbs or a flat tool if necessary.
Be careful not to scratch the surface.
If you hit resistance, try using a rubber band for extra grip, making the process smoother and safer for your device.
How to Remove Ring Doorbell Faceplate Without Tool Youtube?
To remove the Ring Doorbell faceplate without a tool, you can apply downward pressure on the glass while pulling the faceplate upwards.
If it's stubborn, gently pry it with a flat object, like a butter knife.
YouTube has plenty of tutorial videos that can guide you through the process step by step.
Make sure you've got a clean workspace so you don't lose any small parts during the removal.
How to Remove Cover of Ring Doorbell Pro?
To remove the cover of your Ring Doorbell Pro, start by finding the security screw at the bottom of the faceplate. Use the screwdriver that came with your Ring Doorbell Pro to carefully unscrew the security screw. Once the screw is removed, gently lift up on the faceplate to detach it from the device. If you encounter any issues during this process, you can reference the Ring Doorbell Pro manual for further instructions on how to troubleshoot ring doorbell issues.
Use the provided screwdriver to unscrew it.
Once that's done, gently push upward on the inner part of the faceplate with your thumbs to loosen it.
If it's still stuck, you can carefully use a flat object to pry it away.
Just be cautious of any clips to avoid damaging the cover.
Conclusion
Now that you know how to remove the cover of your Ring Doorbell Pro, you're just a few steps away from uncovering its secrets.
As you carefully disassemble it, imagine what insights await you inside.
Will you discover a quick fix or a hidden feature?
The anticipation builds with each turn of the screw.
So, don't hesitate—dive in and reveal what lies beneath.
Your doorbell's potential is waiting, and you're the key to accessing it.