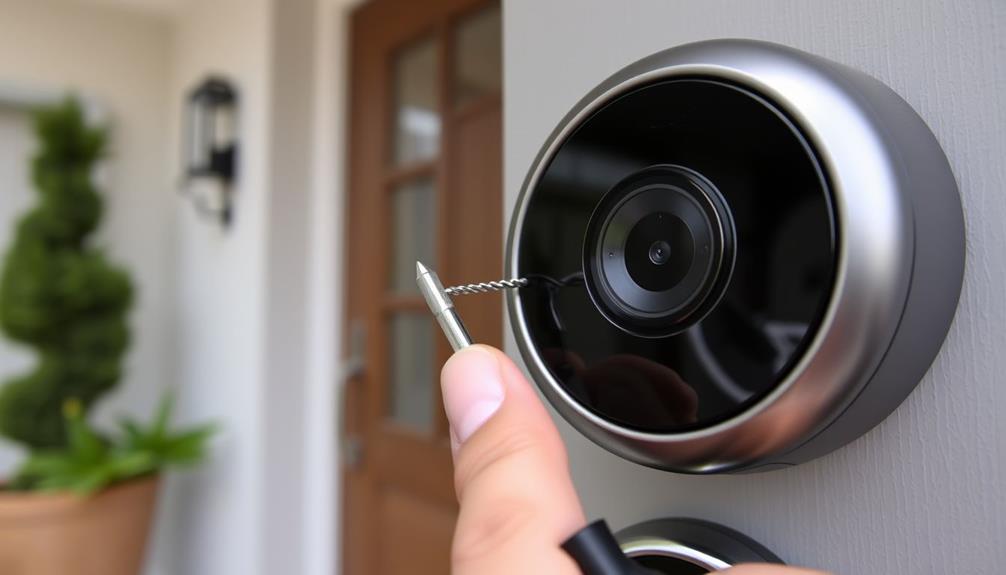
To take off the cover of your Ring doorbell, you will need a star-shaped screwdriver. Begin by locating the security screw at the bottom of the faceplate and unscrewing it counterclockwise. While doing this, gently push upwards with your thumbs at the bottom of the faceplate. If the cover is difficult to remove, use a flat object such as a butter knife to carefully pry it off. Once the faceplate is removed, you can access the battery compartment. Handle everything delicately to prevent any damage. There is further helpful information ahead to assist you through any challenges you may encounter. If you face any difficulties during the ring doorbell cover removal process, consult the official Ring website or contact their customer support for assistance. It is crucial to follow the correct steps to prevent any harm to your device. Taking your time and exercising patience will ensure a successful removal of the cover without any problems.
Key Takeaways
- Locate the security screw at the bottom of the faceplate and use a star-shaped screwdriver to unscrew it counterclockwise.
- Apply upward pressure from the bottom of the faceplate while supporting the front to detach it smoothly.
- If the faceplate is stuck, gently pry it off using a flat object like a butter knife.
- Handle the faceplate with care to avoid dropping or damaging it during the removal process.
Tools Needed for Removal
To successfully remove the cover off your Ring Doorbell, you'll need a few essential tools at your disposal. First and foremost, you'll need the special star-shaped screwdriver that comes with your Ring Doorbell. This tool is vital for loosening the security screw located at the bottom of the faceplate.
If you can't find the original screwdriver, a T6 torx-head screwdriver serves as a suitable alternative. Additionally, it's important to guarantee your workspace is free of distractions, as keeping your area organized can help prevent any accidental damage to the device or losing small parts, such as the security screw.
Regular vet check-ups are also essential for maintaining your devices in peak condition.
Once you've removed the security screw, you might find that the faceplate is a bit stubborn. In such cases, a flat and skinny object, like a butter knife, can help pry it off gently. Be careful not to damage the device while doing this.
Additionally, verify your workspace is clean and organized. Losing small parts, such as the security screw, can be frustrating, and you may need to order replacements from customer service or online if that happens.
Preparing for Faceplate Removal

Before removing the faceplate, check that you have the right tools handy, especially the star-shaped screwdriver.
It's also good to familiarize yourself with the return policies for electronics in case you need to make a return later, such as Target Electronics Return Policy.
Set up a clean workspace to avoid misplacing the small security screw.
With everything in place, you're ready to move forward with the removal process.
Required Tools Checklist
Gather the necessary tools to easily tackle the removal of your Ring Doorbell's faceplate. Having the right equipment on hand guarantees a smooth process and helps you avoid any frustration. Additionally, consider how your workspace is organized to enhance efficiency, similar to smart organization techniques in smart organization techniques.
Follow this checklist to prepare for your task:
- Special Star-Shaped Screwdriver: This is essential for loosening the security screw located at the bottom of the faceplate. If you don't have the original screwdriver, a T6 torx-head screwdriver will work as an alternative.
- Flat and Skinny Object: A butter knife or a similar tool is useful for prying off the faceplate if it's stuck. Confirm it's not too thick to avoid damaging the cover.
- Container for Small Parts: To prevent losing screws or other small components during the removal process, keep a small container handy. This will help you stay organized and make reassembly easier.
Workspace Preparation Tips
A clean and well-lit workspace is essential for successfully removing the faceplate of your Ring Doorbell without losing any small parts. Start by gathering all necessary tools and laying them out clearly on a flat surface. Identify the security screw at the bottom of the faceplate, and have your star-shaped screwdriver ready for action.
| Item | Purpose | Tip |
|---|---|---|
| Star-shaped screwdriver | Remove security screw | Verify it's the right size |
| Flat object (e.g., butter knife) | Pry faceplate gently | Use only if needed |
| Small container | Store removed screw | Prevent loss during process |
| Good lighting | Spot small parts easily | Avoid shadows or dim areas |
Make sure to set aside a safe location for the removed security screw. If it gets lost, you'll want to have a backup plan to order replacements. Keeping your workspace organized will not only help you efficiently remove the faceplate but also guarantee you don't misplace any essential components.
Step-by-Step Faceplate Removal

Now that you're ready to remove the faceplate, it's important to gather the required tools and understand the removal process.
You'll also want to be aware of common issues that might pop up during this task.
Let's walk through each step to guarantee a smooth faceplate removal.
Required Tools Overview
To successfully remove the faceplate from your Ring Doorbell, you'll need a star-shaped screwdriver or a T6 torx-head screwdriver. This tool is vital for loosening the security screw located at the bottom of the faceplate.
Here's a quick overview of what you'll need:
- Star-shaped screwdriver or T6 torx-head screwdriver: This is essential for unscrewing the security screw.
- Flat object (optional): A flathead screwdriver or similar item may help pry the faceplate off gently if it's stuck.
- Container or small bag: Keep the removed screw and faceplate secure so they don't get lost or damaged during the process.
Once you have the right tools, start by locating the security screw at the bottom of the faceplate. You'll need to turn it counterclockwise to remove it.
After unscrewing, push up from the bottom of the faceplate with your thumbs to loosen it. Remember, keeping everything organized will make reassembling much easier later on.
Always handle the faceplate carefully to avoid dropping it when pulling it away from the doorbell body.
Faceplate Removal Process
Begin by locating the security screw at the bottom of the Ring doorbell's faceplate, which you'll need to loosen with your star-shaped screwdriver. Turn the screw counterclockwise until it's loose enough to remove.
Once that's done, apply upward pressure with your thumbs at the bottom of the faceplate while supporting the front with your fingers. This technique gives you the leverage needed to detach the faceplate.
If the faceplate doesn't come off easily, don't force it. Instead, use a flat and skinny object to gently pry it away from the device. Be cautious to avoid damaging the faceplate or the body of the doorbell during this process.
After you've loosened the faceplate, pull it away from the body of the doorbell in one fluid motion. Make sure you have a firm grip to prevent dropping it.
Common Issues Encountered
Removing the faceplate from your Ring doorbell can present several common issues that may hinder a smooth process. Understanding these challenges can help you prepare better and avoid installation issues.
- Difficulty with the Security Screw: You might struggle to grip the security screw with the provided screwdriver. If it doesn't catch properly, you risk stripping it, complicating faceplate removal.
- Visibility Challenges: Locating the security screw can be tricky, especially if you're not in a well-lit area. Poor visibility could lead to multiple attempts to unscrew, increasing the chances of further stripping the screw.
- Missing or Stripped Screws: If the security screw is missing or stripped, you can still pry off the faceplate using a flat object. However, this may require additional force and could potentially damage your doorbell.
To avoid these issues, always use the provided screwdriver to guarantee a secure fit. If you encounter problems, take a moment to reassess your approach and keep your tools handy for a more efficient faceplate removal.
Accessing the Battery

Accessing the battery of your Ring Doorbell is a straightforward process that involves removing the faceplate first. Start by using a screwdriver to remove the security screw located at the bottom. Once you've done this, the faceplate snaps away easily. Gently pry the faceplate off to reveal the battery compartment inside the doorbell unit.
| Step | Action |
|---|---|
| 1. Remove Security Screw | Use a screwdriver to remove the security screw. |
| 2. Detach Faceplate | Gently pry off the faceplate until it snaps away. |
| 3. Access Battery | Locate the battery compartment after removing the faceplate. |
| 4. Remove Battery | Press the black tab and carefully pull it outward. |
Once you have access to the battery, you can charge it or replace it as needed. To detach the battery, press down on the black tab located at the bottom while pulling it out towards the device's bottom. After charging or replacing the battery, verify it slides back into the compartment until it clicks into place, and you're all set!
Safe Battery Removal Process

When you're ready to remove the battery from your Ring Doorbell, follow the proper steps for safe access.
Make certain you handle the battery with care to avoid any damage.
This way, you can guarantee your device stays in top shape for peak performance.
Battery Access Steps
To safely remove the battery from your Ring Doorbell, start by unscrewing the security screw at the bottom and gently prying off the faceplate. Once you've done that, you'll find the battery compartment, making it easy to access the battery in your Ring. Follow these steps for a smooth process:
- Unscrew the security screw: Use a screwdriver to carefully loosen the security screw, guaranteeing that you don't strip it.
- Pull the battery out: Press down on the black tab at the bottom of the battery while simultaneously pulling the battery out towards the bottom of the doorbell. Handle the battery with care to avoid dropping it.
- Replace the cover: After you've replaced the battery, make sure it's securely inserted. Then, reattach the faceplate and screw the security screw back in to guarantee everything is locked in place.
Safe Handling Tips
Prioritize safety by verifying your Ring doorbell is powered off before removing the battery. This step helps prevent any electrical mishaps that could occur during the process.
Once you've powered it down, locate the black tab at the bottom of the battery. Press down firmly while gently pulling the battery out towards the bottom.
Handle the battery with care during removal to avoid dropping it, which could cause damage or injury. As you take it out, inspect the battery for any signs of wear or damage. If you notice any issues, it's best to replace the battery instead of reinserting a compromised one.
Before you put the battery back into the doorbell, always verify it's adequately charged. A charged battery is essential for maintaining the proper functionality of your Ring device.
Once you confirm the battery is in good condition and charged, carefully slide it back into place, verifying it's secure. Taking these safe handling tips into account will help you manage your Ring doorbell's battery efficiently and safely.
Replacing the Faceplate

Replacing the faceplate on your Ring Doorbell is a simple process that lets you customize its appearance. To get started, you'll need to align the top hook of the new faceplate with the corresponding hole on the device. Holding the faceplate at a 45-degree angle makes it easier to fit it properly. Once aligned, snap the bottom of the faceplate back into place, ensuring a secure fit.
Here are three essential steps to remember when replacing your faceplate:
- Align: Make sure the top hook is positioned correctly before pushing the faceplate down.
- Secure: After the faceplate is attached, don't forget to replace the security screw at the bottom. Tighten it fully to keep everything in place.
- Customize: Explore different colored faceplates to match your home's aesthetic; they're all interchangeable!
If you happen to lose the security screw, replacement packs are readily available online or through customer service. With these steps, you can easily update your Ring Doorbell's look while maintaining its functionality and security.
Securing the Faceplate

After you've successfully replaced the faceplate, securing it properly is vital to verify your Ring Doorbell remains functional and protected.
Begin by aligning the top hook of the faceplate with its corresponding hole on the device. To confirm this alignment, hold the faceplate at a 45-degree angle. Once you've aligned the top, you can gently snap the bottom of the faceplate back into place.
With the faceplate securely attached, it's time to insert the security screw. Locate the security screw at the bottom of the faceplate and grab the provided star-shaped screwdriver. Carefully place the screw into its designated hole and tighten it fully. This step is critical, as a loose security screw can lead to the faceplate coming off inadvertently, compromising your doorbell's protection and functionality.
If you happen to lose the security screw, don't worry! You can easily order replacement screws in packs of at least two through customer service or online.
Troubleshooting Common Issues

Sometimes, you might encounter issues when removing the cover from your Ring Doorbell, but knowing how to troubleshoot can make the process smoother. Here are a few common problems and their solutions:
- Stripped Security Screw: If the security screw is stripped, try using a rubber band for added grip. This can help you turn the screw without further damaging it. If that doesn't work, consider reaching out to customer service for a replacement screw.
- Incorrect Screwdriver: Verify you're using the correct screwdriver for your model. The V2 screwdriver mightn't fit the Pro V3 model, complicating your efforts to remove the cover. Double-check the compatibility before starting.
- Visibility Issues: If you're having trouble locating the security screw due to poor lighting, use a flashlight. Improved visibility can make the process much easier and help you avoid accidental stripping of the screw.
If you continue facing challenges, don't hesitate to visit the Ring Community or contact Ring support for additional assistance. With these tips, you can effectively troubleshoot and remove your Ring Doorbell cover.
Additional Maintenance Tips

To keep your Ring Doorbell functioning at its best, regularly check the battery level and clean the faceplate and lens area. A low battery can hinder performance, so make it a habit to monitor it often.
Use a soft, lint-free cloth to wipe down the faceplate and lens every few weeks to guarantee clear video quality and prevent dirt buildup.
Inspect your device for any signs of wear or damage, particularly cracks in the faceplate, as these can compromise both durability and security. If you notice any issues, address them promptly to maintain your doorbell's efficiency.
During reassembly, verify all screws, including the security screw, are tightened properly. A loose faceplate can lead to further issues down the line.
Additionally, consider using silicone skins or weather-resistant covers to protect your Ring Doorbell from harsh elements while enhancing its appearance.
These maintenance tips won't only help your device perform effectively but also extend its lifespan, guaranteeing you enjoy reliable security for years to come.
Community Support Resources

The Ring Community is a valuable resource where you can connect with other users to share experiences and solutions for removing your doorbell cover. By creating a Ring account to post your questions, you gain access to a network of helpful individuals who've faced similar challenges.
Here's how you can make the most of this community:
- Join in the discussion: Participate actively by sharing your own tips and learning from others. The more you engage, the more insights you'll gain.
- Find an answer: Search through existing threads for troubleshooting articles that address your specific issue. Many users have already documented their experiences in detail, so you might find exactly what you need.
- Ask a question and join: If you can't find the answer, don't hesitate to post your question. The community is usually quick to respond, and you might receive personalized advice tailored to your situation.
Frequently Asked Questions
How Do I Remove the Cover From My Ring Doorbell?
To remove the cover from your device, start by finding the security screw at the bottom.
Use the special star-shaped screwdriver that came with it to unscrew that.
Once it's out, push up from the bottom of the cover with your thumbs to loosen it.
If needed, gently pry it away with a flat tool.
Finally, pull the cover off smoothly to avoid any drops.
Make sure your workspace is clean!
How to Remove Door Bell Cover?
Oh, you thought removing a doorbell cover was as easy as pressing a button? Think again!
To tackle this riveting task, start by locating the screw—it's usually hiding like it's on a secret mission.
Grab your trusty screwdriver and unscrew it.
Then, push up from the bottom with your thumbs.
If it resists, a gentle pry might be needed.
Just remember to keep it steady; you don't want a doorbell disaster!
How to Unscrew Ring Doorbell Without Tool?
If you need to unscrew your Ring doorbell without a tool, you can try a few tricks.
Use a rubber band to get a better grip on the screw, or try a flat object like a butter knife to gently pry the cover off if it's loosened.
If the screw's stripped, flipping your makeshift tool might help.
Sometimes, applying upward pressure with your thumbs can pop the cover off without unscrewing anything.
Do You Remove the Plastic Film on a Ring Doorbell?
Yes, you should remove the plastic film on your Ring Doorbell.
It's there to protect the device during shipping and installation, but it can block the camera's view, leading to poor performance.
Just gently peel it off from one corner to avoid leaving any residue.
Make sure the doorbell is powered off before you do this, so you don't accidentally trigger any notifications while removing the film.
Conclusion
Now that you know how to remove the cover off your Ring Doorbell, you're all set to tackle any battery issues or upgrades.
Remember, just like a knight in shining armor needs to polish their sword, keeping your doorbell in top shape guarantees it functions flawlessly.
If you run into any hiccups, don't hesitate to reach out for community support.
You've got this, and your doorbell will thank you for it!