
To take out the battery from your Ring Doorbell 1, first turn off the device for safety. Use a small Phillips screwdriver to remove the four screws on the aluminum faceplate. Carefully remove the faceplate with a plastic spudger to prevent any damage. Once you have taken off the faceplate, remove the plastic cover to reach the micro USB port and battery connector. Detach the battery, remembering its orientation for when you put it back in. After installing the new battery, make sure everything is secure and check the LED lights for confirmation. If you’re interested in maximizing your battery usage and troubleshooting common issues, there is more information to explore.
Key Takeaways
- Power off your Ring Doorbell 1 before starting the battery removal process for safety.
- Unscrew the four screws on the aluminum faceplate using a micro Phillips screwdriver.
- Carefully pry off the faceplate using a plastic spudger to avoid damage.
- Disconnect the battery by noting its orientation for proper installation of the new battery.
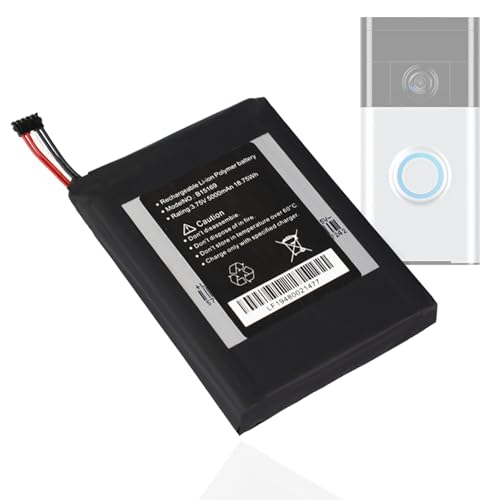
WRUMI B15169 Replacement for Ring Doorbell Battery: Video Doorbell 1st Gen Battery 5-PIN – Model B15169 Video Doorbell 1st Generation 5000mAh 3.75V (Not Compatible with Ring Doorbell 2/3/4 Gen)
B15169 battery for ring doorbell: Not compatible with Ring Doorbell 2/3/4 Gen). Please check if this battery is…
As an affiliate, we earn on qualifying purchases.
As an affiliate, we earn on qualifying purchases.
Overview of Ring Doorbell
The Ring Doorbell is a smart security device that helps you monitor your home and communicate with visitors in real-time. This innovative gadget features a built-in camera and enables two-way communication, enhancing your home security and convenience.
One key aspect of its functionality is the Ring Doorbell battery, which typically lasts between 6-12 months, depending on usage patterns. To guarantee your home remains clean and secure, consider what to look for in a home cleaning service to help maintain your environment.
To maintain peak performance, it's important to regularly check the battery. If you notice that your device isn't working as it should, or if the battery life has diminished considerably, you may need to replace the battery.
Ring Video Doorbells are designed for easy maintenance, allowing you to quickly address any battery issues. Keeping an eye on the battery level guarantees that you won't miss any important alerts or communications.
![AXTH 25-in-1 Small Precision Screwdriver Set, Professional Magnetic Mini Repair Tool Kit for Phone, Computer, Watch, Laptop, Macbook, Ring Doorbell, Eyeglass, Electronic, [Bearing Steel] Screw Driver](https://m.media-amazon.com/images/I/41Gu3qrD6mL._SL500_.jpg)
AXTH 25-in-1 Small Precision Screwdriver Set, Professional Magnetic Mini Repair Tool Kit for Phone, Computer, Watch, Laptop, Macbook, Ring Doorbell, Eyeglass, Electronic, [Bearing Steel] Screw Driver
[25in1, Household Must-Have] The small screwdriver set comes with 24 different bits (Phillips, Flat, Torx, Torx Security, Pentalobe,…
As an affiliate, we earn on qualifying purchases.
As an affiliate, we earn on qualifying purchases.
Tools Needed for Replacement

You'll need a few essential tools to successfully remove and replace the battery in your Ring Doorbell 1. Having the right equipment on hand will make the process smoother and help you avoid any potential damage to the device. Additionally, ensuring good air quality while working can enhance your focus, so consider using air purifiers to keep the environment clean.
Here are the tools you'll need:
- Micro Phillips screwdriver: This is vital for unscrewing the faceplate so you can access the battery compartment.
- Plastic spudger: Use this to gently pry off the faceplate without damaging the casing or internal components. It's designed to minimize scratches and prevent any harm.
- USB charging cable: After installing the new battery, you'll need this to charge it fully before reattaching the faceplate.
Additionally, having double-sided tape on hand is a smart choice. It'll secure the new battery in place, ensuring it stays put once installed.
With these tools ready, you'll be well-equipped to tackle the battery replacement process efficiently. Remember, taking the time to gather these essentials can save you from frustration and potential mishaps later on.

Spudger Pry Tool Kit Electronics Repair Opening Tools, Plastic & Metal Spudger Tool Kit, Prying Open Tool for Laptop, Cell Phone, Tablet, Computer Smartphones and Other Electronic Devices
Complete Electronics Repair Tool Kit – Includes 4 Precision Spudger Pry Tools For Opening Smartphones, Tablets, Laptops, Computers,…
As an affiliate, we earn on qualifying purchases.
As an affiliate, we earn on qualifying purchases.
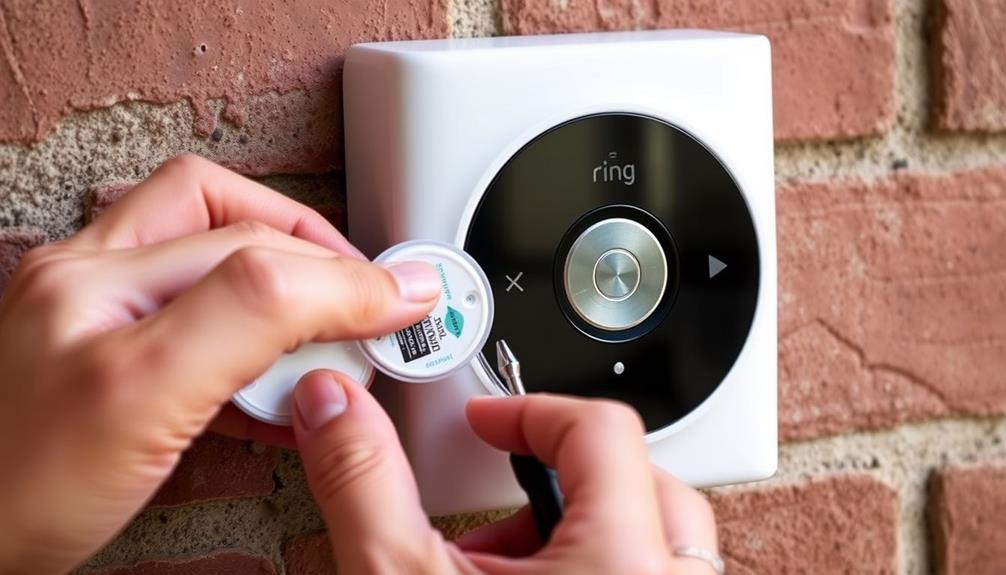
Step-by-Step Removal Process

Powering off the Ring Doorbell 1 is the first step to confirm safety before you begin removing the battery.
Once it's powered down, grab your micro Phillips screwdriver to tackle the four screws securing the aluminum faceplate. This is similar to maintaining a toilet, where regular checks can prevent issues down the line.
Carefully unscrew them, and then use a plastic spudger to gently pry off the faceplate. This will give you access to the screws underneath for further disassembly.
With the faceplate removed, you'll see a plastic cover. Gently pop it out to reveal the micro USB port and the battery connector.
Now, focus on disconnecting the battery. Carefully pry it out from its connector, taking note of the orientation. This will be important for installing the new battery later on.
Once you've successfully removed the battery, you can proceed to replace it with a new one or perform any necessary repairs.
Always confirm you handle the components with care to avoid damaging your Ring Doorbell 1. Following these steps will make the battery removal process straightforward and efficient, allowing you to maintain your device easily.
For those interested in sustainability, it's worth considering how sustainable practices can promote overall public health and hygiene.

Video Doorbell Key Removal Tool Compatible with Ring Battery Doorbell 2024 Release, Wired Doorbell Pro (N ewest Model), Wired Doorbell Plus (N ewest Model) 2PACK
COMPATIBILITY: compatible with Ring Battery Doorbell 2024 Release,Compatible with Wired Doorbell Pro (Newest Model), Wired Doorbell Plus (Newest…
As an affiliate, we earn on qualifying purchases.
As an affiliate, we earn on qualifying purchases.
Post-Replacement Verification

After replacing the battery, check for LED lights on the front of your Ring Doorbell 1 to verify that it powers on. If the LED lights illuminate, you're on the right track. Here are a few steps to guarantee everything's functioning properly:
- Battery Connection: Make sure the new battery is correctly aligned with the connectors. A poor connection can prevent your doorbell from powering on.
- Ring App Monitoring: Open the Ring app to check the battery level. A fully charged battery will display a green indicator, confirming it's ready for use.
- Functionality Test: Press the doorbell button to test its functionality. You should see the camera activate and receive notifications on your smartphone.
If the LED lights don't turn on or you can't connect to Wi-Fi, consider using the USB port to charge the battery directly. Re-check the battery connection to guarantee everything is secure.
Once verified, your Ring Doorbell 1 should operate smoothly, keeping your home secure and connected.
Common Battery Issues and Solutions

Common battery issues with the Ring Doorbell 1 can lead to frustration, but several solutions can help you address these problems effectively.
Many users experience difficulties with the non-removable battery, leading to concerns about battery longevity and performance. If you find your battery degrading, consider exploring DIY methods shared in online forums. These discussions often reveal tips for accessing the battery for replacement or maintenance.
For those seeking replacement solutions, it's crucial to research compatible batteries thoroughly. Unfortunately, many users report challenges in finding reliable sources for replacements. Verify authenticity to avoid further problems.
If you've tried everything and still face issues, don't hesitate to reach out to customer support. While some users express dissatisfaction with the assistance provided, it's worthwhile contacting them for guidance on battery concerns. They might offer insights that can resolve your situation or direct you to the right resources.
Frequently Asked Questions
How Do I Get the Battery Out of My Ring Doorbell?
To get the battery out of your Ring Doorbell, start by unscrewing the faceplate with a micro Phillips screwdriver.
Carefully pry it off with a plastic spudger to avoid damage.
Once you've removed the faceplate, pop off the plastic cover to access the battery.
Gently disconnect the battery, keeping track of its orientation for reinstallation.
After replacing it with a new one, reconnect everything and check the LED to verify it's working.
How Do You Remove a Ring Doorbell 1 Cover?
You're staring at your Ring Doorbell 1, wondering how to access its secrets.
First, grab a micro Phillips screwdriver and unscrew the four screws on the aluminum faceplate. As you remove them, feel the anticipation build.
Next, gently pry off the faceplate with a plastic spudger, being careful not to damage anything.
Once it's off, you'll find the battery compartment waiting for you, ready for your next move.
How Do You Take the Cover off a Ring Doorbell to Charge the Battery?
To take the cover off your Ring Doorbell, start by removing the four screws on the aluminum faceplate with a micro Phillips screwdriver.
Use a plastic spudger to gently pry the faceplate away for easier access.
Once detached, carefully pop out the plastic cover, and you'll see the micro USB port.
This allows you to charge your battery.
Just make sure to pay attention to the orientation when you reconnect it.
Is the Ring Doorbell Battery Removable?
Yes, the Ring Doorbell battery is removable. You can easily replace it when needed.
To do this, you'll first need to detach the faceplate by removing the screws.
Once the faceplate is off, use a plastic spudger to pry open the device and access the battery.
Just be careful when disconnecting and reconnecting the battery to make certain it's properly oriented.
After replacing it, check the LED to confirm everything's working correctly.
Conclusion
By following these simple steps, you've successfully removed your Ring Doorbell battery and can now enjoy a fully functional device.
Remember to check the battery health regularly, keep your doorbell clean, and verify it's charged for peak performance.
With proactive maintenance, you'll prevent issues, extend battery life, and enhance security.
So, tackle those tasks, stay vigilant, and keep your home safe.
Your Ring Doorbell is your partner in protection—make certain it's always ready to serve!