To take off the back cover of your Ring Doorbell, you will need a T6 torx-head screwdriver. Start by unscrewing the security screw located at the bottom of the faceplate. Gently push upward from the bottom to loosen it. If it is stuck, you can carefully use a flat object to pry it off. Once the faceplate is removed, you will be able to access the battery compartment. Remember to make sure the device is turned off before removing the battery. Reattaching the faceplate is also a simple process. If you follow these instructions carefully, you will be well on your way to achieving your goal—more helpful tips are waiting for you!
Key Takeaways
- Use a star-shaped or T6 torx-head screwdriver to remove the security screws on the back cover.
- If the back cover is stuck, gently pry it off using a flat and skinny object.
- Ensure all security screws are completely removed before attempting to detach the back cover.
- Work in a clean area to avoid losing small parts during the removal process.
Tools Needed for Removal
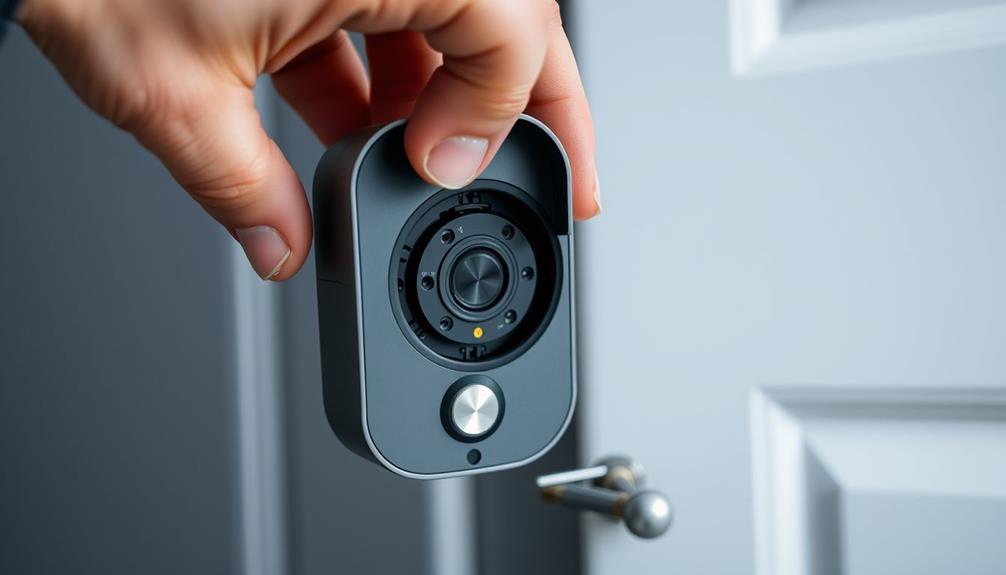
To remove the back cover of your Ring Doorbell, you'll need a special star-shaped screwdriver or a T6 torx-head screwdriver. The provided Ring screwdriver is specifically designed for this task, so make certain you have it on hand. To remove the back cover of your Ring Doorbell, first make sure the device is powered off. Then, use the special star-shaped screwdriver or T6 torx-head screwdriver to loosen the screws securing the cover in place. Carefully lift and remove the cover to access the internal components. For step-by-step instructions on how to remove doorbell cover, refer to the user manual or online tutorials provided by Ring. If you don’t have the provided Ring screwdriver, you can purchase a T6 torx-head screwdriver from a hardware store or online retailer. It’s important to use the correct tool to avoid damaging the screws or cover. If you need further assistance on how to remove Ring Doorbell back cover, you can also search for instructional videos on how to remove ring doorbell back online. These tutorials can provide visual guidance and additional tips for safely removing the cover.
Before you start, gather all the tools needed to guarantee a smooth process. You might also want to keep a flat and skinny object, like a butter knife or a paint scraper, nearby in case the back cover is stuck. Additionally, guaranteeing a smooth process is similar to how an airless paint sprayer provides smooth, even coverage without brush marks.
Next, it's vital to focus on the security screws. You'll need to completely remove all of them before attempting to detach the back cover. This step helps prevent any damage to the device.
To avoid losing any small parts during the removal process, maintain a clean workspace. Lay out a cloth or use a small container to hold the screws as you take them out.
If you find yourself in need of replacement security screws or additional tools, remember that you can order them through customer service or online.
Being well-prepared will make the removal process of your Ring Doorbell's back cover much easier.
Steps to Remove Faceplate

Begin by locating and unscrewing the security screw at the bottom of the faceplate using the included Ring screwdriver or a T6 torx-head screwdriver.
Once the security screw is removed, it's time to remove the faceplate. Use your thumbs to push up gently from the bottom of the faceplate, which should loosen it. Carefully pull the faceplate away from the body of the Ring Doorbell.
If you encounter any difficulties, consider creating a clean workspace to avoid losing the small security screw and to keep your tools organized.
If the faceplate feels stuck, you might need to use a flat and skinny object, like a butter knife or paint scraper, to pry it off gently. Just be cautious not to damage the device.
After successfully removing the faceplate, place it in a secure location where it won't get damaged. This will guarantee you can easily access the battery or make any necessary adjustments to your Ring Doorbell without any hassle.
Accessing the Battery

After removing the faceplate, you'll need to locate the battery compartment at the bottom of the Ring Doorbell. This compartment is where you'll find the battery that powers your device.
Before you proceed, make certain the device is powered off to prevent any electrical issues. It's also a good idea to have a cleaning kit on hand to keep your doorbell free from dust and debris during this process.
To detach the battery, press down on the black tab at the bottom of the battery while gently pulling it out toward the bottom of the doorbell. It's essential to handle the battery carefully to avoid any damage. If you're looking to replace the battery, verify that you have a fully charged one ready to go.
Once you've got the new battery, slide it back into the battery compartment. You should hear a click, indicating that it's securely in place. If your Ring Doorbell features a charging port, you might also consider charging the battery outside the device for convenience.
With the battery replaced and everything securely in place, you're ready to reattach the faceplate and get back to enjoying your Ring Doorbell's security features.
Reattaching the Faceplate

Reattaching the faceplate of your Ring Doorbell is a simple process that guarantees your device is secure and protected.
Start by holding the faceplate at a 45-degree angle. This angle makes it easier to align the top hook of the faceplate with the corresponding hole on the doorbell. Once aligned, gently push the bottom of the faceplate until it snaps back into place. Confirm that it fits snugly against the doorbell body for ideal security.
After the faceplate is securely attached, grab the provided screwdriver and replace the security screw located at the bottom. Tighten it to confirm the faceplate won't come loose over time.
Remember that different colored faceplates are interchangeable, allowing for some customization to match your home's aesthetic while maintaining functionality.
Troubleshooting Common Issues

When you encounter problems removing the back cover of your Ring Doorbell, addressing common issues can help you troubleshoot effectively.
Many users struggle with tight fits and security screws that just won't budge. First, make sure you've completely removed all security screws before attempting to detach the back cover. This step is essential to avoid damaging your device.
If you're still having trouble, gather some tools for leverage. A flat and skinny object, like a butter knife or paint scraper, can help pry the back cover off.
If you notice any stripped screws or have difficulty accessing them, try using a rubber band to improve grip, which can make removal easier without causing damage.
Frequently Asked Questions
How Do I Remove the Cover From My Ring Doorbell?
To remove the cover from your Ring Doorbell, you'll need the special star-shaped screwdriver provided with it.
Start by unscrewing the security screw at the bottom of the faceplate.
Once that's done, push up gently from the bottom using your thumbs.
If it's stuck, use a flat object to pry it loose.
Carefully pull it away from the doorbell, and make sure to store the cover safely after removing it.
How Do You Remove the Back Bracket From a Ring Doorbell?
To remove the back bracket from your Ring Doorbell, start by ensuring all security screws are removed.
Grip the doorbell and the mounting bracket separately for better leverage.
Apply upward pressure on the doorbell while pushing down on the bracket to help separate them.
If it's still stuck, use a flat tool like a paint scraper to gently pry it off.
Remember to be patient; some force may be necessary to detach it successfully.
How Do I Take off a Ring Doorbell?
To take off your Ring Doorbell, start by finding the security screw at the bottom of the faceplate.
Use the provided screwdriver to remove it.
Once that's done, gently push up from the bottom of the faceplate with your thumbs.
If needed, you can use a flat tool to help pry it off.
Make sure the device is powered off before you proceed, and keep all parts safe during the process.
How to Remove Ring Doorbell to Charge?
To charge your Ring Doorbell, you'll first need to remove it from its mounting bracket.
Locate the security screw at the bottom and use the provided screwdriver to take it out.
Once that's done, gently push up from the bottom to loosen the faceplate.
After removing the faceplate, find the battery tab, press it down, and pull out the battery for charging.
Don't forget to securely reattach everything after charging!
Conclusion
Removing the back cover of your Ring doorbell might feel like a challenging task, but it's easier than you think!
With the right tools and a bit of patience, you'll be able to access the battery in no time.
Once you've reattached the faceplate, your doorbell will be ready to guard your home like a superhero.
Don't let the fear of tinkering hold you back—your Ring doorbell's maintenance is just a few simple steps away!