To relocate your Ring Doorbell camera, begin by turning it off at the circuit breaker for safety. Then, remove the faceplate with the included screwdriver and carefully take the camera off its mounting bracket. Remember to keep all the hardware organized to prevent losing anything during the move. When you reach the new location, make sure the Wi-Fi setup is compatible and then log into the Ring app to update the camera’s location settings. Test that the camera is functioning correctly after the relocation and don’t forget to adjust your subscription if needed. You can find more tips to help with the move and ensure that your security system works smoothly.
Key Takeaways
- Power off the Ring doorbell at the circuit breaker before handling to ensure safety during the move.
- Detach the camera from its mounting bracket using the provided screwdriver for safe removal.
- Store all hardware and the camera in a safe place to prevent loss or damage during the relocation.
- Log into the Ring app to update the camera's location settings after relocating it to the new spot.

Ring Spare Parts Kit for Battery Doorbell
Everything you need to setup your Ring Battery Doorbell in just a few minutes.
As an affiliate, we earn on qualifying purchases.
As an affiliate, we earn on qualifying purchases.
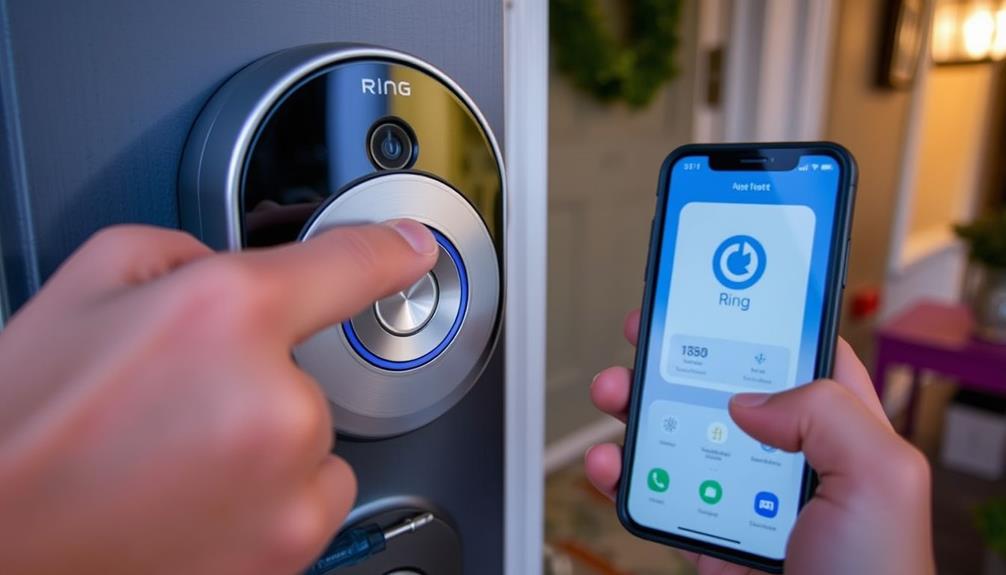
Overview of Ring Doorbell Features
The Ring Video Doorbell offers a range of features, including real-time video streaming and two-way audio, so you can easily communicate with visitors from anywhere. This Ring device not only enhances your security but also provides you with convenience and flexibility.
Available in both wired and battery-operated models, you can choose the best option for your home installation needs. Additionally, the Ring doorbell can integrate with essential kitchen gadgets for a seamless smart home experience.
With the integrated Ring app, you can access live feeds, view recorded videos, and receive motion alerts, ensuring you're always connected to your front door. The app's user-friendly interface allows you to manage your Video Doorbell effortlessly.
Furthermore, the Ring doorbell is compatible with various smart home systems, which enhances your home automation and overall security features.
Different models come with unique capabilities such as night vision, customizable motion zones, and advanced AI detection for people and packages. These features help you tailor the device to your specific security needs.
Whether you're monitoring deliveries or checking who's at the door, the Ring Video Doorbell provides the tools you need for peace of mind while being away from home.
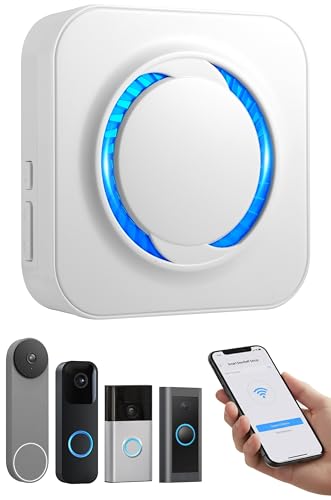
MISDUOCOCO Wireless Doorbell Chime Extender for Ring Blink Google Nest, Wi-Fi Smart Doorbell Booster with No Wiring Required & No Range Limits, Compatible with Alexa App-Connected, 5 Volumes 58 Chimes
【Smart Doorbell Chime Universal Compatibility | 2.4GHz Network Stable Connection】Works with all Ring, Blink, Google Nest Video Doorbell…
As an affiliate, we earn on qualifying purchases.
As an affiliate, we earn on qualifying purchases.
Preparing to Move Your Device

Before you relocate your Ring doorbell, it's important to prepare the device to guarantee a smooth and safe move. Start by powering off the device at the circuit breaker. This step prevents any electrical issues during the removal process. Next, carefully detach the faceplate using the provided screwdriver. Store the hardware in a plastic bag or its original box to keep everything organized.
Additionally, maintain a continuous WiFi connection to access recorded videos while you move. It's also vital to confirm that your new location's internet setup is compatible with your Ring doorbell and any existing accessories.
Here's a quick checklist to help you prepare for the move:
| Task | Description |
|---|---|
| Power Off | Disable power at the circuit breaker. |
| Remove Device | Detach faceplate and store hardware safely. |
| Check Compatibility | Verify internet setup at the new location. |
If you plan to transfer ownership, don't forget to remove the device from the Ring app and provide the new owner with setup instructions. Following these steps will make your relocation process much easier.

Video Doorbell Screwdriver, Double-Ended T6 T15 Screw Driver Tool for Camera Video Doorbell Replacement, Battery Change, Wifi Password Reset
DOORBELL SCREWDRIVER: This video camera screwdriver is used for Wifi password reset access, battery replacement, charging and secure…
As an affiliate, we earn on qualifying purchases.
As an affiliate, we earn on qualifying purchases.
Steps for Moving the Camera

To move your Ring camera, start by powering it off at the circuit breaker for safety. This step guarantees you won't accidentally activate the device while handling it.
Additionally, verify that your new setup location is suitable for security, similar to the way you'd consider security enhancement options for your home.
Next, carefully detach the camera from its mounting bracket using the provided screwdriver. Take your time to avoid damaging any hardware during this process.
Once the camera is removed, store it along with the mounting hardware in a safe place. Using a plastic bag or the original box can help prevent loss or damage while you're in the middle of moving.
After you've relocated to your new address, it's time to set the device back up. First, log into the Ring app and update the camera's location settings to reflect your new environment.
If necessary, complete a new setup process by adding the camera to the Ring app at the new location. This guarantees that your device functions properly and continues to provide security at your new home.
Following these steps will help you successfully move your Ring camera without any hassle.

Security Camera Universal Mounting Bracket,Adjustable Indoor/Outdoor Security Wall Metal Bracket, Compatible with Arlo Pro/Pro 2/Pro 3/Pro 4/Ultra/Ultra 2, & with Ring Stick Up Cam Battery (4 Pack)
【VERSATILE MOUNTING & 360° ROTATION ADJUSTMENT】The VIEWZONE Adjustable Metal Mount can easily be adjusted with 360-degree swivel and…
As an affiliate, we earn on qualifying purchases.
As an affiliate, we earn on qualifying purchases.
Updating Your Location in the App

Updating your location in the Ring app is vital for guaranteeing your camera operates effectively in its new environment. To do this, start by logging into your Ring account.
Once you're in, access the device settings by selecting the gear icon on the device preview. From there, navigate to "Device Settings," then go to "General Settings." Here, you can change the location to your newly added address. It's important to verify that the air quality in your new location is also ideal, as cleaner air can improve your overall health and well-being, just like how air purifiers improve indoor air quality.
Before you attempt to update the device's location, make sure your new address is already added in the Ring app. If you haven't done this yet, take a moment to add it. For better accuracy, you might consider removing the device from its previous location and completing a new setup at your new address. This can help confirm that the camera functions ideally.
Lastly, remember to maintain a continuous Wi-Fi connection at your new location. This is essential for the ideal functionality of your Ring devices after the move. Keeping everything updated will allow you to enjoy peace of mind, knowing your home is secure.
Subscription Adjustments for New Location

When you move to a new location, you need to update your subscription plan details in the Ring app to guarantee you keep your benefits.
It's also a good idea to check if your previous perks transfer to your new address and to review your video storage options.
This way, you'll have the coverage you need right from the start.
Update Subscription Plan Details
Moving to a new location means you'll want to adjust your Ring Protect Plan to maintain uninterrupted video storage and coverage.
Start by opening the Ring app on your device. Here, you can easily update your subscription plan to fit the requirements of your new location. Review your current plan details to see if they align with the features you'll need in your new environment.
It's essential to guarantee a continuous Wi-Fi connection at your new place, as this is critical for your Ring devices to function effectively and for you to access your videos.
Check if your new location necessitates any changes in plan type or pricing, as different areas might've varied subscription rates or features available.
During your move, make sure to keep your subscription active to avoid any service interruption. If you find that your new circumstances require a different plan, you can adjust or cancel your existing subscription after relocating.
Transfer Benefits to New Address
To guarantee you keep all the benefits of your Ring Protect Plan, transfer your subscription to your new address through the Ring app. This guarantees you continue enjoying features like video storage and real-time alerts. If you don't transfer your benefits, you'll lose access to all stored videos and data tied to your previous address.
Here's what you need to do:
- Open the Ring app and navigate to the settings menu.
- Add your new location to guarantee your devices are recognized.
- Review your subscription details to fit the needs of your new location.
Review Video Storage Options
After transferring your benefits to your new address, it's time to review your video storage options to confirm you're getting the best plan for your needs.
When you move, you might need to adjust your Ring Protect Plan subscription to guarantee uninterrupted video storage and access. The Ring Protect Plan has different tiers, so take a moment to assess which features are essential for your new location.
Use the Ring app to view your current plan details and see if you need to switch to a different subscription based on the number of devices you have or the features you want.
If your new home requires additional coverage or enhanced features, you can modify your plan directly in the app.
Deleting Previous Address in the App

To delete a previous address in the Ring app, you'll first need to access the settings menu for your account options.
Once there, confirm the address deletion process by selecting the "Delete Location" option and ensuring all devices are removed.
This step is vital to prevent any data loss before adding your new location.
Accessing Ring App Settings
Open the Ring app and head to the settings menu by tapping the three lines in the top left corner. From there, you'll want to access your account options. Scroll down until you find the "Delete Location" option.
It's vital to confirm that no devices are currently installed at the location you wish to delete. Once you tap on "Delete Location," confirm the action by selecting the red bin icon.
Before you begin this process, keep the following in mind:
- Deleting the location will remove all associated devices.
- You'll lose any data linked to those devices.
- It's important to update your account with the new address first.
Taking these steps will help you manage your Ring app settings and make certain that you're ready for any adjustments. Deleting a previous address can streamline your account, making it easier to set up your Ring devices in their new locations.
Always double-check your settings to avoid losing important information or experiencing service disruptions.
Confirming Address Deletion Process
Deleting a previous address in the Ring app is a straightforward process that guarantees your account stays organized.
To start, open the Ring app and tap the three horizontal lines in the top left corner to access the settings menu. From there, select "Account," then navigate to "Locations" to view your saved addresses.
Once you find the location you want to delete, simply tap on it. You'll see the option to "Delete Location." Before you proceed, double-check that no devices are currently installed at that address. If everything's in order, scroll to the bottom and tap the red bin icon to confirm your decision to delete. This action will remove the address and all associated data from your account.
After completing these steps, the previous address will no longer be accessible in the app.
It's crucial to keep your Ring app locations updated to make certain you have the most relevant and accurate information at your fingertips. By regularly managing your locations, you can streamline your experience and maintain a tidy account.
Community Support and Resources

The Ring Community provides a helpful platform where you can connect with other users to share experiences and get advice on moving and setting up your Ring cameras. Engaging with this community not only expands your knowledge but also allows you to tap into a wealth of shared insights.
If you're unsure about how to relocate your camera, you can easily post a question and receive prompt responses from those who've successfully navigated similar challenges.
Here are some benefits of participating in the Ring Community:
- Access to expert tips: Learn best practices for relocating your camera from seasoned users.
- Real-time feedback: Get immediate answers to your specific questions about camera movement.
- Shared experiences: Discover how others tackled issues related to reinstallation at new locations.
Troubleshooting Common Issues

After moving your Ring Doorbell camera, you might encounter some common issues that need troubleshooting.
It's important to understand the steps to resolve problems like camera visibility, connectivity, or lagging video.
Let's go through some quick fixes and essential tips to get your camera back up and running smoothly.
Common Camera Problems
When your Ring doorbell camera isn't capturing video as expected, start by checking its alignment and mounting to verify it's positioned correctly for ideal viewing. A misaligned camera can lead to missed footage and a frustrating experience.
If you're facing issues, consider these common problems:
- Confirm the camera is securely mounted without any loose connections.
- Check the settings in the Ring app for motion detection sensitivity; this can impact how the camera responds to activity.
- Verify your Wi-Fi connection is strong and stable, as weak signals can cause video lag or disconnection.
If you still have questions about why your camera isn't working, inspect if the infrared sensors are blocked, especially during night vision mode.
Troubleshooting Steps Explained
How can you effectively troubleshoot common issues with your Ring doorbell camera to guarantee it captures the best view?
First, check the mounting height. Ideally, your camera should be positioned between 4-5 feet above ground for maximum field of view. If you notice it's not capturing the desired angle, unscrew the faceplate and reposition the camera slightly before securely reattaching it.
Next, assess your connectivity. If you've moved the camera, confirm that the Wi-Fi signal is strong in its new location. Open the Ring app to verify that the device is properly configured. If the camera still struggles with connectivity, consider adjusting settings such as motion zones or sensitivity to enhance performance without needing to relocate it again.
If issues persist, you might need to reset the device. Hold the setup button for 20 seconds to clear any software-related problems.
Tips for Quick Fixes
Here are five quick fixes you can try to troubleshoot common issues with your Ring doorbell camera.
First, make sure the camera is securely mounted. A slight adjustment can enhance its angle for capturing the desired view. If the camera's field of view is obstructed, consider repositioning it to a higher or lower location for better visibility.
Next, use the Ring app to access the camera's live feed. This way, you can make real-time adjustments to its placement as needed. If you're struggling with the camera's rotation or angle, refer to the installation manual for proper mounting techniques.
Lastly, take environmental factors into account. Sunlight glare or shadows can hinder performance, so moving the camera to a different location might be necessary.
- Check the camera's mounting angle for improved visibility.
- Reposition the camera if the field of view is blocked.
- Utilize the Ring app for live feed adjustments.
Leaving Devices for New Owners

Leaving your Ring doorbell and cameras intact for the new owners guarantees they've functional security devices right from the start. It's a thoughtful gesture that helps them feel secure in their new home.
To guarantee a smooth changeover, provide the new owner with all necessary information about the setup and operation of the Ring devices. This includes instructions on how to access the Ring app and re-connect the devices to Wi-Fi.
Before you hand over the devices, make certain to remove any personal information. This protects your privacy and allows the new owner to create their Ring account without hassle. It's also wise to leave behind your contact information in case they encounter any issues or need assistance later on.
Consider including a simple guide that covers the basic functionality of the devices, so they can quickly get familiar with them. This way, the new owners can enjoy the benefits of their new security system without unnecessary complications.
Customizing Camera Settings and Arrangement

Once you've set up your Ring devices for the new owners, you can customize your camera settings and arrangement to enhance your security experience. This process involves a few simple steps within the Ring app, allowing you to tailor the surveillance to your specific needs.
Start by adjusting features like motion sensitivity and video quality to guarantee you're capturing important details without unnecessary alerts. You can also set specific motion zones, focusing the camera's detection capabilities on areas that matter most to you.
Additionally, consider rearranging the camera display order in the app. This lets you prioritize frequently used devices for quicker access. Don't forget that the physical positioning of each camera is equally important; changing its mounting angle can greatly improve coverage.
Here are some key points to remember while customizing camera settings:
- Adjust motion sensitivity for fewer false alarms.
- Set specific motion zones for targeted monitoring.
- Change video quality for clearer recordings.
Frequently Asked Questions
How Do I Adjust the Camera on My Ring Doorbell?
To adjust the camera on your Ring Doorbell, you'll want to start by accessing the Ring app on your device.
Select your doorbell from the list, then head to Device Settings.
From there, you can modify the camera angle by adjusting the mounting bracket.
Make certain your doorbell is securely fastened, and check the camera view regularly to verify it covers the desired area.
Don't hesitate to make adjustments as needed!
Can You Move the Camera Angle on the Ring Doorbell?
You can't move the camera angle on the Ring Doorbell itself since it's fixed in place.
However, you can reposition the entire device if you need a different view.
For best results, install it at about 48 inches from the ground.
Some models offer wedge kits that let you adjust the angle slightly, but remember, any major adjustments require physically relocating the doorbell.
How Do I Make My Ring Camera Move?
Wondering how to make your Ring camera move? Unfortunately, you can't adjust it remotely, but you can change its angle manually.
Start by detaching the camera from its mount, reposition it to your desired angle, and then securely reattach it.
If you need a different location, uninstall it and reinstall at the new spot.
Don't forget to reconnect to Wi-Fi and check the Ring app afterward to keep everything functioning smoothly!
How to Move Ring Camera to a Different Location?
To move your Ring camera to a different location, start by turning off the power at the circuit breaker for safety.
Use the screwdriver to detach the faceplate and carefully remove the camera from its mount.
Store the hardware in a safe place.
At the new location, check the wifi compatibility, then reinstall the camera according to the Ring app instructions.
Don't forget to update the device location in the app for seamless access.
Conclusion
Moving your Ring Doorbell camera doesn't have to be a hassle.
By following the steps outlined, you can guarantee your device continues to protect your home in its new location.
For instance, imagine you've just relocated to a new neighborhood and want to keep an eye on your front porch.
By quickly updating the app and adjusting the camera, you can easily maintain your peace of mind in your new surroundings.
Happy monitoring!