You have the option to install your Ring Doorbell without drilling holes by using a no-drill adhesive mount. To start, make sure the wall surface is clean and smooth for optimal adhesion. Apply robust double-sided tape and press the mount against the wall for a few minutes. It is important to let the adhesive set for approximately an hour before attaching the doorbell. This technique is ideal for tenants since it does not leave any damage and can endure various weather conditions. Additionally, you can easily remove it when necessary. For further advice on achieving a secure installation, there is plenty more information available!
Key Takeaways
- Ensure the wall surface is clean, smooth, and free of debris for optimal adhesive adhesion before applying the No-Drill Mount.
- Use the strong double-sided adhesive included with the No-Drill Mount for secure attachment; avoid rough textures.
- Apply the adhesive strips accurately and hold the mount firmly against the wall for several minutes to establish a strong bond.
- Wait at least one hour after applying the adhesive before securely attaching your Ring Video Doorbell.

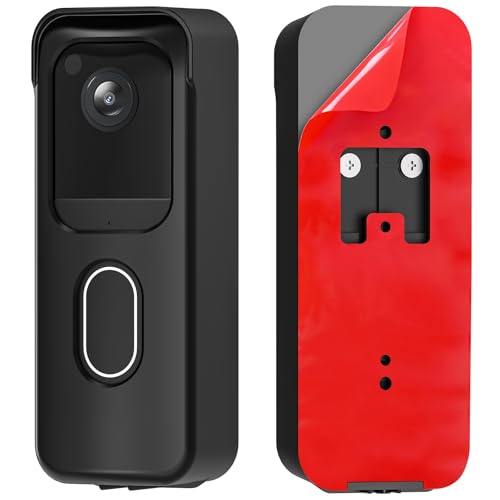
BFYTN Adhesive Mount Compatible with Ring/Other Video Doorbell No-Drill Mounting Bracket Cover Holder Not Block Doorbell Sensor
360 degree full coverage protection Design : Real 360 degree protection and protects your doorbell ,it doesn't block…
As an affiliate, we earn on qualifying purchases.
As an affiliate, we earn on qualifying purchases.
Overview of No-Drill Mount
The No-Drill Mount offers a hassle-free way to install your Ring Video Doorbell without damaging walls, making it perfect for renters.
This innovative solution uses strong double-sided adhesive to provide a secure attachment, ensuring your doorbell stays in place despite various weather conditions.
With an operating temperature range of -4°F to 158°F, you won't have to worry about it failing during extreme temperatures.
Additionally, incorporating smart organization techniques can further enhance your entryway's functionality, creating a more inviting atmosphere essential kitchen gadgets.
To achieve the best results, you'll need to apply the No-Drill Mount on a clean, smooth surface.
It's not suitable for rough textures or glass, so keep that in mind when choosing a location.
The waterproof adhesive guarantees durability, but note that it provides a one-time use for installation.
However, the product includes an extra set of tapes to accommodate any potential re-installation needs.
Before attaching your Ring Video Doorbell, make sure to hold the mount firmly against the wall for several minutes.
Allow the adhesive to cure for a few hours, and you'll be all set.
With the No-Drill Mount, you can enjoy a straightforward installation process tailored for your rental living situation.

QIBOX No Drill Adhesive Video Doorbell Mount, Compatible with Ring/Blink Wireless Video Doorbell, Anti-Theft, Black Aluminum Steel, Wall Mount
Universal Compatibility: Fits Ring doorbell models Wireless/2/3/3 Plus/4/(2020/2023/2024 Release) and Blink Doorbell1st Gen Mount, 𝐍𝐨𝐭 𝐜𝐨𝐦𝐩𝐚𝐭𝐢𝐛𝐥𝐞 𝐰𝐢𝐭𝐡 𝟐𝐧𝐝…
As an affiliate, we earn on qualifying purchases.
As an affiliate, we earn on qualifying purchases.
Installation Process

To successfully install your Ring Doorbell, you'll need to prepare the surface first, making certain it's clean and free of debris for ideal adhesion.
Consider using eco-friendly cleaning products, as they can be effective for this purpose and are better for the environment, which aligns with what to look for in a home cleaning service.
Next, focus on applying the adhesive correctly to guarantee a strong hold.
Preparation of Surface
Verify your wall surface is clean and smooth for the best adhesion of the No-Drill Mount. Proper preparation of the surface is crucial for achieving an ideal adhesive bond. Use a cleaning solution to remove any dust, dirt, and grease. This step guarantees that the adhesive can bond effectively and prevents future issues.
| Step | Action |
|---|---|
| 1. Surface Check | Inspect for rough surfaces and textures. |
| 2. Cleaning | Use a non-damaging cleaning solution. |
| 3. Drying | Allow the surface to dry completely. |
| 4. Adhesive Setting | Allow adhesive to set for several hours. |
| 5. Stability Check | Regularly check stability, especially after bad weather. |
Avoid rough surfaces like brick or glass, as these can hinder the adhesive's performance. After you mount the No-Drill Mount, make sure to allow the adhesive to set properly. This will enhance the bond and guarantee your Ring Doorbell remains securely in place. Regularly check stability, especially when exposed to varying weather conditions.
Adhesive Application Technique
Applying the adhesive correctly is vital for guaranteeing your No-Drill Mount stays securely in place.
Begin by thoroughly cleaning the wall surface. This step is significant for ideal adhesion with the double-sided tape. Once the wall is clean, you can proceed to apply the adhesive strips to the back of the No-Drill Mount.
Additionally, it's important to take into account the environment where you're installing the mount, as factors like humidity and temperature can affect adhesive performance. For guidance on cat safety with household items, verify that your installation is away from areas where pets may interfere.
Firmly press the mount against the wall, confirming it's level, and hold it in place for at least five minutes to secure the adhesive bond. After that, allow the adhesive to set for a minimum of one hour before installing your Ring Video Doorbell. This waiting period guarantees that everything is securely attached and reduces the chance of any mishaps.
Keep in mind that the adhesive strips are for one-time use. If you ever need to remove the mount, gently pull both adhesive strips upwards simultaneously. This technique allows for easy removal without damaging the wall.
If you plan on reinstalling, make sure to have an extra set of adhesive strips on hand, as the original ones won't work again. Following these steps will help you achieve a dependable and sturdy installation.
Final Mounting Steps
Once the adhesive has fully set, you can begin securely attaching your Ring Video Doorbell to the No-Drill Mount. Make sure to follow these final mounting steps for a successful installation:
- Ensure the wall surface is clean: A clean surface enhances the effectiveness of the adhesive.
- Press the No-Drill Mount firmly: Hold it against the wall for several minutes to activate the double-sided adhesive.
- Wait for the adhesive to cure: Allow at least one hour for maximum stability before proceeding.
- Attach the Ring Video Doorbell: Securely screw it onto the mounting plate, following the installation instructions provided.
No Drill Door Mount for Blink Video Doorbell (2025 2nd Gen), Adhesive Mounting Bracket Accessories for Security System, Not for Blink Video Doorbell (2021&2023 Release), Black
【Compatibility】ONLY designed for Blink Video Doorbell (2025 2nd Gen), not compatible with Blink Video Doorbell (2021&2023 release), perfect…
As an affiliate, we earn on qualifying purchases.
As an affiliate, we earn on qualifying purchases.
Suitable Surfaces

When mounting your Ring Doorbell, it's essential to choose the right surface.
Smooth, even surfaces like drywall or painted wood work best, while rough textures like brick or stucco can cause issues.
Make sure to prepare the surface properly for the best adhesion and durability.
Ideal Surface Types
For the best adhesion, the No-Drill Mount for your Ring Doorbell works best on smooth, even surfaces like painted drywall, vinyl siding, or smooth wood. Using the right surface guarantees ideal adhesion, allowing your doorbell to stay securely in place.
Here are ideal surfaces to take into account:
- Painted drywall: Provides a clean wall surface for effective installation.
- Vinyl siding: Smooth texture allows for excellent adhesive performance.
- Smooth wood: Creates a sturdy foundation for the No-Drill Mount.
- Metal surfaces: Make sure they're clean and rust-free for proper adhesion.
Be certain the wall is clean before installation to maximize the adhesive tape's waterproof properties.
Press the mount firmly against the surface for several minutes, allowing the adhesive to set properly.
Avoid using the No-Drill Mount on rough textures or glass, as these can compromise adhesion performance.
Avoid Rough Textures
To guarantee your Ring Doorbell stays securely in place, steer clear of rough textures that can compromise the adhesive's effectiveness. The No-Drill Mount is designed for smooth surfaces, and rough textures like brick, shingles, or uneven stucco can hinder the adhesion process. For ideal installation, verify the surface is both clean and dry before applying the No-Drill Mount.
Here's a quick reference table to help you identify suitable and unsuitable surfaces for mounting:
| Surface Type | Suitable for No-Drill Mount | Comments |
|---|---|---|
| Brick | No | Rough texture affects adhesion |
| Stucco | No | Uneven surface problematic |
| Wood | Yes | Verify it's smooth |
| Vinyl Siding | Yes | Great for effective mounting |
The adhesive used in the No-Drill Mount is waterproof, making it suitable for various weather conditions. However, mounting on glass isn't recommended, as it won't provide effective adhesion. Stick to the smooth surfaces to guarantee your Ring Doorbell remains securely in place!

Qjin Double Sided Tape for Ring Video Doorbell (2nd Generation), Mounting Tape (No Drilling Required) 5 Pack
Secure Mounting: Provides a secure and stable hold for your Ring Video Doorbell (2nd Generation), ensuring it stays…
As an affiliate, we earn on qualifying purchases.
As an affiliate, we earn on qualifying purchases.
User Experiences

Users have shared positive experiences with the No-Drill Mount, highlighting its easy installation and secure adhesion on smooth surfaces. Many renters appreciate this option as it avoids any damage to walls.
However, surface preparation is vital for best results. Here are some key insights from user experiences:
- Apply firm pressure on the mount for several minutes to improve adhesion.
- Wait at least one hour after applying the adhesive before attaching the Ring Doorbell for better bond strength.
- The adhesive performs well in various weather conditions, but some users faced challenges in extreme temperatures.
- While the No-Drill Mount excels on smooth surfaces, it may struggle on rough textures like brick or stucco.
Advantages of No-Drill Installation

No-drill installation methods, like the Ring No-Drill Mount, allow you to secure your doorbell without damaging your walls, making it a perfect choice for renters. This approach offers quick and easy installation, considerably reducing the time and effort required compared to traditional drilling methods. You'll appreciate how simple it's to set up, especially if you're living in a temporary space.
The adhesive used in the No-Drill Mount is waterproof and designed to withstand various weather conditions, ensuring your doorbell remains secure without compromising wall integrity. This means you won't have to worry about unsightly holes or repairs when you move out.
Flexibility is another major advantage; with this non-permanent installation, you can easily relocate the Ring Doorbell whenever necessary, adapting to your changing living situation. Whether you're a frequent mover or just in a temporary living arrangement, the No-Drill Mount provides a reliable solution.
You can enjoy the benefits of a smart doorbell without the hassle of permanent fixtures, making it a smart choice for anyone looking to maintain their home's aesthetics while enhancing security.
Maintenance and Removal

Maintaining your Ring Doorbell's No-Drill Mount is essential for guaranteeing it remains secure and functional over time. Regular checks will help you avoid any unexpected issues, especially after extreme weather. Here are some maintenance tips to keep your mount in top shape:
- Check Stability: Regularly assess the mount's stability to guarantee it's securely attached.
- Clean Surface: Before reapplying, make sure the wall surface is clean to improve adhesive effectiveness.
- Adhesive Strips: Remember, the adhesive tape is single-use. Have extra strips ready for potential reinstallation.
- Removal Process: To remove the mount, pull both adhesive strips upwards simultaneously to prevent damage to the wall.
Frequently Asked Questions
Can You Attach a Ring Doorbell Without Drilling?
Yes, you can attach a Ring Doorbell without drilling. You'll want to use the No-Drill Mount, which relies on strong double-sided adhesive for secure installation.
Make sure to apply it on smooth, even surfaces and clean the wall beforehand for ideal adhesion. The adhesive is weather-resistant, but it's best to avoid glass or rough textures.
After applying the mount, let the adhesive set for a few hours before attaching your doorbell.
Do You Need to Drill Holes to Install a Ring Doorbell?
You don't necessarily need to drill holes to install a Ring Doorbell.
There are alternative mounting options available that use strong adhesive, allowing for a secure installation without damaging your walls.
Just make sure to clean the surface thoroughly for ideal adhesion.
However, keep in mind that these methods mightn't work with all surfaces or in extreme weather, so check compatibility before you start your installation.
Can You Attach a Ring Doorbell With Command Strips?
You might think about using Command Strips to attach your Ring Doorbell, but it's not the best choice.
They don't hold up well against weight or weather changes, which can lead to your doorbell falling.
Instead, consider a reliable mounting solution designed specifically for your device.
The No-Drill Mount offers strong adhesive support and can endure various temperatures, ensuring your doorbell stays securely in place for longer.
Can You Install a Ring Doorbell Without Wiring?
Yes, you can install a Ring Doorbell without wiring.
It operates on battery power, so you don't need any electrical connections. This makes it perfect for renters or anyone looking to avoid complex installations.
Just make sure you charge the battery regularly.
Once it's set up, you can enjoy all the features that come with the Ring Doorbell, like motion alerts and two-way audio, all without needing to deal with wires.
Conclusion
To summarize, mounting your Ring doorbell without drilling isn't only possible but practical for renters or those hesitant to damage their walls.
You might worry about the stability, but rest assured, these no-drill options are designed to hold firmly in place.
With the right adhesive or bracket, you can enjoy the benefits of your doorbell without the hassle.
So go ahead, secure your home with confidence, and keep your walls intact!