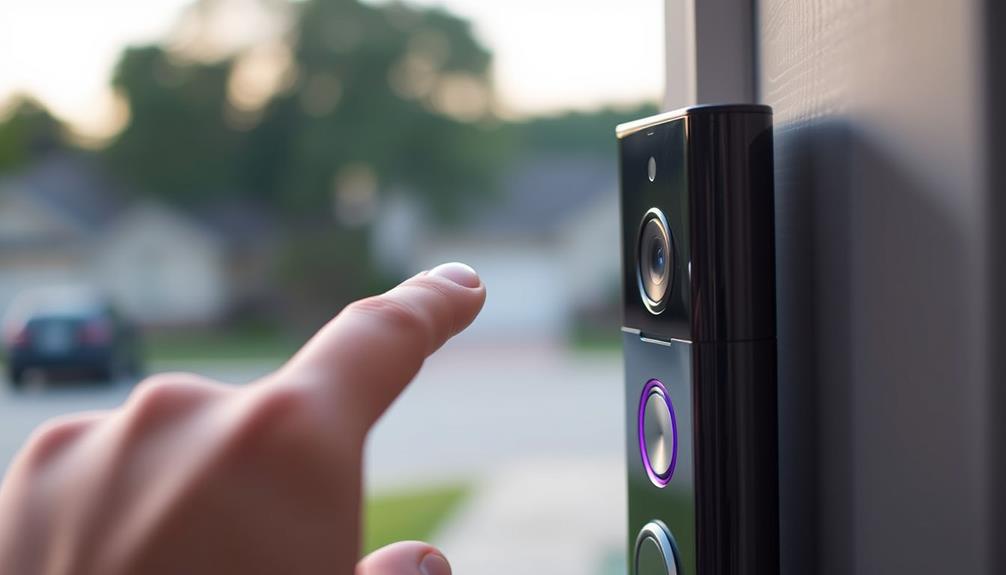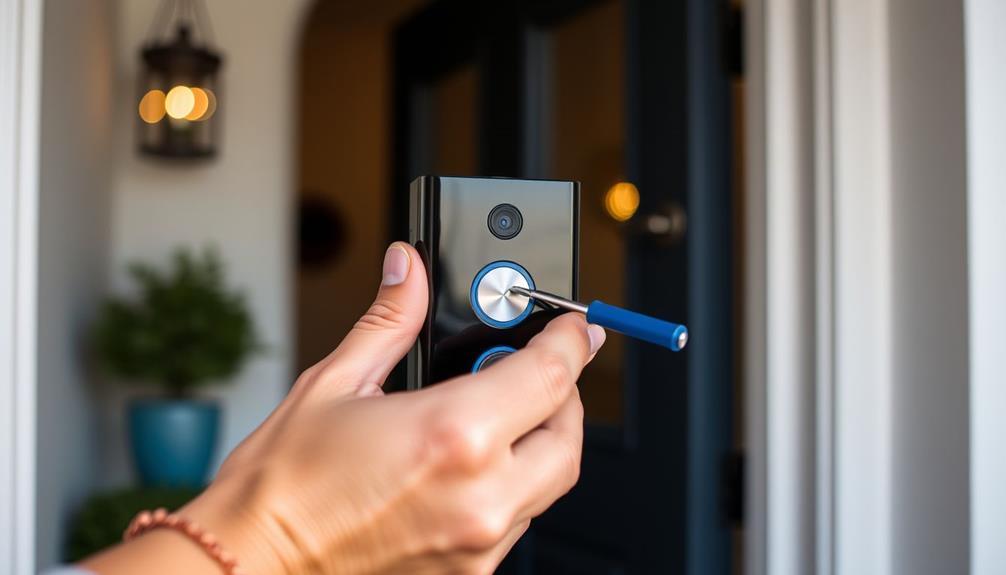
To remove your Ring doorbell cover, start by gathering a star-shaped screwdriver and a flat, skinny object like a butter knife. First, locate the security screw at the bottom of the faceplate and turn it counterclockwise. Next, gently push up on the faceplate's bottom with your thumbs and use the flat object if it's stuck. Pull the faceplate off smoothly and set it aside. If you need to access the battery, verify the cover is fully off. For detailed steps on replacing the battery and reattaching the cover, you'll want to look into more information.
Key Takeaways
- Locate the security screw at the bottom of the faceplate and remove it using the included star-shaped screwdriver.
- Push up from the bottom of the faceplate to loosen it, using a flat object if necessary.
- Carefully pull the faceplate away to avoid dropping it and place it in a secure location.
- Access the battery by pressing the black tab inside the compartment and pulling the battery out.
Tools Needed for Removal
To remove the Ring doorbell cover, grab the special star-shaped screwdriver included in your doorbell kit or a T6 torx-head screwdriver as a backup.
These tools are vital to effectively remove the security screw that holds the faceplate in place.
It's important to verify that your workspace is clean and organized, much like how regular filter changes are significant for maintaining air flow in air purifiers.
When you're ready, use the special star-shaped screwdriver to remove the security screw located at the bottom of the faceplate.
If the faceplate seems stuck, a flat and skinny object, such as a butter knife, may help pry it off gently.
It's important to keep the security screw in a safe location; you'll need it to reattach the faceplate later.
If you lose your original screwdriver, don't worry! You can easily order replacement screwdrivers through customer service or online.
Once you've removed the faceplate, you can access the battery to charge it when needed.
With the right tools and a clear workspace, you'll have everything you need for a smooth removal process.
Steps to Remove Faceplate

Begin by locating the security screw at the bottom of the faceplate and using the included star-shaped screwdriver to turn it counterclockwise. This will loosen the screw, allowing you to remove the faceplate. Once the screw is out, push up from the bottom of the faceplate with your thumbs to help loosen it further. It's important to handle the doorbell carefully, as maintaining its condition is vital for effective functionality and ensuring a positive user experience in your home security setup.
You can find valuable insights on personal growth and wellness that can enhance your overall lifestyle while managing your smart home devices.
If you find it difficult to detach, you can gently insert a flat and skinny object, like a butter knife, to pry the faceplate away from the body of the doorbell. Be careful while doing this to avoid damaging the device. After the faceplate is loosened, carefully pull it away from the body of the doorbell. Make sure to do this in a fluid motion to prevent dropping the faceplate.
Once removed, place the faceplate in a secure location to prevent any damage. This step is essential, as you'll want to keep it safe for reinstallation later. Following these steps will help you successfully remove your Ring doorbell faceplate without any hassle.
Accessing the Battery

After successfully removing the faceplate, you can easily access the battery compartment of your Ring Doorbell. First, verify the device is powered off to prevent any electrical issues. Inside, you'll find the battery secured with a black tab. To remove it, press down on the tab while you pull the battery out toward the bottom.
Here's a quick reference table to guide you through the process:
| Step | Action | Notes |
|---|---|---|
| 1. Faceplate Removal | Loosen security screw | Use a screwdriver |
| 2. Locate Battery | Find battery compartment | Inside the doorbell device |
| 3. Remove Battery | Press tab, pull battery | Verify the tab is pressed down |
Once you have the battery out, you can charge or replace it as needed. When you're ready to insert the new or charged battery, simply slide it back into the compartment until it clicks securely into place. That's all there is to accessing your Ring Doorbell battery!
Replacing the Battery

Once you've accessed the battery compartment, replacing the battery is a straightforward process that guarantees your Ring Doorbell continues to function effectively. Start by confirming the faceplate is completely removed. If you haven't done so yet, use a screwdriver to unscrew the security screw located at the bottom, then gently lift the cover off. It's also important to verify that the environment around your doorbell is suitable and protected, as extreme weather conditions can affect its performance, much like how weather-resistant materials can extend the lifespan of outdoor fixtures.
Next, locate the black tab at the bottom of the battery compartment. Press down on it and pull the battery out towards the bottom. Before inserting the new battery, make sure it's fully charged to maintain peak performance with your doorbell.
When you're ready to replace the battery, slide it back into the compartment until it clicks securely in place. It's vital that the connection is firm to guarantee your doorbell operates correctly.
After you've successfully replaced the battery, you can move on to reattaching the faceplate. Align the top hook first, then secure it with the security screw at the bottom, ensuring everything is snug and ready for use. Your Ring Doorbell will be back up and running in no time.
Reattaching the Faceplate

Reattaching the faceplate is all about proper alignment and securing it with the security screw.
You'll want to make sure everything fits snugly to prevent any accidental removal.
Don't forget to explore customization options to make your doorbell stand out!
Proper Alignment Techniques
To guarantee a secure fit, align the top hook of the faceplate with the corresponding hole on the doorbell body. Start by holding the faceplate at a 45-degree angle; this makes it easier to align properly.
Once the hook is positioned correctly, gently push the bottom of the faceplate down. You'll know it's in place when you hear it snap securely.
After snapping the faceplate into position, give it a gentle tug to verify that it's firmly attached. This step is essential to confirm your doorbell functions properly and stays securely in place. If it feels loose, you might need to adjust the alignment and snap it back in.
Once you're confident that the faceplate is secure, the last step is to replace the security screw at the bottom of the faceplate. This not only adds an extra layer of security but also prevents unauthorized removal.
Following these alignment techniques will help guarantee a seamless reattachment of your Ring doorbell cover, keeping it safe and functional for your home security needs.
Securing With Security Screw
After securely snapping the faceplate into place, grab the star-shaped screwdriver to fasten the security screw at the bottom of the faceplate. It's crucial to verify it is lined up properly before you start turning. Hold the faceplate at a 45-degree angle while positioning it, then push the bottom firmly until it clicks. This confirms the faceplate snaps into place correctly.
Here's a quick reference table to help you remember the steps:
| Step | Action |
|---|---|
| 1. Align | Verify the top hook fits into the hole |
| 2. Position | Hold at a 45-degree angle for alignment |
| 3. Snap | Firmly push the bottom until it clicks |
| 4. Secure | Use the screwdriver to screw in the security screw |
| 5. Check | Confirm the faceplate is securely attached |
If you lose or damage the security screw, don't worry—replacement packs are available online. Now that you've reattached and secured the faceplate, your Ring Doorbell is ready to keep you connected!
Customization Options Available
Customizing your Ring Doorbell faceplate with different colored covers lets you match it perfectly to your home decor. You can easily change the look of your doorbell while ensuring it remains functional and secure. Here are some great customization options available for you:
- Interchangeable Colors: Choose from a variety of colors to match your style, making your doorbell a seamless part of your home's exterior.
- Silicone Skins: For added protection, consider silicone skins that not only provide a unique look but also safeguard against weather elements and scratches.
- Easy Reattachment: When reattaching the faceplate, align the top hook with its hole and hold it at a 45-degree angle for a smooth fit.
- Secure Installation: After snapping the bottom into place, always reinsert the security screw to keep the faceplate firmly attached and prevent theft.
Tips for Successful Removal

To successfully remove your Ring Doorbell cover, you need the right tools and a tidy workspace.
Make sure you've got that special star-shaped screwdriver handy, as it's essential for getting the job done.
A clean area will help you keep track of small parts, so you won't lose anything during the process.
Proper Tool Selection
Selecting the right tools is essential for successfully removing your Ring Doorbell cover without damaging any components. Using the incorrect tools can lead to stripped screws or a damaged faceplate, making the removal process frustrating.
Here's a list of tools you'll need:
- Star-shaped screwdriver: This tool, included with your Ring Doorbell kit, fits perfectly into the security screw at the bottom of the faceplate.
- T6 torx-head screwdriver: As an alternative, you can use this screwdriver, but make sure it's compatible with your specific Ring model.
- Rubber bands: If you encounter stripped screws, using a rubber band can provide extra grip while you turn the screwdriver to remove the screw.
- Flat object: A butter knife or a similar flat and skinny tool can help pry off the faceplate if it's stuck.
With these tools at your disposal, you'll be well-equipped to remove your Ring Doorbell cover efficiently. Just remember to handle each tool carefully to avoid damaging any components during the removal process.
Secure Workspace Preparation
A clean and organized workspace is key to successfully removing your Ring Doorbell cover without losing any small components, like screws. To guarantee a smooth process, follow these tips for preparing your secure workspace.
| Step | Action | Tips |
|---|---|---|
| 1. Clear the Area | Remove clutter and guarantee ample space | This helps you focus on the task |
| 2. Gather Tools | Have your star-shaped screwdriver ready | Guarantee it's compatible with your model |
| 3. Designate a Spot | Set aside a small container for screws | This prevents them from rolling away |
| 4. Use a Flat Tool | Keep a flat and skinny object handy for prying | A butter knife works well for the faceplate |
| 5. Organize Components | Place the security screw in a designated area | This avoids misplacing essential parts |
Following these steps will help you efficiently remove the faceplate without losing any small components. By preparing your secure workspace, you minimize the risk of damage and make the removal process far less stressful.
Troubleshooting Common Issues

When you encounter difficulties removing the Ring doorbell cover, a few common issues may arise that can easily be addressed. Here's what you can do:
- Stripped Security Screw: If the security screw is stripped or tough to catch, try using a rubber band for extra grip when turning the provided Ring screwdriver.
- Correct Tool Usage: Confirm you're using the star-shaped screwdriver that came with your device. It's specifically designed for the security screw on the Ring doorbell.
- Visibility Issues: If you're having trouble identifying the screws, grab a flashlight. It'll help illuminate the area and make access easier.
- Persistent Problems: If multiple attempts to remove the faceplate lead to frustration, document any issues you encounter. Then, reach out to Ring's customer support for troubleshooting assistance. They can help you remove and charge the battery by pulling it downward.
Additional Resources for Help

You can find plenty of additional resources online to help you navigate the process of removing your Ring doorbell cover with ease. Start by accessing video tutorials that provide step-by-step visual guidance. These can be particularly helpful when learning how to remove a Ring Doorbell, especially if you're unsure about where to begin.
If you run into trouble, don't hesitate to join the Ring Community. This platform allows you to engage with other users, share experiences, and seek advice on common issues, like how to press the black tab when the faceplate snaps away.
Additionally, you can consult expert tips found in articles and forums that focus on efficient techniques for faceplate removal and reassembly.
Should you need personalized assistance, look into the customer support options provided by Ring. They can guide you through troubleshooting specific problems related to the cover removal process.
Frequently Asked Questions
How Do I Take the Cover off a Ring Doorbell?
To take the cover off your Ring Doorbell, start by locating the security screw at the bottom.
Use the star-shaped screwdriver to unscrew it.
Once that's done, push up gently from the bottom with your thumbs to loosen the faceplate.
If needed, use a flat tool to carefully pry it away.
Just make sure to do it smoothly to avoid dropping the cover.
Store it safely to prevent any damage.
How to Unscrew Ring Doorbell Without Tool?
Isn't it frustrating when you need a tool but can't find one?
To unscrew your Ring doorbell without it, grab a Phillips screwdriver #1 or #00 if you've got one handy.
If the screw's stripped, try placing a rubber band over it for extra grip.
If all else fails, gently pry the faceplate off with your thumbs or a flat object, but be careful not to damage anything.
Don't hesitate to reach out to Ring support if needed!
Can You Change the Cover on Ring Doorbell?
Yes, you can change the cover on your Ring Doorbell!
It's a simple process, and you can easily swap out different colored faceplates to match your style.
Just unscrew the security screw at the bottom, slide off the old cover, and align the new one by inserting the top hook and snapping the bottom into place.
Don't forget to secure it by replacing the screw once you're done.
Enjoy customizing your doorbell!
How Do You Remove a Ring Doorbell Cover With a Stripped Screw?
If you've got a stripped screw on your Ring Doorbell cover, don't worry.
Try placing a rubber band over the screw head to get better grip with your screwdriver.
If that doesn't work, use pliers to grip the screw if it's sticking out enough.
A screw extractor set can also help you drill into the screw for easier removal.
If you still can't get it, consider reaching out to Ring customer support for help.
Conclusion
Removing your Ring doorbell cover doesn't have to be a hassle.
Follow the steps, access the battery, and replace it with ease.
With a few simple tools and some handy tips, you'll keep your device running smoothly.
Remember, when you know how to remove the cover, when you can troubleshoot problems, and when you can maintain your device, you'll enjoy the benefits of security at your fingertips.
Stay connected, stay secure!