To install your Ring Doorbell 3, start by ensuring the battery is fully charged until one LED light is on. If you currently have a doorbell installed, you will need to remove it. Check that the transformer voltage falls within the range of 8-24 VAC. Mount your doorbell at a height of 48 inches from the ground and mark the spots for drilling holes. For tough surfaces like brick, use plastic anchors. Connect the existing wires to the device’s back and secure it with the provided four screws. Finally, attach the faceplate. If you encounter any problems during the installation process or would like tips for optimal performance, there is more helpful information available.
Key Takeaways
- Charge the battery until one LED lights up before starting the installation process.
- Disconnect power at the circuit breaker to ensure safety during installation.
- Use a level tool to position the doorbell at 48 inches from the ground.
- Connect existing doorbell wires to the back of the Ring device, securing it with four screws.
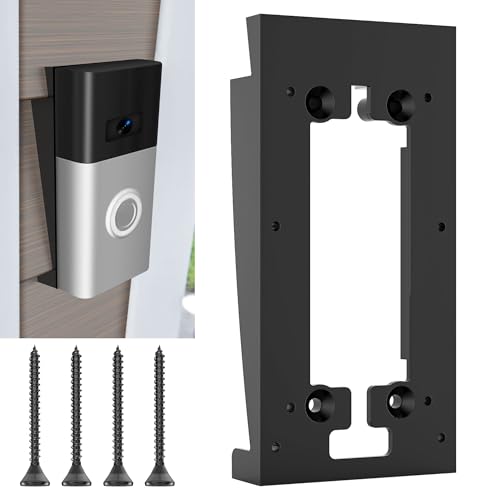
Vinyl Siding Doorbell Wall Mount Kit Fit for Ring/Video Doorbell, Compatible with Ring 2, Ring 3, Ring 3 Plus Video Doorbell Doorbell Siding Mount (4-Inch Standard Siding Only)
PERFECT VIEWING ANGLE ADJUSTMENT: This ri-ng doorbell siding mount is specifically designed to fix the upward tilt issue…
As an affiliate, we earn on qualifying purchases.
As an affiliate, we earn on qualifying purchases.
Installation Preparation
Before you begin the installation of your Ring Doorbell 3, make sure to charge the battery using the provided USB cable until one LED lights up. This indicates it's ready for use.
Next, it's vital to prepare your workspace. First, disconnect the power at the circuit breaker to guarantee safety during the installation. If you have an existing doorbell, remove it before proceeding. For peak safety and efficiency, consider using eco-friendly cleaning products while preparing your workspace, as they can help maintain a clean environment.
Check that your transformer voltage meets the requirements of 8-24 VAC, with a maximum of 40VA and a frequency of 50/60Hz. This confirms compatibility with your Ring Doorbell 3.
Once you've confirmed the power requirements, you'll want to position your doorbell correctly. Use the included level tool to align the device at a height of 48 inches from the ground, which maximizes its performance.
Before you drill, mark the mounting holes with a pencil. This step is essential for guaranteeing accurate drilling and securing the device properly. Taking the time to prepare correctly will make the installation process smoother and help your Ring Doorbell function effectively.

RIOVO Adjustable 30 to 55 Degree Doorbell Angle Mount Compatible with Video Doorbell Wired/Pro and Blink Video Doorbell, Replacement Angle Adjustment Adapter Mounting Bracket Wedge Kit
Compatible Model: This universal angle mount is NOT a dedicated accessory for Ring. It is a versatile adapter…
As an affiliate, we earn on qualifying purchases.
As an affiliate, we earn on qualifying purchases.
Mounting Process

Now that you've prepared your workspace and confirmed the Ring Doorbell 3 is charged, it's time to start the mounting process. Before you begin, make certain you have the right tools on hand, as a smooth installation will make a significant difference in your experience. Consider exploring top-rated home comfort solutions that might enhance your overall home setup.
Begin by drilling holes at the marked positions where you want to install the Ring Video Doorbell. If you're mounting on brick, concrete, or stucco surfaces, make sure to use plastic anchors to guarantee a secure fit.
Next, connect the existing doorbell wires to the back of the Ring device. Don't worry about the order; it doesn't matter.
After the wires are connected, it's time to secure the Ring Video Doorbell 3 to the wall. Use all four included screws to firmly attach it, ensuring it won't move or fall.
Once the doorbell is mounted, install the faceplate. Simply slot it in at the top of the device and click it into place for a clean finish.
Finally, use the provided security screws to secure the faceplate. Avoid using wood screws, as they could potentially damage the battery.
Your Ring Video Doorbell 3 is now ready for installation.

Video Doorbell Key Removal Tool Compatible with Ring Battery Doorbell 2024 Release, Wired Doorbell Pro (N ewest Model), Wired Doorbell Plus (N ewest Model) 2PACK
COMPATIBILITY: compatible with Ring Battery Doorbell 2024 Release,Compatible with Wired Doorbell Pro (Newest Model), Wired Doorbell Plus (Newest…
As an affiliate, we earn on qualifying purchases.
As an affiliate, we earn on qualifying purchases.
Troubleshooting and Help

Troubleshooting your Ring Doorbell 3 can be straightforward with the right resources at your fingertips. If you run into issues during installation, head over to the Ring Help Home for extensive guidance. It's a valuable tool for resolving mounting and installation concerns. To guarantee your home setup is optimized, consider using small space solutions that can enhance the overall functionality of your entryway.
If you're experiencing connectivity problems, the Wi-Fi Help section offers tips to boost your signal strength. A strong Wi-Fi connection is essential for your doorbell to function effectively. Additionally, familiarize yourself with the Ring app for a better understanding of its features and settings.
For power-related troubles, don't forget about the Power & Battery Help resources. They provide insights into troubleshooting charging issues and managing your battery life effectively. If you find yourself dealing with incorrect security screws during installation, it's best to contact Ring Support. They can help you resolve this without risking damage to your device.

KURUI Concrete Anchors for Drywall Masonry Stucco Brick, 180Pcs Wall Hanging Assortment Kit for Wall Decor Picture Frame, 90 Dry Wall Anchors and 90 Flat Head Screws, Wall Hangers with Drill Bit
STRONG MATERIAL – All the blue concrete anchors and screws are made of selected materials with premium quality…
As an affiliate, we earn on qualifying purchases.
As an affiliate, we earn on qualifying purchases.
Frequently Asked Questions
Can You Install Ring Doorbell 3 Without Drilling?
Yes, you can install the Ring Doorbell 3 without drilling. Consider using adhesive strips or a no-drill mount specifically designed for your device.
Just keep in mind that these alternatives mightn't hold up as well in extreme weather, so check their compatibility with your doorbell's weight.
Always review the manufacturer's guidelines, too, because using non-standard methods might void your warranty.
It's important to make sure your doorbell stays secure and functional.
How to Fix Ring Doorbell 3 to Wall?
Think of fixing your Ring Doorbell 3 to the wall like hanging a picture; you want it secure and straight.
Start by aligning the doorbell at about 48 inches high. Mark the spots for screws, then drill if needed.
Connect the wires on the back, tighten everything in place, and snap on the faceplate.
After ensuring it's secure, check for a solid white light to confirm it's all set before restoring power.
How Do You Install a Ring Doorbell 3 Corner Mount?
To install your Ring Doorbell 3 corner mount, first, make sure the surface is clean and dry.
Use the provided template to mark your drilling spots.
Drill the holes, inserting plastic anchors if needed for sturdiness.
Connect the doorbell wires on the back, then position the doorbell on the mount.
Secure it with the included screws, and finally, attach the faceplate, locking it with the security screw to keep it safe.
How to Install Ring Doorbell 3 Non-Wired?
To install your Ring Doorbell 3 in a non-wired setup, start by charging the battery with the orange USB cable until the green light shows.
Next, position the doorbell at about 48 inches high. Secure it to the wall with the provided screws.
Insert the fully charged battery until it clicks into place.
Conclusion
Now that you've successfully mounted your Ring Doorbell 3, imagine the peace of mind washing over you like a gentle tide, knowing you can monitor your front door from anywhere.
You've transformed your home into a fortress of security, ready to greet friends and deter unwanted visitors alike.
Embrace the convenience and safety that's now just a tap away on your smartphone.
With every ring, you're not just alerted—you're empowered.
Enjoy your newfound sense of vigilance!