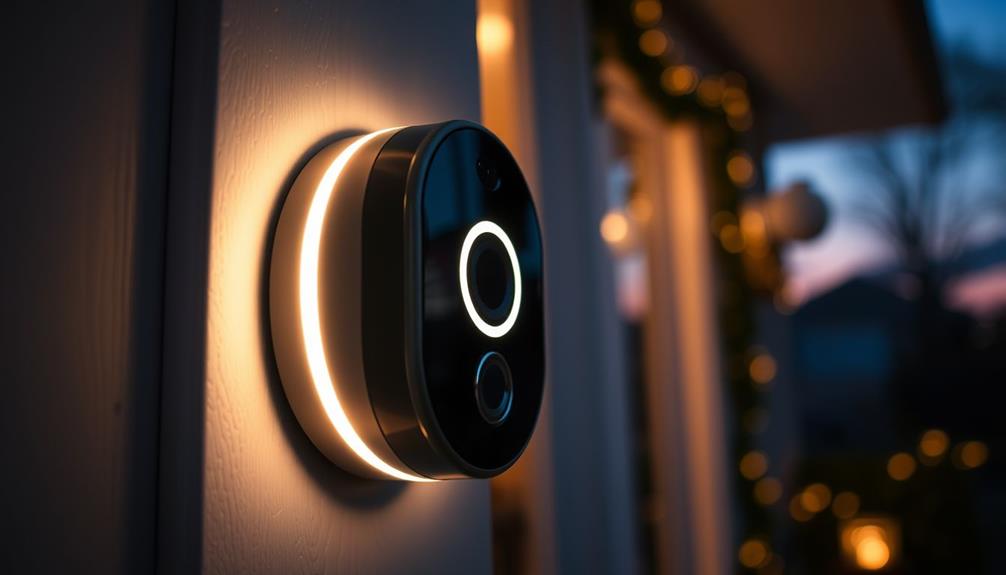

You can easily tell when your Ring doorbell is fully charged by checking the LED indicators. When the light is blinking red, it's still charging. A solid green light means the battery is fully charged. For 1st and 2nd Generation models, the blue light will turn solid when fully charged. If you've got a newer model with a Quick Release Battery Pack, a solid green light signals completion as well. To make certain your Ring doorbell operates at peak performance, keep an eye on the app for battery status. There's so much more to discover about maintaining your device effectively. If you want to monitor the Ring doorbell 2 charging status more closely, you can also check the device’s settings in the Ring app. This will give you more detailed information about the battery level and charging progress. Additionally, you can set up notifications to receive alerts when the battery is running low or when it is fully charged, ensuring that you never miss a beat with your home security. Keeping a close watch on these indicators and settings will help you ensure that your Ring doorbell is always ready to keep your home safe and secure.
Key Takeaways
- A solid green light indicates that the Ring doorbell battery is fully charged.
- For 1st and 2nd Generation models, a blue LED light turns solid when fully charged.
- Regularly check the Ring app for battery status updates and percentage remaining.
- Charging typically takes between 5 to 10 hours; monitor indicators during this time.
Understanding Battery Charging Indicators
When you charge your Ring doorbell, understanding the battery charging indicators can help you quickly know its status. The charging indicators provide essential information during the charging process. A blinking red light on the battery signifies that it's currently charging, while a solid green light means the battery is fully charged.
Additionally, the device will display a blinking blue light during charging, which turns solid blue once the battery reaches full capacity.
For cat health and nutrition, it's important to monitor the device closely to prevent any potential issues. For the Video Doorbell (2nd Generation), you may notice both red and green lights appearing during charging. When you see that solid green light, you can be confident that your battery is fully charged and ready for use.
Typically, charging takes between 5 to 10 hours, depending on your power source.
To stay updated on your device's battery status, regularly check the Ring app. This app not only gives you charging progress but also offers insights into the overall health of your battery.
Charging Process Overview

Charging your Ring doorbell involves connecting it to a power source with a micro-USB cable, guaranteeing a hassle-free process that typically takes 5 to 10 hours. For 1st and 2nd Generation doorbells, you'll need to remove the device from the wall to access the charging port. However, newer models come equipped with Quick Release Battery Packs for easier access.
During the charging process, the charging status is indicated by LED lights. A solid green light means your battery is fully charged, while red and green lights show that charging is in progress. Additionally, the doorbell will display a blue light that blinks during charging and stops blinking once fully charged, providing you with visual confirmation of the charge status.
To keep track of your battery level, regularly monitor it through the Ring app. This guarantees your doorbell stays fully charged and ready for use.
| Charging Status | LED Indicator |
|---|---|
| Charging In Progress | Red and Green Lights |
| Fully Charged | Solid Green Light |
| Charging Complete | Blue Light Stops Blinking |
Model-Specific Charging Instructions

Each Ring doorbell model has unique charging instructions that guarantee you get the best performance from your device.
For the 1st and 2nd Generation Ring Doorbells, your battery is fully charged when the blue LED light on the battery turns solid after charging. If you own a model with a Quick Release Battery Pack, look for a solid green light on the battery to know it's fully charged.
To maintain peak performance, consider the air quality in your environment, as it can impact your overall well-being; regular use of air purifiers can help improve indoor air quality.
During the charging process, you'll notice red and green lights blinking on the battery, indicating it's actively charging. The typical charging time for your Ring doorbell battery ranges from 5 to 10 hours, depending on the power source you're using.
Before reinstalling the battery into your doorbell, always verify it's fully charged. This step is vital to prevent incorrect discharge reporting and maintain peak performance.
Following these model-specific charging instructions will help extend your doorbell's battery life and confirm it operates efficiently. Remember, a fully charged battery means your doorbell is ready to perform at its best, providing you with reliable security and peace of mind.
Monitoring Battery Status in the App

To keep tabs on your Ring doorbell's battery status, you'll want to open the Ring app and head to the device settings.
This is important because understanding your battery life can help you avoid unexpected interruptions in service, similar to how data protection regulations impact AI development and use.
Here, you'll find a clear overview of your power settings, including the remaining battery percentage.
Understanding this information can help you optimize your doorbell's longevity and performance.
Accessing Battery Status
How can you easily check the battery status of your Ring doorbell in the app? Start by opening the Ring app and proceeding to the device settings menu. Here, you'll find the battery status displayed under the Power Settings section, showing you the percentage of remaining charge. This makes it simple to monitor your doorbell's battery life at a glance.
For added convenience, consider how this aligns with Island Getaways, where technology can enhance your travel experiences and guarantee your home is secure while you're away.
To better understand power usage, take advantage of the app's features that help identify which settings might be draining the battery faster. Keeping the Ring app updated guarantees you have access to the latest battery management features and alerts, so always check for updates.
After charging your doorbell, it's a good idea to test the doorbell to confirm that the battery status has been updated in the app. This way, you can verify everything is functioning properly and that you're getting the most out of your device.
Monitoring your battery status regularly will help you stay ahead of any issues, making sure your Ring doorbell is always ready to go.
Power Settings Overview
Monitoring your Ring doorbell's battery status in the app is straightforward and essential for maintaining it stays fully charged. To do this, simply navigate to the device settings in the Ring app and select "Power Settings." Here, you'll find the battery level indicator, which shows the current charge percentage. This allows you to keep track of your doorbell's health and avoid unexpected outages due to battery drainage. Just like how essential oils can enhance overall well-being through consistent monitoring and care, keeping an eye on your doorbell's battery guarantees peak performance natural alternatives to synthetic fragrances.
Additionally, the app features a "Power Usage" section that reveals which functions consume the most battery. By reviewing this information, you can refine settings to enhance battery life, ensuring your doorbell remains functional when you need it most.
Keep an eye on the charging status as well; a solid green light indicates the battery is fully charged, while blinking red or green lights show it's still charging. Regularly checking these power settings in the Ring app helps you stay informed about your doorbell's performance and prolongs its longevity. Staying proactive about your battery status means you can enjoy peace of mind without the worry of sudden power loss.
Optimizing Battery Longevity
Regularly checking your Ring app not only helps you stay informed about your doorbell's battery status but also empowers you to optimize its longevity through informed adjustments. By monitoring your battery level, you can act before it drains completely. The app will send notifications when the battery is low, prompting you to charge your Ring Video, so you're never left without power.
Here's how you can optimize performance with the app:
| Feature | Action |
|---|---|
| Battery Level | Check regularly for updates. |
| Power Usage | Identify and adjust settings. |
| Notifications | Enable alerts for low battery. |
In the Power Usage section, you can see which features consume the most energy. If you notice high usage on certain settings, consider tweaking them to enhance battery longevity. Keeping your app updated is vital as updates may improve battery management features, allowing for more efficient monitoring. By taking these steps, you can guarantee that your Ring doorbell remains functional and ready to protect your home.
Troubleshooting Charging Issues

If you're facing charging issues with your Ring Doorbell, it's essential to identify the common problems at play.
Start by checking your power source and inspecting the cable and connections for any damage.
Additionally, consider how the doorbell's performance can be impacted by environmental factors, similar to how website performance can affect user experience.
Addressing these factors can help you troubleshoot the situation and get your doorbell charged up again.
Common Charging Problems
Charging problems can occasionally arise with your Ring Doorbell, so it's important to troubleshoot the issue promptly. Here are some common charging issues you might encounter:
- No Charging Light: If the charging lights don't blink when connected, inspect your USB connection. Confirm it's properly plugged into a functional power source.
- Damaged Cable: Inspect the charging cable for visible damage or wear. A damaged cable can prevent proper charging of your device.
- Malfunctioning Indicators: If the charging indicators aren't functioning correctly, try restarting the device. This can resolve temporary issues that may arise.
- Battery Not Charging: If the battery doesn't show a solid green light after 5-10 hours of charging, consider trying a different USB power source or cable.
Addressing these issues promptly can help guarantee your Ring Doorbell remains fully charged and operational. If you continue to experience problems, it may be time to contact customer support for further assistance and troubleshooting guidance.
Taking these steps will help you keep your device in top shape and ready for use.
Checking Power Source
To troubleshoot charging issues effectively, you should first check the power source to confirm your Ring Doorbell is receiving adequate power. Begin by verifying the USB charging cable is properly connected to both the Ring device and a functional power source. A faulty connection can prevent charging, so inspect the cable for any visible damage like frays or breaks. If the charging indicators don't activate, try plugging it into a different power source to rule out a malfunctioning outlet.
Here's a quick reference table to guide you:
| Action | What to Check | Notes |
|---|---|---|
| Inspect Cable | Look for visible damage | Worn cables may not work well |
| Check Connection | Verify secure connections | Loose connections can disrupt power |
| Test Different Source | Use another outlet | Helps identify faulty outlets |
| Monitor Indicators | Observe charging indicators | Unresponsive indicators may need a reset |
| Restart Device | Reboot the Ring device | Can reset the charging system |
If issues persist, don't hesitate to contact Ring customer support for tailored assistance.
Cable and Connection Issues
Sometimes, a simple issue with the cable or connection can prevent your Ring Doorbell from charging properly. To troubleshoot potential problems, follow these steps:
- Check the USB cable: Verify it's securely connected to both the battery and a functional power source. A loose connection can disrupt the charging process.
- Inspect for visible damage: Look for any frays or breaks in the cable. If you find any, it could hinder charging and may require a replacement.
- Test a different power source: If the charging indicators don't activate, try plugging the USB cable into another outlet or charger. This helps rule out issues with the original power source.
- Restart the device: If the charging indicators malfunction, restarting the device can sometimes reset the system and restore proper functionality.
If you've tried these steps and are still facing connection issues, it might be time to contact customer support. There could be underlying problems with the battery or device that need professional attention.
Taking these actions guarantees your Ring Doorbell is ready to go when you need it!
Maintaining Battery Health

Maintaining your Ring doorbell's battery health is important for guaranteeing it performs at its best and lasts longer. Regularly charge your battery-powered device to prevent unexpected outages. It's essential not to let the battery completely deplete before recharging, as this can greatly reduce its overall battery lifespan.
To optimize performance, store your Ring doorbell in moderate temperatures, avoiding extreme heat or cold that could harm the battery.
Additionally, keeping your firmware updated is crucial; this enhances device functionality and improves battery efficiency. You can easily check for updates via the Ring app.
Don't overlook the charging ports! Periodically clean them to maintain good contact and effective charging. Dust or debris can hinder the charging process, leading to longer charge times or incomplete charges.
Safety Precautions During Charging

When charging your Ring doorbell, it's important to follow safety precautions to prevent any potential hazards. Here are some key tips to guarantee a safe charging experience:
- Inspect the Charging Cable and Port: Always check that both the charging cable and port are free from dirt and debris. A clean connection helps maintain safety and effectiveness during charging.
- Monitor Battery Status: Regularly check the battery status while charging to avoid overcharging. Overcharging can pose a fire risk, so keep an eye on the progress.
- Avoid Extreme Temperatures: Don't charge your doorbell in extreme temperatures. Charging in high heat or cold can affect battery performance and overall safety.
- Check for Damage: If you notice any signs of swelling or damage to the battery, discontinue use immediately. It's vital to prioritize safety and contact customer support for guidance.
Customer Support Resources

If you're facing issues with your Ring doorbell charging, there are several customer support resources available to help you troubleshoot and resolve your concerns.
Start by visiting the official Ring website, where you'll find a thorough FAQs section that addresses common charging issues and questions about battery charge. This can often provide quick answers to your problems.
If you need more personalized assistance, consider emailing a customer satisfaction specialist who can guide you through your specific concerns.
For immediate help, take advantage of the live chat support feature, which connects you with a representative ready to assist you in real time.
Additionally, don't overlook the community forums. Here, you can share your experiences and seek advice from other Ring device owners who may have faced similar charging issues. Engaging with other users can provide insights and solutions that you mightn't find elsewhere.
With these customer support resources at your fingertips, you can confidently address any charging concerns and make sure your Ring doorbell functions as intended.
Common Charging Myths

Many misconceptions surround charging Ring doorbells, leading users to misunderstand how to properly maintain their devices. Here are some common myths you should be aware of:
- Charging overnight guarantees a full charge: Charging times can vary between 5 to 10 hours, depending on your power source.
- A red light means there's a malfunction: This red light actually indicates that the battery is charging. A solid green light confirms it's fully charged.
- You must fully drain the battery before recharging: To maintain battery health, it's recommended to charge when the battery level drops below 90%.
- All Ring doorbells charge the same way: The 1st and 2nd Generation models require removal for charging, while newer models come with Quick Release Battery Packs for easier access.
Additionally, don't forget about hardwired Ring doorbells; they may still need manual charging if the battery level drops, despite primarily using wired power.
Frequently Asked Questions
How Do I Know When the Ring Doorbell Battery Is Fully Charged?
To know when your Ring Doorbell battery is fully charged, look for a solid green light on the device. The solid green light indicates that the Ring Doorbell battery is fully charged and ready for use. It usually takes several hours to fully charge the battery, so be sure to keep an eye on the ring doorbell 2 charging indicator to know when it is ready. Once fully charged, you can enjoy uninterrupted monitoring and security for your home.
If the light is red and green, it's still charging.
For models with a removable battery, a blinking blue LED indicates charging, which stops once it's fully charged.
You can also check the Ring app for the current battery level and charging progress.
Typically, it takes about 5 to 10 hours to charge completely.
Does Ring Doorbell Stop Flashing When Fully Charged?
When you're wondering if your Ring Doorbell stops flashing when it's fully charged, you'll be pleased to know it does.
The device shifts from blinking lights to a solid blue indicator, signaling completion.
You'll notice the red and green lights during charging, but once charging's done, that steady blue light shines bright.
This simple visual cue lets you easily confirm your device is ready without needing to check your app.
How Long Does Ring Doorbell Need to Be Charged?
Your Ring Doorbell typically needs about 5-10 hours to charge, depending on the power source you're using.
For the 1st and 2nd Generation models, you'll have to remove the battery for charging, while newer models allow for easier access with Quick Release Battery Packs.
Confirm the micro-USB cable is properly connected and your power source is working to guarantee effective charging.
Keep an eye on the battery status through the Ring app for updates.
Can You Check Battery Level on Ring Doorbell?
Did you know that 30% of smart doorbell users experience battery issues?
You can easily check the battery level on your Ring Doorbell through the Ring app. Just navigate to the device settings and select "Power Settings." The app shows a visual indicator of your battery status, helping you avoid unexpected power drains.
Plus, the LED lights on the device itself also provide charging feedback, keeping you informed in real time.
Conclusion
To wrap up, keeping your Ring Doorbell fully charged guarantees you won't miss any important alerts.
Did you know that over 60% of users report feeling more secure with their doorbell camera?
By understanding the charging indicators and maintaining battery health, you can enjoy peace of mind knowing your device is always ready.
Regularly check the app for status updates and don't hesitate to reach out for support if you encounter any issues.
Stay secure!