To install your Ring Doorbell on the wall, start by turning off the power at the breaker box for safety. If there's an old doorbell, remove it and disconnect the wires carefully. Position the mounting bracket where you want the Ring to go, making sure to mark the screw holes. Secure the wiring to the bracket, then click the Ring Doorbell into place. Restore power and test the device to verify it's working properly. Finally, set it up using the Ring app for notifications and preferences. More helpful tips and detailed steps are just ahead!
Key Takeaways
- Gather necessary tools, including a screwdriver and screws, and ensure safety precautions are taken before beginning the installation process.
- Remove the old doorbell by detaching the faceplate and unscrewing it gently to access the wiring.
- Position the mounting bracket over the existing hole and mark screw holes for accurate drilling, ensuring a secure fit.
- Connect existing wires to the mounting bracket and align the Ring Doorbell, pressing it into place until it clicks securely.

SightPro Magnetic Laptop Privacy Screen 14 Inch 16:10 - Patented Removable Laptop Privacy Filter Shield and Protector
- Magnetic Snap-on Attachment: Easy magnetic attachment and removal
- Compatible Dimensions: Fits 14.1-inch screens, verify measurements
- Enhanced Privacy: Blacks out side views, clear front view
As an affiliate, we earn on qualifying purchases.
Installation Preparation
Before you plunge into installing your Ring doorbell, gather all the necessary tools and ascertain everything's ready for a smooth setup.
You'll need items from the Ring doorbell kit, like a screwdriver, screws, and the installation instructions. If you're working with brick or stucco surfaces, grab a drill and a masonry drill bit too.
Additionally, verifying the area around your doorbell is clear of any potential hazards will help prevent incidents that could disrupt the installation process. For example, keeping plumbing issues in mind can help you avoid complications if your doorbell is near existing plumbing lines, especially if you're unfamiliar with the specifics of your home's setup clogging remedies.
If you're replacing an existing doorbell, start by turning off the power at the breaker box to ensure safety while you handle the exposed wiring.
Carefully remove the old doorbell by using a screwdriver or box cutter to take off the faceplate. Gently pull out the device to access the power wires, being cautious not to damage them.
Once you've removed the old doorbell, position the mounting bracket over the hole left behind.
Use a level tool to ascertain it's straight, marking the screw hole locations for drilling. This preparation will save you time and hassle during the installation process, ensuring your Ring doorbell is securely mounted and ready to go.

SightPro Magnetic Laptop Privacy Screen 14 Inch 16:9 - Patented Removable Laptop Privacy Filter Shield and Protector
- Magnetic Snap-on Attachment: Easy magnetic attachment and removal
- Compatible Dimensions: Fits 14-inch screens, verify measurements
- Enhanced Privacy: Blacks out side views, clear front view
As an affiliate, we earn on qualifying purchases.
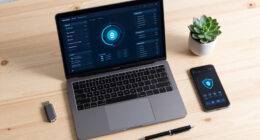
Internet Connectivity

To guarantee your Ring doorbell operates smoothly, it's crucial to establish a strong Wi-Fi connection at its installation location. Before you finalize the installation, use the Ring app to test the signal strength. If you find the Wi-Fi signal is weak, consider using a Wi-Fi extender or the Ring Chime Pro to boost connectivity. These devices can greatly enhance your Ring doorbell's performance.
Additionally, maintaining good air quality in your home can improve overall device performance; for instance, air purifiers reduce allergens that might interfere with electronic devices.
When connecting your Ring doorbell, verify it's set up on a 2.4 GHz Wi-Fi network. This frequency band often provides better coverage and stability than the 5 GHz band, which many devices struggle with. The initial setup process with the Ring app typically takes about 10 minutes, so be patient during this time.
Additionally, keep your router firmware updated to improve performance and minimize connectivity issues. An updated router can help your Ring doorbell maintain a reliable connection, ultimately guaranteeing peak performance.

Magicmoon 15.6" Privacy Filter Screen Protector, Anti-Spy/Glare Film for 15.6 inch 1920 x 1080 Resolution Widescreen Notebook Laptop with 16:9 Aspect Ratio (Not for 16:10) (Touch Screen Not Compatible)
- Compatible Screen Size: Fits 15.6 inch widescreen laptops
- Privacy Protection: Blocks side-viewing for privacy
- Blue Light Reduction: Filters out 30% of blue light
As an affiliate, we earn on qualifying purchases.
Safety Precautions

Installing your Ring doorbell requires careful attention to safety precautions to prevent accidents and guarantee a smooth setup. Begin by locating your breaker box and turning off the power to the existing doorbell. This step is vital to avoid electric shock when dealing with exposed wiring. If you're using a battery-operated model, make sure the battery is fully charged, so you won't need a power shut-off.
Always inspect existing wiring for damage or fraying, as this can lead to potential hazards during installation. Use insulated tools to handle electrical components safely. Wearing personal protective equipment (PPE) like gloves and safety glasses is essential for your protection.
Here's a quick overview of key safety precautions:
| Precaution | Description |
|---|---|
| Power Shut-off | Turn off power at the breaker box |
| Inspect Wiring | Check for frayed or damaged wiring |
| Use Insulated Tools | Minimize risk of electric shock |
| Wear PPE | Always use gloves and safety glasses |
Adhering to these safety precautions and following the installation manual guarantees a safe and successful installation process.

SightPro 14 Inch 16:10 Laptop Privacy Screen Filter - Computer Monitor Privacy Shield and Anti-Glare Protector
- Filter Dimensions: 11 15/16" x 7 1/2" (14.1" diagonal)
- Compatibility: Fits Lenovo, HP, Dell, Acer, Asus, Samsung
- Easy Installation: Two attachment options: adhesive strips or slide tabs
As an affiliate, we earn on qualifying purchases.
Old Doorbell Removal

Carefully detach the faceplate of your old doorbell with a screwdriver or box cutter to avoid damaging the wall or existing wiring. This step is vital to guarantee that you don't disrupt any underlying systems, similar to how you'd assess key factors in choosing a home cleaning service before making a decision.
Once the faceplate is off, you can move on to removing the old doorbell itself. Follow these steps to guarantee a smooth process:
- Unscrew the old doorbell: Use your screwdriver to remove the screws securing the old doorbell to the wall. Be gentle, as you don't want to pull or damage the existing wiring during this step.
- Disconnect the power wires: After unscrewing, loosen the screws on the wires to completely disconnect them from the old device. Make sure you handle these wires carefully to avoid any mishaps.
- Dispose of the components: Once everything is detached, guarantee that the old doorbell components are safely disposed of or stored for future reference or recycling.
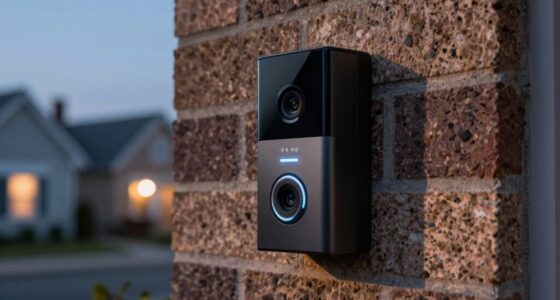
Mounting the New Doorbell

With the old doorbell removed, you can now mount the new Ring Doorbell securely in place. Start by positioning the mounting bracket over the hole left by the old doorbell. Make sure it's level, then mark the screw holes with a pencil for accurate drilling.
If you're using existing doorbell wiring, wrap the wires securely around the screws on the mounting bracket, ensuring they don't touch each other for safety. This installation process is essential, much like understanding the benefits of converting 401k to Gold IRA to secure your financial future.
Next, refer to the live video feed from the Ring app to determine the best placement angle for the camera. Once you've found the most suitable angle, secure the mounting bracket with screws.
After that, align the Ring Video Doorbell above the mounted bracket and press down firmly until it clicks into place, ensuring a secure fit.
Power Restoration and Testing

Restoring power to your Ring Doorbell is vital for its operation, as it guarantees that your device can effectively communicate and process notifications. So head back to the breaker box after installation. Once you've restored power, it's time to test functionality to verify everything's working smoothly. Follow these steps:
- Check Notifications: Press the doorbell button and watch for a notification on your mobile device via the Ring app. This confirms that your doorbell is operational and highlights the importance of understanding credit card impacts on personal finances.
- Examine Wire Connections: If your digital chime doesn't sound, double-check the wire connections for any loose ends. Make sure everything's snug and secure.
- Verify Diode Installation: Confirm the diode is correctly installed for digital chimes. This is vital to avoid issues with sound notifications.
Once you've confirmed that both the doorbell and chime are functioning correctly, install the security screws to secure the faceplate. This not only protects your device but also prevents tampering.
With power restored and functionality tested, your Ring Doorbell is ready to enhance your home security.
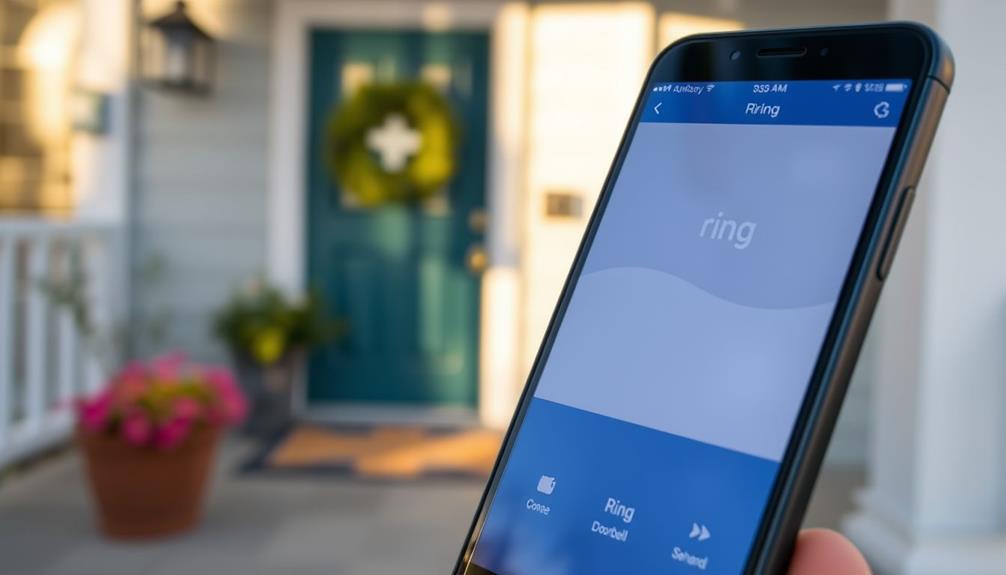
App Configuration

After confirming your Ring Doorbell is powered and functioning correctly, it's time to configure the app for peak use. Start by opening the Ring app and following the on-screen instructions to connect your doorbell to your Wi-Fi network. This setup process is vital for enabling all features, as proper ethical considerations in data management enhance user experience and security.
Once connected, you can customize your notification preferences. Decide when you want to receive alerts for motion detection, doorbell rings, or camera activity. You can even schedule active times to limit notifications during specific hours, giving you better control over alerts and activity monitoring.
If you'd like to share access with family members or trusted individuals, the Ring app makes it easy. They can view the live feed and receive notifications about doorbell events, enhancing your home's security.
Don't forget to regularly check for software updates within the app. Keeping your Ring Doorbell up to date guarantees peak performance and access to new features. With these configurations, you'll have a tailored experience that suits your needs perfectly, making your installation truly effective.
Troubleshooting Tips

If you're facing issues with your Ring Doorbell, a few troubleshooting tips can help you quickly resolve common problems. Here are three key areas to focus on:
- Wi-Fi Signal: Verify your doorbell is within range of a strong Wi-Fi signal. Weak connectivity can hinder device functionality and impact video quality. If needed, consider adding a Wi-Fi extender to boost the signal.
- Secure Connections: If your doorbell isn't powering on, double-check the wire connections. Make sure they're secure and not touching each other to avoid any installation challenges.
- Ring App Settings: If you're missing alerts or notifications, verify that your Ring app settings are correctly configured. Confirm the device is added to your account and check for any updates that might affect performance.
If you experience a choppy video feed or lag, it might be time to reposition the router.
Don't forget to explore the troubleshooting section of the Ring app for additional guidance from other users who encountered similar issues.
Following these tips can help maintain the performance and reliability of your Ring Doorbell.
Frequently Asked Questions
How Do I Attach My Ring Doorbell to the Wall?
To attach your Ring Doorbell to the wall, start by positioning the mounting bracket where you want it. Use a pencil to mark the holes for drilling, ensuring the bracket is level for proper alignment. Once the holes are marked, drill the necessary holes and secure the mounting bracket to the wall using the provided screws. With the bracket in place, you can now attach your Ring Doorbell easily by sliding it onto the bracket and tightening the security screws for a firm fit.
Mark the screw holes with a pencil for accuracy. Use a level to keep it straight, then secure it with screws.
If you're replacing an old doorbell, connect the existing wires.
Next, align the Ring Doorbell with the bracket and press until it clicks.
Can You Just Stick on a Ring Doorbell to Wall?
Sure, you can just stick a Ring doorbell on the wall, if you want to play a game of "Will it stay?"
But let's be real; that adhesive isn't exactly a long-term plan.
For better security, you'll want to use screws. They'll keep your doorbell safe and sound, especially in busy areas or harsh weather.
Trust me, you don't want it falling off during a rainstorm or a surprise visitor!
Does a Ring Doorbell Require Wiring?
A Ring Doorbell doesn't necessarily require wiring. You can choose a battery-powered model, offering freedom in placement without needing to connect to your existing doorbell system.
However, if you opt for a wired version, it'll still rely on a battery but will receive a trickle charge from your electrical system.
Just keep in mind that battery-powered models will need periodic recharging, especially with features like motion detection actively used.
Is There a Way to Install Ring Doorbell Without Drilling?
You might find yourself in a situation where drilling's not an option, like when you're renting or just want to avoid wall damage.
Fortunately, you can install a Ring doorbell without drilling!
Try using adhesive strips or a no-drill bracket that securely holds the device.
You could also consider a mounting wedge on the door frame or even a clamp that attaches directly to the door.
Just make sure it's in a good spot for Wi-Fi!
Conclusion
Now that you've successfully installed your Ring doorbell, you might wonder if it really enhances your home security.
Studies show that homes with visible security devices deter up to 60% of potential intruders.
So, not only have you upgraded your doorbell, but you've also taken a proactive step in protecting your home.
Keep an eye on your app for any alerts, and enjoy the peace of mind that comes with knowing you're safer at home.